Hello Everyone,
Here’s a card to offer some encouragement to a loved one.
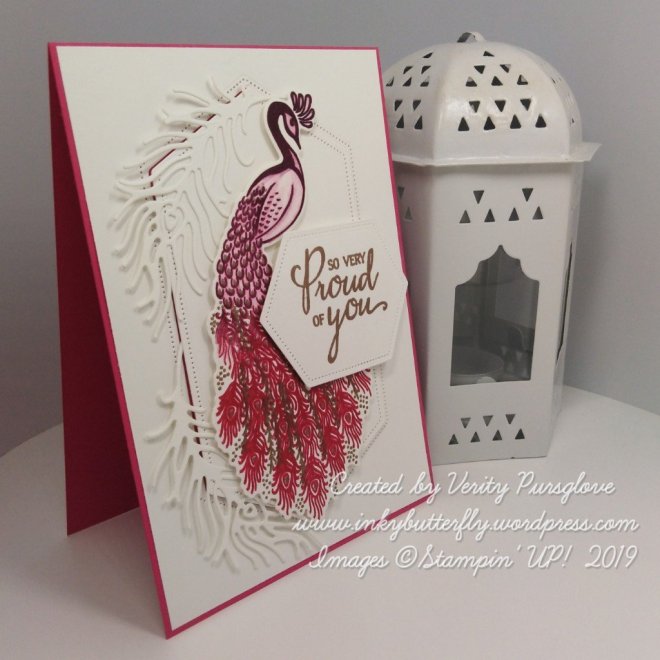
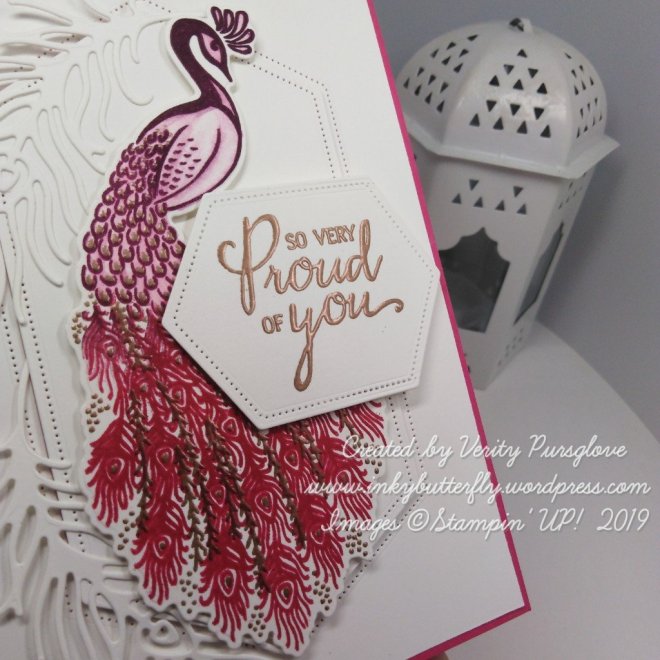
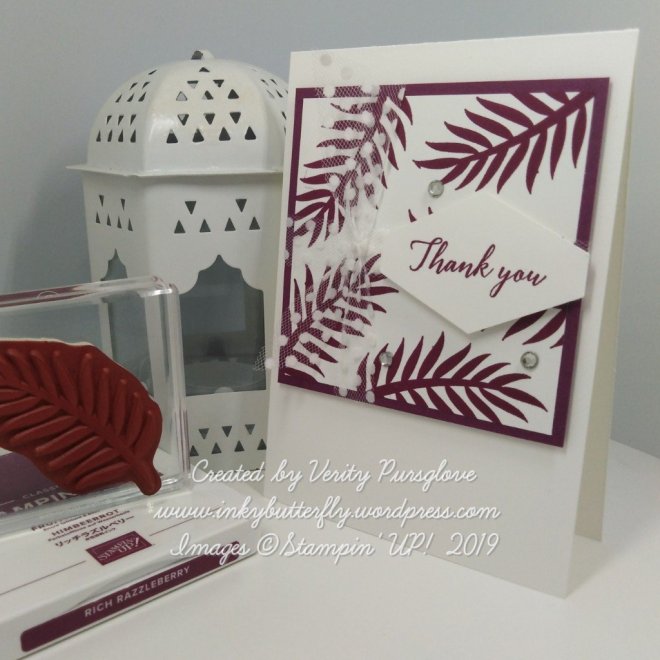
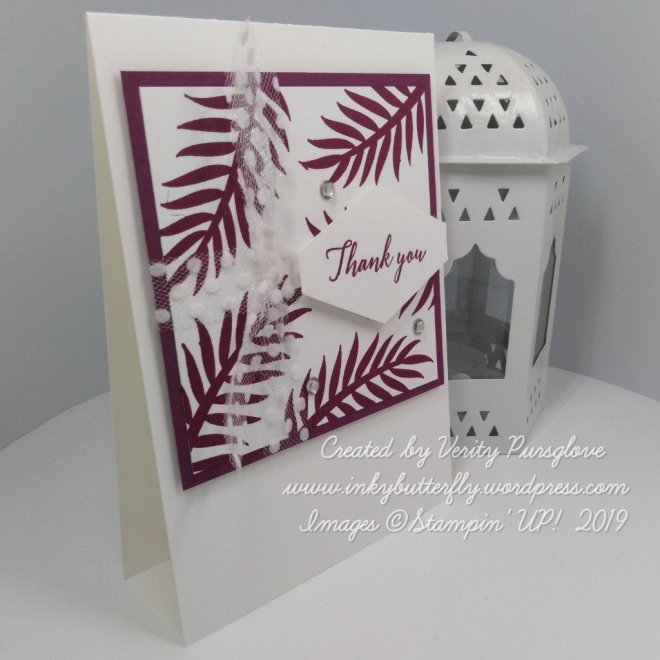
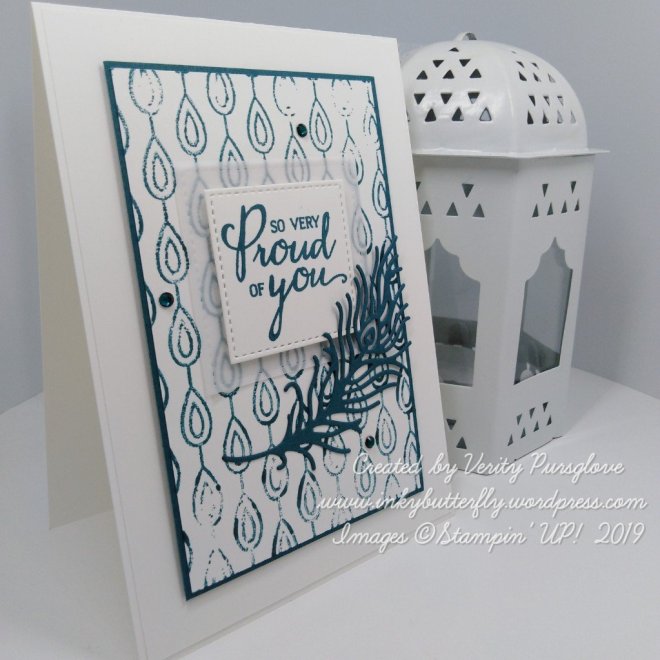
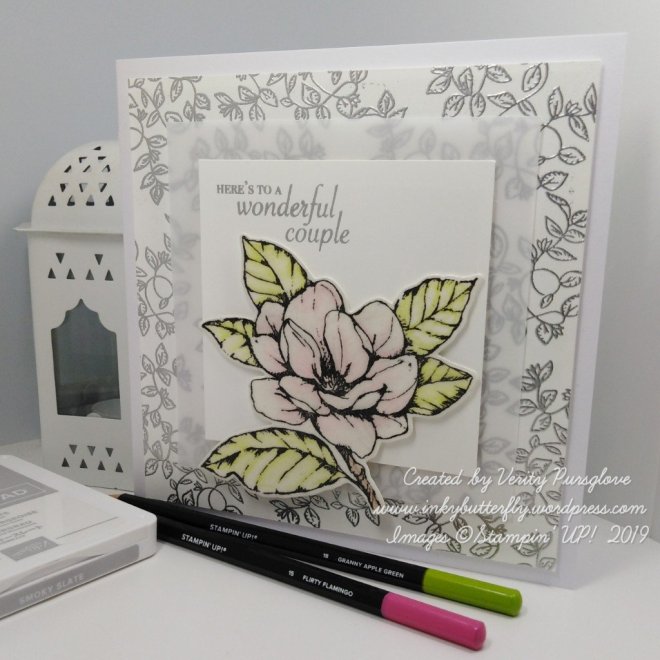
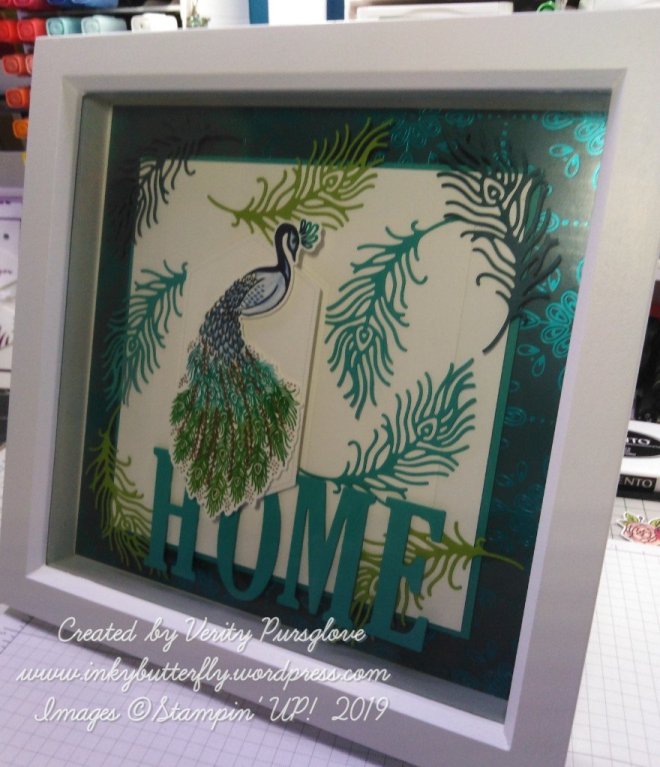
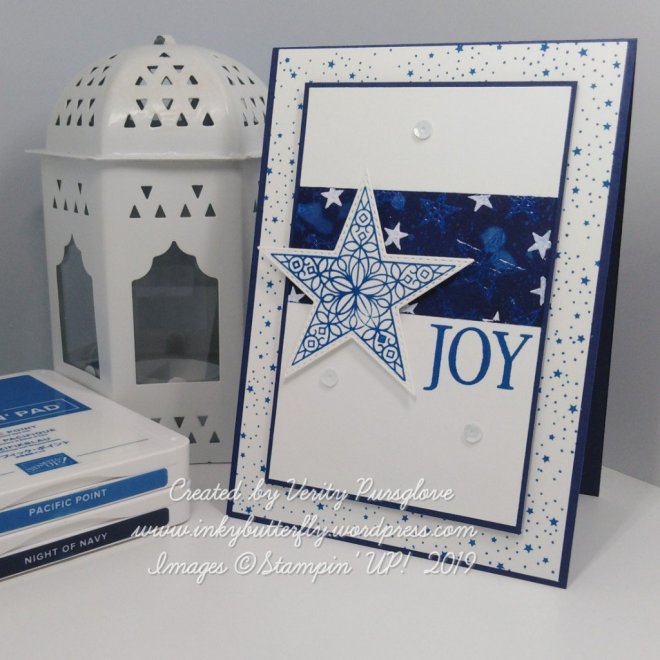
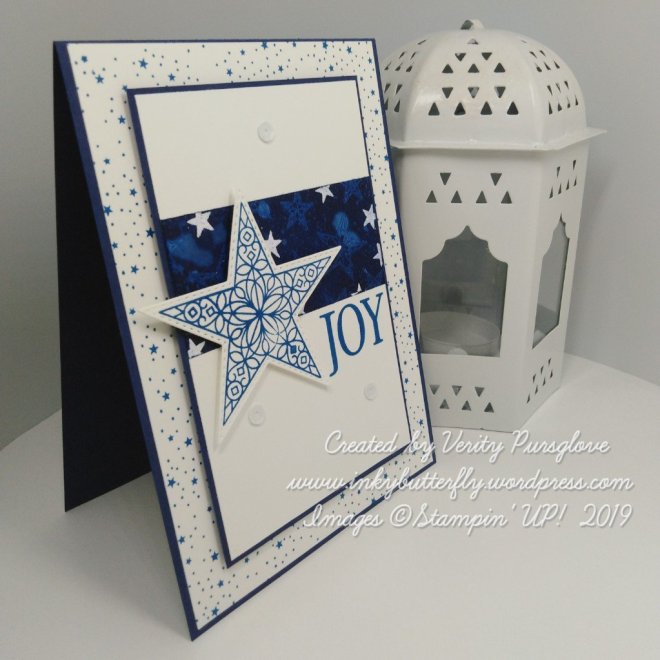
I am using products from the Nonle Peacock suite with Pretty Peacock ink.

I used the letterpress technique for the background of the topper panel. This is done by applying ink to the folder first. The ink transfers when it is rolled through a die cut machine.
The piece was layered on to Oretyy Peacock card stock, and adhered to a white card base with dimensionals.
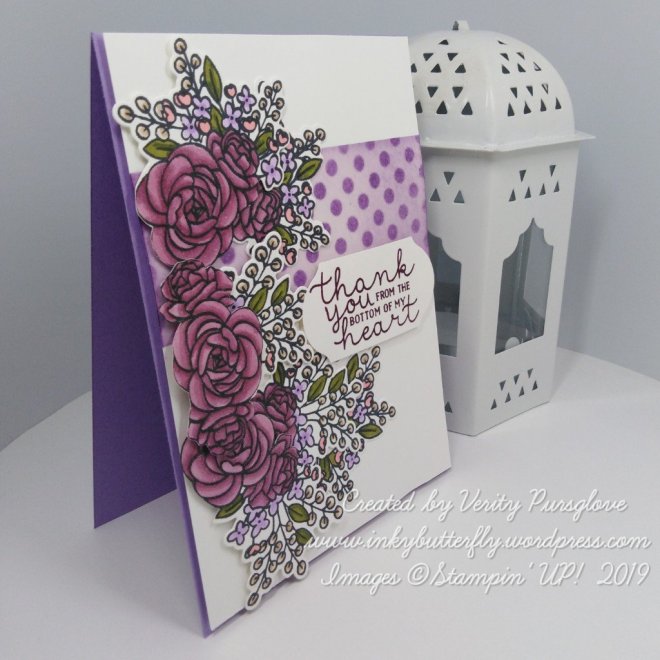
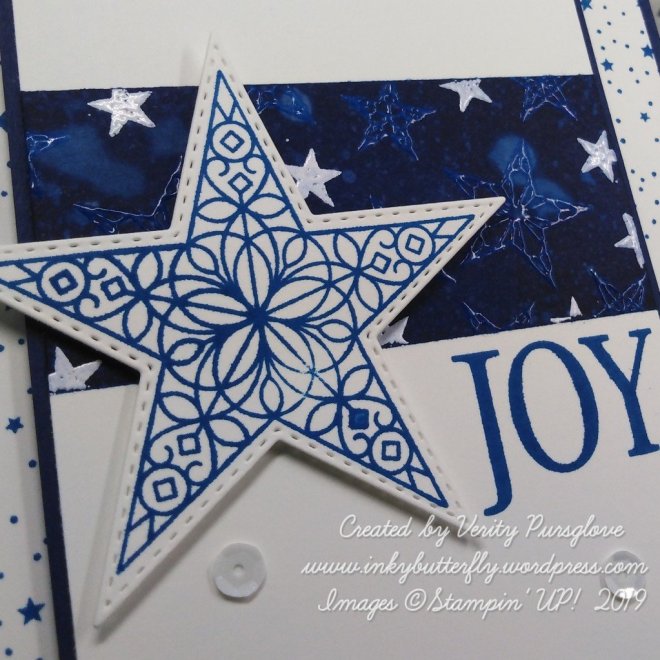
The sentiment was stamped and die cut with a Stitched Square. I used dimensionals to add this to a larger vellum square.
A die cut feather and matching rhinestones completed the card.
I hope you enjoyed this project. The supplies used are listed and linked to the online store below.
I would love to be your demonstrator.
Thanks for stopping by today and happy Stampin’!
Verity xx
Product List

|
|

|

|

|

|


")