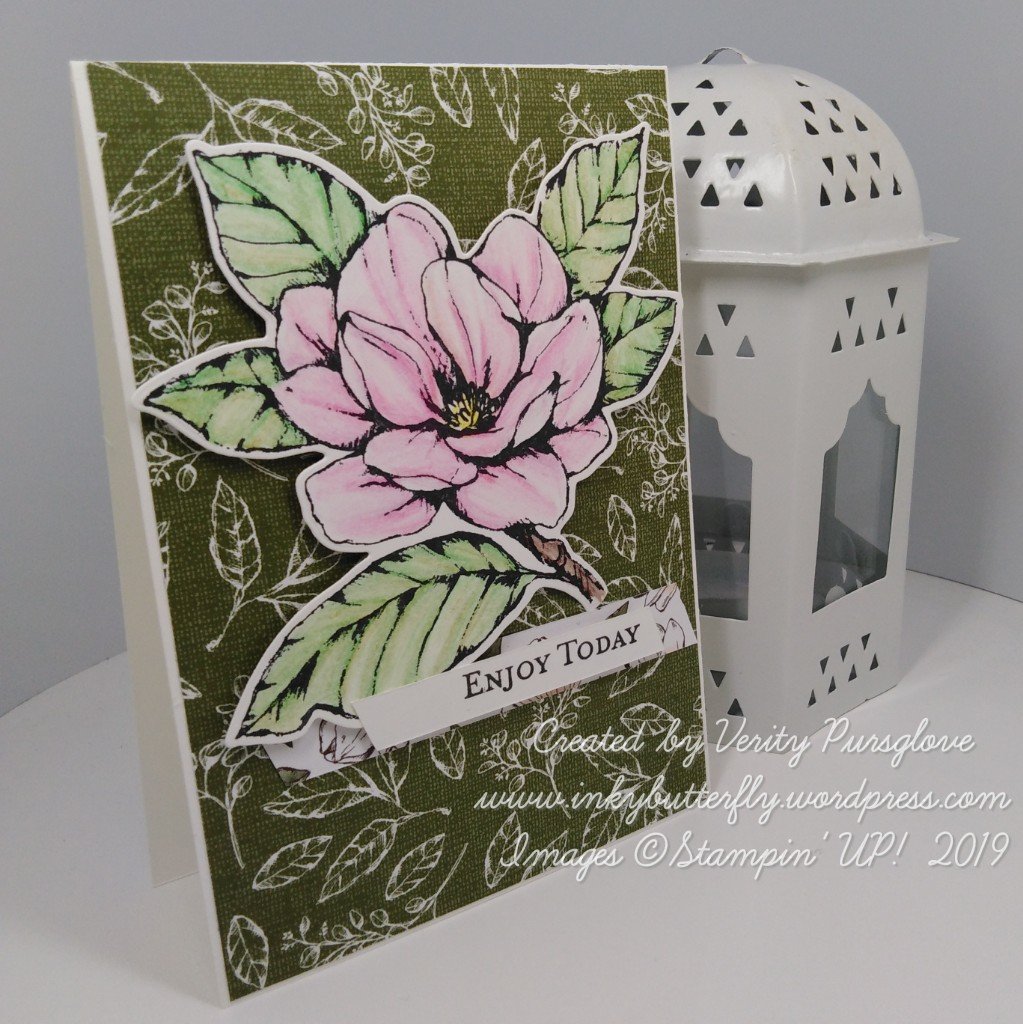
Welcome to this week’s Project Share. As always my friends have created some lovely work. Please use the links to visit their blogs and read more about their projects.
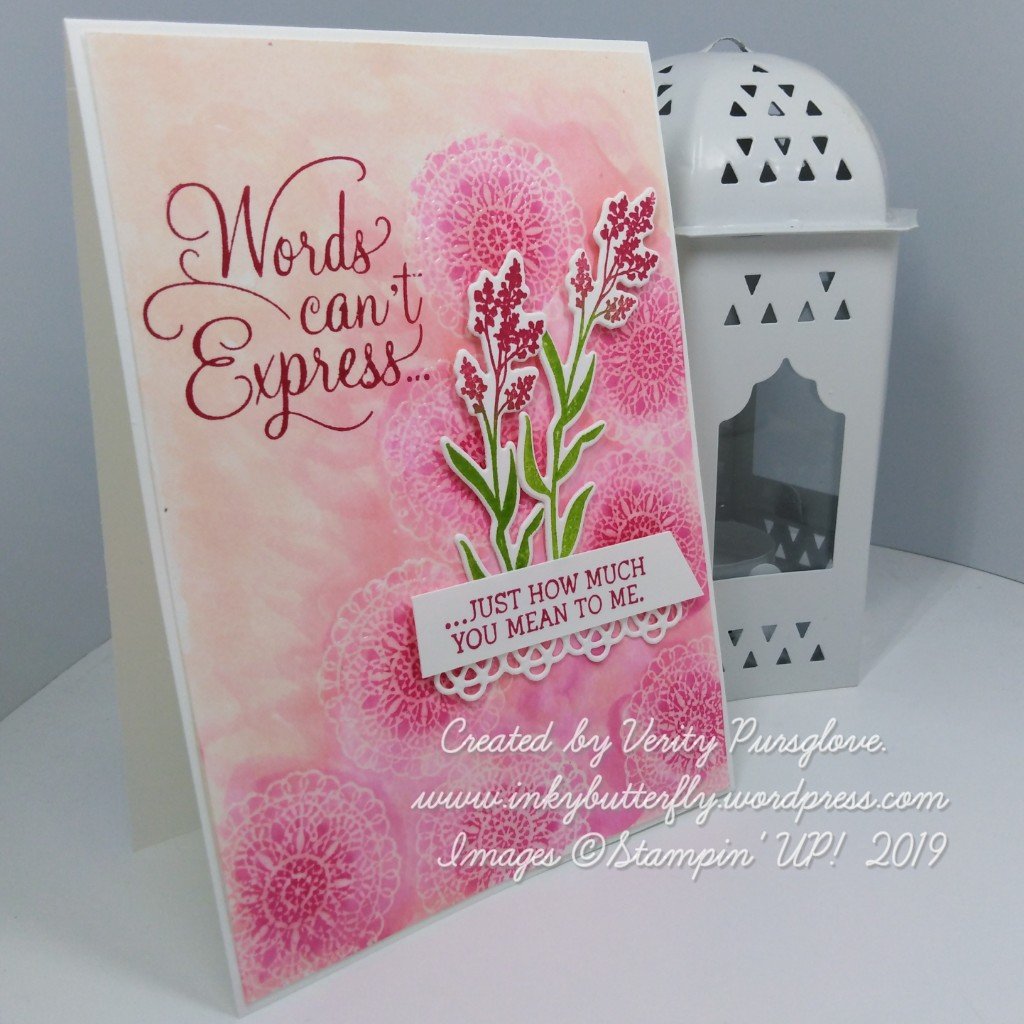
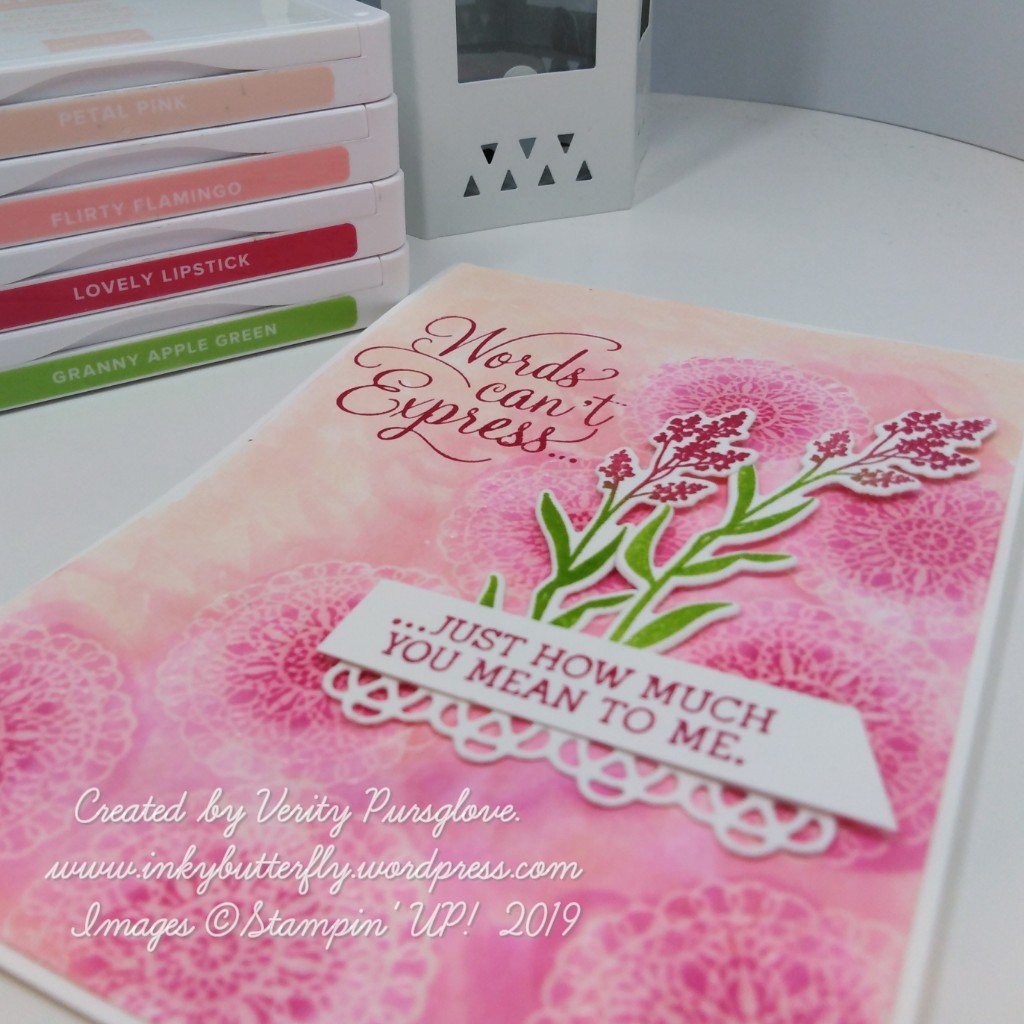
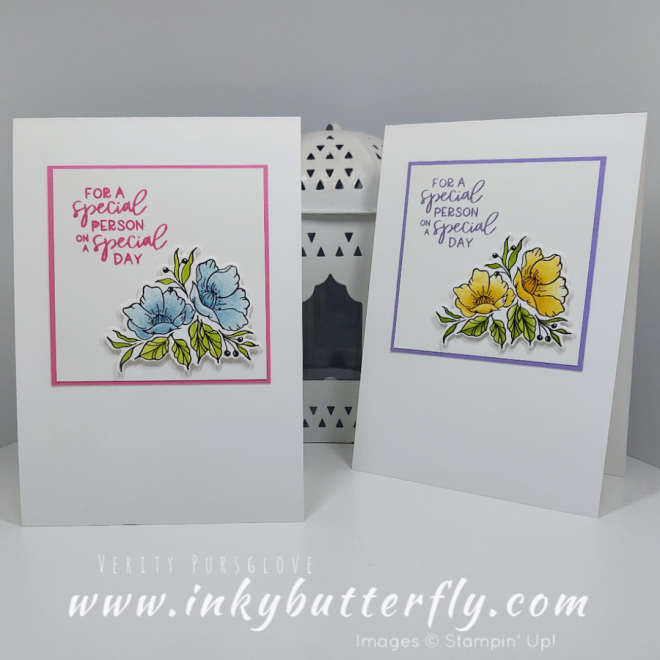
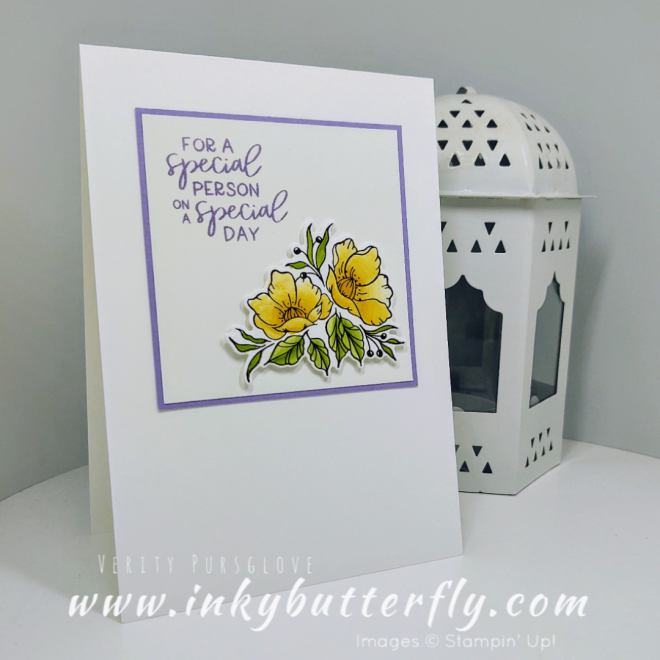
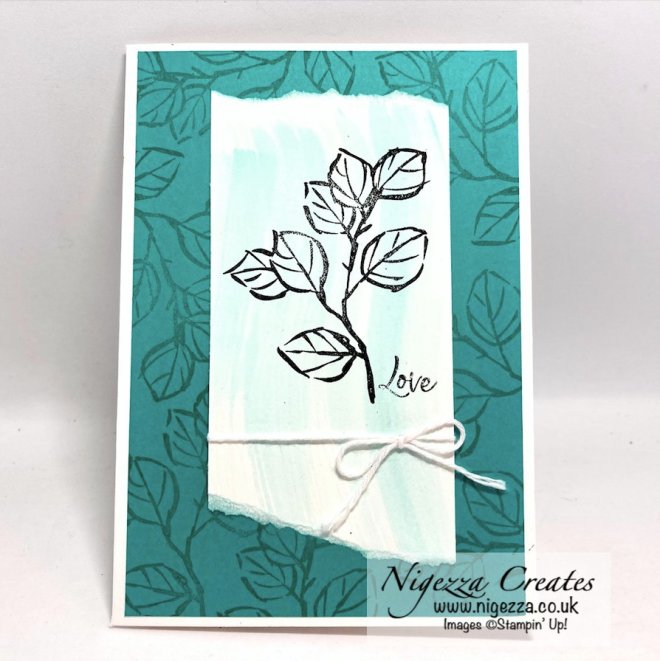
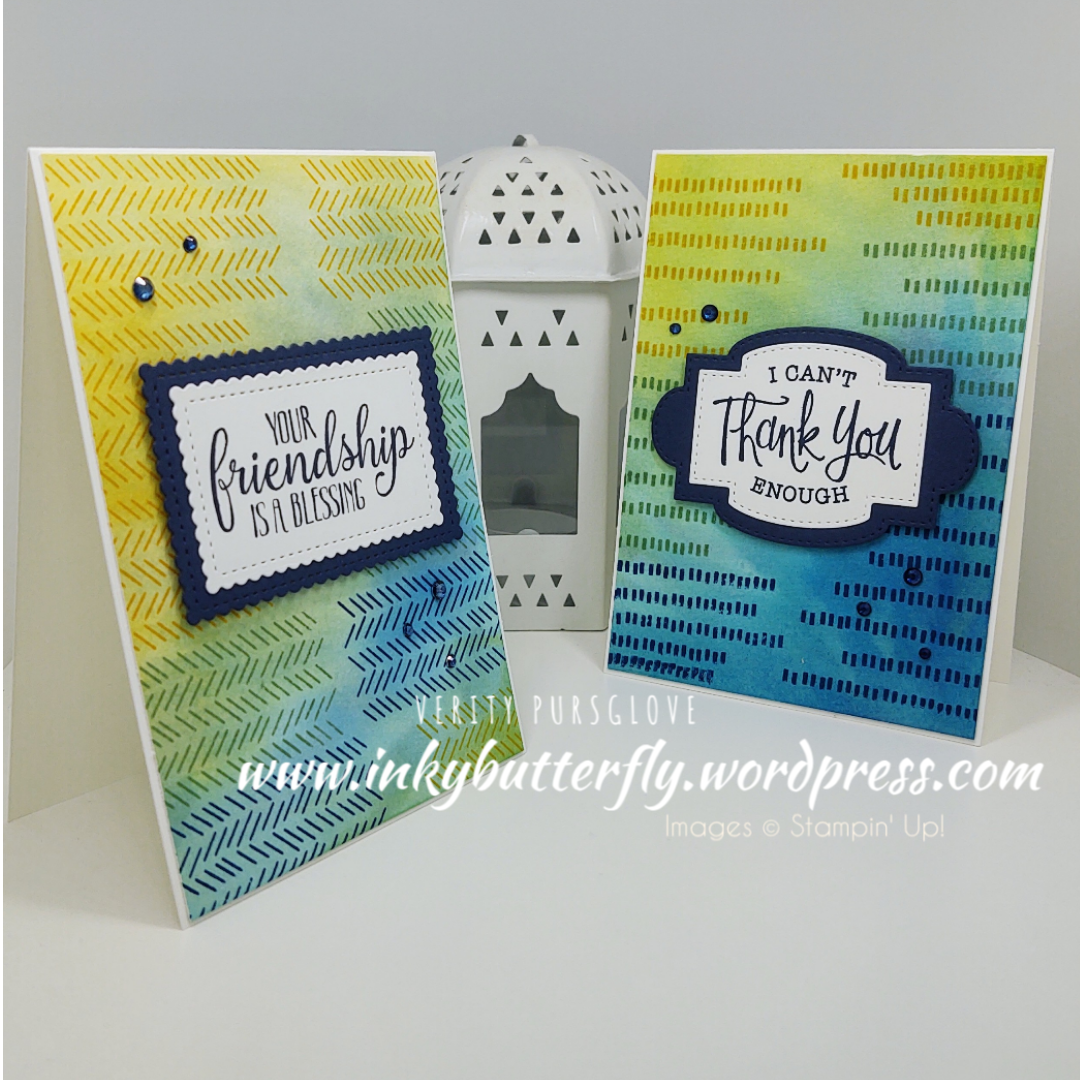
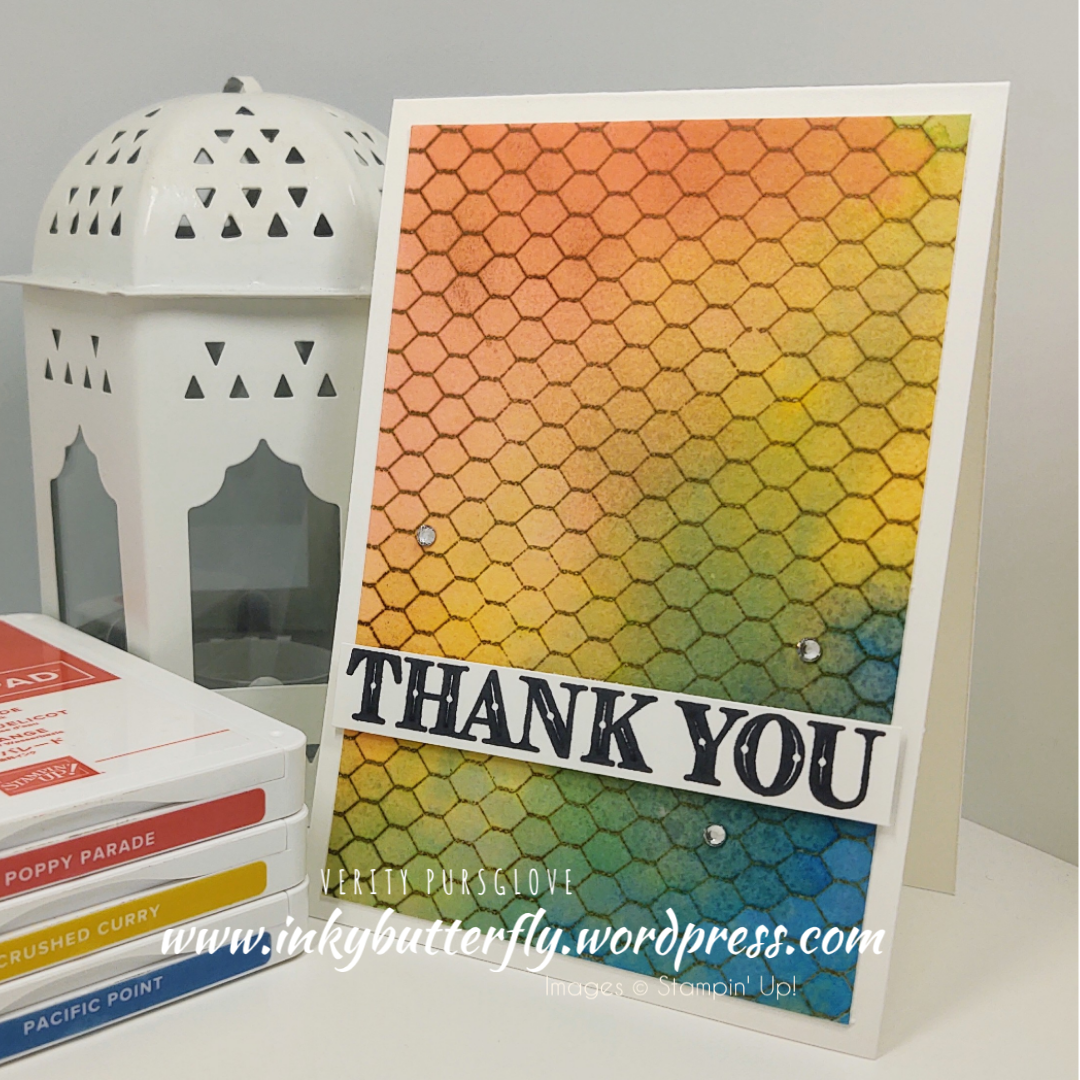
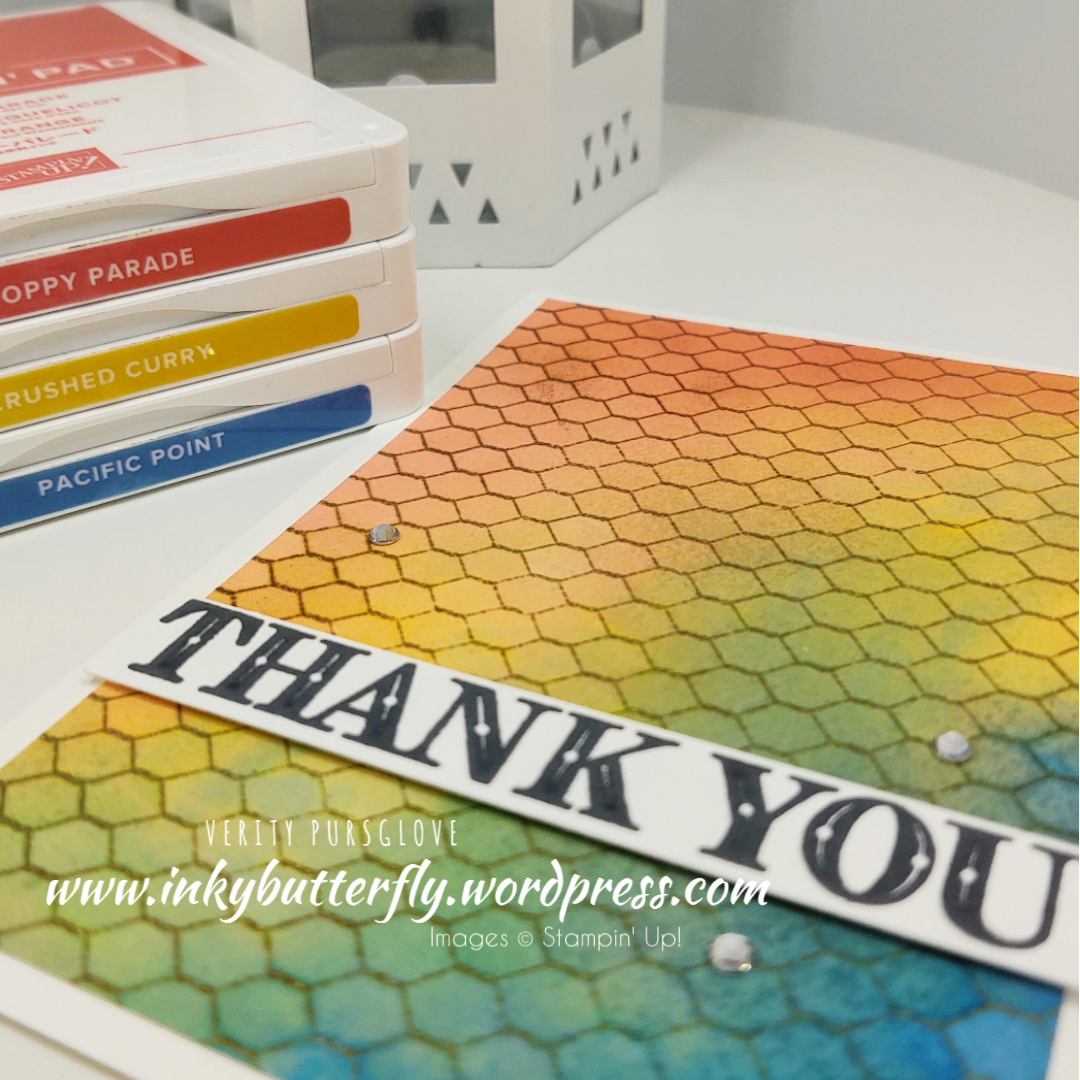
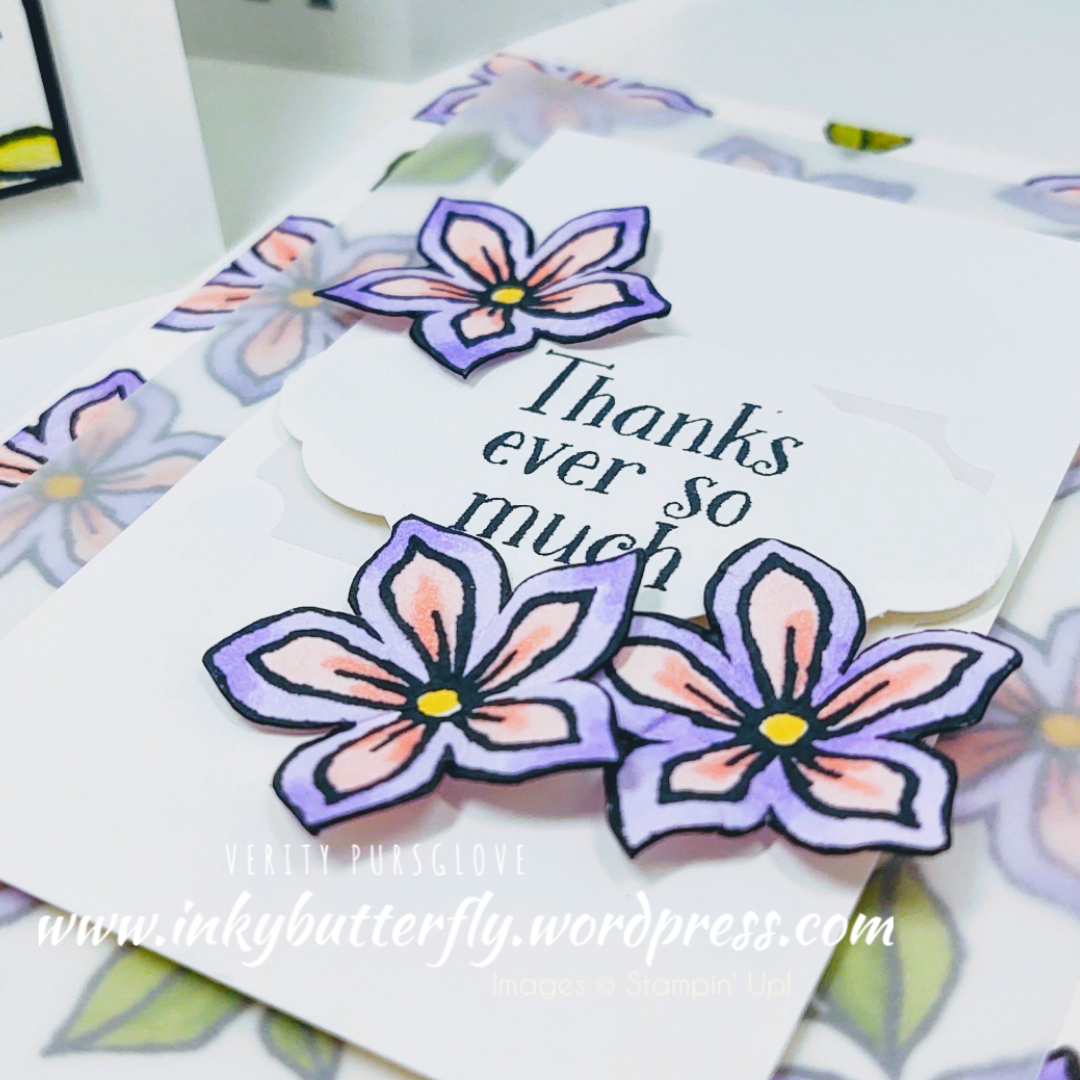
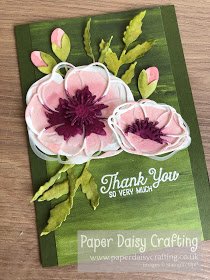
Jill’s style speaks volumes in this clean and simple card….
I’d love to know if you give this technique a try!
I hope you enjoyed this project.
The supplies used are listed and linked to the online store below.
If your order is less than £150, use the Hostess Code HS9XUAG2 when placing your order to get an extra gift from me!
I would love to be your demonstrator.
Don’t forget to check out the amazing joining offer running during September! Two free stamp sets, pre-cut cardstock and a pack of rhinestones will be added to your custom Starter Kit!
Today’s post is accompanied by a longer video than usual while a talk to all of you out there that don’t know where to start will papercraft and cardmaking!
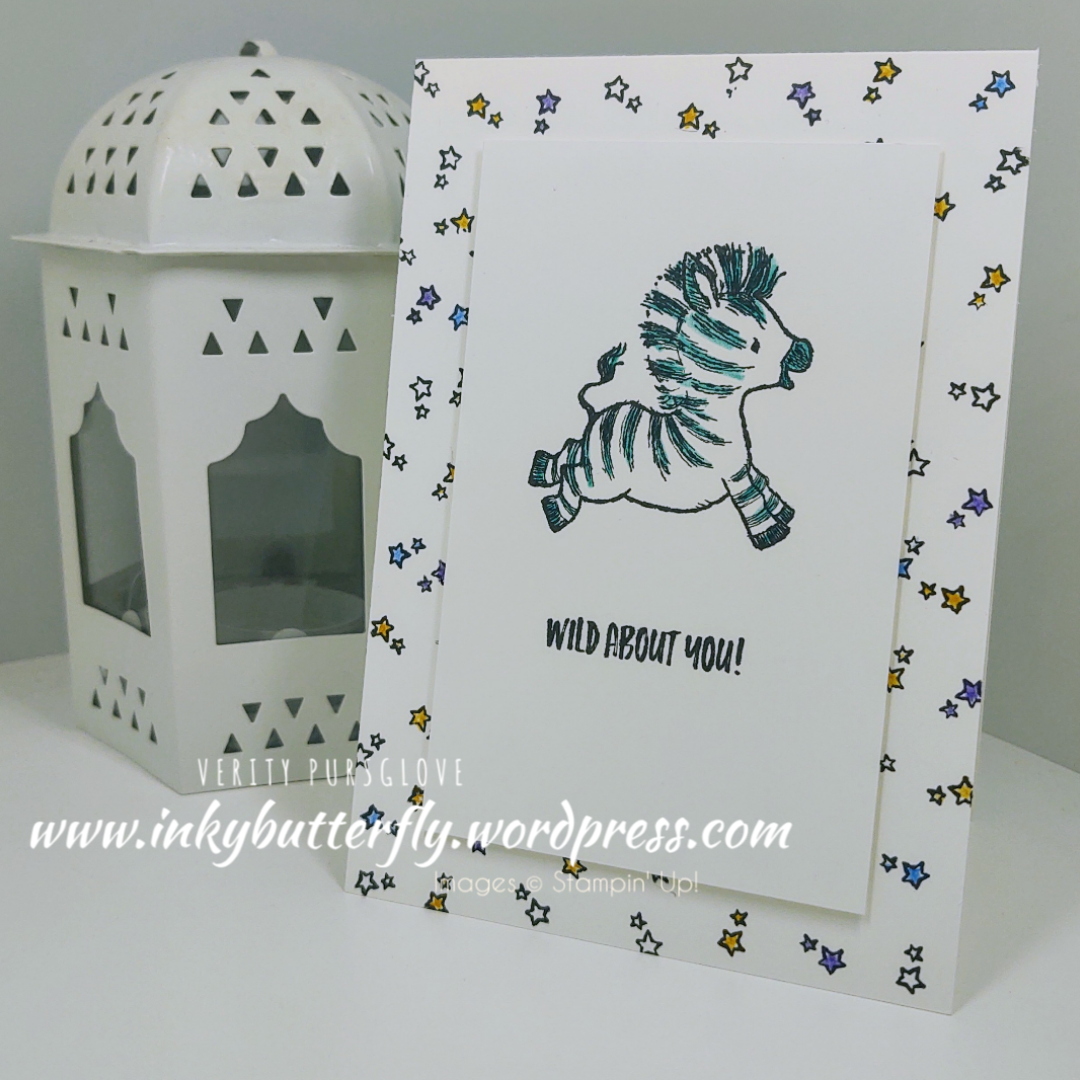
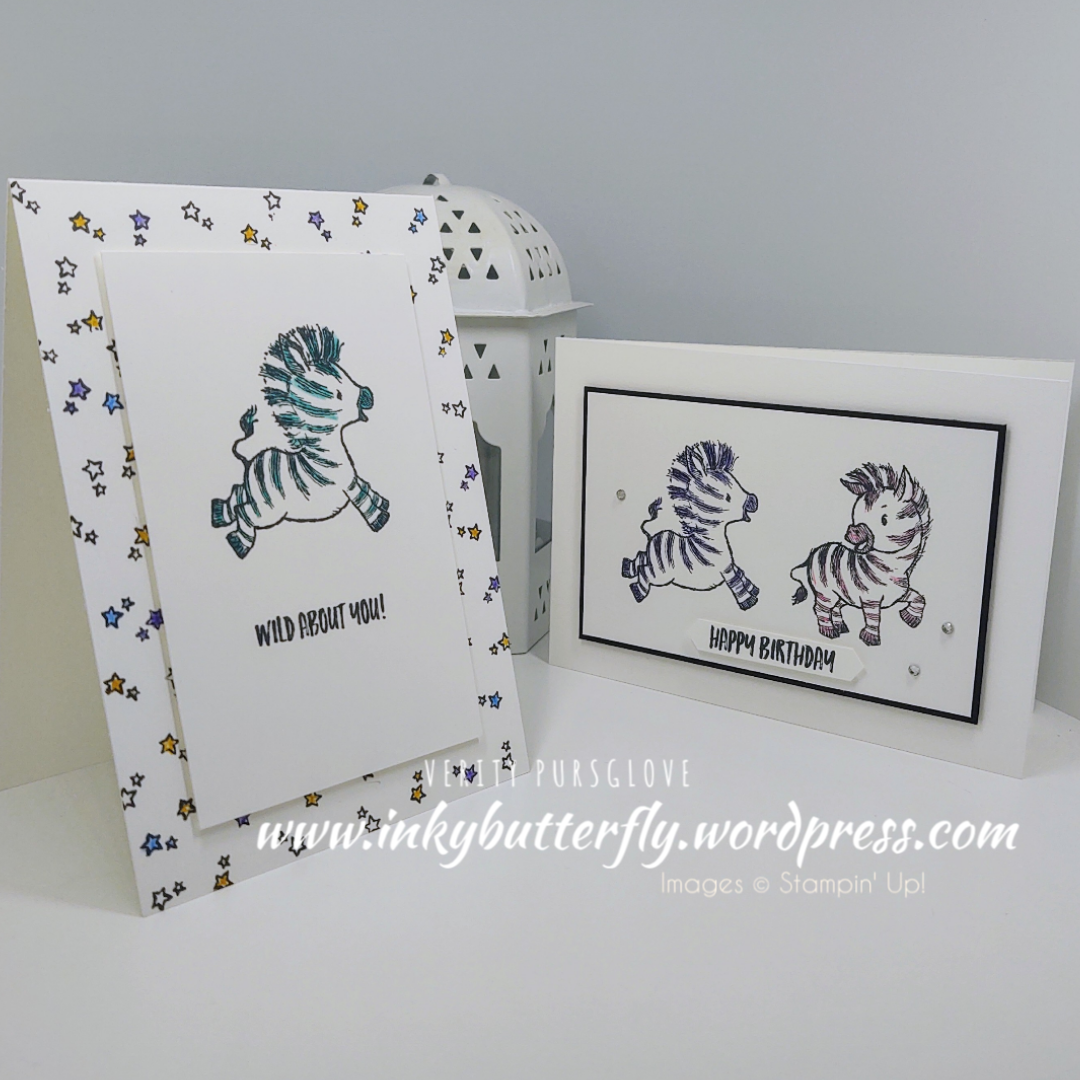
I present the Zany Zebras Product Collection and suggest some additional items to add to a your collection, or a Starter Kit.
I have added direct links to these products in my online shop below.
In the video, I make these cards. The first uses only products supplied in the collection.
The seconds adds some black card, the classic label punch and some rhinestones.
Watch the video here!
I hope you enjoyed this project.
The supplies used are listed and linked to the online store below.
If your order is less than £150, use the Hostess Code VKY3SPC7 when placing your order to get an extra gift from me!
Spend £200 and get an extra £20 of rewards to spend on whatever you want!I would love to be your demonstrator.
Would you like to join my Stampin’ Up! team?
Choose an additional free bundle when you join during June!
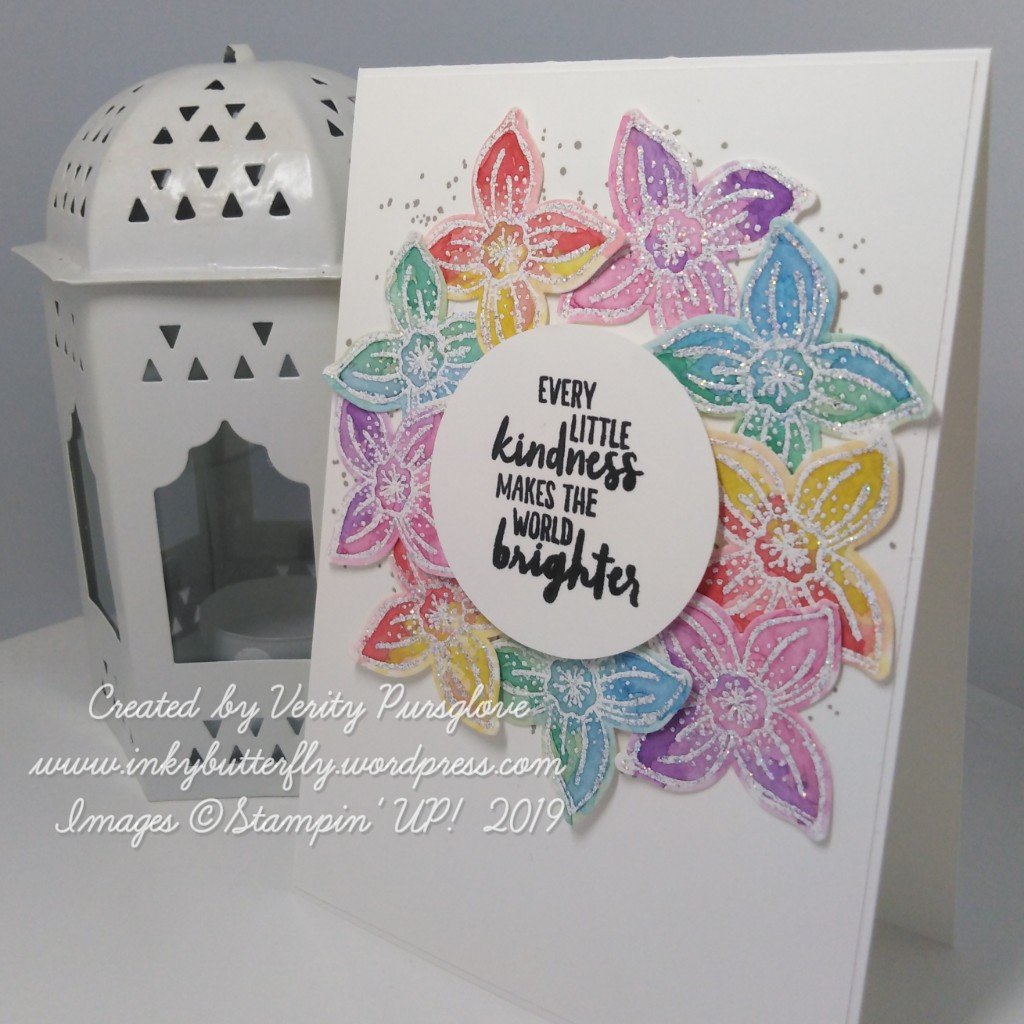
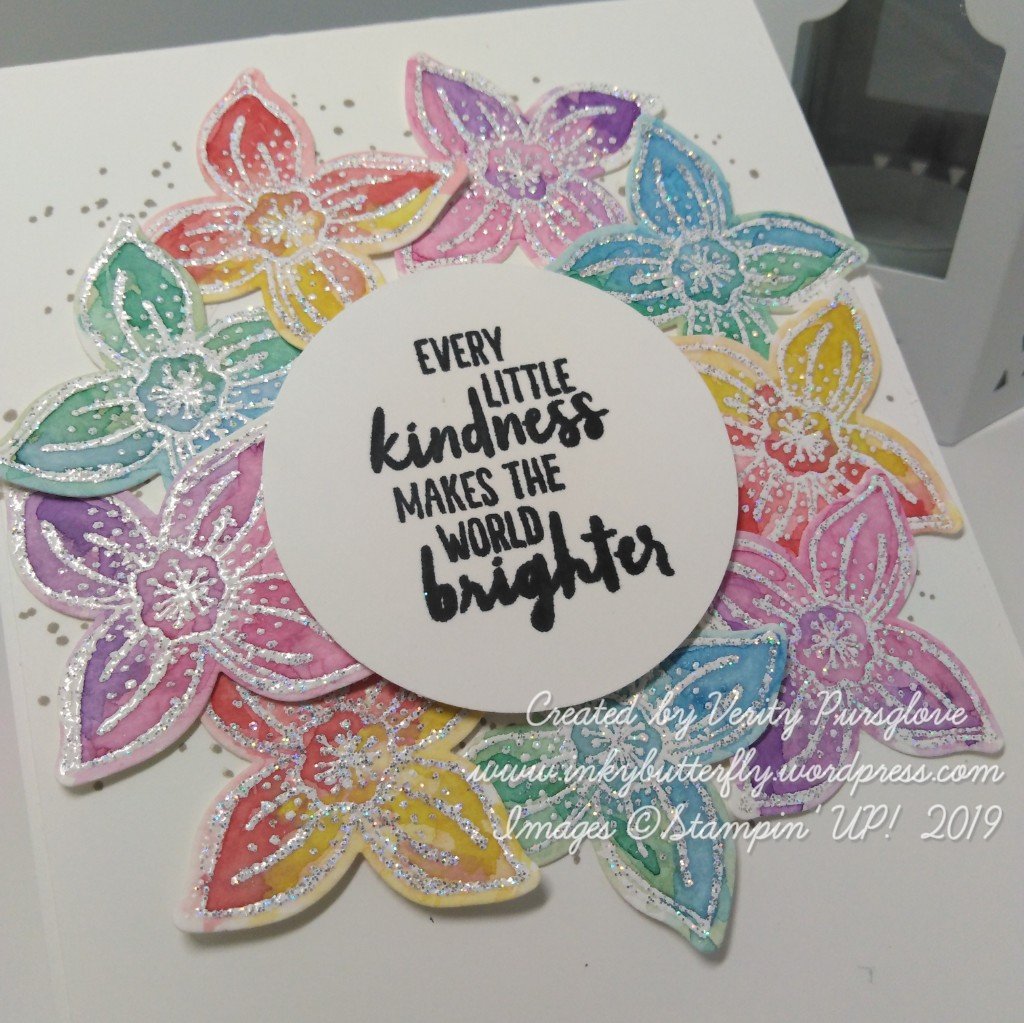
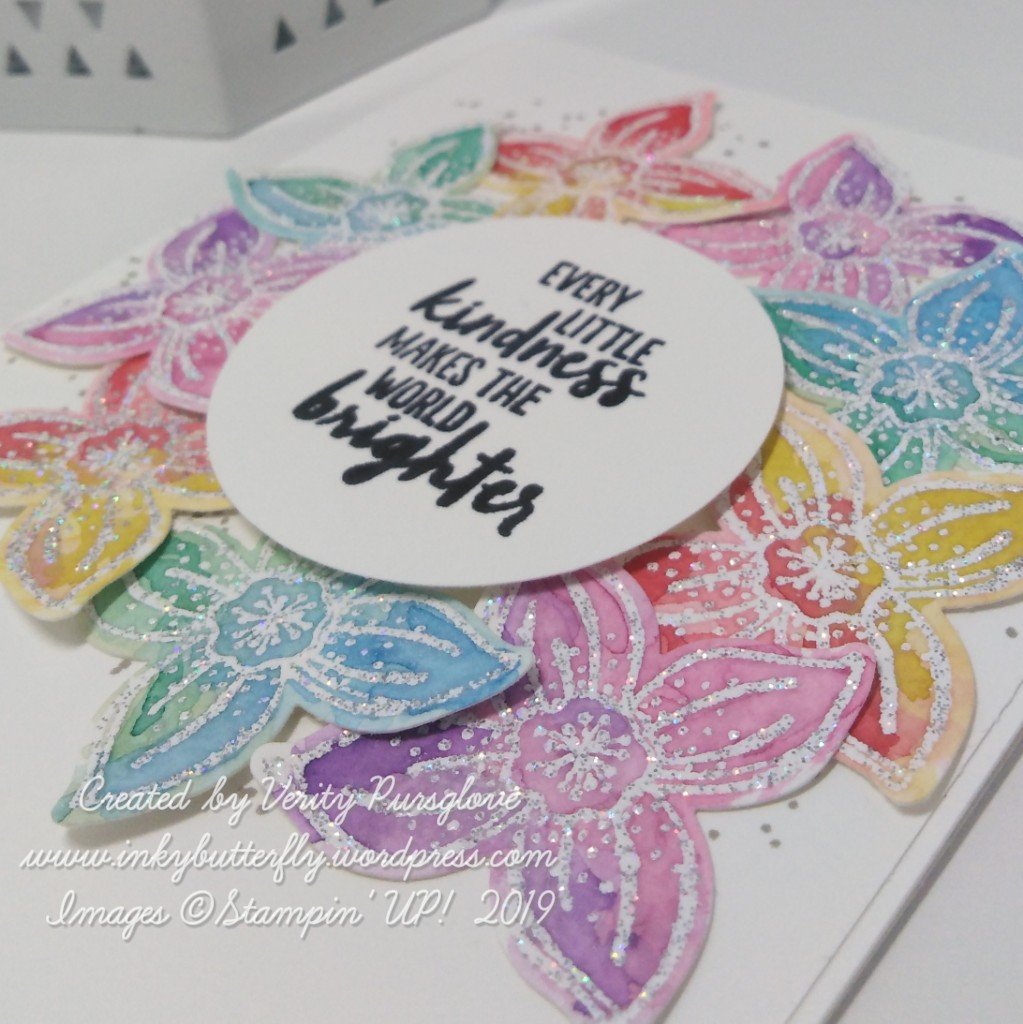
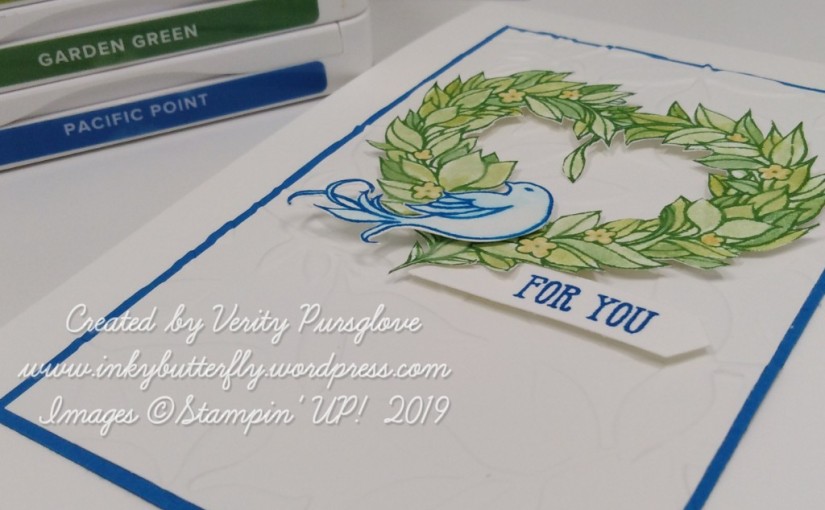
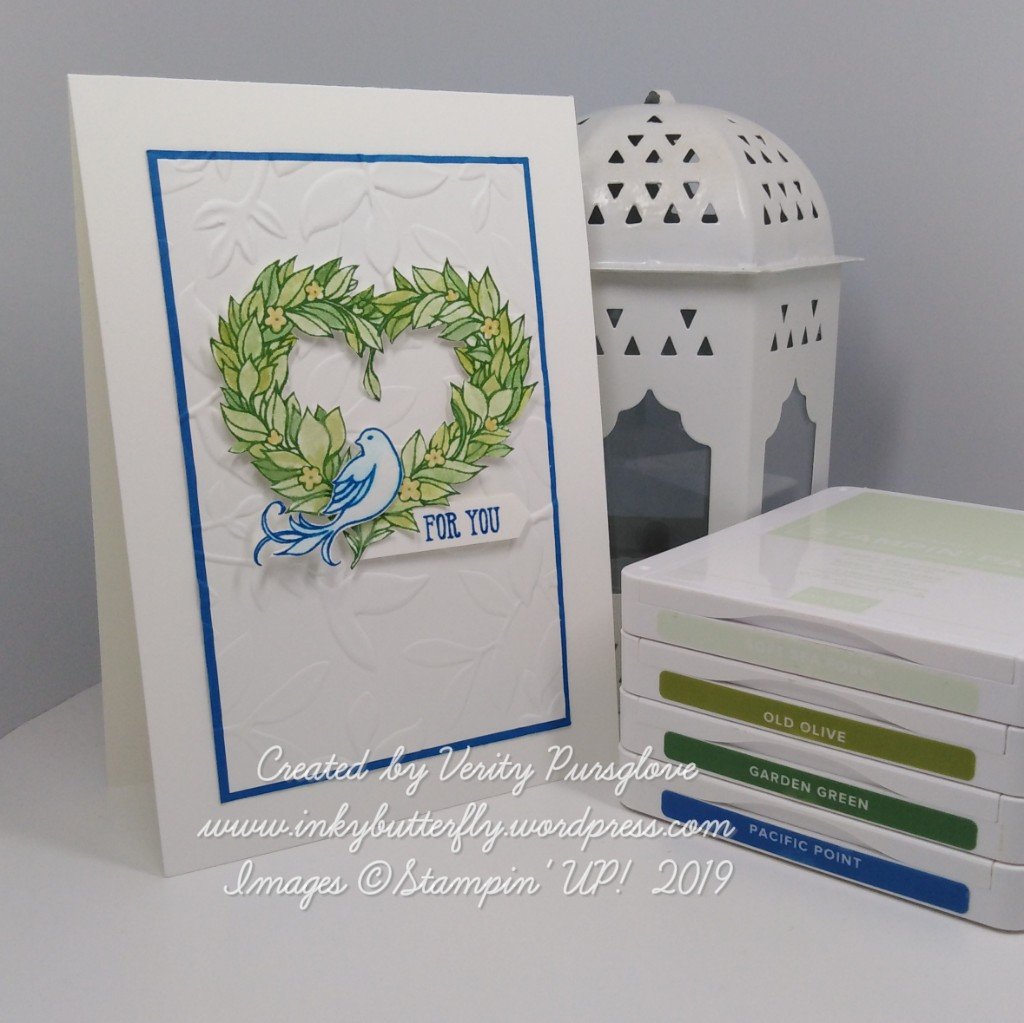
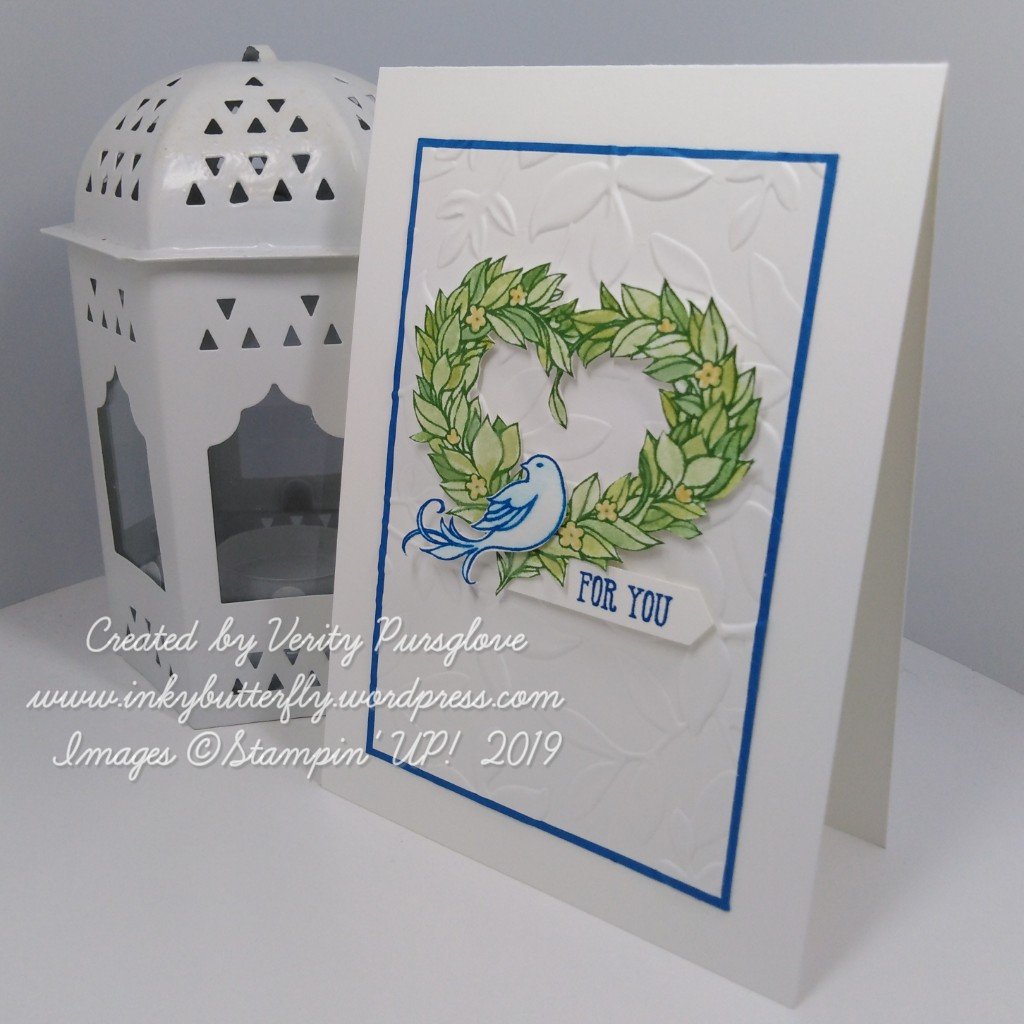
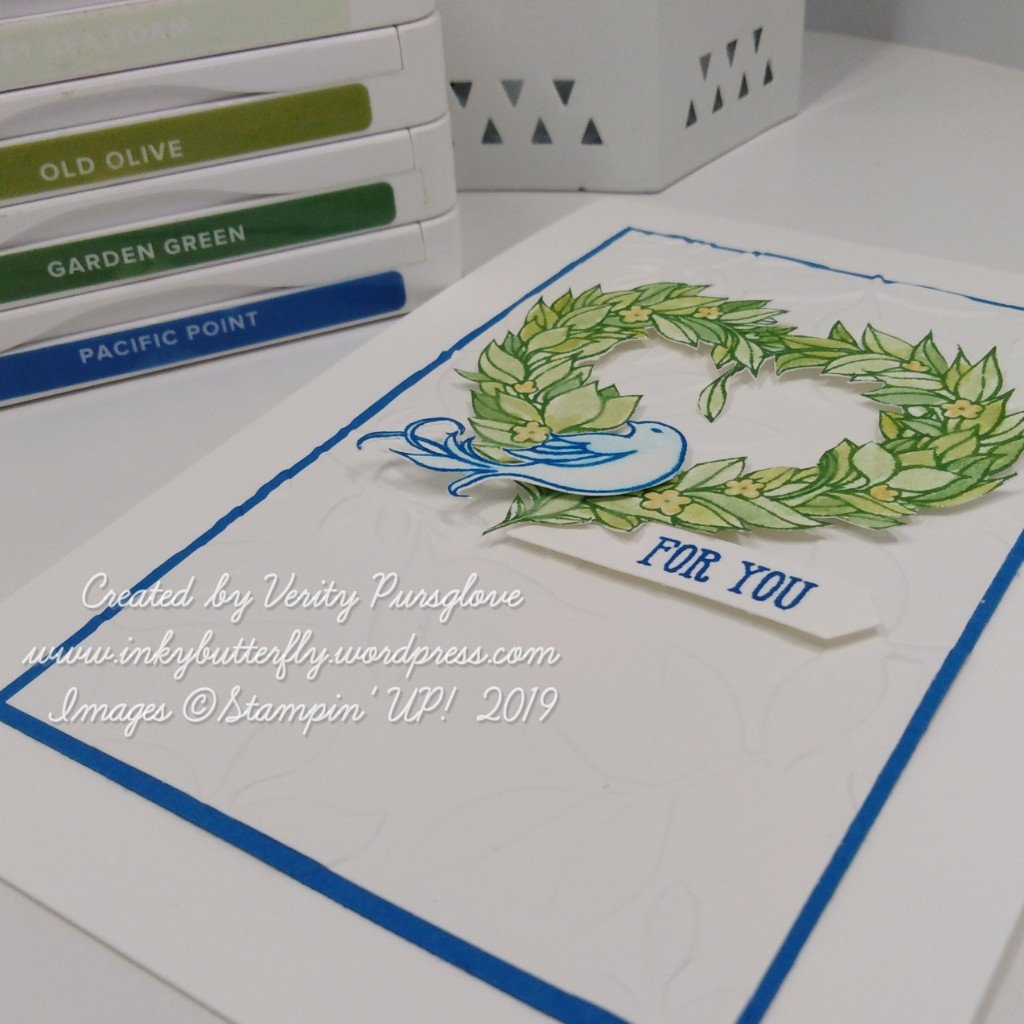
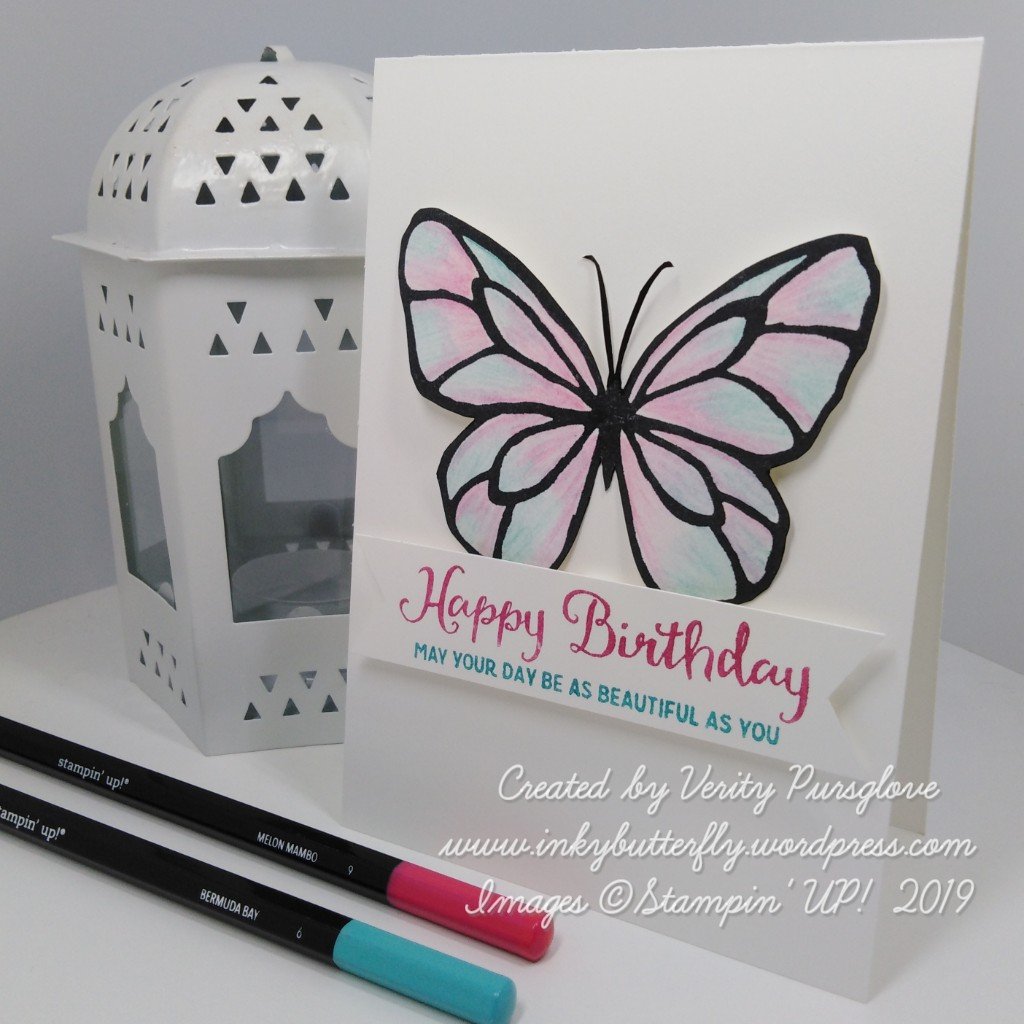
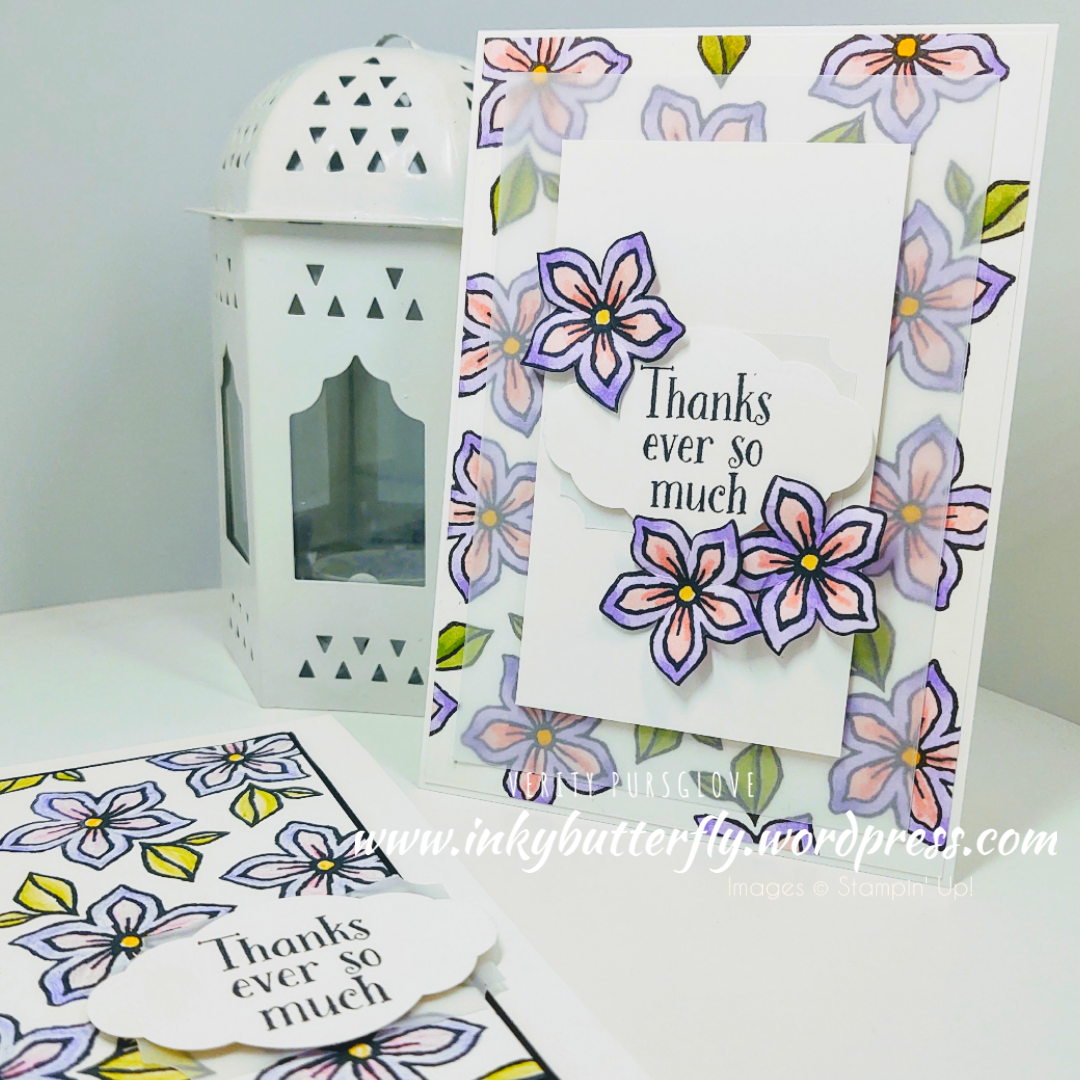
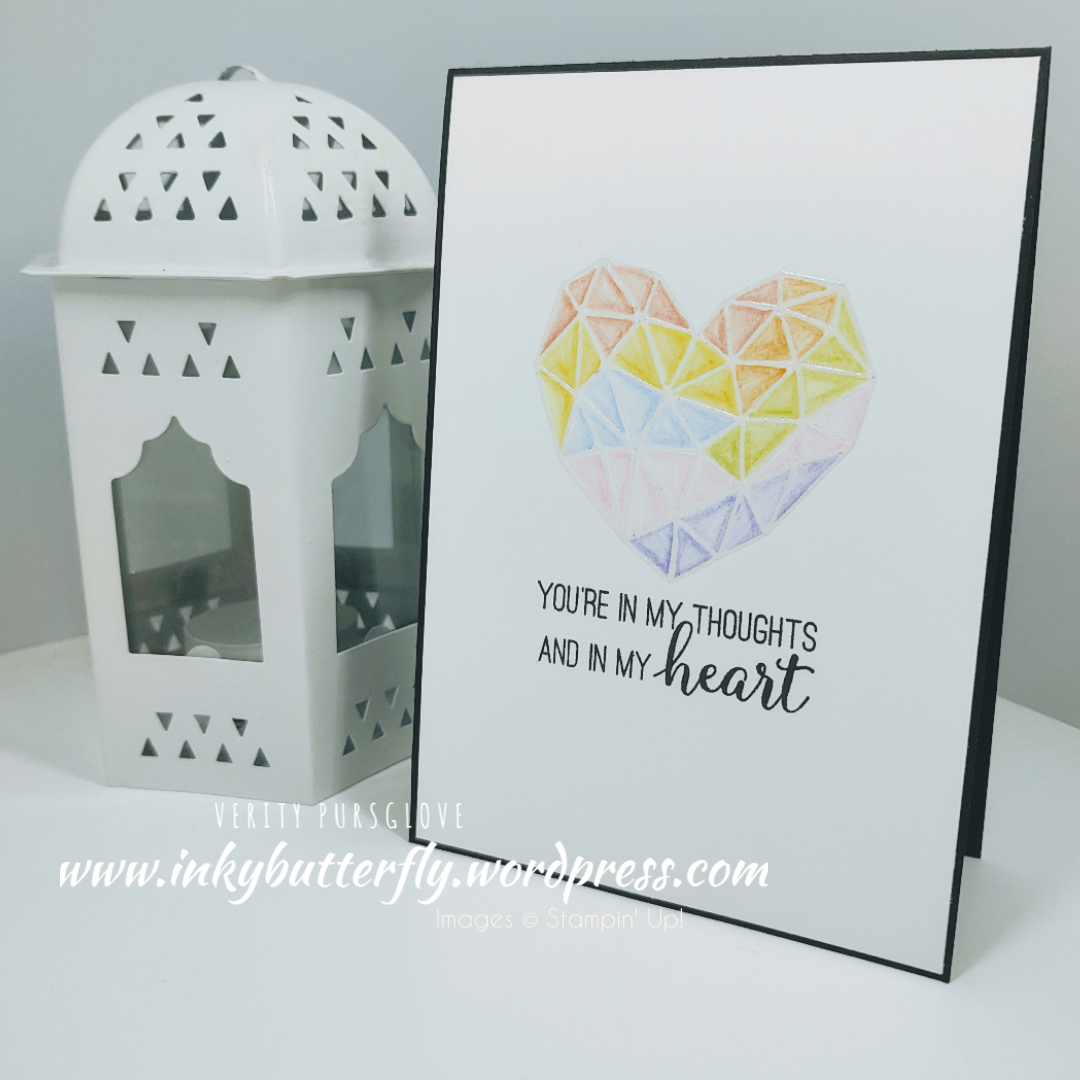
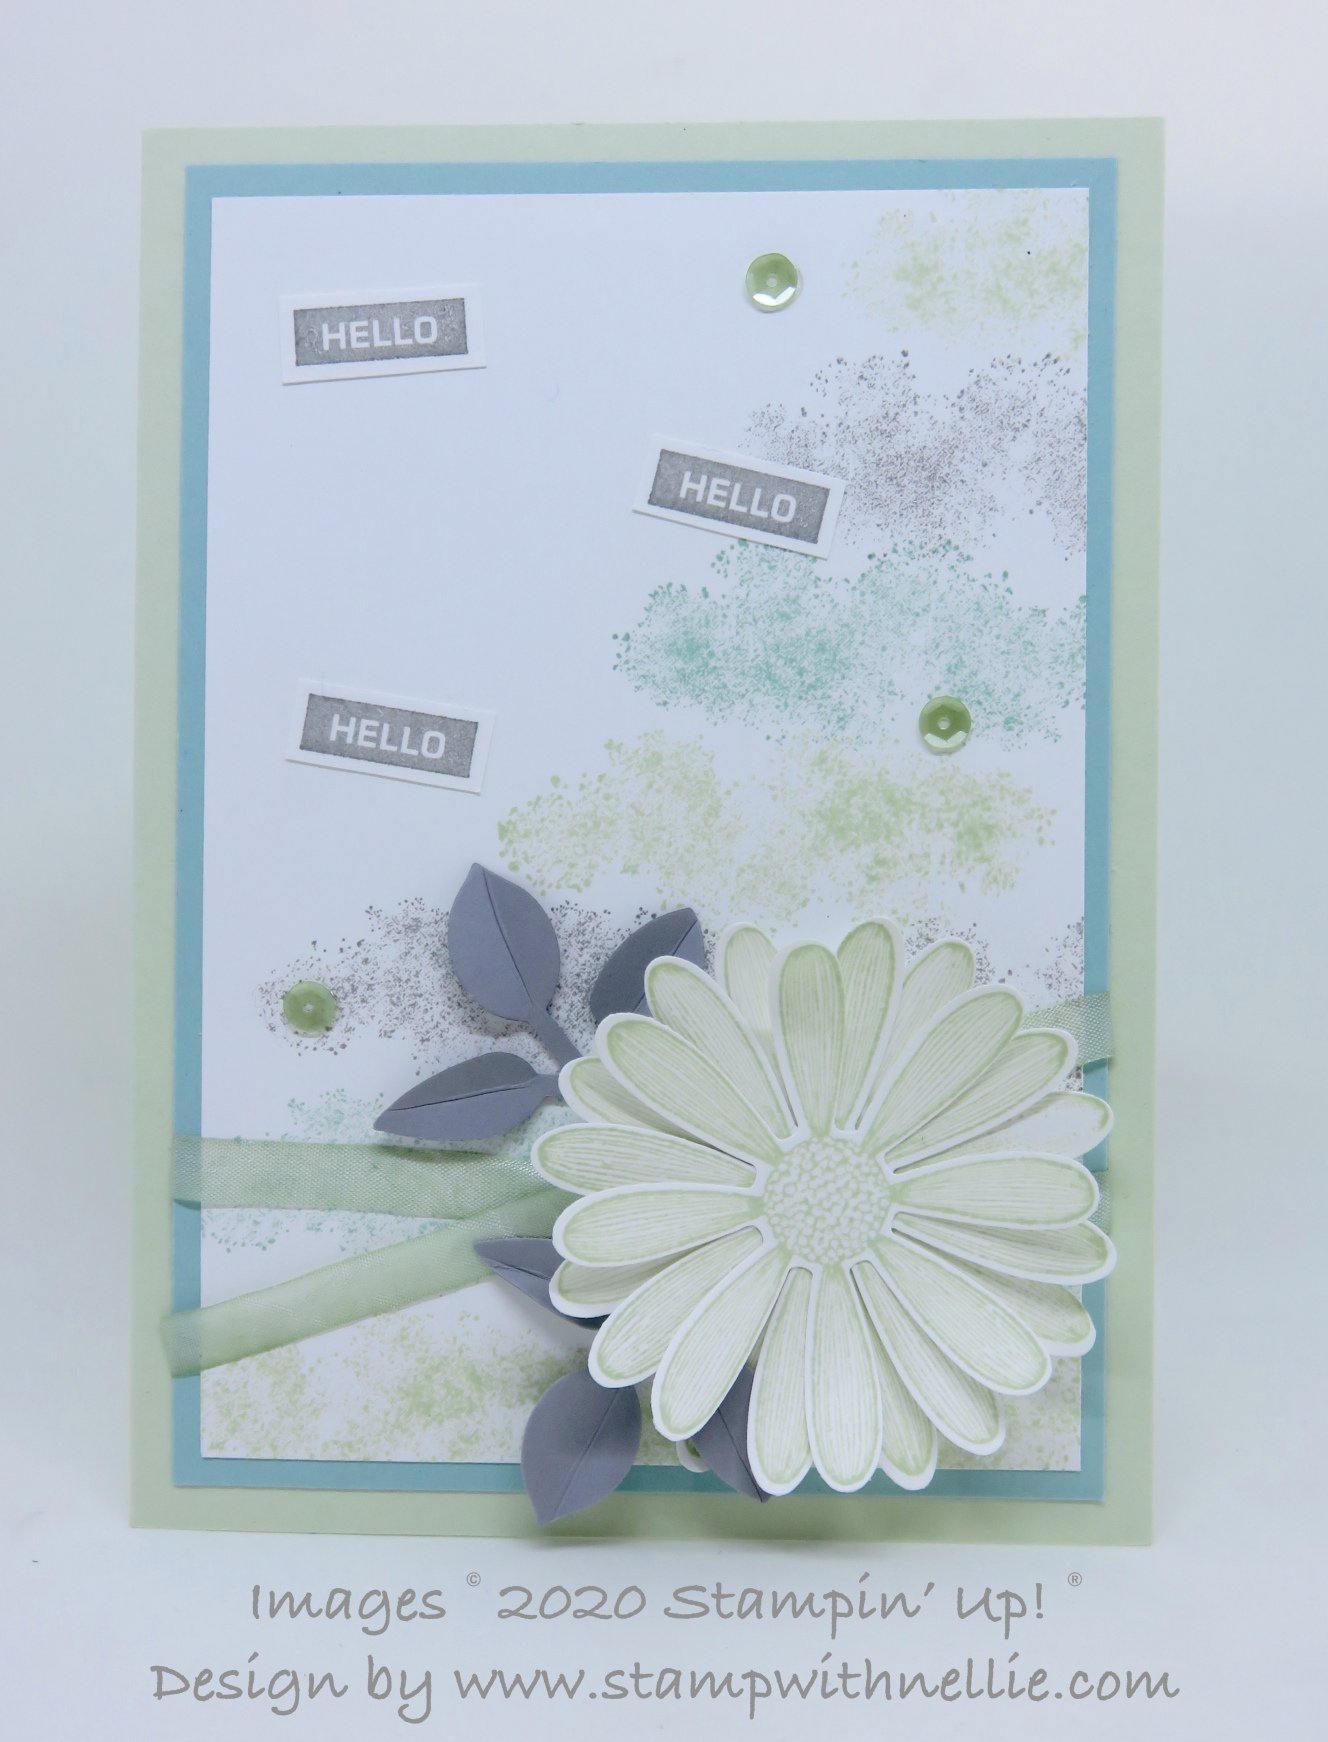
All the projects I am sharing this week will feature at least one retiring product.
Today it is the Modern Heart stamp set.
I kept it simple heat embossing the image with clear powder.
The facets were coloured with watercolour pencils, though I think a “real” watercolor effect may have been more successful to achieve the rainbow look.
The sentiment was added with black Memento ink.
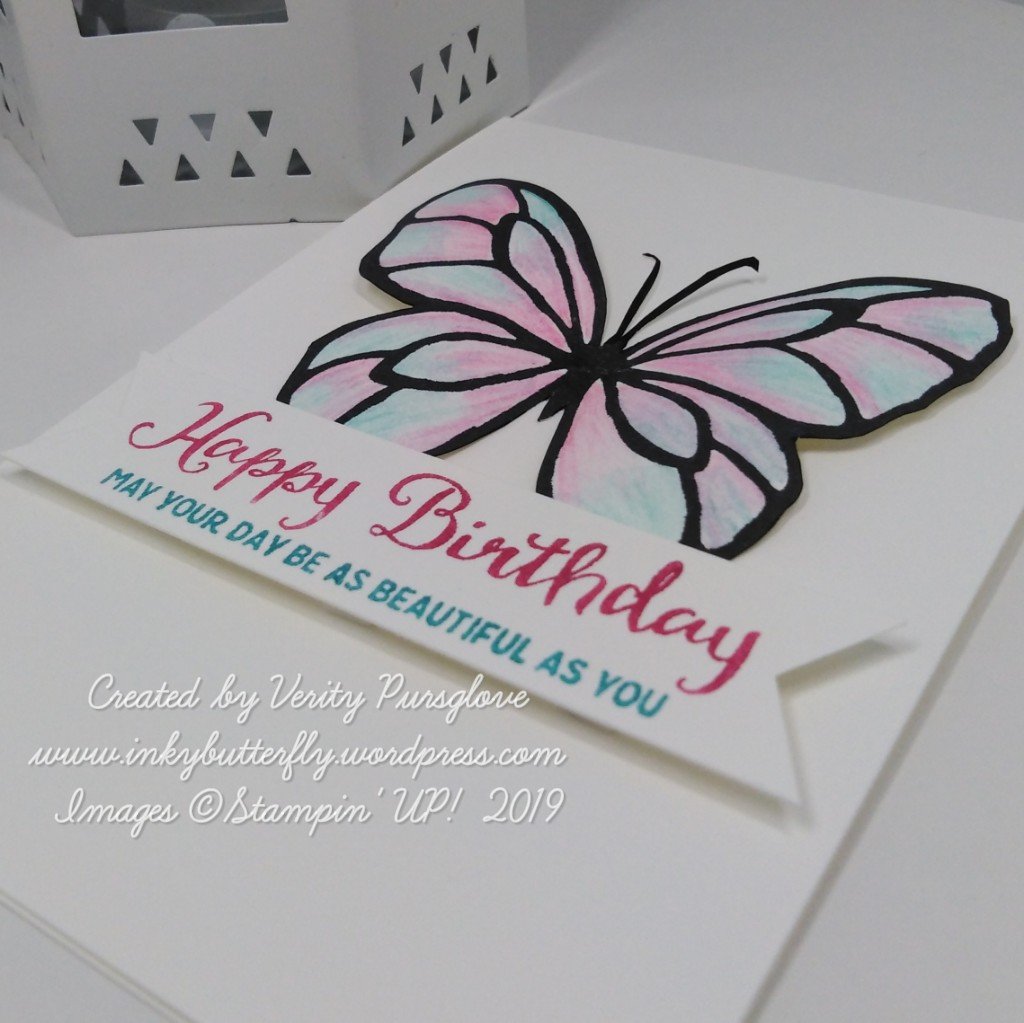
I hope you enjoyed this project. The supplies used are listed and linked to the online store below.
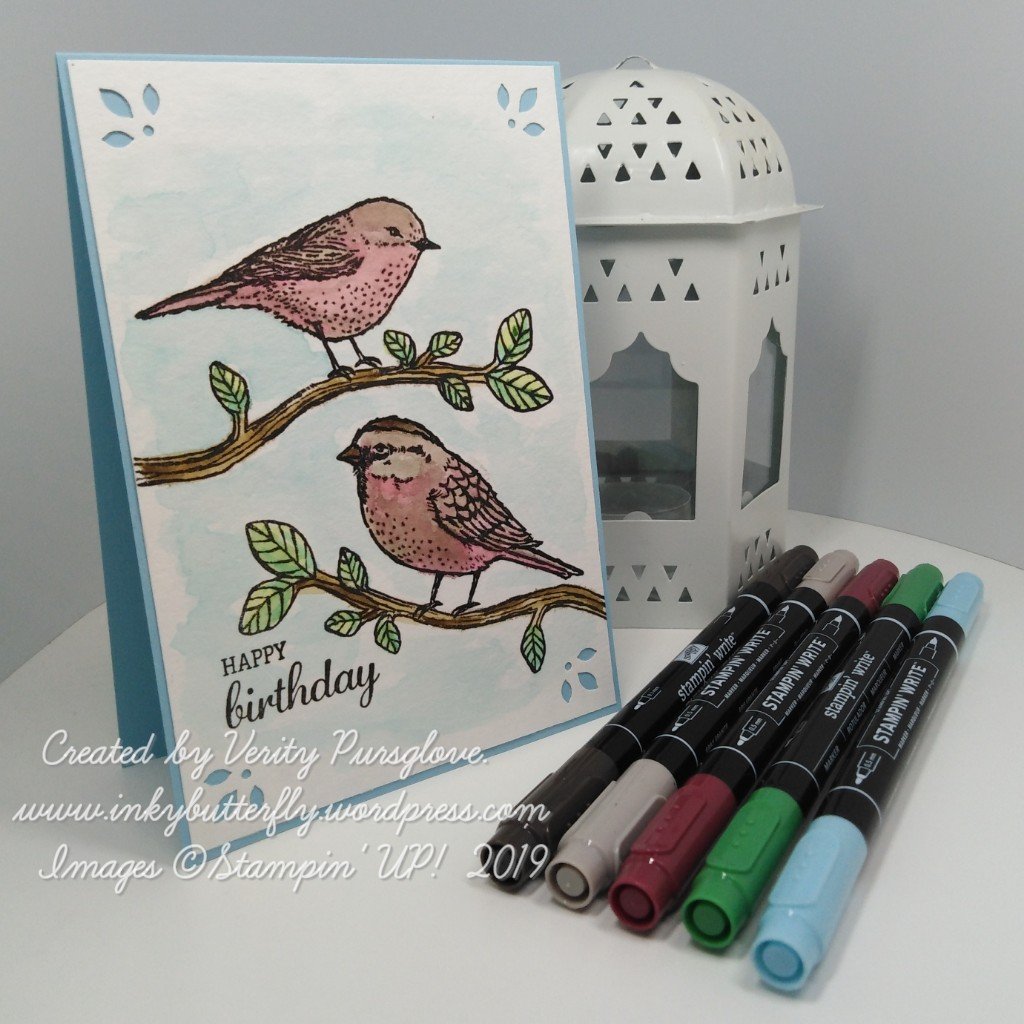
Welcome to this week’s Project Share. As always my friends have created some lovely work. Please use the links to visit their blogs and read more about their projects.
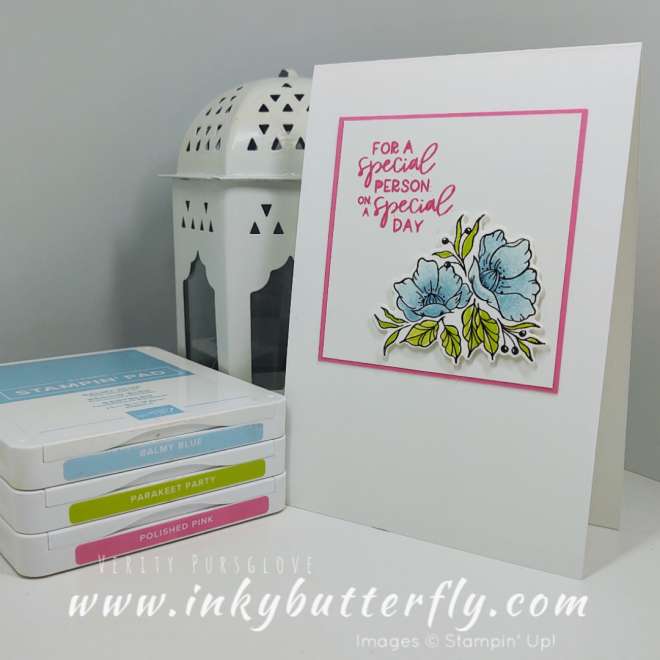
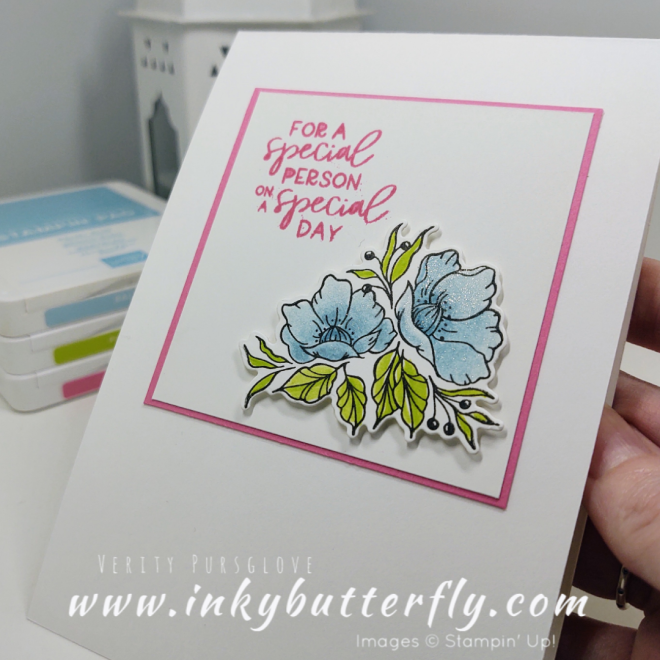
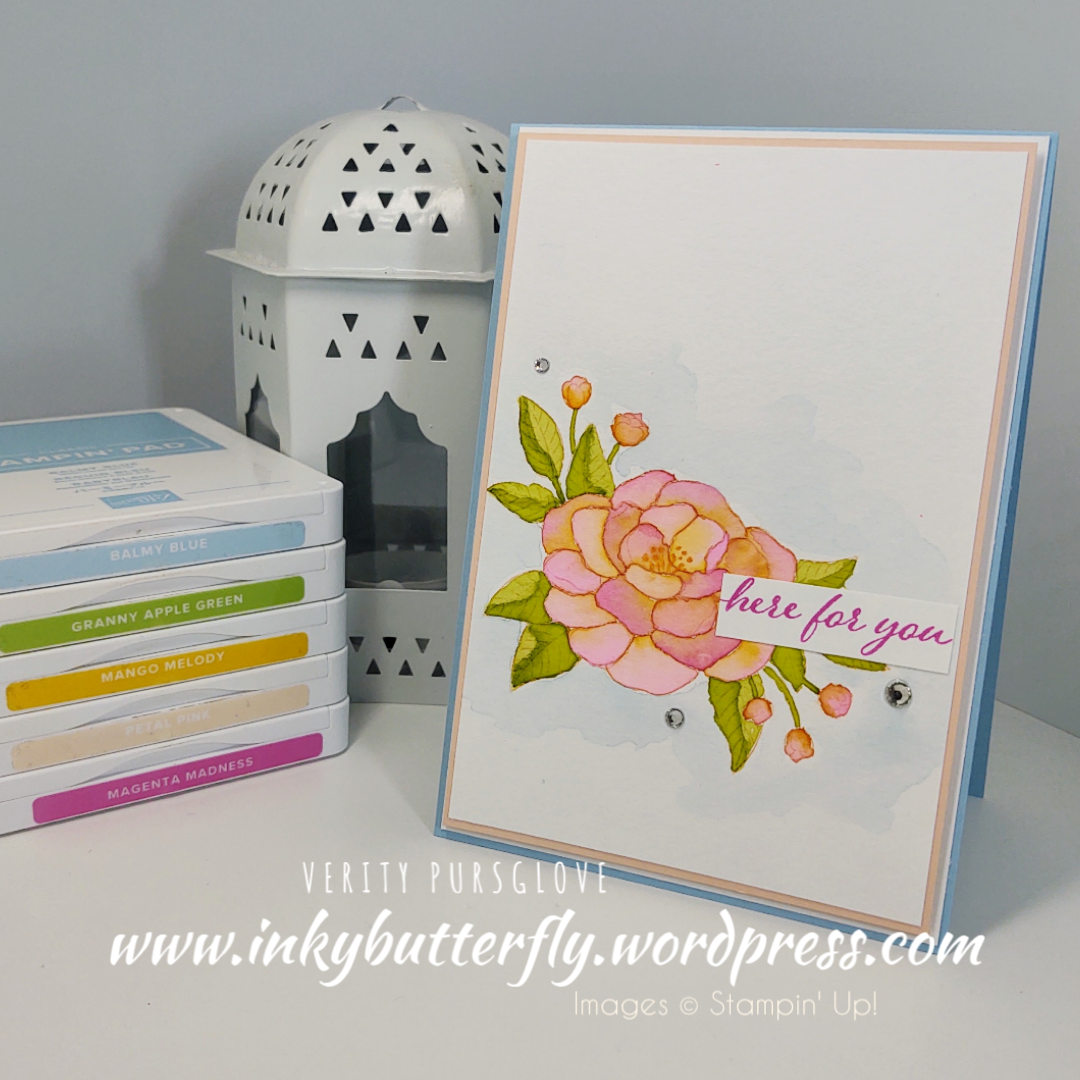
Jill is casing Pinterest with her Poppy card. Water colouring and die cutting coming together perfectly!
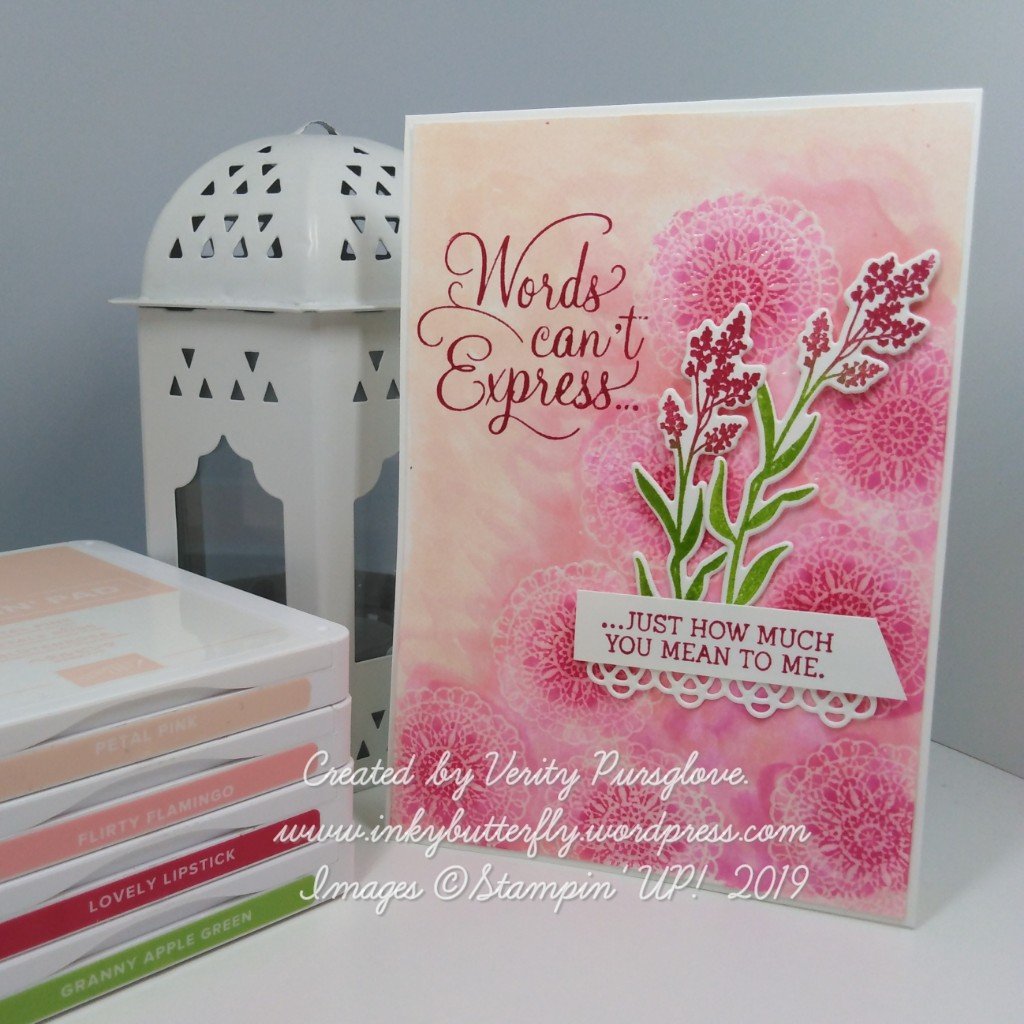
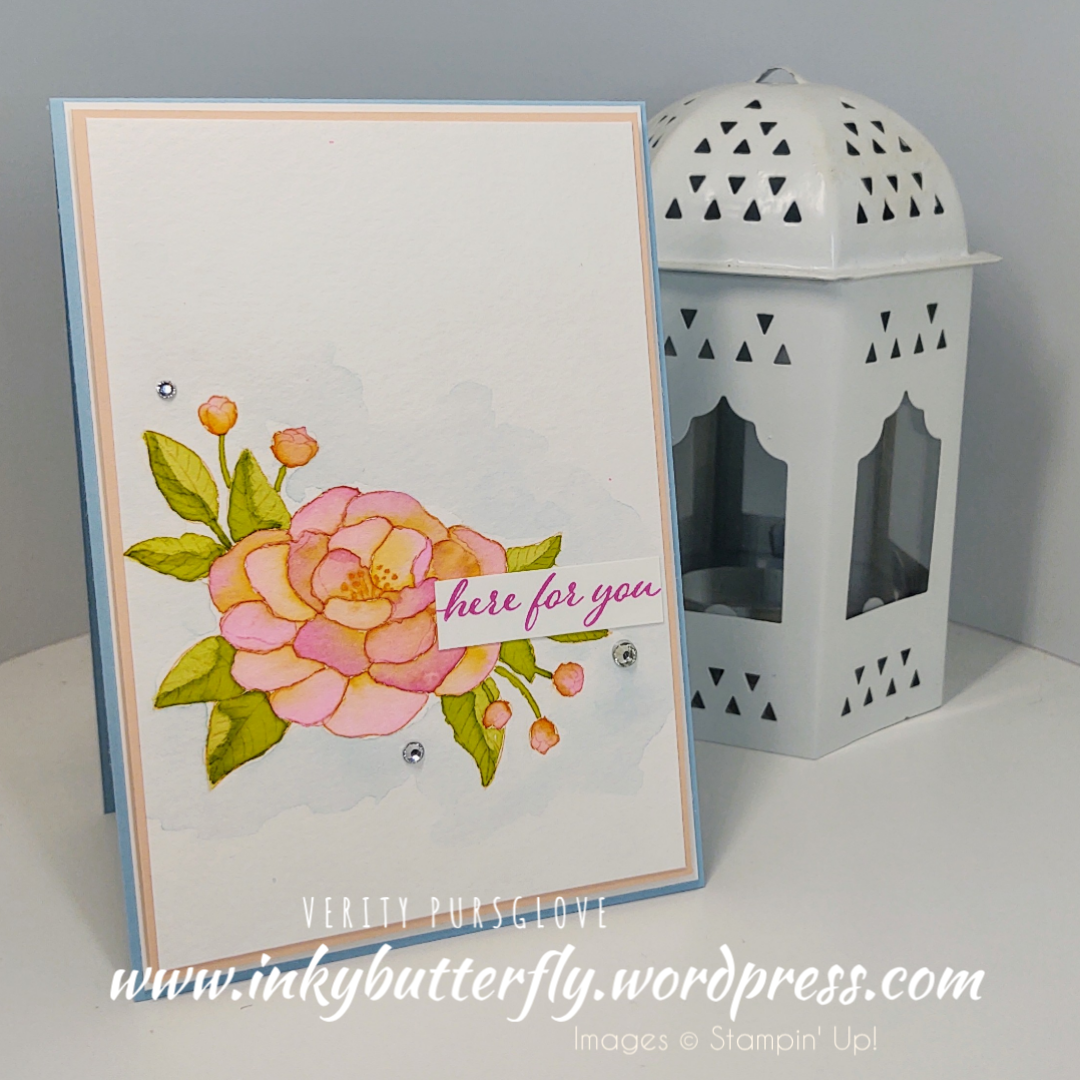
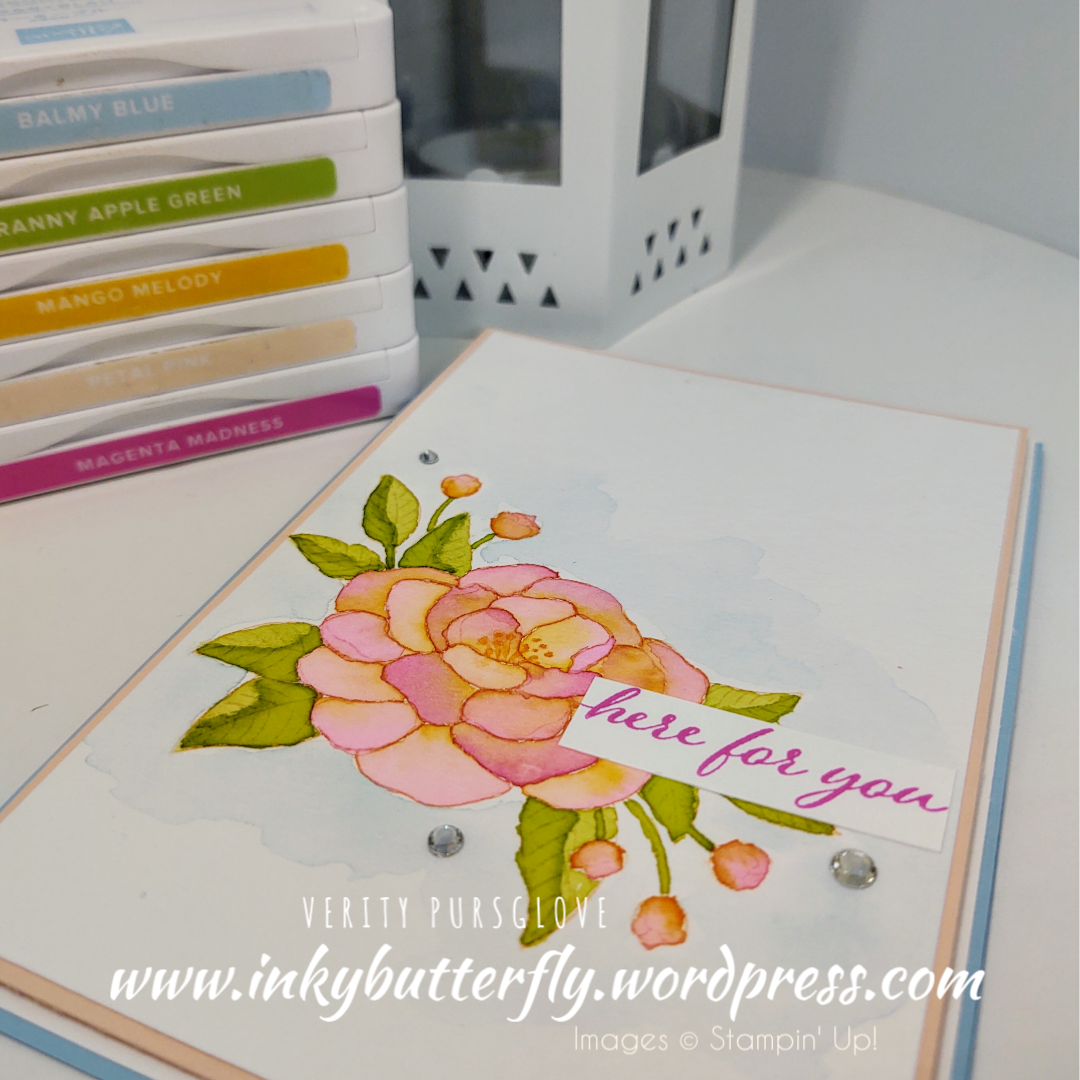
Hello Everyone,Yesterday I made some time to do a bit of water colouring.I used the Stamparatus to ensure the image was stamped crisply on to the watercolour paper with Stazon ink.I coloured the image with watercolour pencils and blended them with an aqua painter.I die cut the coloured image using the Stitched So Sweetly dies. This was adhered to Granny Apple Green card stock also cut with the dies..The sentiment was stamped with Gorgeous Grape ink and cut with a Stitched Rectangle die.The pieces were adhered to a Granny Apple Green card base that had already been layered with Whisper White.I hope you enjoyed this project. The supplies used are listed and linked to the online store below.I would love to be your demonstrator.Thanks for stopping by today and happy Stampin’!Verity xxProduct List
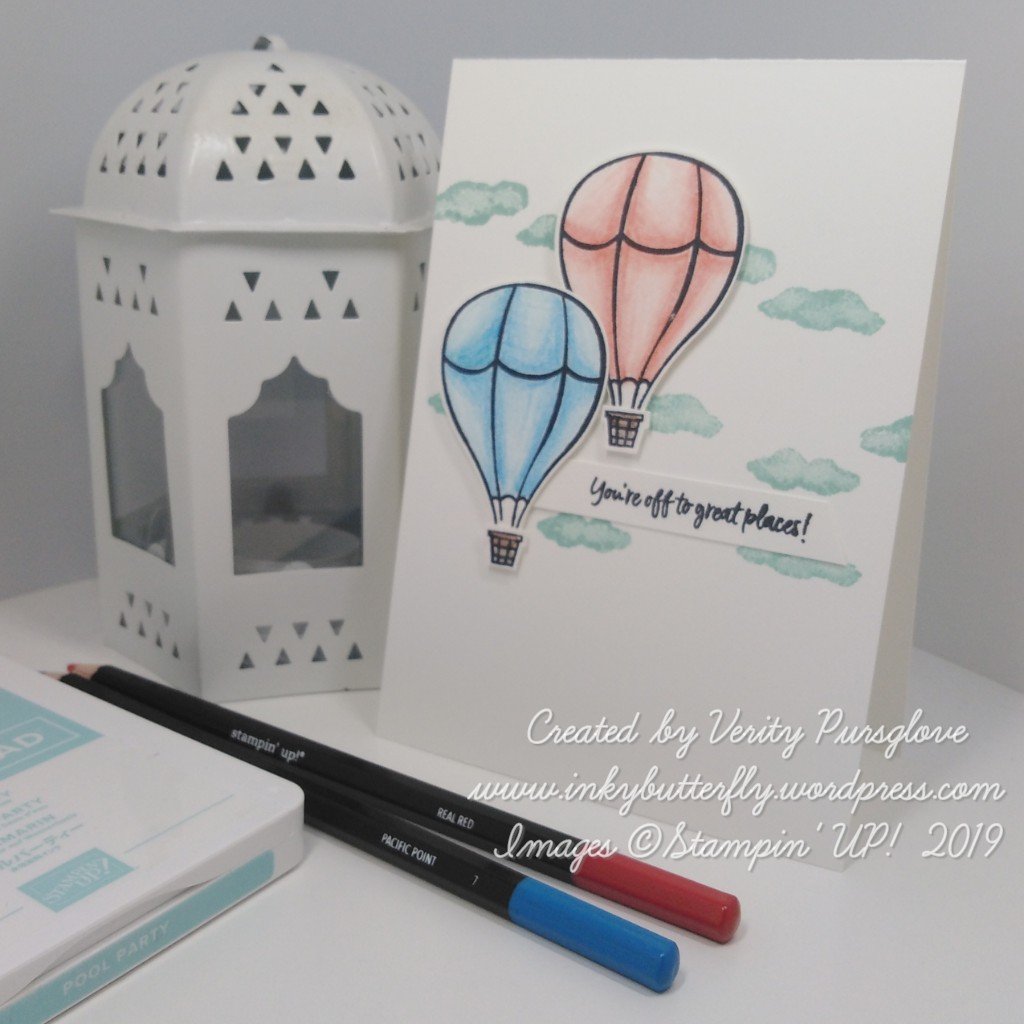
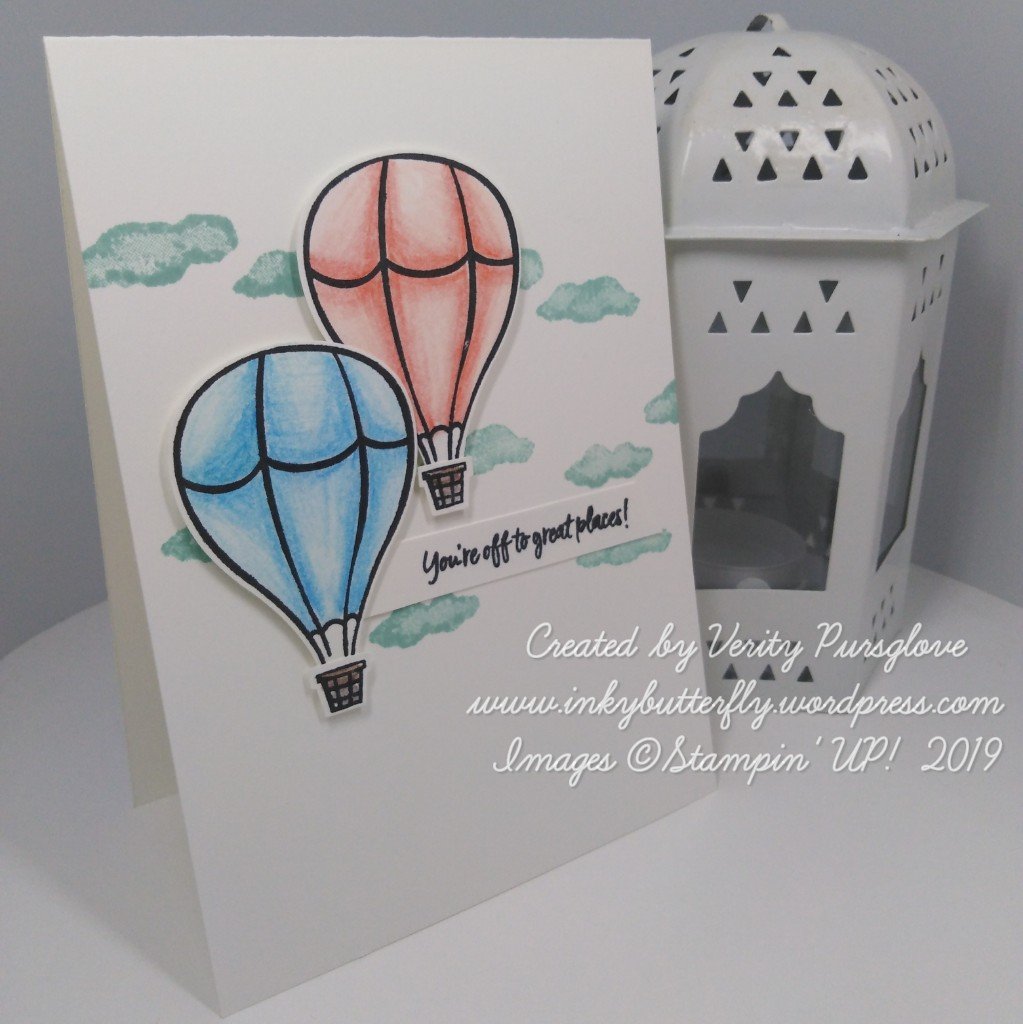
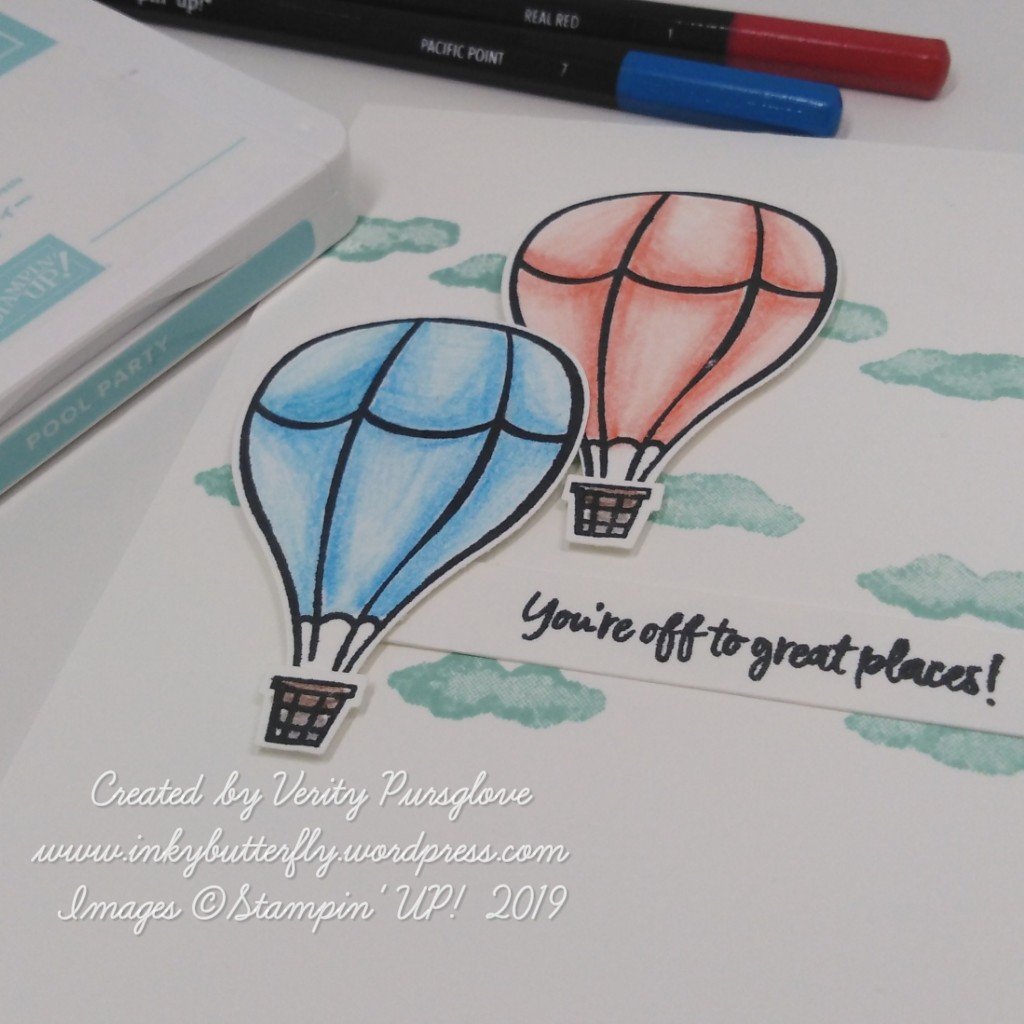
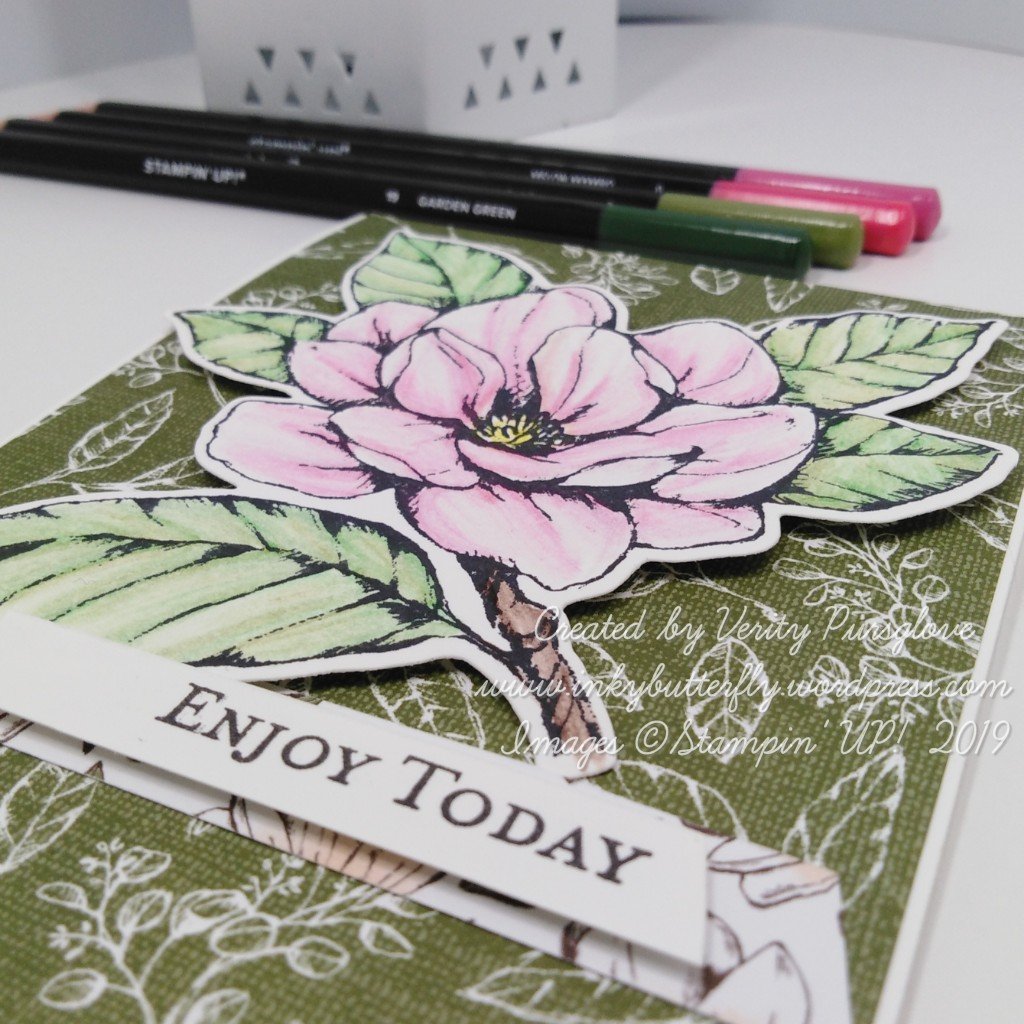
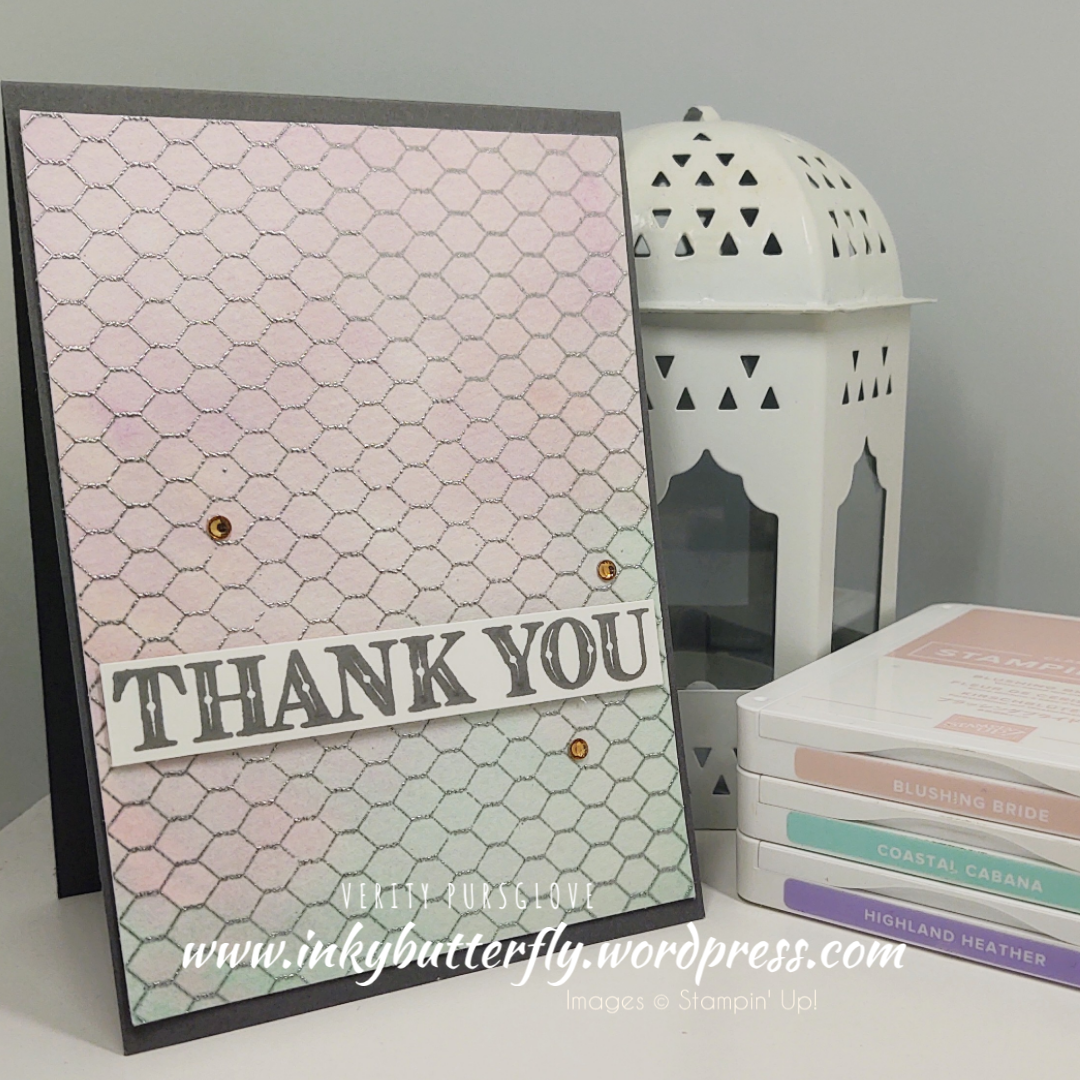
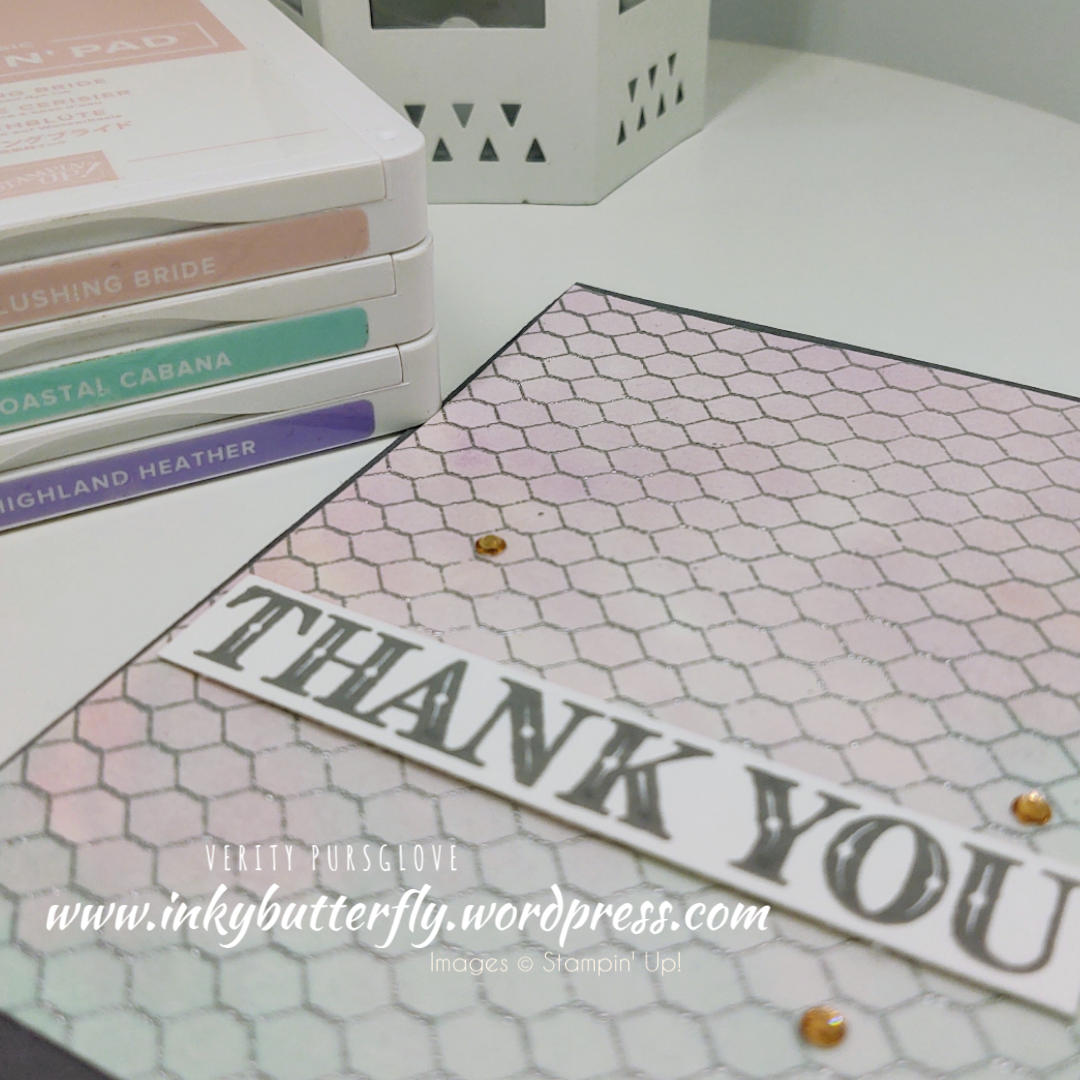
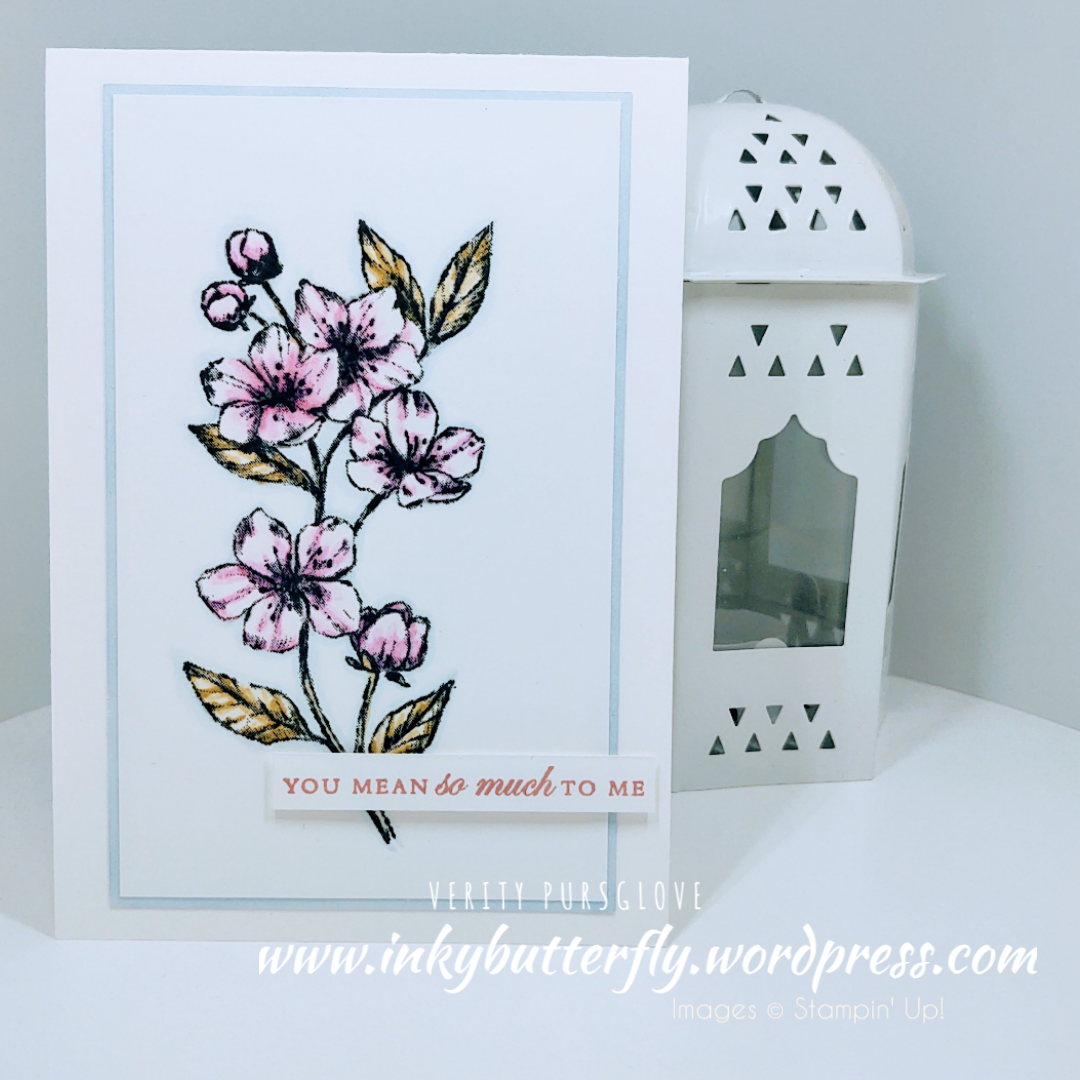
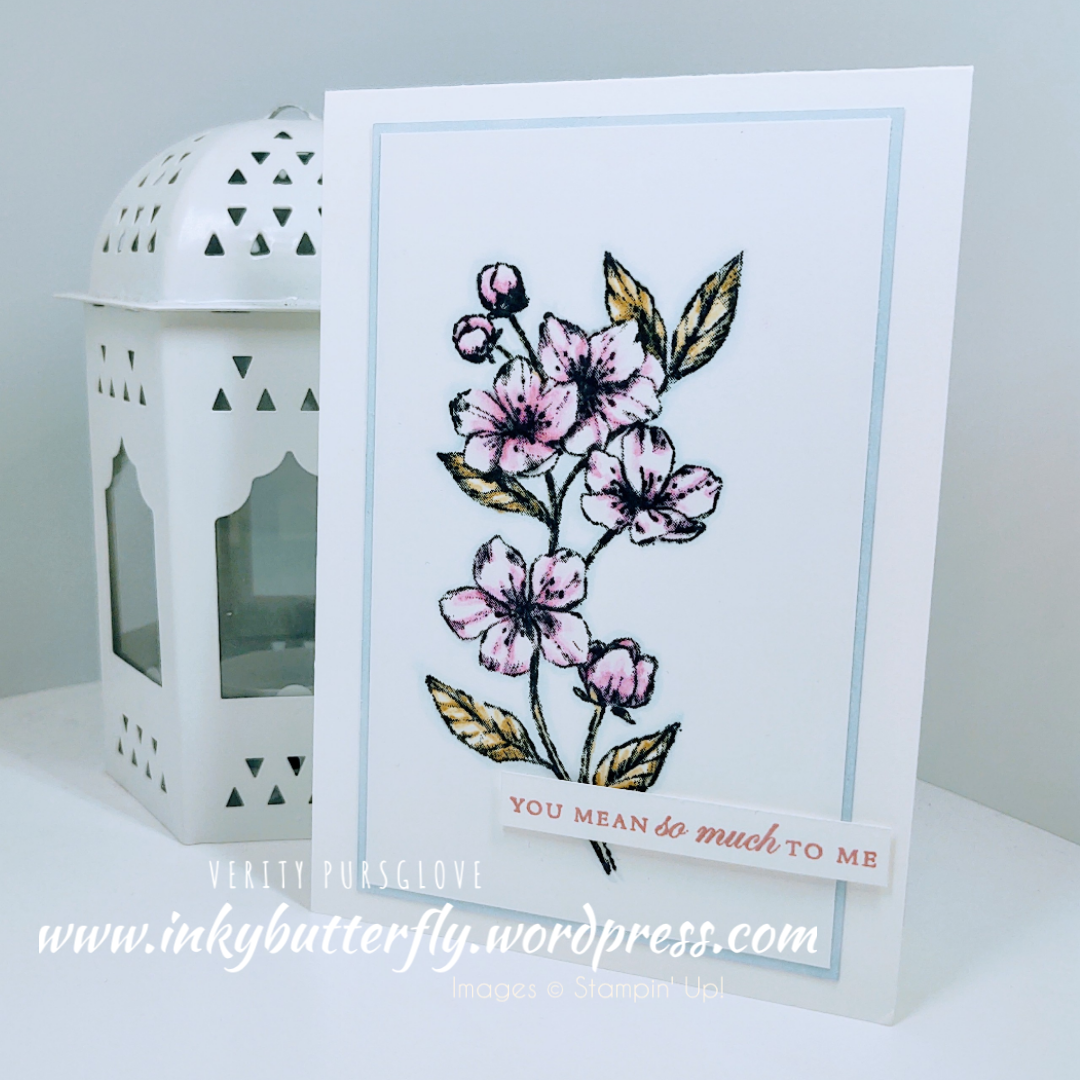
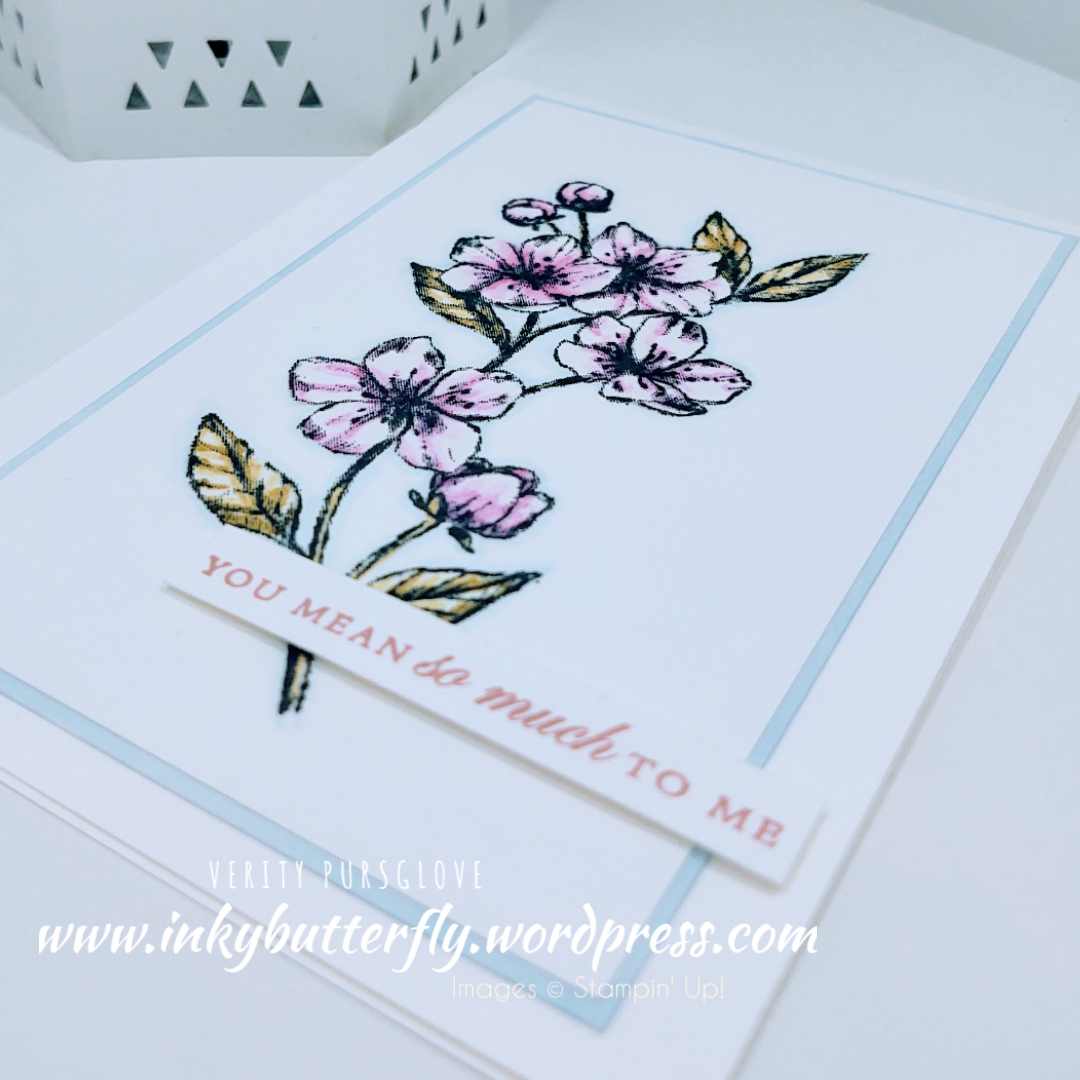
Another card for you today with lots of white space.
The cherry blossom was stamped with Stazon ink.
Flirty Flamingo and Old Olive watercolour pencils were used to colour the image.
A light Seaside Spray Stampin’ Blend Marker was used to outline the image and softened with a colourless lifter. It’s amazing how much of a difference it makes.
The image was layered with Seaside Spray card stock before adhering to a white card base.
The sentiment strip was added with dimensionals.
I hope you enjoyed this project. The supplies used are listed and linked to the online store below.
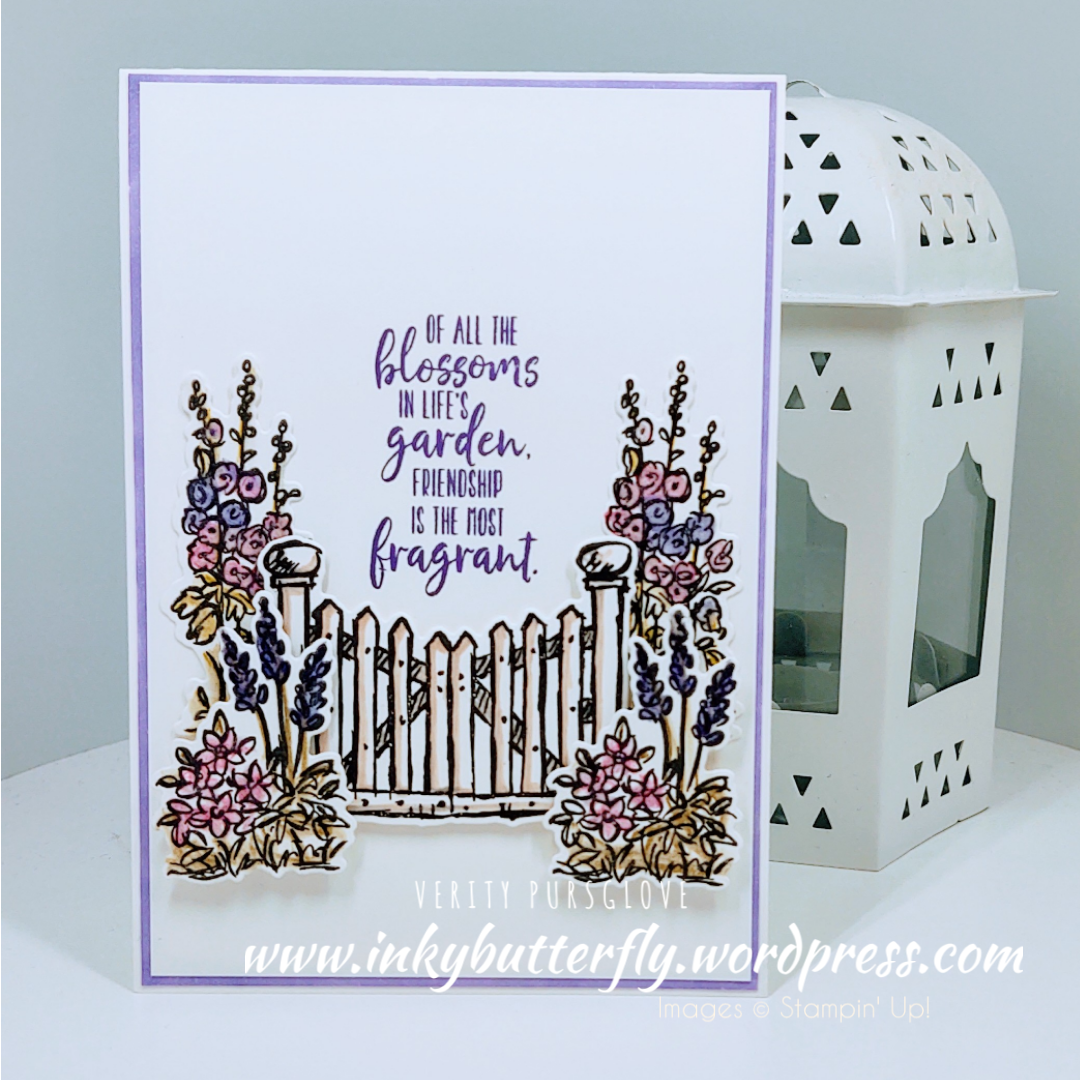
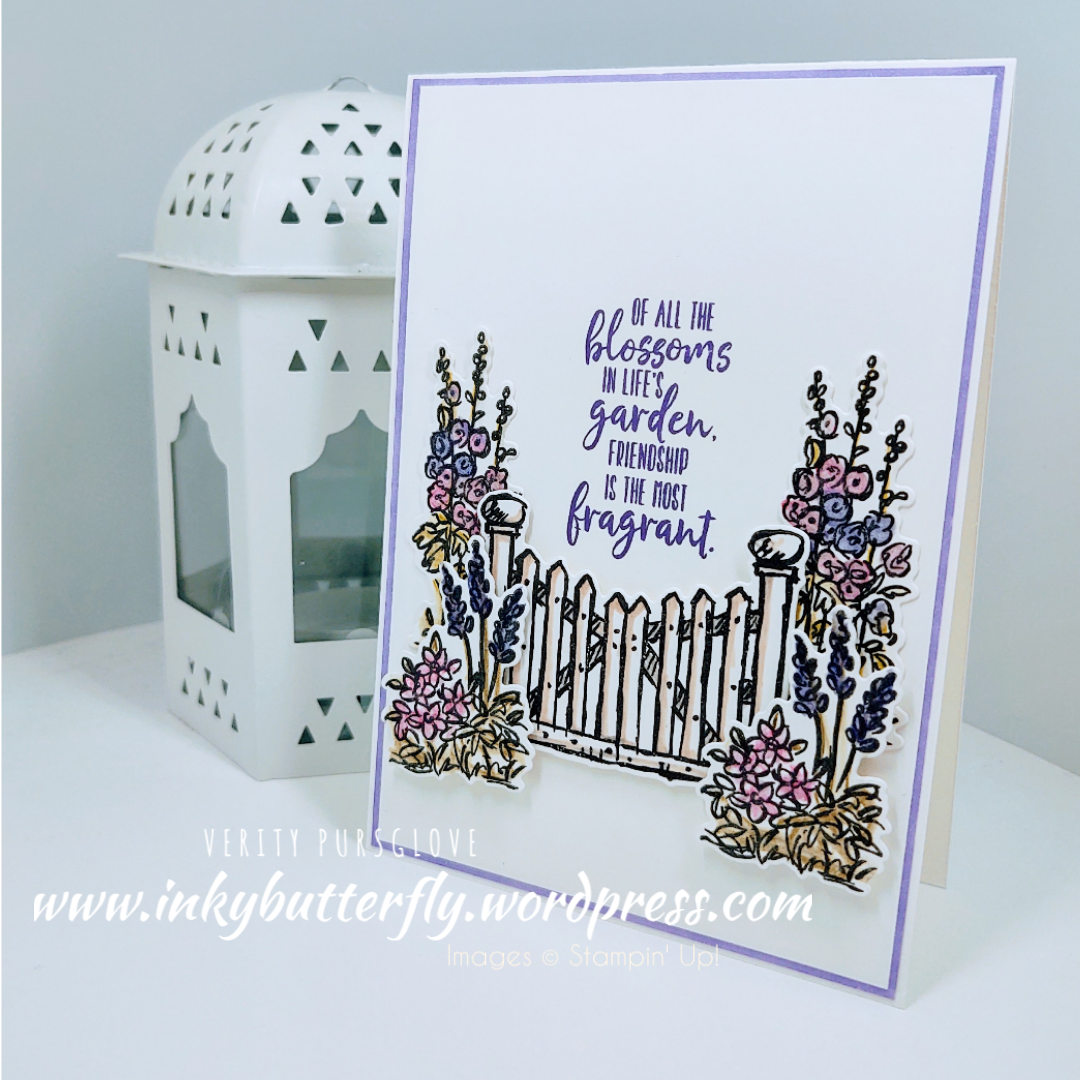
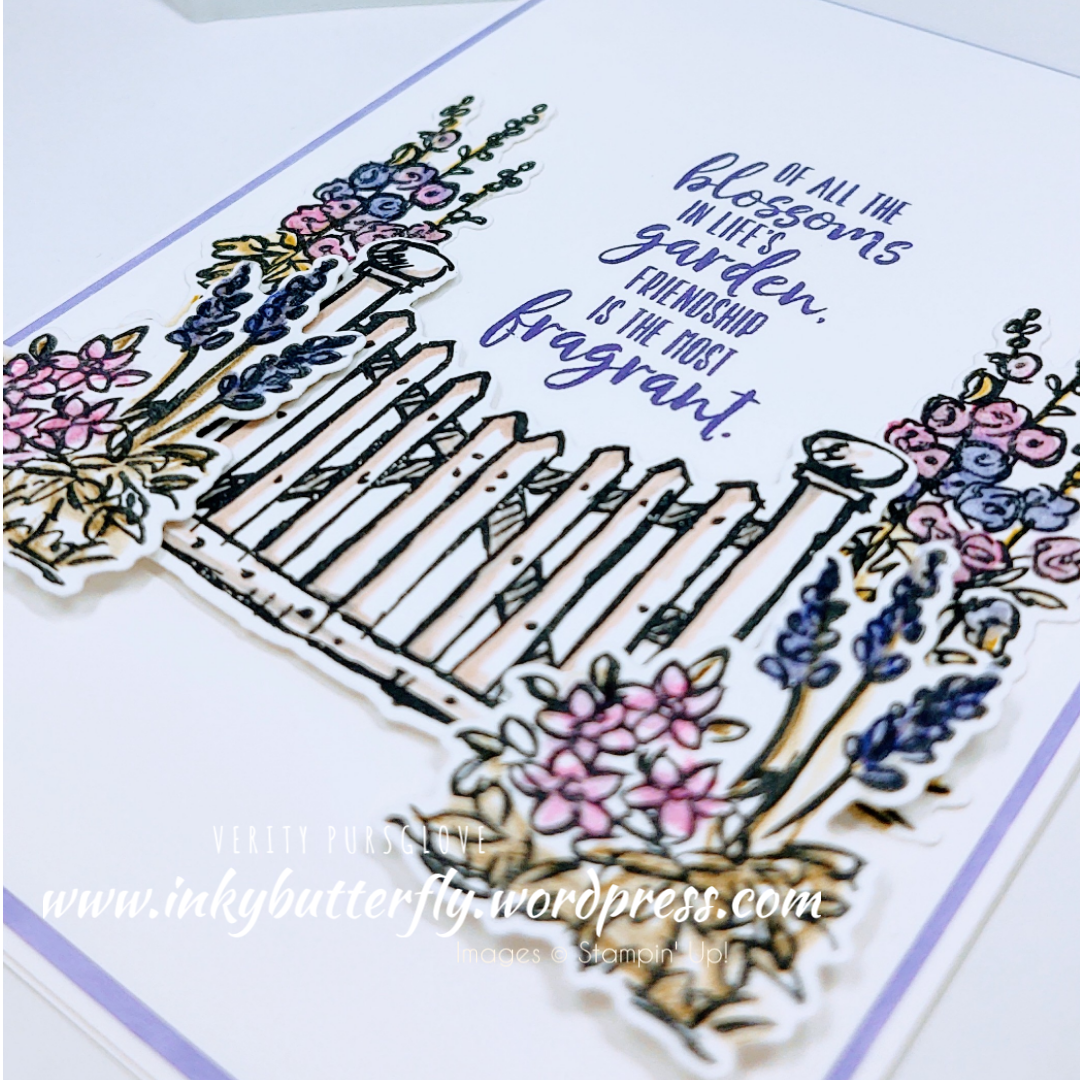
I am so pleased with how this card turned out. It’s been in my head for some time!
I stamped the floral images I wanted to use on to some Whisper White card stock using Stazon black ink. The gate was stamped ith Memento ink. These were left to dry completely before colouring them.
Watercolour pencils were used to colour the flowers, smoothing out the lines with a blender pen.
I wanted the gate to be white, but added a touch of Ivory Stampin’ Blends marker for some depth.
All the pieces were die cut ready to adhere to the card.
A white card base was prepared by adding a layer of card stock which I coloured the edge of with a Highland Heather Stampin’ Blend Marker.
A final layer was stamped with a sentiment. The die cut pieces were added to the card using Snail and dimensionals.
I hope you enjoyed this project. The supplies used are listed and linked to the online store below.
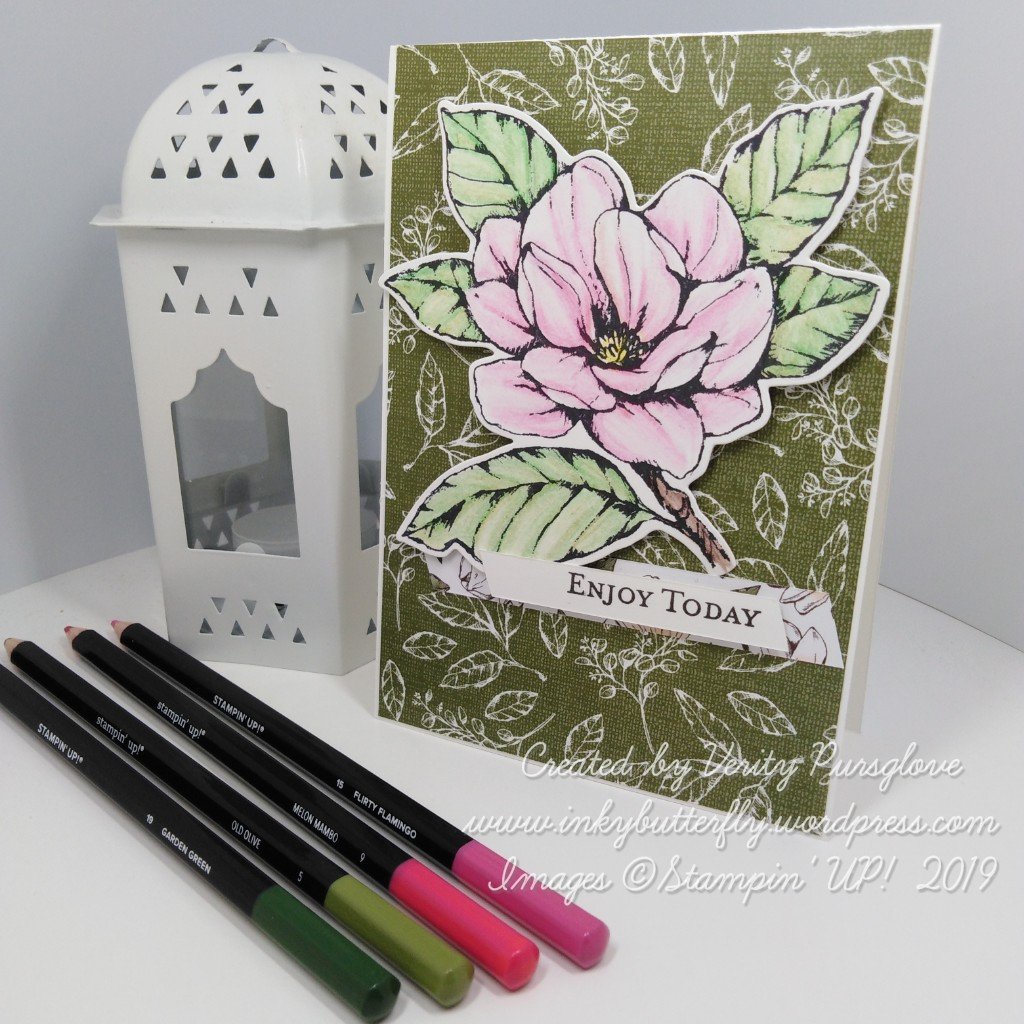
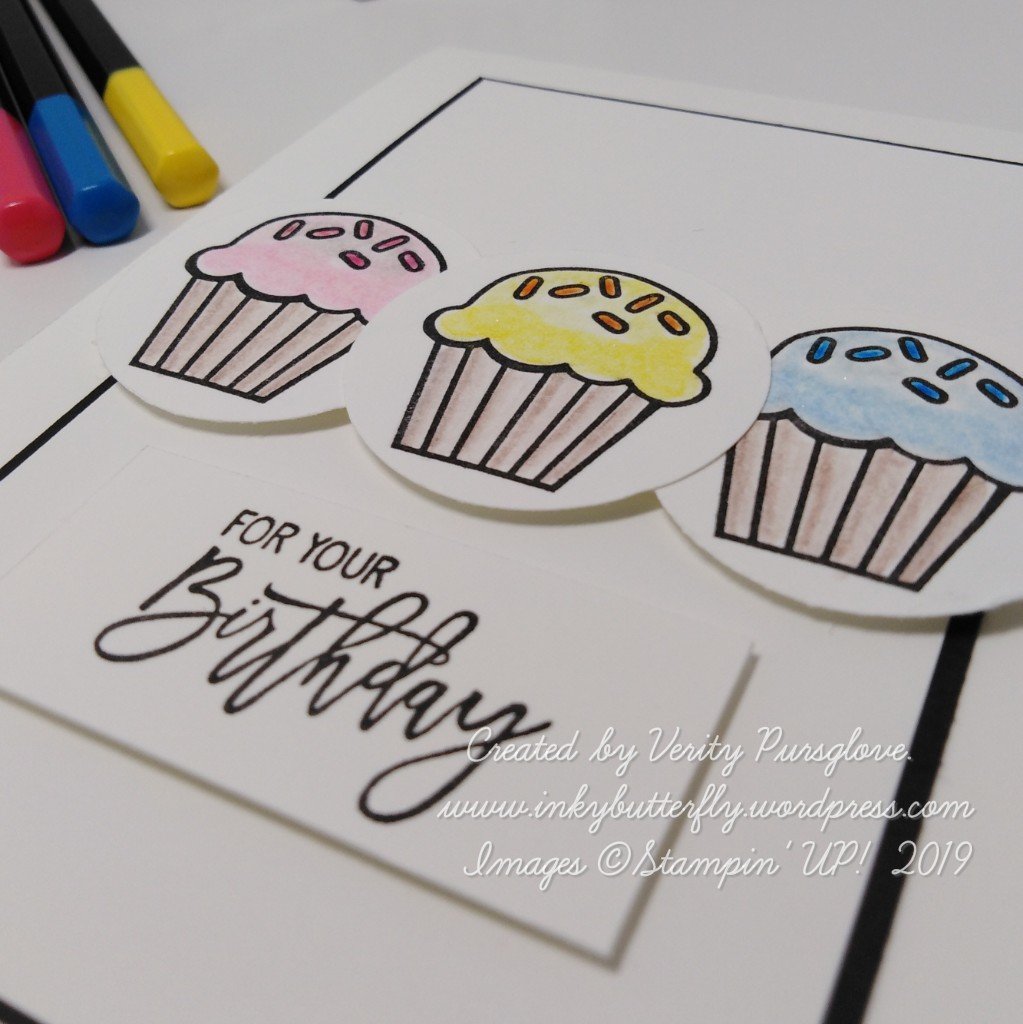
Allow me to introduce the Magnolia Lane Suite. This is an astoundingly beautiful stamp set with coordinating dies. The Designer Series Paper is equally stunning.
Other products in the suite include a ribbon combo pack and cute embellishments.
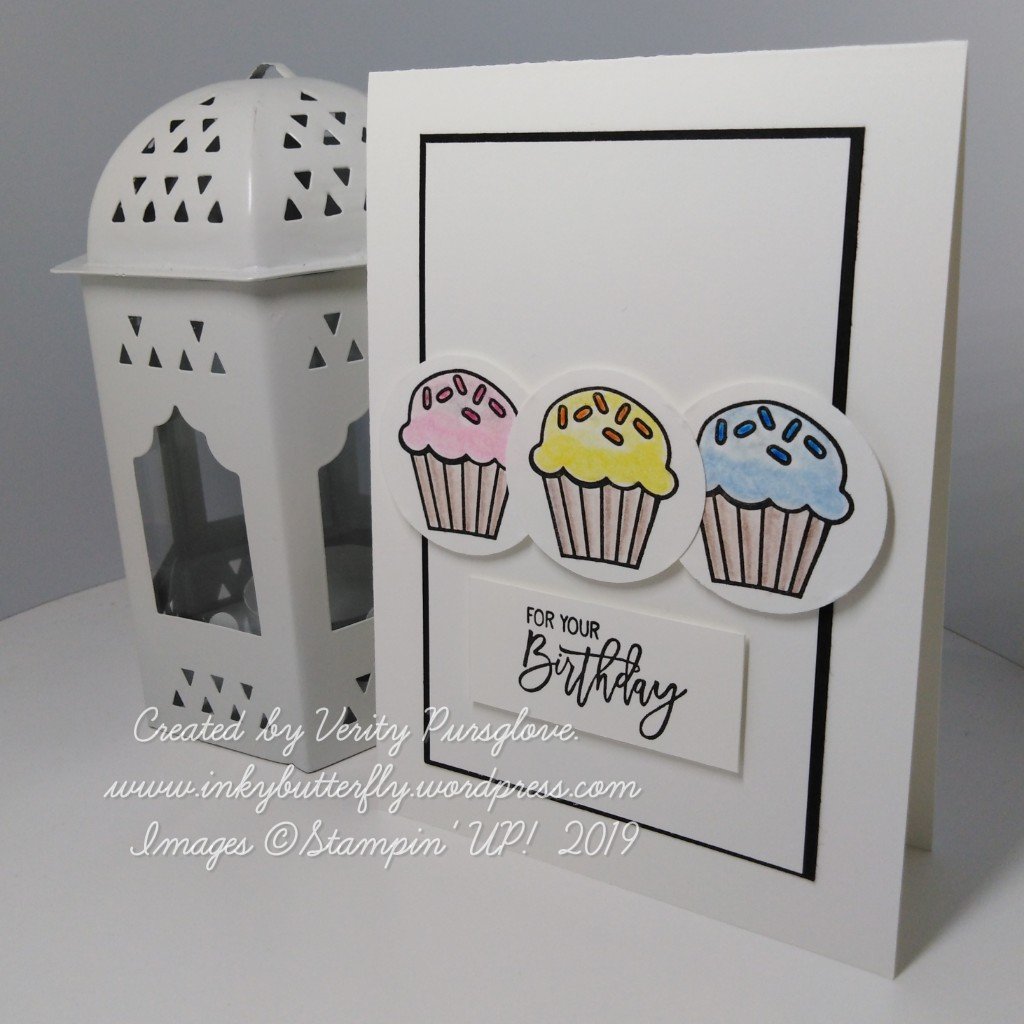
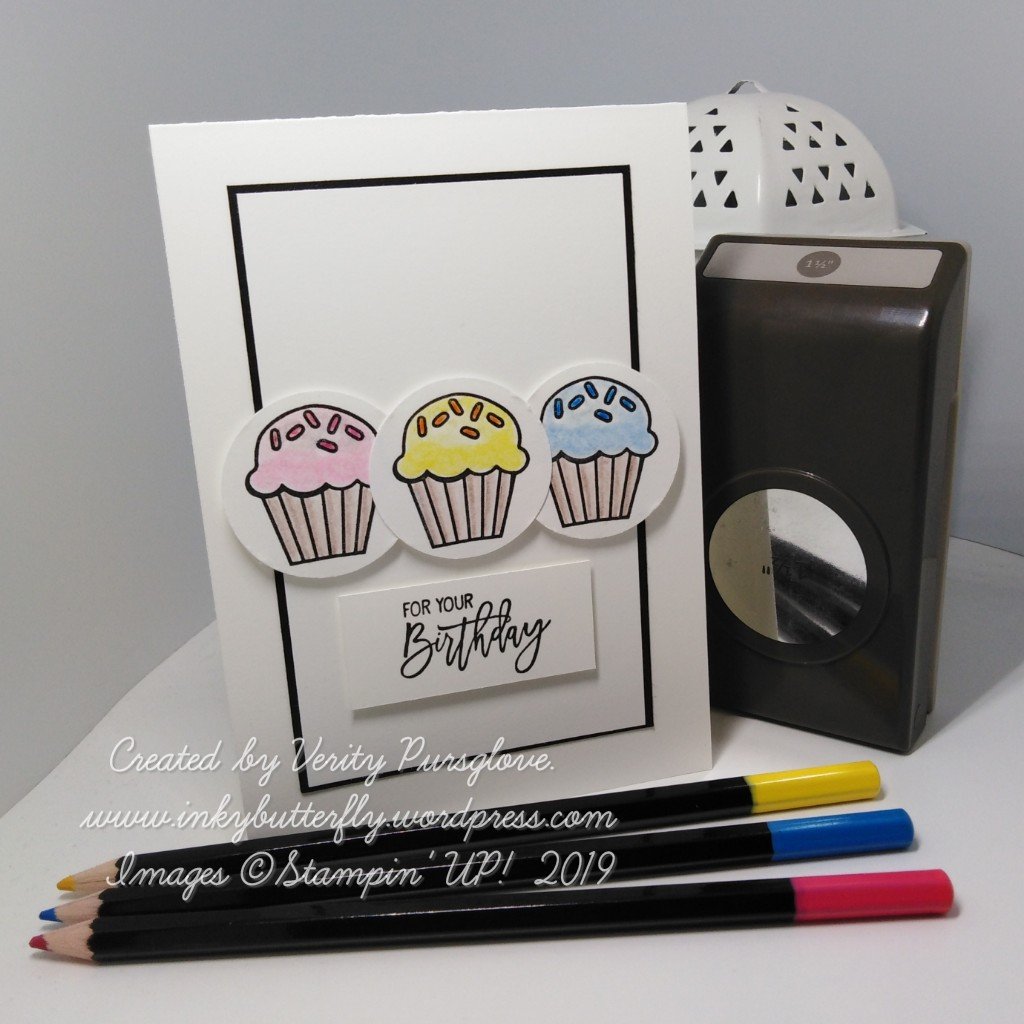
I love how this card turned out, pretty and simple design but really effective.
The card base was built from Whisper White card stock. A smaller panel adhered to black card stock before adding to the base.
The cupcakes and sentiment were stamped on to a separate sheet and allowed to dry.
Each cake was coloured with watercolour pencils and a blender pen then cut out with a 1-1/2 inch circle punch. Dimensionals were used to add them to the card. An extra dimensional was put behind the centre one for extra depth.
The sentiment was trimmed down and also added with dimensionals.
I hope you enjoyed this project. The supplies used are listed and linked to the online store below.
I would love to be your demonstrator.
Don’t forget to check out Sale-a-bration and the free products available when you spend multiples of £45.
If your shopping wish list gets to £99, there’s no better time to join my team. You can choose £170 worth of products to be included in your personal starter kit; add a little extra and receive an exclusive Stampin’ Up! Craft & Carry tote.

")


")


")


")
")


")


")


")


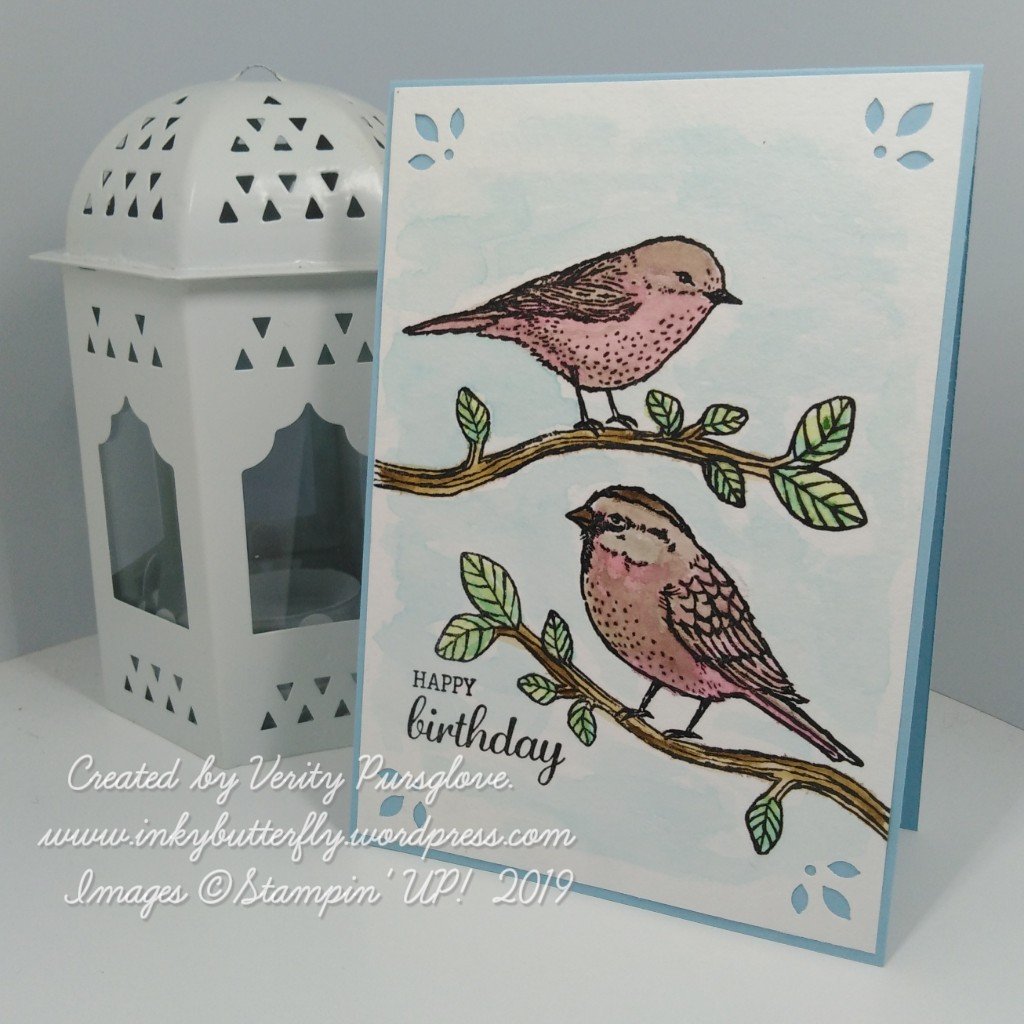
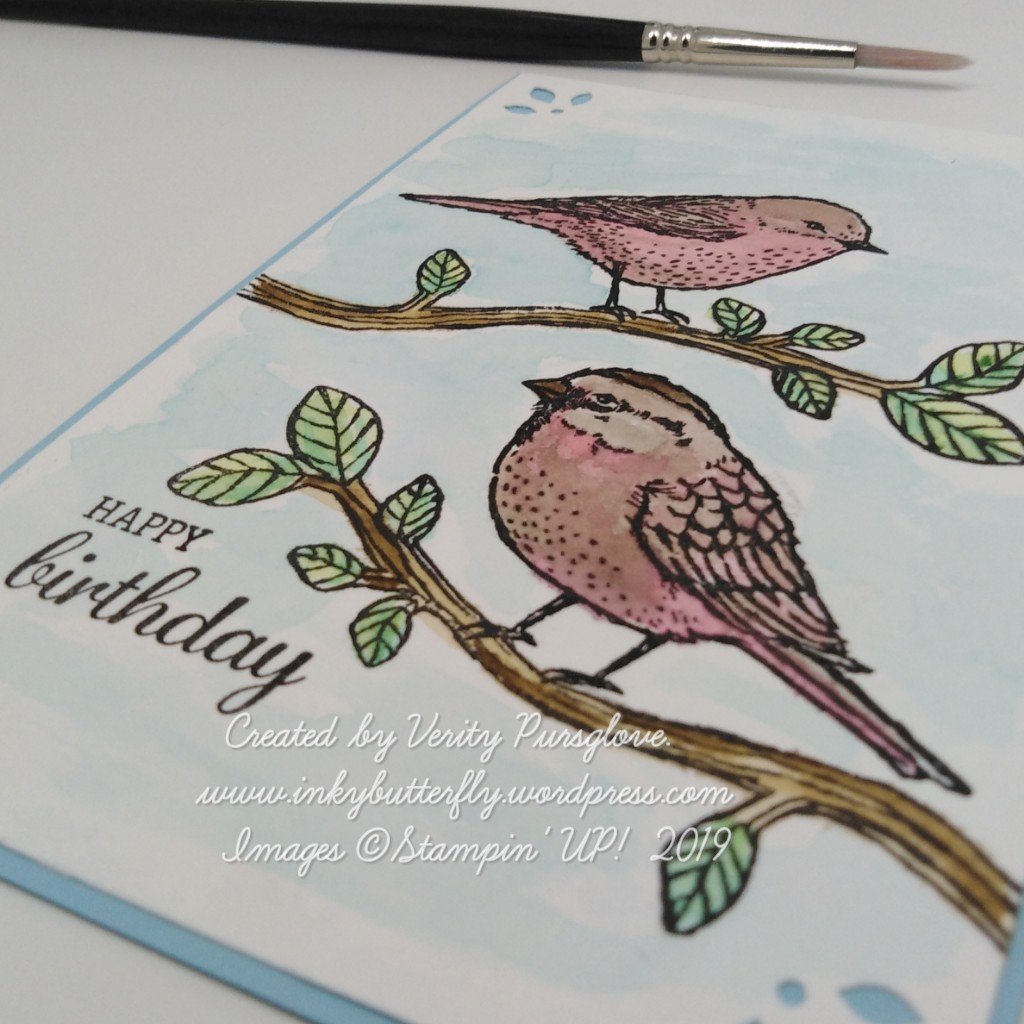
 Hello Everyone,Yesterday I made some time to do a bit of water colouring.I used the Stamparatus to ensure the image was stamped crisply on to the watercolour paper with Stazon ink.I coloured the image with watercolour pencils and blended them with an aqua painter.
 I die cut the coloured image using the Stitched So Sweetly dies. This was adhered to Granny Apple Green card stock also cut with the dies..The sentiment was stamped with Gorgeous Grape ink and cut with a Stitched Rectangle die.The pieces were adhered to a Granny Apple Green card base that had already been layered with Whisper White.
 I hope you enjoyed this project. The supplies used are listed and linked to the online store below.I would love to be your demonstrator.Thanks for stopping by today and happy Stampin’!Verity xxProduct List


")


")