Using Die Cuts and Punches to Make Beautiful Cards

Hello Everyone,

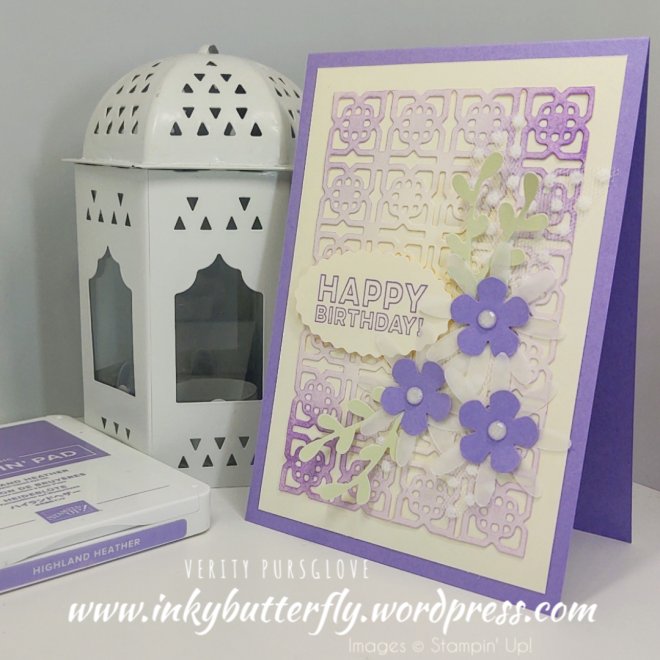
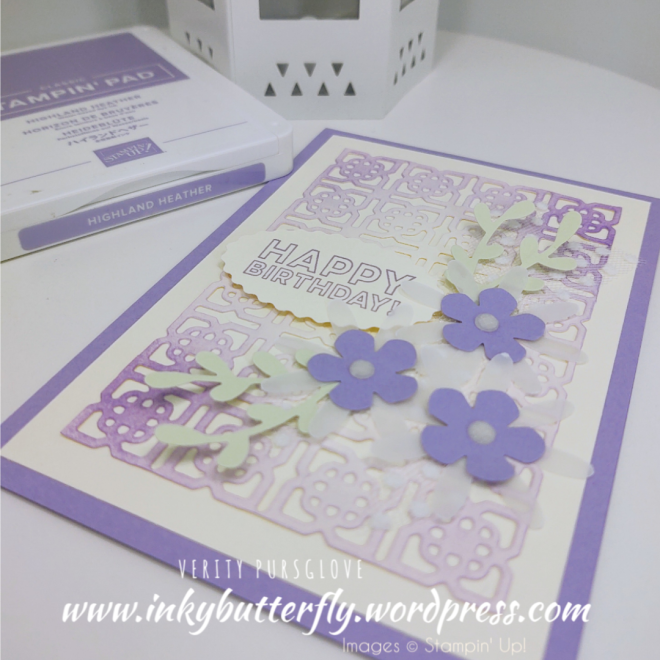
Today I wanted to make something really special and extravagant.

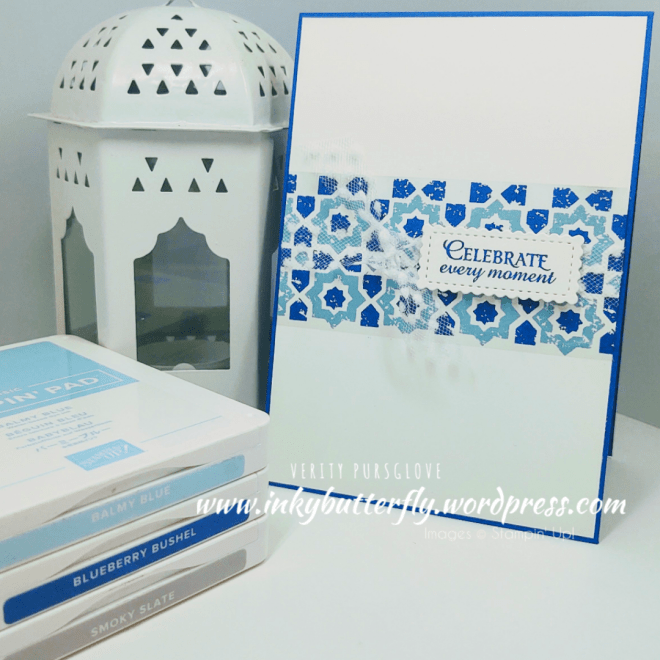
I pulled out the gorgeously detailed Many Medallions dies and the coordinating stamp set.

With a trim, this die cut fits a UK card base perfectly. Adding some ink with a blending brush highlights the details!

See how I made this card in my video tutorial…..

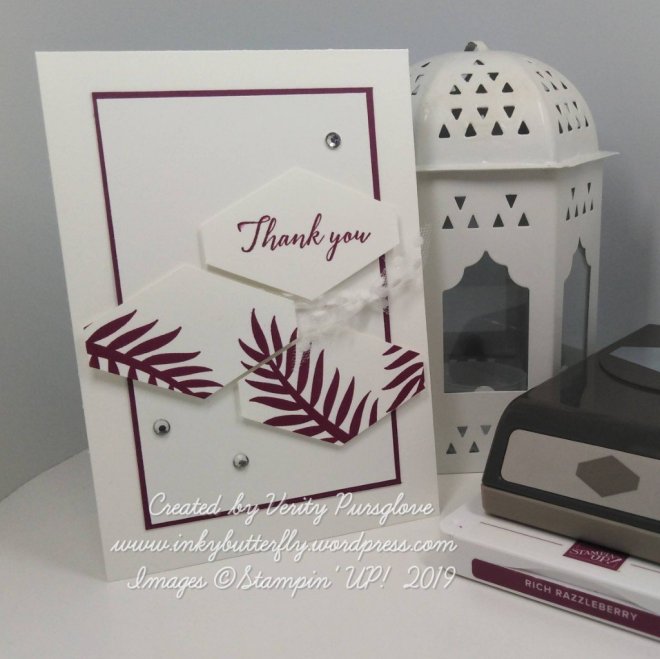
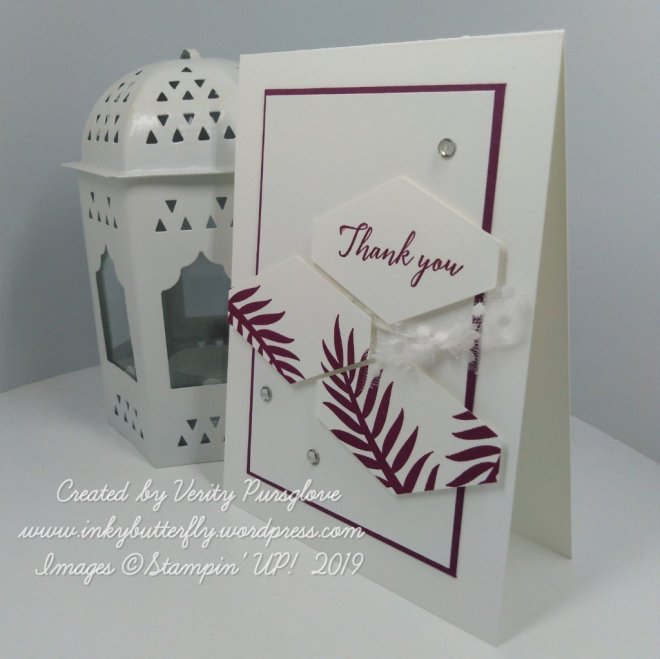
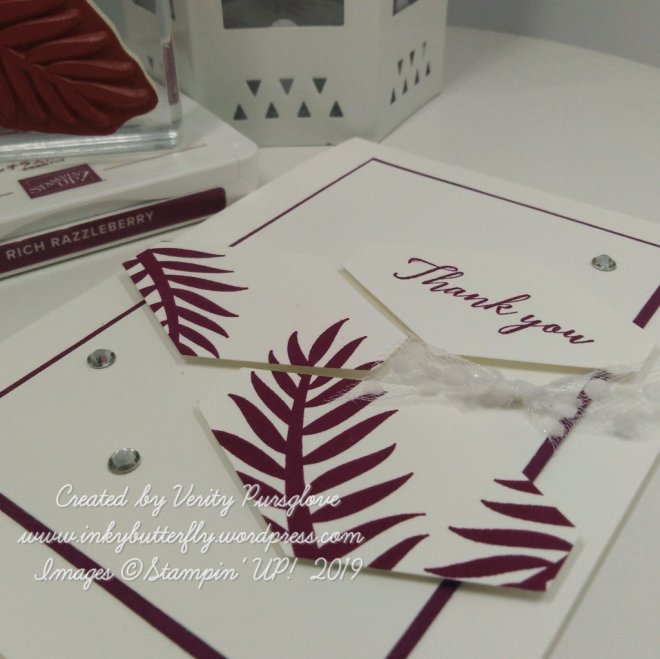
This combination of punches makes quick and easy embellishments.

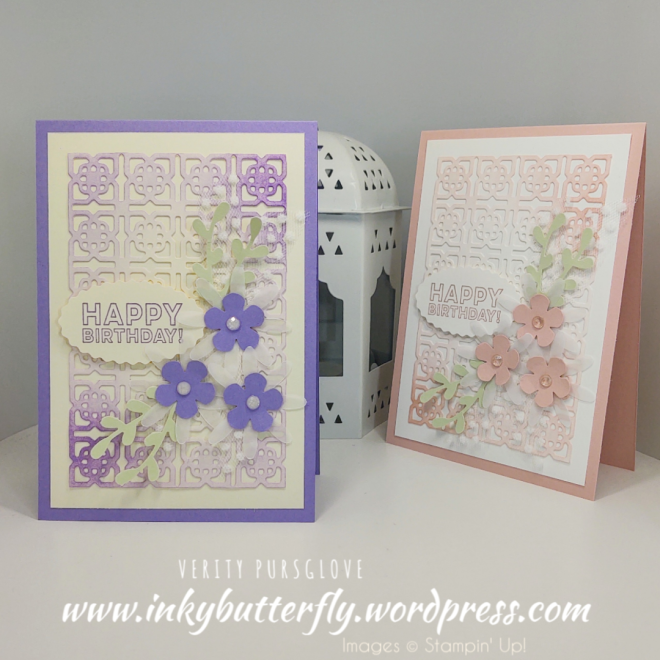
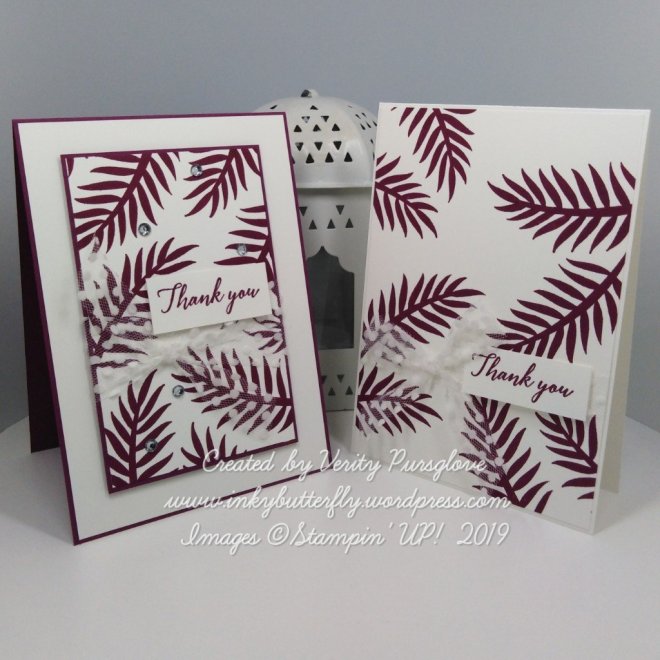
I love this version of the card made in Blushing Bride!

I hope you enjoyed this project.

The supplies used are listed and linked to the online store below.

If your order is less than £150, use the Hostess Code UYZ33U2J when placing your order to get an extra gift from me!

I would love to be your demonstrator.

Thanks for stopping by today and happy Stampin’!

Verity xx

Product List

Project Share Project

Hello Everyone,

Welcome to this week’s Project Share. As always my friends have created some lovely work. Please use the links to visit their blogs and read more about their projects.

Jill has taken the plunge with this slim line card. The punched daisies fit well on this type of card!

Visit Jill’s blog here

Heather has made the beautiful card. I really like the way the die cut sentiment has been trimmed down to fit the design!

Visit Heather’s blog here

Gez has been practicing her colouring with this card. The plaid DSP is a great partner to the images!

Visit Gez’s blog here

I hope you enjoyed these projects. The supplies used are listed and linked to the online store below.

I would love to be your demonstrator.

Thanks for stopping by today and happy Stampin’!

Verity xx

Product List

Rainbow of Butterflies

Hello Everyone,

Hippo Happiness is the stamp set used today… But no hippos in sight on my project!

See this card created in my video tutorial!

Of course you may want to use different colours for your creation. The Brights Classic Stampin’ pad collection is perfect.

A more affordable option is the Brights Stampin’ Write marker pack.

Wink of Stella glitter brush pens add sparkle without the mess!

I hope you enjoyed this project. The supplies used are listed and linked to the online store below.

I would love to be your demonstrator.

Thanks for stopping by today and happy Stampin’!

Verity xx

Product List

Magical Birthday

Hello Everyone,

I have finally made a card with this mermaid! The background turned out really well too, the Granny Apple Green and Shaded Spruce inks complement the other colours nicely.

Here is a video showing how this card was made.

I hope you enjoyed this project. The supplies used are listed and linked to the online store below.

I would love to be your demonstrator.

Thanks for stopping by today and happy Stampin’!

Verity xx

Product List

Bermuda Bay Classic Stampin' Pad

Bermuda Bay Classic Stampin’ Pad

[131171]

£6.00

With Deepest Sympathy

Hello Everyone,

It is a sad reality that not all the cards we make and send are for happy events. There is comfort however, that even at these sad times, a beautiful handmade card can be created.

I used a simple layout, starting by stamping a Whisper White card panel with an image from the Verdant Garden stamp set and Smoky Slate ink.

The panel was layered with Basic Grey card stock and some Polka Dot Tulle was wrapped around the middle. This was adhered to a white card base with dimensionals.

The sentiment is from the Peaceful Moments set and was stamped with Smoky Slate ink. This was then die cut and also added to the card with dimensionals.

I hope you enjoyed this project. The supplies used are listed and linked to the online store below.

I would love to be your demonstrator.

Thanks for stopping by today and happy Stampin’!

Verity xx

Product List

Blue Tiles

Hello Everyone,

Photopolymer stamp sets are so easy to use, especially when lining up images like this.

Here I have used the Verdant Garden stamp set to create this tile effect.

Again, j am using up some remaining Blueberry Bushel card stock for the card base.

Balmy Blue ink was used first, stamping the image across a white layer. Blueberry Bushel ink was used fill in the gaps with the compliment image from the set.

Polka Dot Tulle, (not retiring!), was added around the layer before adhering it to the card base.

The sentiment was taken from the Honey Bee stamp set and cut with the smallest Stitched So Sweetly die, (also staying!).

I hope you enjoyed this project.

The supplies used are listed and linked to the online store below.

I would love to be your demonstrator.

Thanks for stopping by today and happy Stampin’!

Verity xx

Product List

Keeping it Simple – Part 5

Hello Everyone,

If you follow my blog you will have seen that I have doing a series of simple cards with minimal supplies.

The card base was made with Whisper White card stock.

I added a smaller panel layered with Rick Razzleberry card stock with Polka Dot Tulle tied around the middle.

On some scrap card, I stamped some leaves. I cut two portions with the Tailored Tag Punch. I also stamped and punched the sentiment.

The pieces were positioned a bit like a jigsaw puzzle around the knot of the ribbon using dimensionals.

A few rhinestones finish the card!

I hope you enjoyed this project. The supplies used are listed and linked to the online store below.

I would love to be your demonstrator.

Thanks for stopping by today and happy Stampin’!

Verity xx

Product List

Keeping it Simple – Part 4

Hello Everyone,

Welcome to part 4 of this series all about keeping it simple. Limited supplies doesn’t mean limited options!

So today, it is the layout that has been changed, opting for a square stamped panel as the focal point.

As before, I used Rich Razzleberry Ink to stamp the leaves from the Tropical Chic stamp set and layered this on to matching card stock.

The tulle ribbon was wrapped and tied around the panel before adhering to a white card base with dimensionals.

Also, as before, the sentiment was cut with the Tailored Tag Punch and some rhinestones finished the card.

I hope you enjoyed this project. The supplies used are listed and linked to the online store below.

I would love to be your demonstrator.

Thanks for stopping by today and happy Stampin’!

Verity xx

Product List

Here’s a reminder of the previous cards made with these supplies!

Keeping it Simple – Part 3

Hello Everyone,

Here’s another keep it simple card….

This time I have added a punch to the supply list and used a simple stamping technique to get more from a single ink pad.

The background panel has been stamped with second generation ink…. This means inking the stamp, stamping on to scrap card and then using the second impression on the project. This gives a lighter shade without buying extra ink colours.

The Tailored Tag Punch was used to cut the sentiment.

I hope you enjoyed this project. The supplies used are listed and linked to the online store below.

I would love to be your demonstrator.

Thanks for stopping by today and happy Stampin’!

Verity xx

Product List

Keeping it Simple – Part 2

Hello Everyone,

You may well remember a recent post where I used minimal supplies – Keeping it simple.

Today’s card uses the same products, but added coloured card stock and an extra embellishment.

I stamped the leaves first overlapping the edges of a small card layer. This was adhered to Rich Razzleberry card stock.

The Tulle ribbon was added toward the bottom and tied in a knot.

This topper was adhered using dimensionals to a Rich Razzleberry card base pre-prepared by adding a white card layer.

The sentiment was stamped next on to a strip of card stock and adhered with dimensionals.

Some scattered rhinestones added some bling to complete the card.

I hope you enjoyed this project. The supplies used are listed and linked to the online store below.

I would love to be your demonstrator.

Why not join my team and enjoy discounted prices on your favourite Stampin’ supplies!

Thanks for stopping by today and happy Stampin’!

Verity xx

Product List

Keeping it Simple

Hello Everyone,

There was a little challenge set in our team Facebook group this weekend…. Keep it simple – one stamp set, one colour and one embellishment.

I picked out;

  • Tropical Chic,
  • Rich Razzleberry ink,
  • Polka Dot Tulle ribbon.

And this is what I came up with… Super easy to achieve whether you are a beginner or more experienced stamper.

I stamped the leaves first overlapping the edges of the card layer.

The Tulle ribbon was added toward the bottom and tied in a bow. The layer was added to a white card base.

The sentiment was stamped next on to a strip of card stock and adhered with dimensionals.

I hope you enjoyed this project. The supplies used are listed and linked to the online store below.

I would love to be your demonstrator.

Why not join my team and enjoy discounted prices on your favourite Stampin’ supplies!

Thanks for stopping by today and happy Stampin’!

Verity xx

Product List