Inspired Thursday

Hello Everyone,

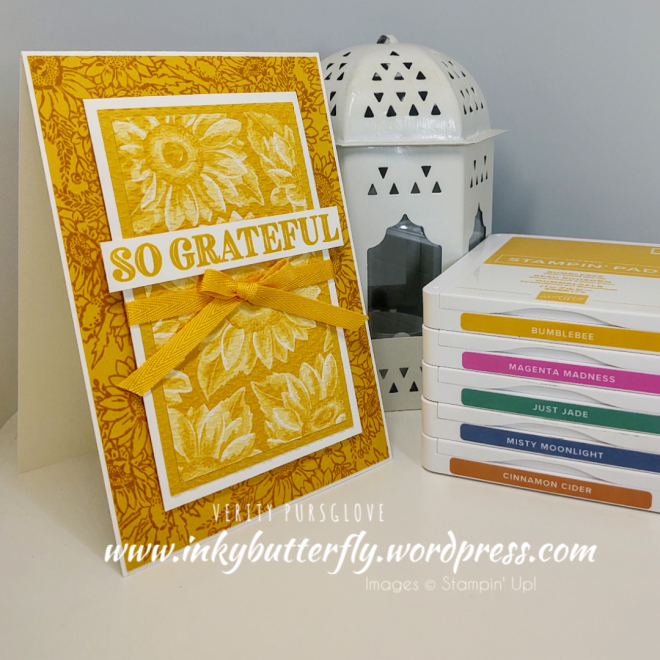
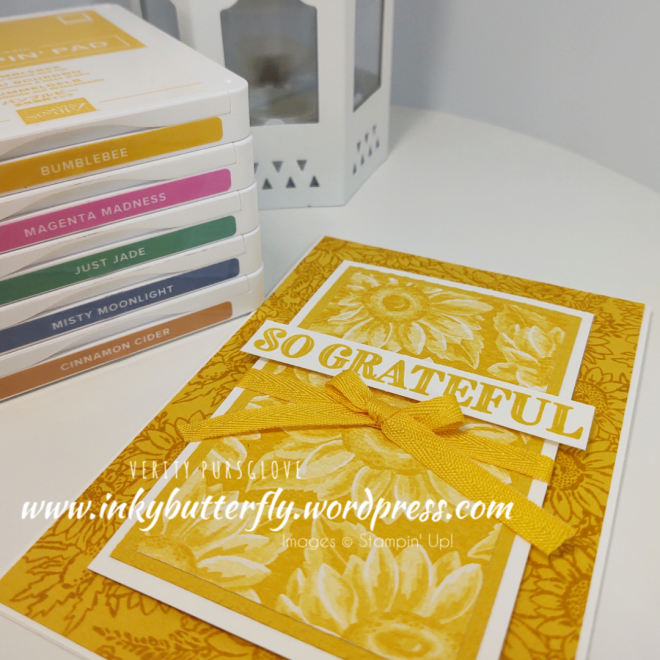
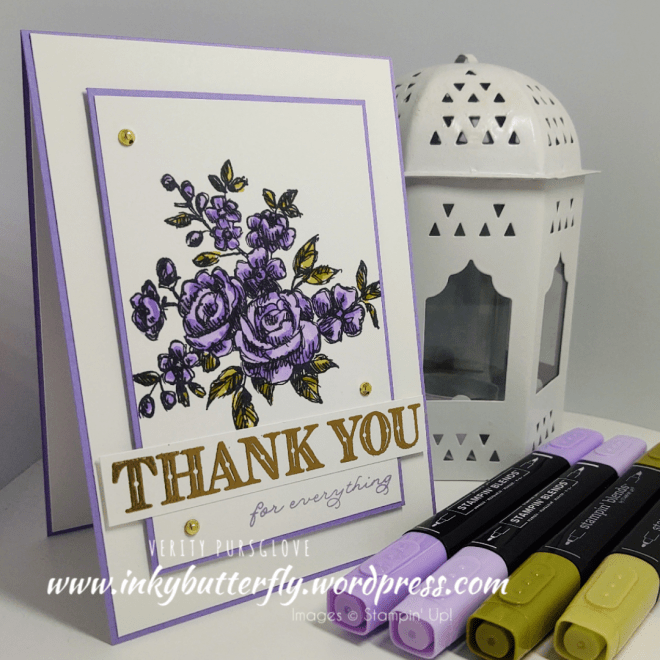
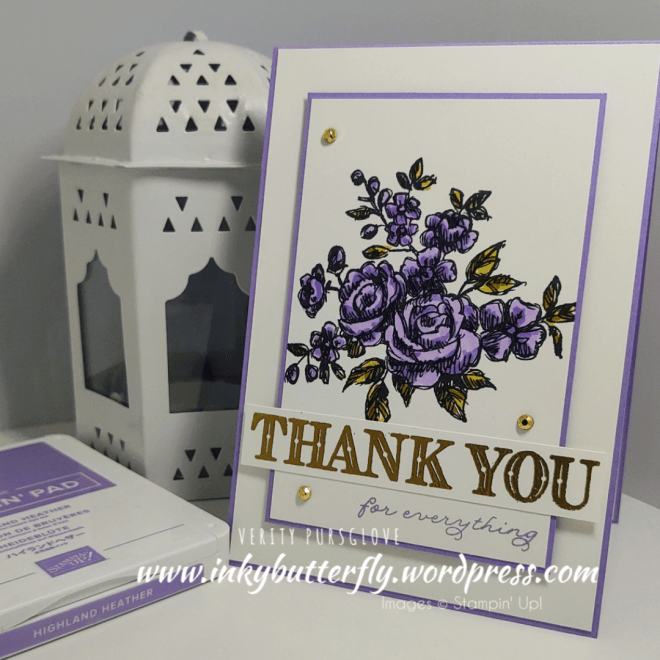
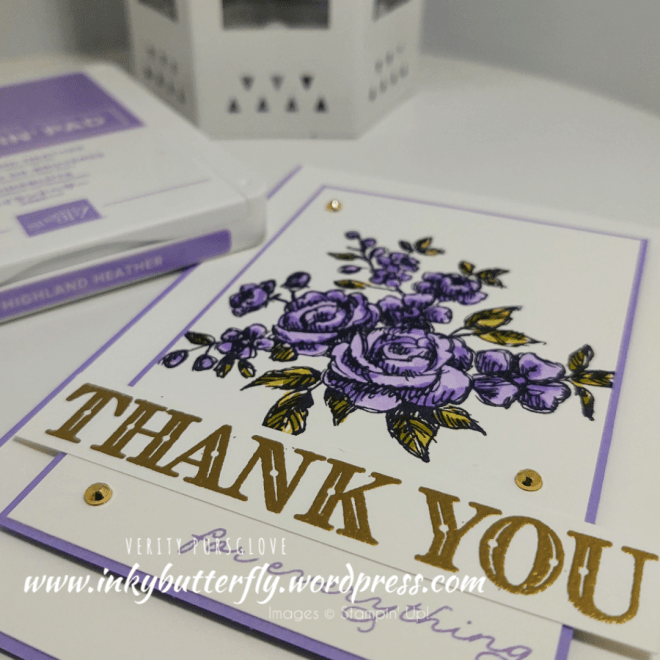
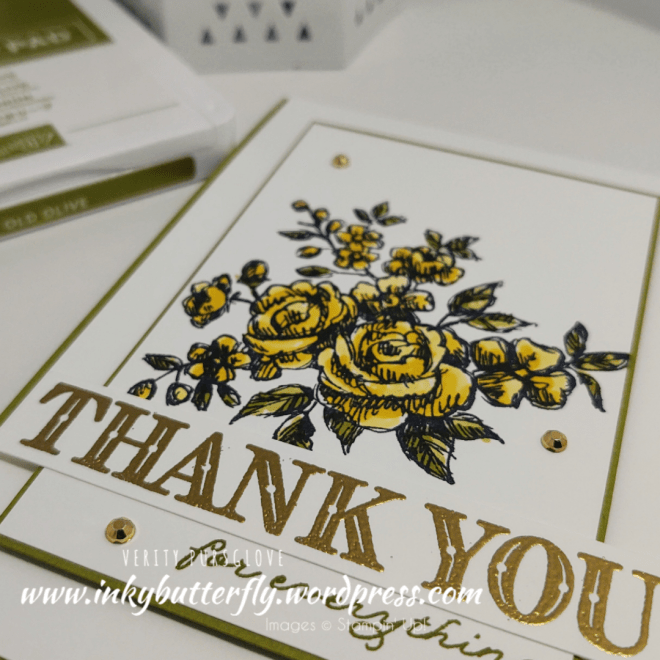
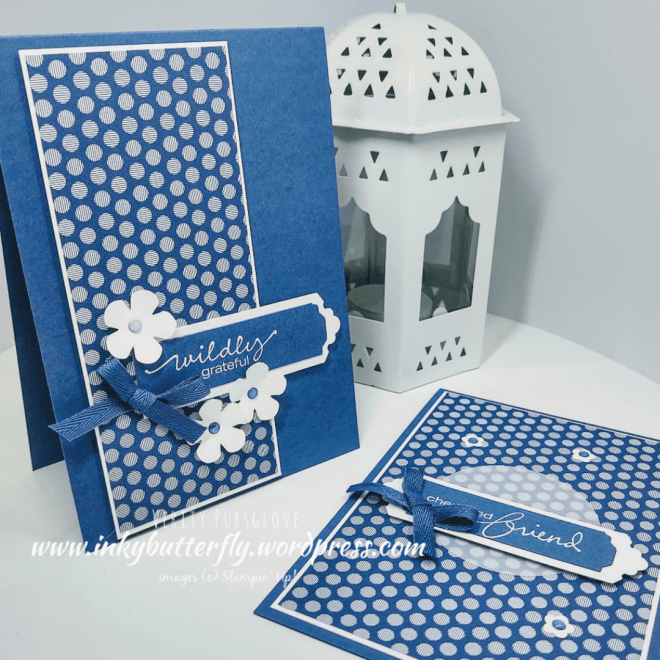
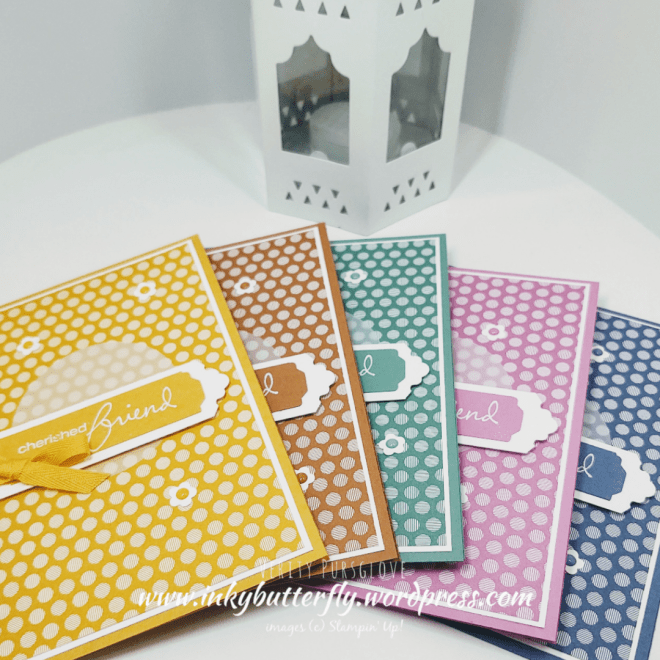
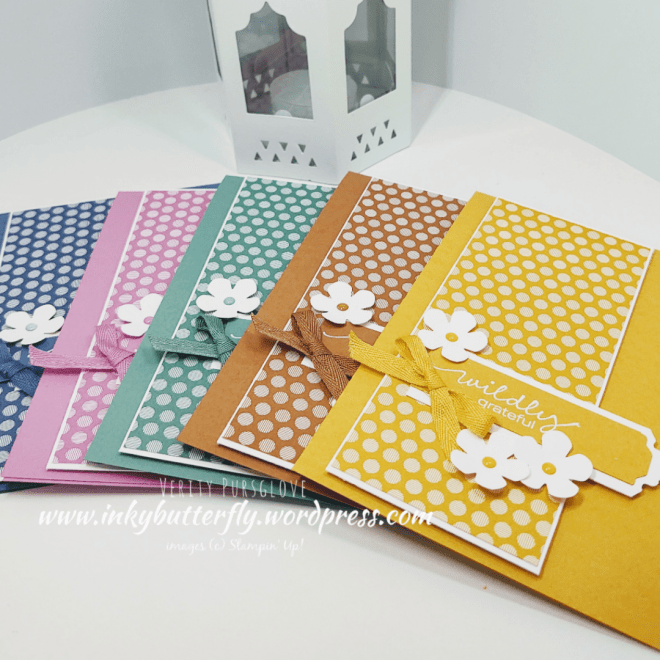
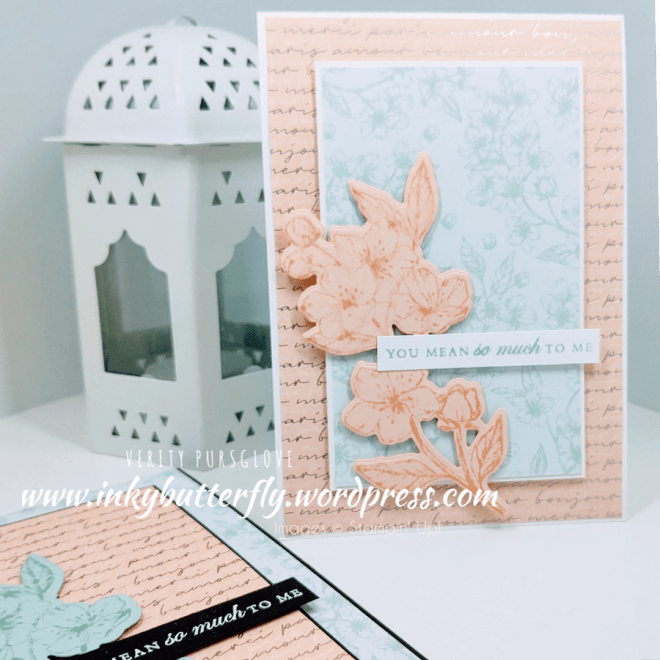
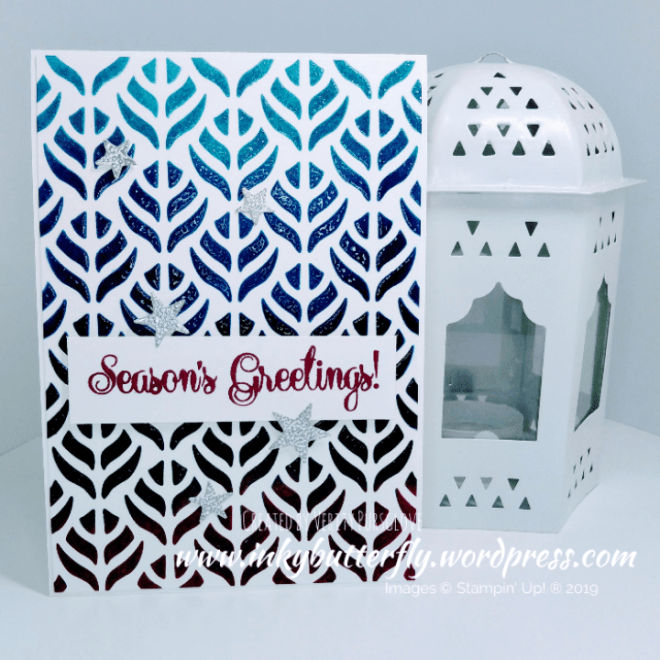
This set of cards was inspired by the Project Share Project I participate in each Thursday.

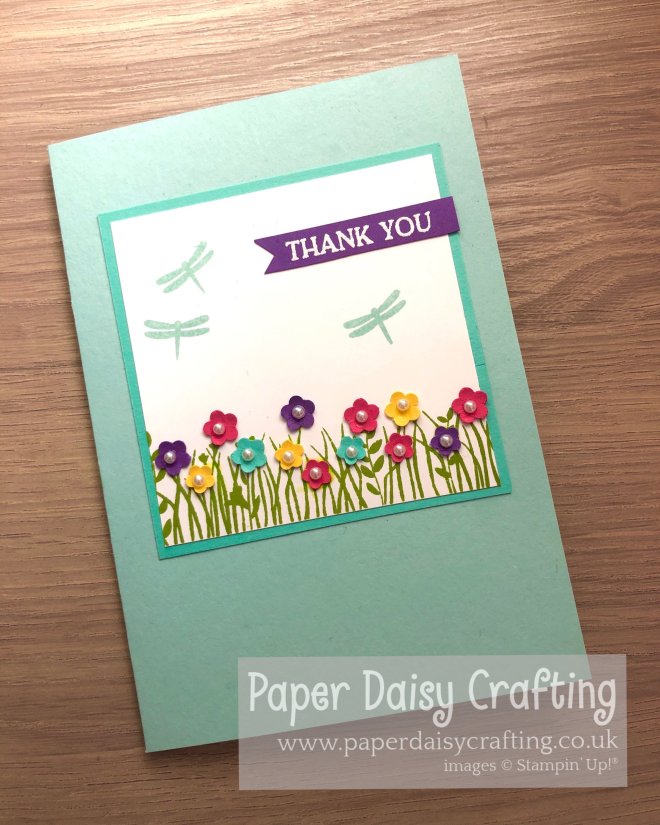
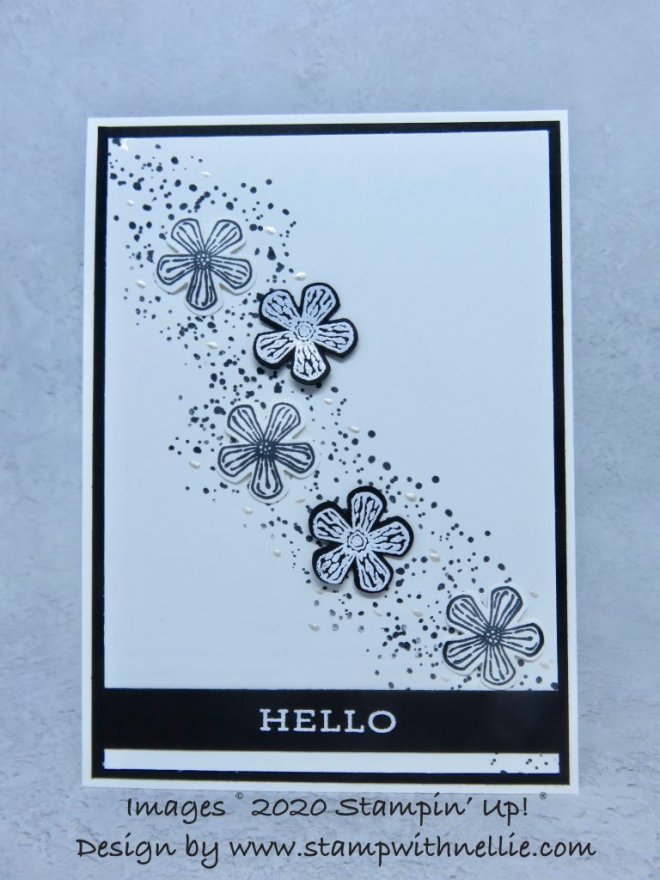
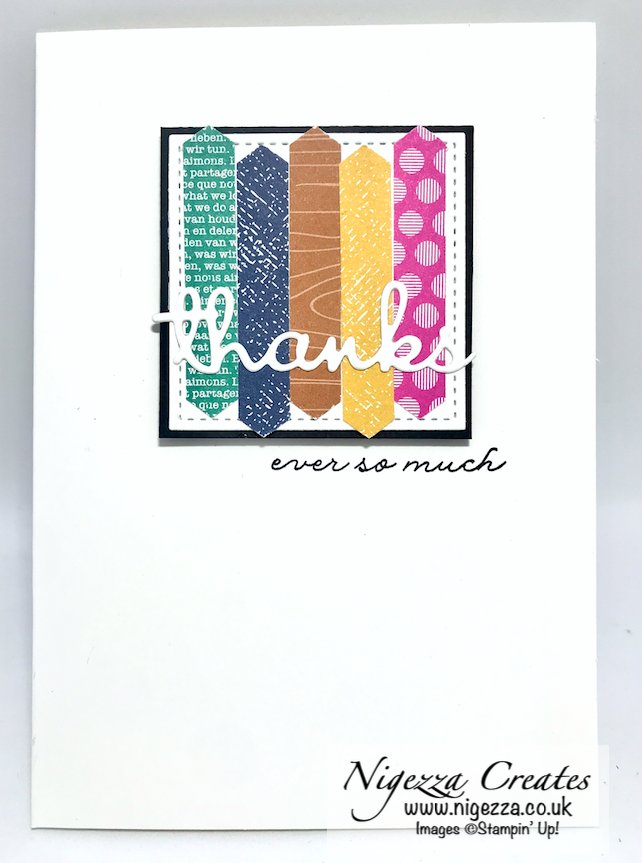
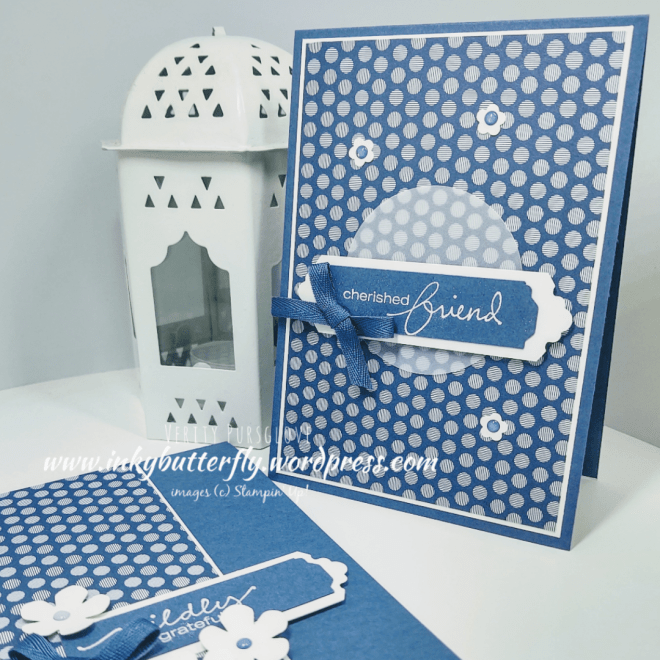
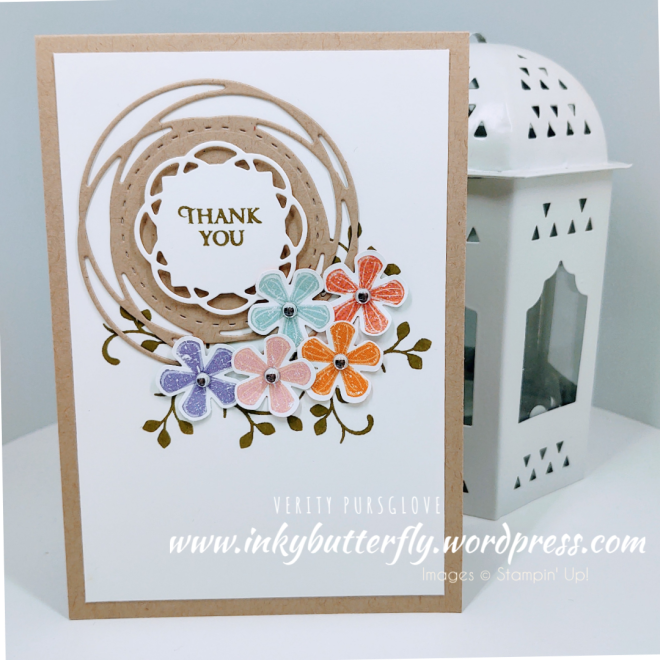
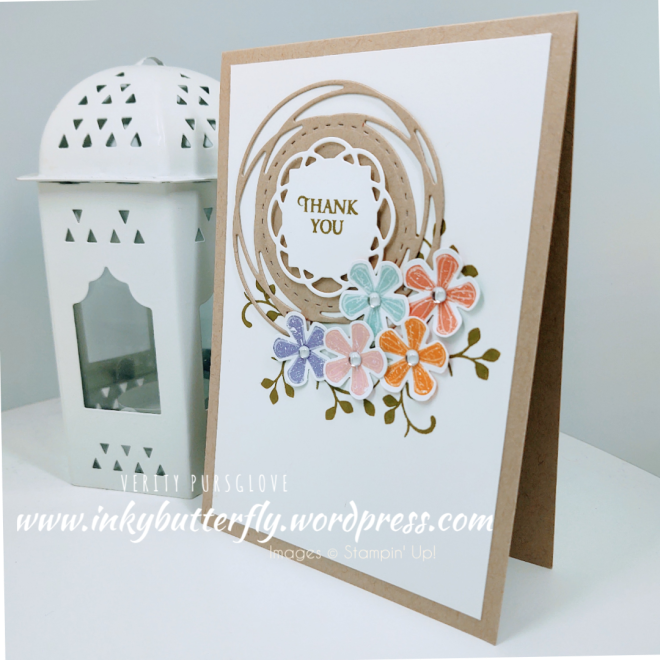
From those projects I picked out, Jar of Flowers, Ornate Thanks and the Tasteful Textile Embossing Folder.

You can see the original cards in this blog post….

https://inkybutterfly.wordpress.com/2020/07/30/project-share-project-105

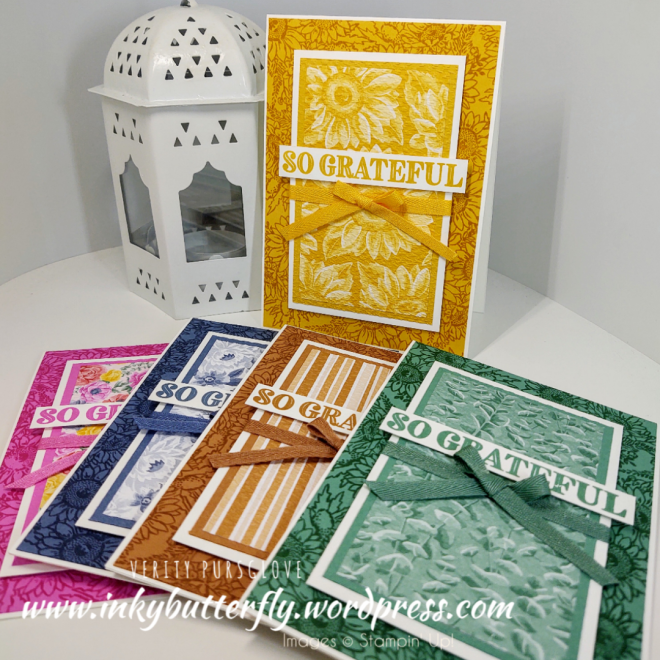
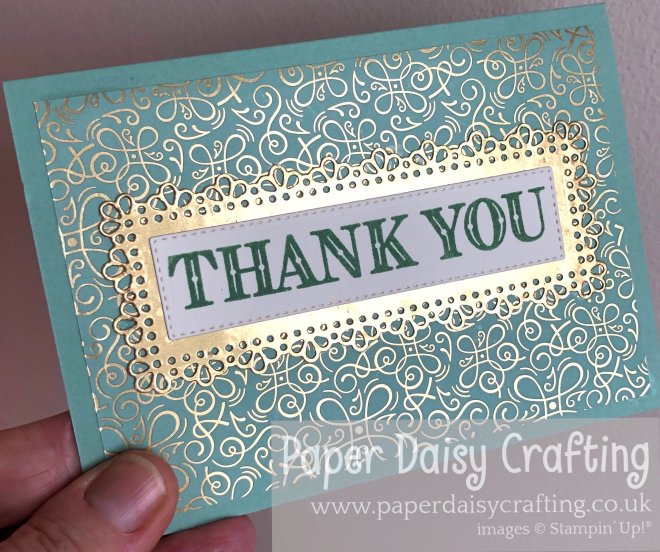
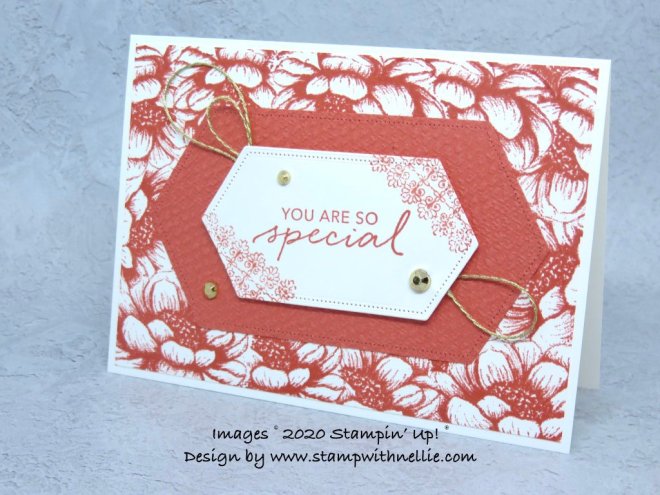
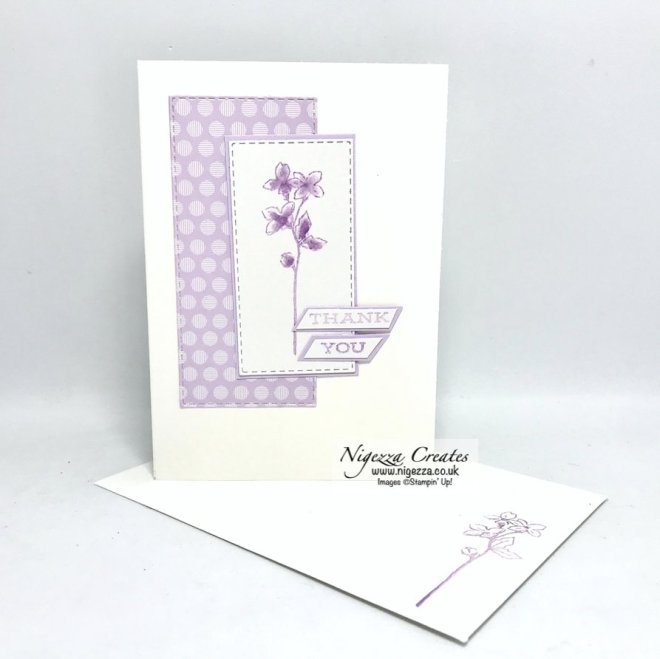
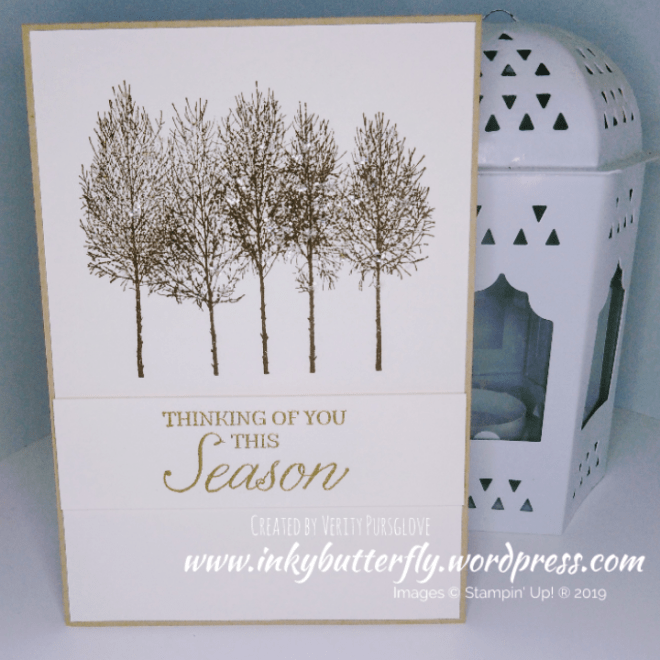
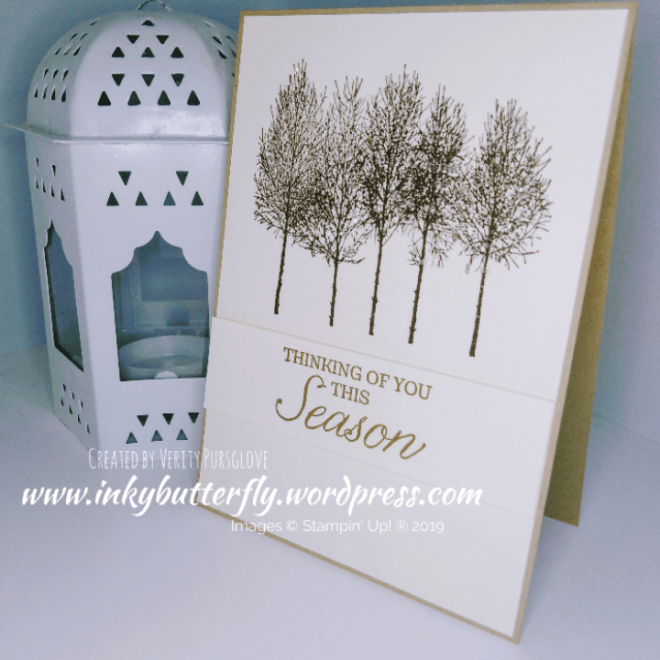
I added the Flowers for Every Season Designer Series Paper and used the 2020 in colour inks and ribbons.

See how I made these cards in my video tutorial….

So which is your favourite?

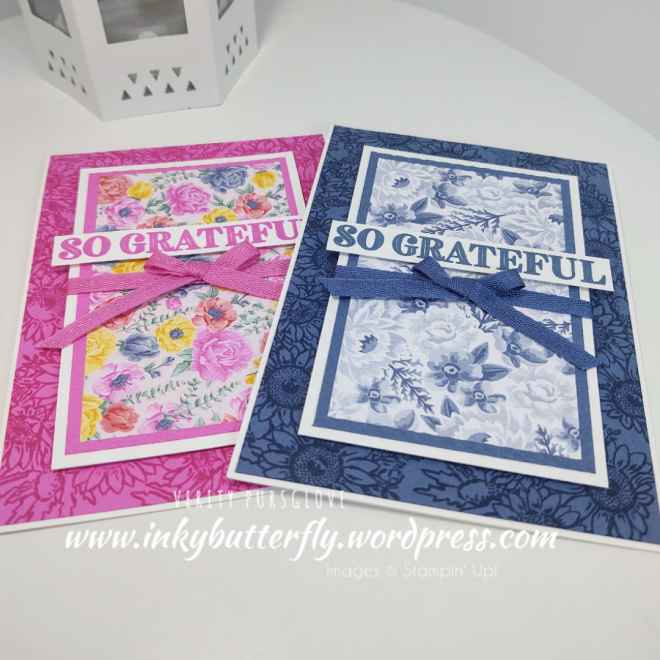
This layout could be used for masculine cards too!

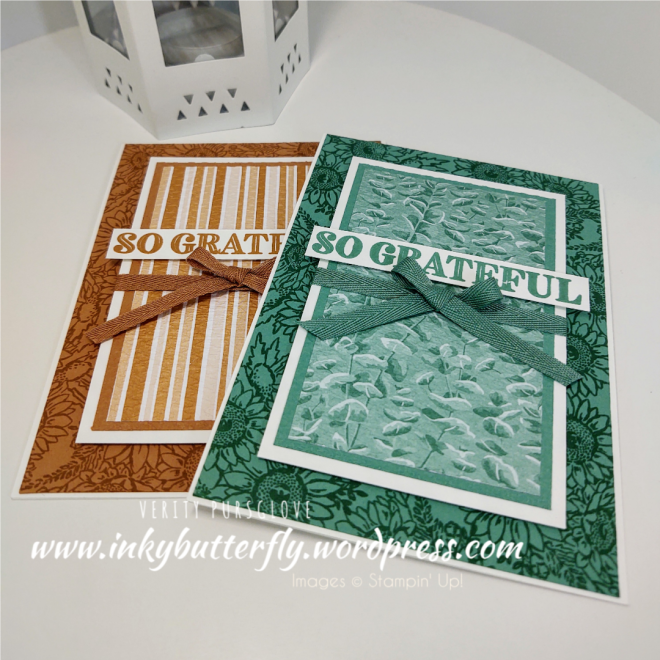
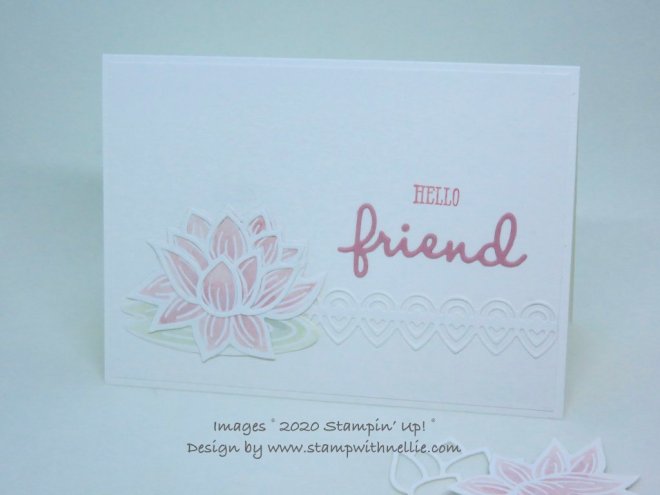
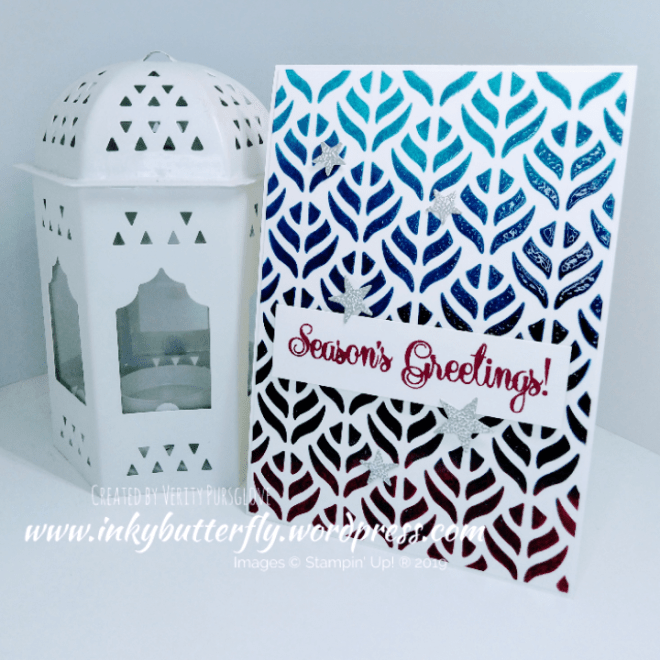
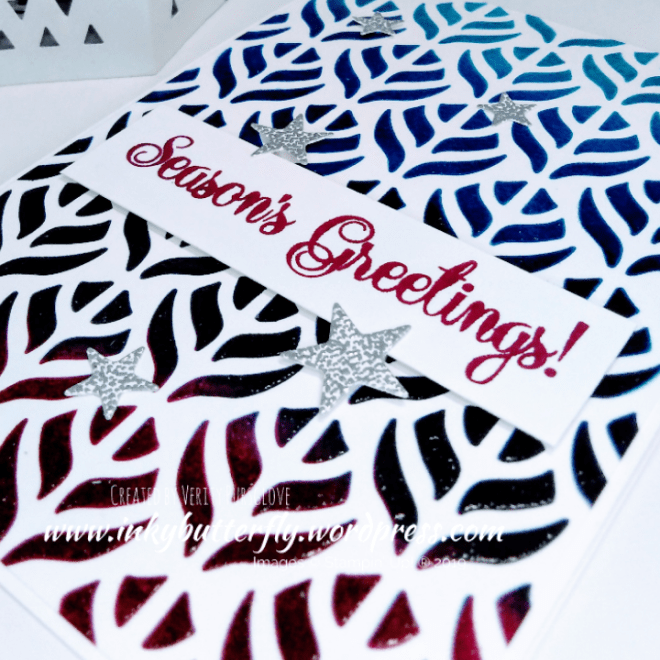
I really like this embossing folder!

I hope you enjoyed this project.

The supplies used are listed and linked to the online store below.

If your order is less than £150, use the Hostess Code BREHFN2Q when placing your order to get an extra gift from me!

I would love to be your demonstrator.

Thanks for stopping by today and happy Stampin’!

Verity xx

Product List

Project Share Project

Hello Everyone,

Welcome to this week’s Project Share. As always my friends have created some lovely work. Please use the links to visit their blogs and read more about their projects.

Jill is spoiling her customers with these gorgeous cards. The foiled DSP is so pretty!

Visit Jill’s blog here

Heather was inspired to try some masking. A fantastic way to build a complete background!

Visit Heather’s blog here

Gez has used a simple layout for her thank you cards. This works with just about any colour!

Visit Gez’s blog here

I hope you enjoyed these projects. The supplies used are listed and linked to the online store below.

I would love to be your demonstrator.

Thanks for stopping by today and happy Stampin’!

Verity xx

Product List

Project Share Project

Hello Everyone,

Welcome to this week’s Project Share. As always my friends have created some lovely work. Please use the links to visit their blogs and read more about their projects.

This week all the ladies have made some masculine cards. These are always a little tricky so hopefully their work will give you some ideas!

Jill has used the power of geometry to create her card. The sentiment cleverly combines two different stamp sets.

Visit Jill’s blog here

Heather has gone for an automotive theme. I love how the heat embossing adds interest to the background.

Visit Heather’s blog here

Gez has gone for a vintage style. The embossing folder adds texture, and the inked edges give it that old world look.

Visit Gez’s blog here

I hope you enjoyed these projects. The supplies used are listed and linked to the online store below.

I would love to be your demonstrator.

Thanks for stopping by today and happy Stampin’!

Verity xx

Product List

Teacher Thank You cards with the Fancy Phrases Stamp Set

Hello Everyone,

Nothing like some last minute crafting to bring out some creativity!

I realised I needed some teacher thank you cards….

The Fancy Phrases Stamp Set is very easy to work with and gives great results quickly.

You can see how these cards came together in my video tutorial….

And here are pictures of the yellow version,

I used the same green for the foliage, and I love the Gilded Gems to finish them off.

I hope you enjoyed this project.

The supplies used are listed and linked to the online store below.

If your order is less than £150, use the Hostess Code BREHFN2Q when placing your order to get an extra gift from me!

I would love to be your demonstrator.

Thanks for stopping by today and happy Stampin’!

Verity xx

Product List

Paper Trimmer

[152392]

£23.00

In Colour Blending with Comfort and Hope

Hello Everyone,

I hope you had a lovely weekend!

This week I am making backgrounds! And I am starting with this blended background using the 2920 in colours.

See how I made today’s card in my video tutorial…..

I made the mistake of forgetting to use my embossing buddy, but the overall effect turned out okay in the end.

With so many other colours in the Stampin’ Up! catalogue there are lots of possibilities with this layout.

I hope you enjoyed this project.

The supplies used are listed and linked to the online store below.

If your order is less than £150, use the Hostess Code BREHFN2Q when placing your order to get an extra gift from me!

July means Bonus Days…. Get a £5 voucher to redeem in August for every £45 spent!

I would love to be your demonstrator.

Thanks for stopping by today and happy Stampin’!

Verity xx

Product List

Project Share Project

Hello Everyone,Welcome to this week’s Project Share. As always my friends have created some lovely work. Please use the links to visit their blogs and read more about their projects.

Jill’s clean and simple style is perfect with this stamp bundle. Beautiful summery colours!

Visit Jill’s blog here for more information.

Heather has gone monochrome! The heat embossing looks amazing!

Visit Heather’s blog here for more details.

Gez is exploring the new in colour designer series papers using all the patterns to create her card!

Visit Gez’s blog here for more.

I hope you enjoyed these projects.

The supplies used are listed and linked to the online store below.

I would love to be your demonstrator.

Thanks for stopping by today and happy Stampin’!

Verity xx

Product List

Introducing 2020 In Colours

Hello Everyone,

I hope you are enjoying the Bank Holiday!

I thought I would introduce the new 2020-2022 In Colours and coordinating products today! They are gorgeous!

You can see also new punches and stamp sets too!

And here they are;

Bumble Bee

Cinnamon Cider

Just Jade

Magenta Madness

Misty Moonlight

See more about these new colours and how I made these card in my video.

I hope you enjoyed this project.

I would love to be your demonstrator.

Thanks for stopping by today and happy Stampin’!

Verity xx

Apologies, shop links will not be available until the products are available to purchase.

In the meantime, please request a free catalogue using the Contact Me page in the Main Menu.

Project Share Project

Hello Everyone,

Welcome to this week’s Project Share. As always my friends have created some lovely work. Please use the links to visit their blogs and read more about their projects.

Jill is sharing another layout using her one sheet wonder, combining dies and punches

Visit Jill’s blog here

Heather has also been busy making backgrounds with the emboss resist technique.

Visit Heather’s blog here

Gez has learned some origami from one of our other teammates and made this lovely desktidy.

Visit Gez’s blog here

I hope you enjoyed these projects. The supplies used are listed and linked to the online store below.

I would love to be your demonstrator.

Thanks for stopping by today and happy Stampin’!

Verity xx

Product List

Bone Folder

[102300]

£6.50

Peacock Duo

Hello Everyone,

This week I’m doubling up! Two cards each day with the same or similar products!

Today, it’s the Royal Peacock stamp set and matching dies with Call Me Clover and Blueberry Bushel retiring In Colours.

For the first card, the peacock was stamped with the assistance of the Stamparatus, first with Blueberry Bushel for the head and body and Call Me Clover for the tail.

The details were heat embossed with copper powder, (also retiring), and then die cut.

Some additional feathers were die cut to embellish the sentiment. This was stamped with Blueberry Bushel ink and cut with the Stitched So Sweetly dies.

The second card is completely different!

Four large feathers were die cut from Blueberry Bushel card stock and adhered together to form an oval-ish shape.

Stitched Square dies were used to cut the green frame and the stamped sentiment.

A few rhinestones added some extra interest to the background.

I hope you enjoyed this project. The supplies used are listed and linked to the online store below.

I would love to be your demonstrator.

Thanks for stopping by today and happy Stampin’!

Verity xx

Product List

In My Heart

Hello Everyone,

All the projects I am sharing this week will feature at least one retiring product.

Today it is the Modern Heart stamp set.

I kept it simple heat embossing the image with clear powder.

The facets were coloured with watercolour pencils, though I think a “real” watercolor effect may have been more successful to achieve the rainbow look.

The sentiment was added with black Memento ink.

I hope you enjoyed this project. The supplies used are listed and linked to the online store below.

I would love to be your demonstrator.

Thanks for stopping by today and happy Stampin’!

Verity xx

Product List

Blender Pens

[102845]

£11.25

Paper Trimmer

[152392]

£23.00

Project Share Project

Hello Everyone,

Welcome to this week’s Project Share. As always my friends have created some lovely work. Please use the links to visit their blogs and read more about their projects.

All of this week’s featured projects pay homage to the fabulous free items that were available during the Stampin’ Up! Sale-a-bration event which ended on Tuesday!

Jill’s card is lovely reminder that springtime is on it’s way!

Visit Jill’s blog here

Heather has used foiled DSP with this beautifully coloured cake!

Visit Heather’s blog here

Gez is using embossed coloured vellum for her pretty card!

Visit Gez’s blog here

I hope you enjoyed these projects. The supplies used are listed and linked to the online store below.

I would love to be your demonstrator.

Thanks for stopping by today and happy Stampin’!

Verity xx

Product List

Project Share Project

Hello Everyone,

Welcome to this week’s Project Share.

Despite all that is going on in the world my friends have continued to create some projects to inspire you and maybe have a go at yourself!

Please use the links to visit their blogs and read more about their projects. While you are there why not like and subscribe!

Jill has combined the beautiful florals of the Best Dressed designer series paper with Stitched So Sweetly dies to decorate a notebook. This would make a great gift

Visit Jill’s blog here to see more about this project.

Heather’s card is clean and simple, but perfectly combines annual catalogue favourites and Sale-a-bration freebies!

Visit Heather’s blog here for more ideas.

Gez is going back to basics with some #simplestamping! Everyone starts somewhere and this stamp set is perfect for a beginner stamper!

Visit Gez’s blog here to see more

I hope you enjoyed these projects.

The supplies used are listed and linked to the online store below.

I would love to be your demonstrator.

Thanks for stopping by today and happy Stampin’!

Verity xx

Product List

Punched Blooms

Hello Everyone,

This project has a little Sneak Peek at a new product coming soon, the Pleased as Punch Designer Series Paper.

This is one of a collection of items specifically designed to coordinate with products already available.

The paper can be used with these items;

Product List

For this project I wanted to create a wreath look with the Painted Labels dies. These elements were cut from Crumb Cake and Whisper White card stock.

The sentiment from the Honey Bee set was stamped with Mossy Meadow ink.

The same ink was used to add the foliage on the white card layer.

The card was assembled using a Crumb Cake card base.

One each of the coloured flowers on the paper was punched and adhered to the card.

A rhinestone was added to each of the flower centres.

I hope you enjoyed this project. The supplies used are listed and linked to the online store below.

I would love to be your demonstrator.

Thanks for stopping by today and happy Stampin’!

Verity xx

Product List

Parisian Blossoms 2 Ways

Hello Everyone,

I couldn’t decide on whether to use black or white card bases with this layout, so I made it with both.

Which do you prefer?

I used the usual card and DSP layers to build the card base.

The blossoms were stamped with matching ink on to the same colour card stock for a tone on tone look. Each was adhered with dimensionals.

The sentiment was stamped with Pool Party ink on white card stock. For the black card, this was heat embossed with white powder. These were also adhered with dimensionals.

I hope you enjoyed this project. The supplies used are listed and linked to the online store below.

I would love to be your demonstrator.

Thanks for stopping by today and happy Stampin’!

Verity xx

Product List

Paper Trimmer

[152392]

£23.00

Project Share Project

Hello Everyone,

Welcome to this week’s Project Share. As always my friends have created some lovely work. Please use the links to visit their blogs and read more about their projects.

Jill has made this stunning white on white layered card. I think this gives a great faux embossed look.

Visit Jill’s blog here for more details.

Heather has made this cute chocolate slider, a really fun way to give a sweet treat as a gift.

Visit Heather’s blog here to see how to make one yourself.

Gez’s playful penguins are looking cosy in their hats and scarves in this layered card.

Visit Gez’s blog here to see more about this project.

I hope you enjoyed these projects. The supplies used are listed and linked to the online store below.

I would love to be your demonstrator.

Thanks for stopping by today and happy Stampin’!

Verity xx

Product List

Seasons Greetings

Hello Everyone,

I thought I would share this non traditional Christmas card design with you today.

The colour combination I used is Balmy Blue, Pacific Point, Night of Navy and Rich Razzleberry.

Whisper White card stock was coloured through a decorative mask using Stampin’ Sponges.

Before removing the mask, versamark ink was pressed over the panel. (The ink pad will get stained, so using an older pad might be a good idea).

I applied some clear embossing powder and heat set this to give a shiny design. This was adhered to a white card base.

A sentiment was added using Rich Razzleberry ink.

The stars were heat embossed with silver powder and die cut with the coordinating dies.

I hope you enjoyed this project. The supplies used are listed and linked to the online store below.

I would love to be your demonstrator.

Thanks for stopping by today and happy Stampin’!

Verity xx

Product List

Paper Trimmer

[152392]

£23.00

Glittered Winter Woods

Hello Everyone,

I thought I would revisit the festive stamp sets in the Annual catalogue for today’s project.

The trees were stamped with Early Espresso Ink onto a Very Vanilla card layer.

Dabs of glue were added to the image which were covered with Ice Glitter. The excess was was tapped off and allowed to dry before adhering to a Crumb Cake card base.

The sentiment was heat embossed with gold powder and added below the trees with dimensionals.

I hope you enjoyed this project. The supplies used are listed and linked to the online store below.

I would love to be your demonstrator.

Thanks for stopping by today and happy Stampin’!

Verity xx

Product List

Silhouette Deer

Hello Everyone,

For today’s card I used a combination of mask and ink blending to create a background.

Using post-it notes, I masked off a section of card stock.

With sponge daubers I applied ink starting with Balmy Blue.

Pacific Point was added next along the top, then Highland Heather along the bottom.

The deer and sentiment were stamped with versamark ink and heat embossed with Shimmer Black powder.

A Stitched Rectangle Die was used to cut the panel. This, was adhered to a card base that had been stamped with snowflakes in Silvery Shimmer Ink.

I hope you enjoyed this project. The supplies used are listed and linked to the online store below.

I would love to be your demonstrator.

Thanks for stopping by today and happy Stampin’!

Verity xx

Product List

Wrapped Wrapped in Plaid x3

Hello Everyone,

Here are some more cards using Perfectly Plaid bundle and Wrapped in Plaid Designer Series Paper.

The paper has three main colours in collection, Cherry Cobbler, Shaded Spruce and Night of Navy. It is these colours that I have used for my card bases.

To make a card base cut an A4 sheet of card stock lengthways at 4-1/8 inches (10.5cm), turn and score at 5-7/8 inches (15cm).

Each card base was layered with a piece of coordinating DSP measuring 4 inches (10.2cm) by 5-3/4 inches (14.6cm).

The smaller panels measured;

3 inches (7.6cm) by 4-3/4 inches (12cm) for the coloured card stock;

2-7/8 inches (7.3cm) by 4-5/8 inches (11.7cm) for the white card stock.

On this piece, the sentiment was stamped with versamark ink and heat embossed with gold powder.

The embossed panels were adhered to the corresponding card base.

Scrap coloured card was used to stamp and heat emboss the trees which were cut with the coordinating punch. These were added to each card using dimensionals.

I hope you enjoyed this project. The supplies used are listed and linked to the online store below.

I would love to be your demonstrator.

Thanks for stopping by today and happy Stampin’!

Verity xx

Product List

Paper Trimmer

[152392]

£23.00