Last Minute Seasonal Cards!

Hello Everyone,

With the last postal day before Christmas approaching, I have this last minute card idea for you.

Along the way I have a couple of tips to speed up the process.

You can see how I made this card in my video tutorial

This sample uses Shaded Spruce and Real Red with Basic Grey for the sentiment, all mounted on a Smoky Slate card base.

I hope you enjoyed this project.

The supplies used are listed and linked to the online store below.

I would love to be your demonstrator.

Thanks for stopping by today and happy Stampin’!

Verity xx

Product List

Pear Pizzazz Classic Stampin' Pad

Pear Pizzazz Classic Stampin’ Pad

[131180]

More Christmas Cards with the Cottage Wreaths Bundle

Hello Everyone,

I thought I’d bring you another Christmas card idea with this lovely Cottage Wreaths stamp set and dies.

I chose Soft Succulent and Polished Pink for my colour combinations on this one.

Additional die cuts were added to the wreath image to give it more full look.

You can see how I made this card in my video tutorial…

The ribbon and embellishments were coloured with a Stampin’ Blend marker to coordinate them with the project.

The original more traditional version is shown here and use Shaded Spruce and Sweet Sorbet.

I hope you enjoyed this project.

The supplies used are listed and linked to the online store below.

I would love to be your demonstrator.

Thanks for stopping by today and happy Stampin’!

Verity xx

Product List

Christmas Wreath Card using the Sparkle of the Season

Hello Everyone,

I’ve had this card idea in my head for a while and I’ve finally managed to make it!

For this layout I used eight die cuts which I then used to create four pieces that I could arrange to form the wreath design.

You can see how I made this card in my video tutorial…..

The Cherry Cobbler & Gold Metallic Ribbon is absolutely gorgeous in real life. It finishes off the card brilliantly.

This sample uses more die cut, 12 in total, and uses a mixture of leaves in Shaded Spruce and Granny Apple Green. The sentiment is stamped with Poppy Parade.

I hope you enjoyed this project.

The supplies used are listed and linked to the online store below.

If your order is less than £150, use the Hostess Code PBNW9JZN when placing your order to get an extra gift from me!

I would love to be your demonstrator.

Thanks for stopping by today and happy Stampin’!

Verity xx

Product List

Poinsettia Place Mini Gift Bags

Hello Everyone,

Something completely different from me today…. a 3D project!

Each mini gift bag is made with a 6×6 piece of designer series paper.

Score the sheet at (inches) …..

1-3/8, 2-3/4, 4-1/8 and 5-1/2….

turn and score again at 1-3/8

See the full process in my video tutorial….

The Postage Stamp Punch makes a great tag alternative with the punches and die cut elements added to it!

Don’t forget to stop by the sale …….

I hope you enjoyed this project.

The supplies used are listed and linked to the online store below.

If your order is less than £150, use the Hostess Code W7ZJNXEV when placing your order to get an extra gift from me!

I would love to be your demonstrator.

Thanks for stopping by today and happy Stampin’!

Verity xx

Product List

Pootlers Team Blog Hop – August-December Mini Catalogue Favourites!

Hello Everyone,

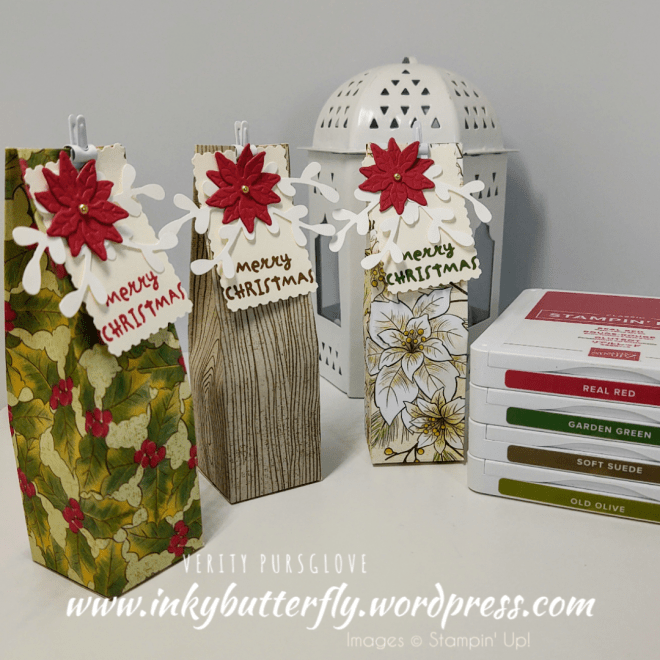
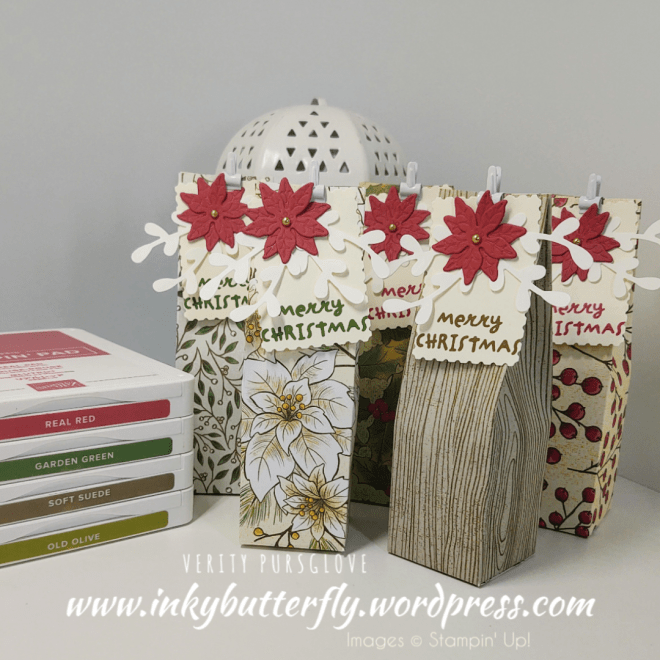
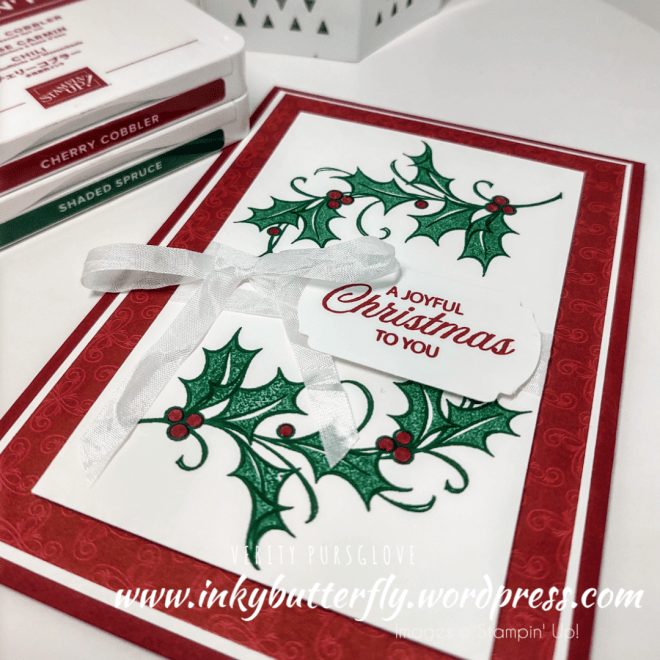
It’s time for a team blog hop! This time we are showcasing the August-December Mini Catalogue products!

Use the link provided below to view all the other projects in this blog hop, there will be loads of different ideas!

You are invited to the Inlinkz link party!

Click here to enter

https://fresh.inlinkz.com/js/widget/load.js?id=9c9b10dbdecdfb9300b0

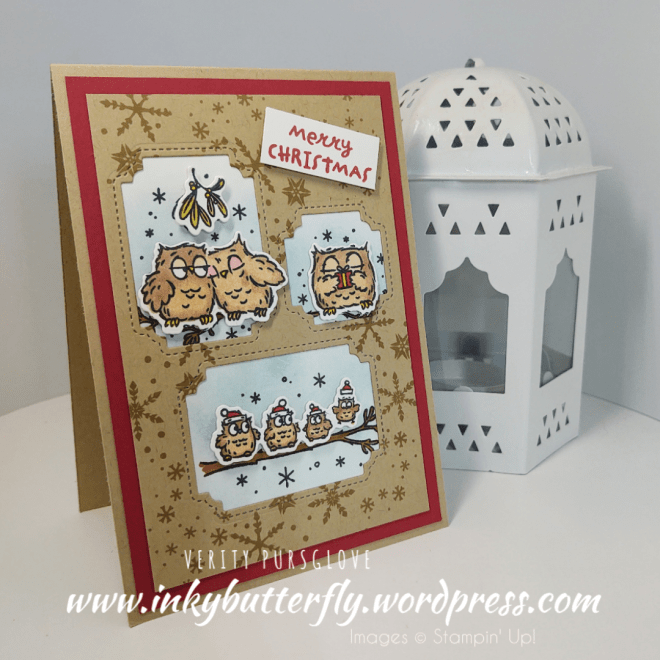
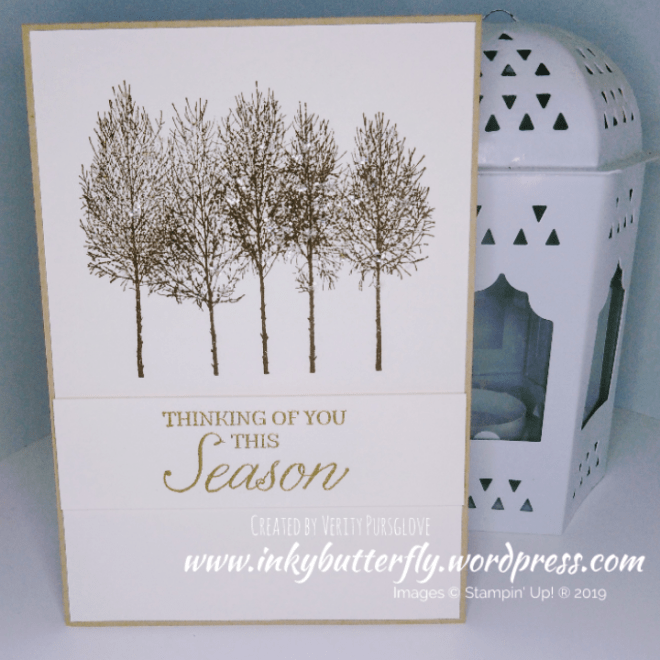
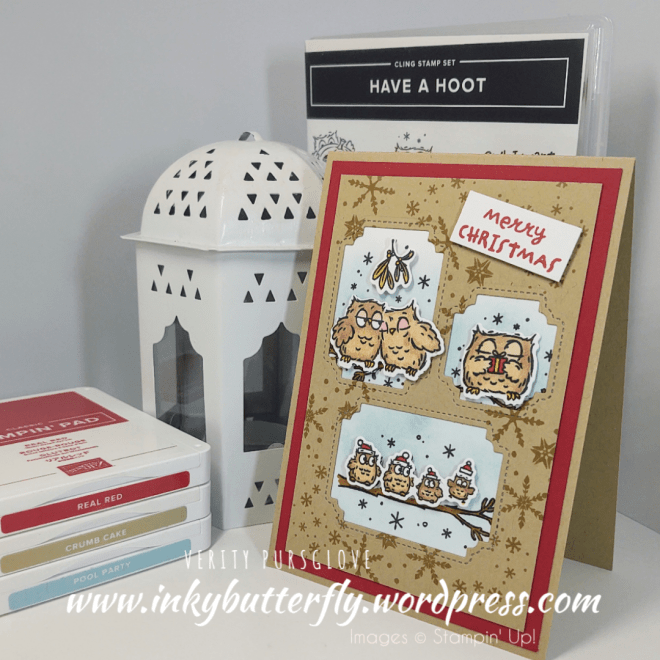
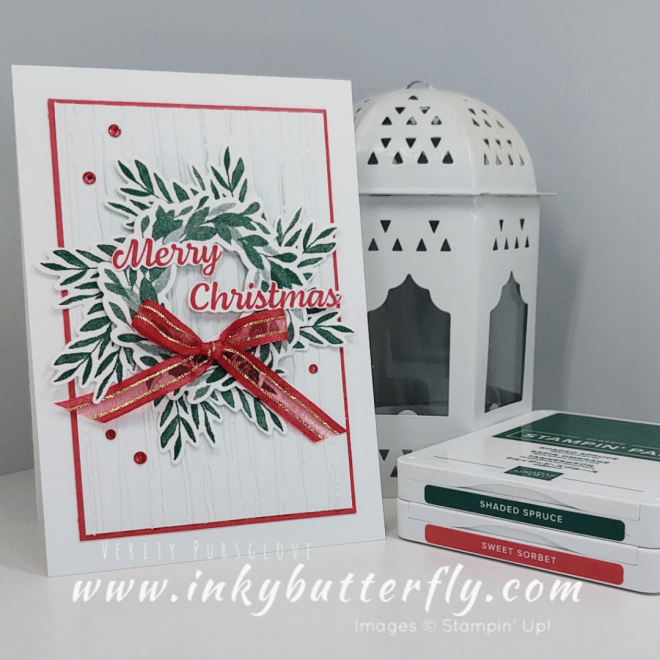
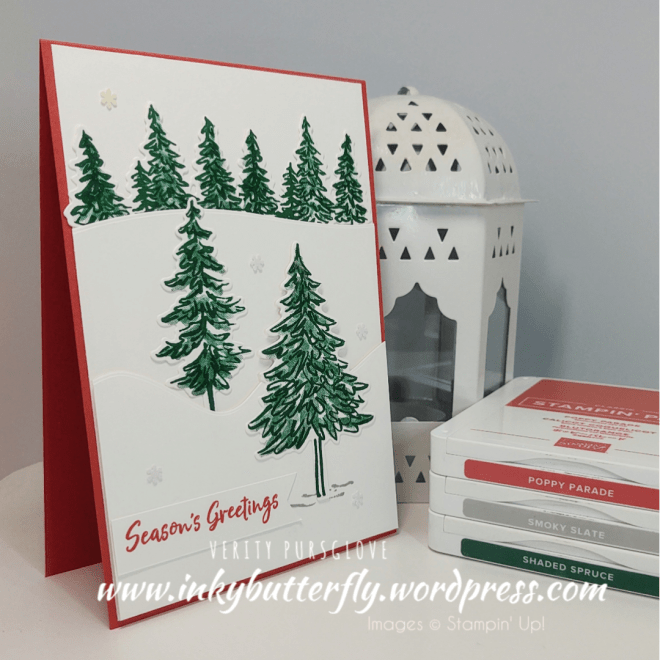
I picked Have a Hoot and the coordinating Peek a Hoot dies to work with.

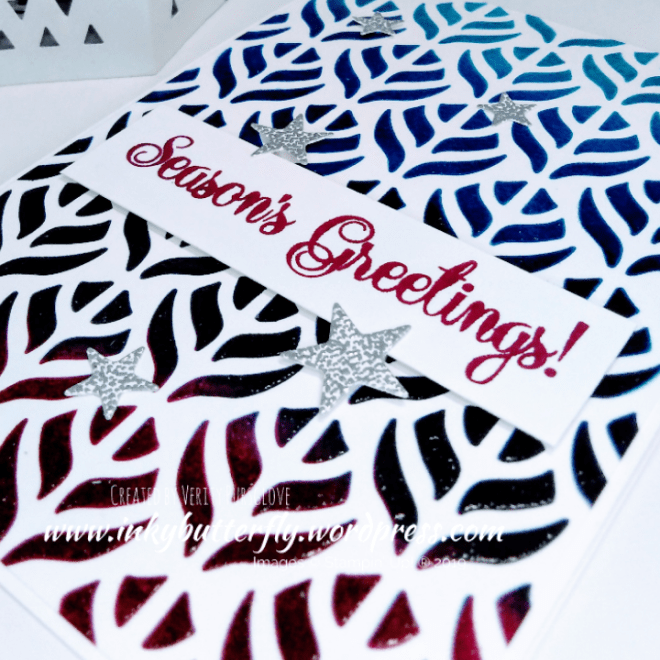
I used the tags die in the set to create these apertures in Crumb Cake cardstock and stamped this with Crumb Cake ink.

This was used to mark a piece of Whisper White, identifying where the owls would be stamped. I used the Stamparatus to position the stamps.

The images were stamped again on a separate sheet for colouring and die cutting.

Pool Party ink was applied to the white cardstock before colouring the tree branches. (No need to colour the owls at this point).

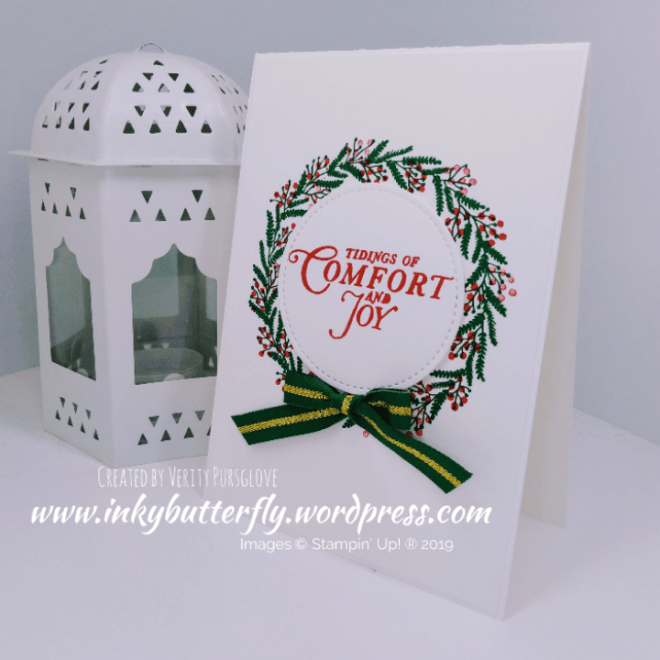
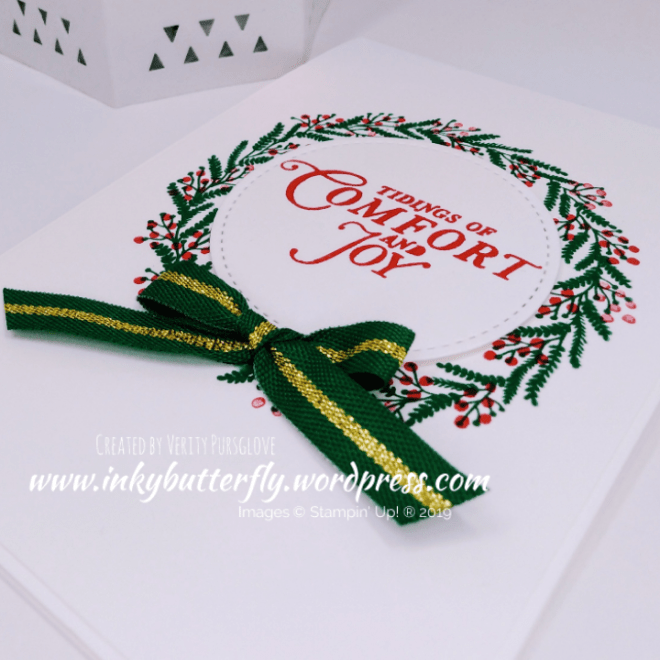
This was adhered behind the Crumb Cake apertures, then onto a piece of Real Red cardstock before adding to a Crumb Cake card base.

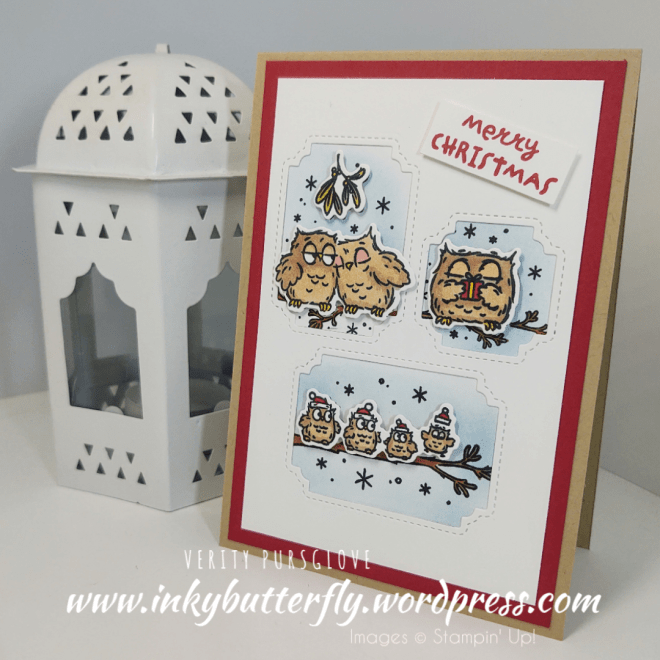
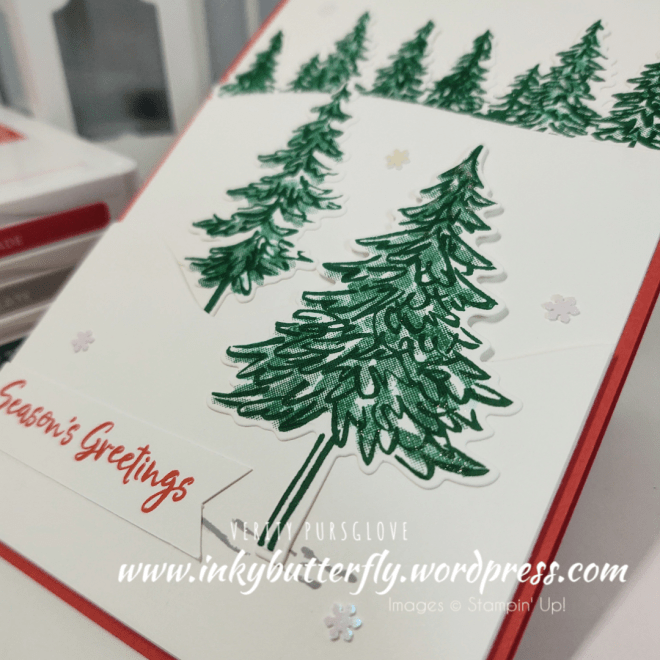
The owls were coloured with Stampin’ Blends markers before die cutting. They were adhered to the card with dimensionals.

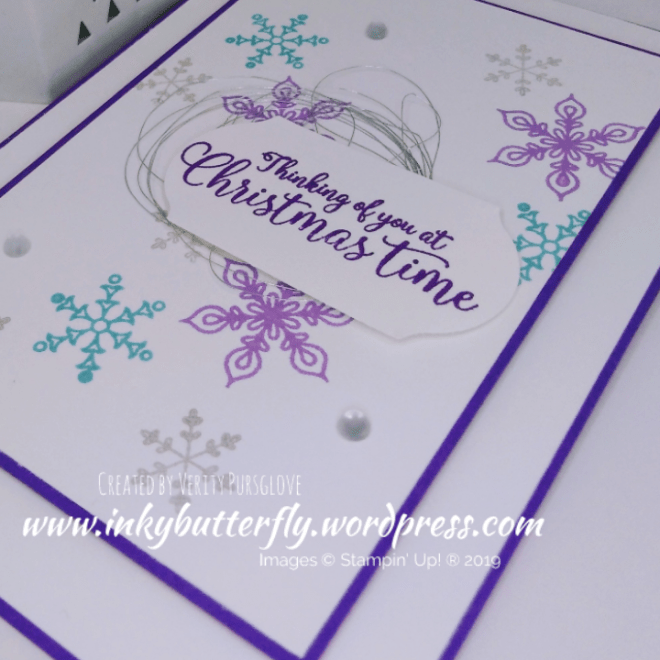
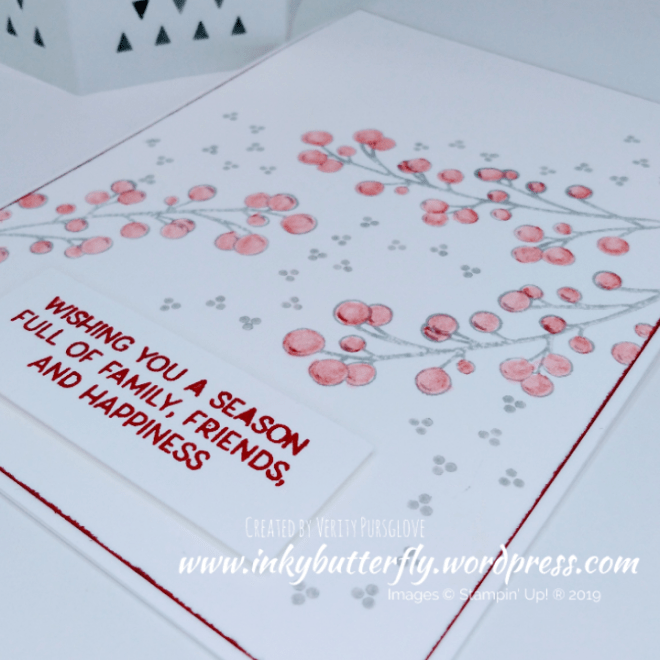
Finally, Real Red ink was used to stamp a sentiment.

I hope you enjoyed this project.

The video tutorial for this project will be available tomorrow, do stop by again then!

The supplies used are listed and linked to the online store below.

If your order is less than £150, use the Hostess Code HS9XUAG2 when placing your order to get an extra gift from me!

I would love to be your demonstrator.

Thanks for stopping by today and happy Stampin’!

Verity xx

Product List

Paper Trimmer

[152392]

£23.00

Festive Friday with Snowflake Wishes

Hello Everyone,

A nice simple card for this week’s Festive Friday featuring the Snowflake Wishes bundle and Snowflake Splendour Designer Series Paper

You can see how I made this card in my video tutorial…..

I hope you enjoyed this project.

The supplies used are listed and linked to the online store below.

If your order is less than £150, use the Hostess Code 3MA77KE6 when placing your order to get an extra gift from me!

I would love to be your demonstrator.

Thanks for stopping by today and happy Stampin’!

Verity xx

Product List

Festive Friday with Tis the Season DSP & Joyful Holly

Hello Everyone,

It’s Festive Friday! And today we are working with the Tis the Season designer series paper and the Joyful Holly stamp set.

The layout has been kept simple to show how a number of cards can be made in a short amount of time.

See how I made these cards in my video tutorial….

Which is your favourite?

I hope you enjoyed this project.

The supplies used are listed and linked to the online store below.

If your order is less than £150, use the Hostess Code 3MA77KE6 when placing your order to get an extra gift from me!

I would love to be your demonstrator.

Thanks for stopping by today and happy Stampin’!

Verity xx

Product List

Paper Trimmer

[152392]

£23.00

Festive Friday with Peace and Joy

Hello Everyone,

So for Festive Friday I just had to use my new cut and emboss machine!

The Peace and Joy bundle was perfect!

See the card made in my video tutorial….

I just had to add the extra bling using rhinestones and Wink of Stella!

I hope you enjoyed this project.

The supplies used are listed and linked to the online store below.

If your order is less than £150, use the Hostess Code 3MA77KE6 when placing your order to get an extra gift from me!

I would love to be your demonstrator.

Thanks for stopping by today and happy Stampin’!

Verity xx

Product List

Joy Dies

[153530]

£30.00

Paper Trimmer

[152392]

£23.00

Festive Friday with In the Pines

Hello Everyone,

Here’s another Festive Friday!

This is the In the Pines bundle, beautiful coordinating stamps and dies to make festive cards.

Keeping this one simple, creating a cute snowy scene!

See how I made the card in my video tutorial…

The touch of Wink of Stella adds a frosty look!

I hope you enjoyed this project.

The supplies used are listed and linked to the online store below.

If your order is less than £150, use the Hostess Code 3MA77KE6 when placing your order to get an extra gift from me!

I would love to be your demonstrator.

Thanks for stopping by today and happy Stampin’!

Verity xx

Product List

Project Share Project

Hello Everyone,

Welcome to this week’s Project Share. As always my friends have created some lovely work. Please use the links to visit their blogs and read more about their projects.

Jill has made these sweet tea light boxes. I can see these making gorgeous table favours!

Visit Jill’s blog here

Heather’s card has a vellum front. This gives the project a beautifully elegant look!

Visit Heather’s blog here

Gez has used the one sheet wonder technique with vintage styling to make her cards!

Visit Gez’s blog here

I hope you enjoyed these projects. The supplies used are listed and linked to the online store below.

I would love to be your demonstrator.

Thanks for stopping by today and happy Stampin’!

Verity xx

Product List

Joyful Christmas

Hello Everyone,

For today’s card I am using the gorgeous Beauty and Joy stamp set. This set will retire after Christmas, don’t miss adding this to your crafty stash!

The images were stamped on to Whisper White card stock. The stamps have a textured finish to give a realistic look.

The Cherry Cobbler sentiment frames the tree and the gold stars add some glitz.

I hope you enjoyed this project. The supplies used are listed and linked to the online store below.

I would love to be your demonstrator.

Thanks for stopping by today and happy Stampin’!

Verity xx

Product List

Paper Trimmer

[152392]

£23.00

More Yuletide Cheer

Hello Everyone,

This card was made completely spontaneously using supplies I had with me whilst crafting with my team.

I wouldn’t normally use so many stamp sets on one project but look how lovely it is!

The card design is reasonably self explanatory, building the background with the images as shown in the photo. The gold snowflakes were a late addition but really help tie the layout together.

A Stitched circle die was used the cut the sentiment which adhered with dimensionals.

I hope you enjoyed this project. The supplies used are listed and linked to the online store below.

I would love to be your demonstrator.

Thanks for stopping by today and happy Stampin’!

Verity xx

Product List

Family, Friends & Happiness

Hello Everyone,

I haven’t used this image from the Frosted Foliage stamp set, so I created this simple card.

The outline image was stamped on to a card layer with Gray Granite ink and coloured with a Cherry Cobbler watercolour pencil.

Some little dots from the Beauty and Joy set we’re added to fill in the background.

Cherry Cobbler Ink was added to the edge of the card stock before adhering to the card base.

The sentiment was added at the bottom with dimensionals.

I hope you enjoyed this project. The supplies used are listed and linked to the online store below.

I would love to be your demonstrator.

Thanks for stopping by today and happy Stampin’!

Verity xx

Product List

Blender Pens

[102845]

£11.25

Blush Snowflakes

Hello Everyone,

As the Christmas season is drawing ever nearer, I thought I would share a quick card idea.

This card was simply stamped using the Frosted Foliage stamp set and Blushing Bride ink.

The sentiment is from the same set and stamped with Real Red ink. This was cut with a Stitched Circle Die and adhered to the card with dimensionals.

Simples! But very pretty!

I hope you enjoyed this project. The supplies used are listed and linked to the online store below.

I would love to be your demonstrator.

Thanks for stopping by today and happy Stampin’!

Verity xx

Product List

Project Share Project

Hello Everyone,

Welcome to this week’s Project Share. As always my friends have created some lovely work. Please use the links to visit their blogs and read more about their projects.

Jill has made this stunning white on white layered card. I think this gives a great faux embossed look.

Visit Jill’s blog here for more details.

Heather has made this cute chocolate slider, a really fun way to give a sweet treat as a gift.

Visit Heather’s blog here to see how to make one yourself.

Gez’s playful penguins are looking cosy in their hats and scarves in this layered card.

Visit Gez’s blog here to see more about this project.

I hope you enjoyed these projects. The supplies used are listed and linked to the online store below.

I would love to be your demonstrator.

Thanks for stopping by today and happy Stampin’!

Verity xx

Product List

Spruce Wreath

Hello Everyone,

This stamp set has to be one of my favourites from the Autumn Winter catalogue.

Shaded Spruce ink was used to stamp the wreath on to a white card base. The “berries” were added using Real Red ink.

The sentiment was stamped with Real Red ink and cut with Stitched Circle die. This was adhered in the centre of the wreath with dimensionals.

A bow was tied from Shaded Spruce Gold striped ribbon and added to the bottom.

I hope you enjoyed this project. The supplies used are listed and linked to the online store below.

I would love to be your demonstrator.

Thanks for stopping by today and happy Stampin’!

Verity xx

Product List

Seasons Greetings

Hello Everyone,

I thought I would share this non traditional Christmas card design with you today.

The colour combination I used is Balmy Blue, Pacific Point, Night of Navy and Rich Razzleberry.

Whisper White card stock was coloured through a decorative mask using Stampin’ Sponges.

Before removing the mask, versamark ink was pressed over the panel. (The ink pad will get stained, so using an older pad might be a good idea).

I applied some clear embossing powder and heat set this to give a shiny design. This was adhered to a white card base.

A sentiment was added using Rich Razzleberry ink.

The stars were heat embossed with silver powder and die cut with the coordinating dies.

I hope you enjoyed this project. The supplies used are listed and linked to the online store below.

I would love to be your demonstrator.

Thanks for stopping by today and happy Stampin’!

Verity xx

Product List

Paper Trimmer

[152392]

£23.00

Ho Ho Ho

Hello Everyone,

This card really shows how beautifully Stampin’ Up! colours match across the product range… Ink, paper and card stock!

A Garden Green card base was layered with a strip of Very Vanilla, Garden Green card stock and a scrap of Toile Tidings DSP.

I didn’t measure these, I just used off cuts and trimmed to the correct width.

Garden Green ink was used to stamp the sentiment and trees on to Very Vanilla card stock. These were adhered with dimensionals.

I hope you enjoyed this project. The supplies used are listed and linked to the online store below.

I would love to be your demonstrator.

Thanks for stopping by today and happy Stampin’!

Verity xx

Product List

Paper Trimmer

[152392]

£23.00

Glittered Winter Woods

Hello Everyone,

I thought I would revisit the festive stamp sets in the Annual catalogue for today’s project.

The trees were stamped with Early Espresso Ink onto a Very Vanilla card layer.

Dabs of glue were added to the image which were covered with Ice Glitter. The excess was was tapped off and allowed to dry before adhering to a Crumb Cake card base.

The sentiment was heat embossed with gold powder and added below the trees with dimensionals.

I hope you enjoyed this project. The supplies used are listed and linked to the online store below.

I would love to be your demonstrator.

Thanks for stopping by today and happy Stampin’!

Verity xx

Product List

Christmas Time

Hello Everyone,

This stamp set is one of my favourites in the Autumn Winter catalogue – especially these snowflakes!

I chose a slightly different colour palette and like the end result.

I started with the largest snowflake and Highland Heather ink. Next I added Balmy Blue and then Silvery Shimmer inks.

The panel was adhered to some Gorgeous Grape card stock and then to a pre-prepared card base with dimensionals.

Loops of silver thread were secured to the card. The sentiment was stamped with Gorgeous Grape ink and cut with the Timeless Label punch. This was added with dimensional adhesive to complete the card.

I hope you enjoyed this project. The supplies used are listed and linked to the online store below.

I would love to be your demonstrator.

Thanks for stopping by today and happy Stampin’!

Verity xx

Product List

Paper Trimmer

[152392]

£23.00