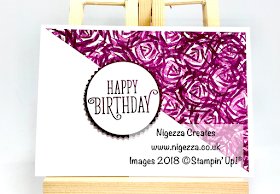
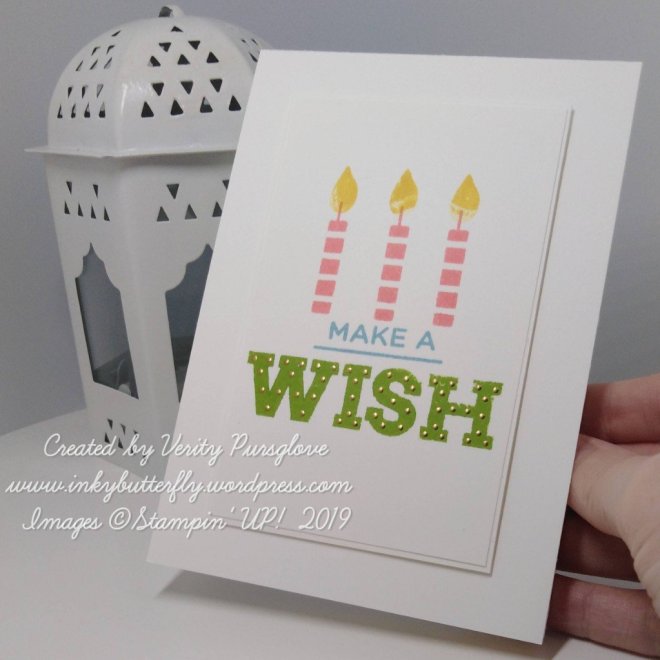
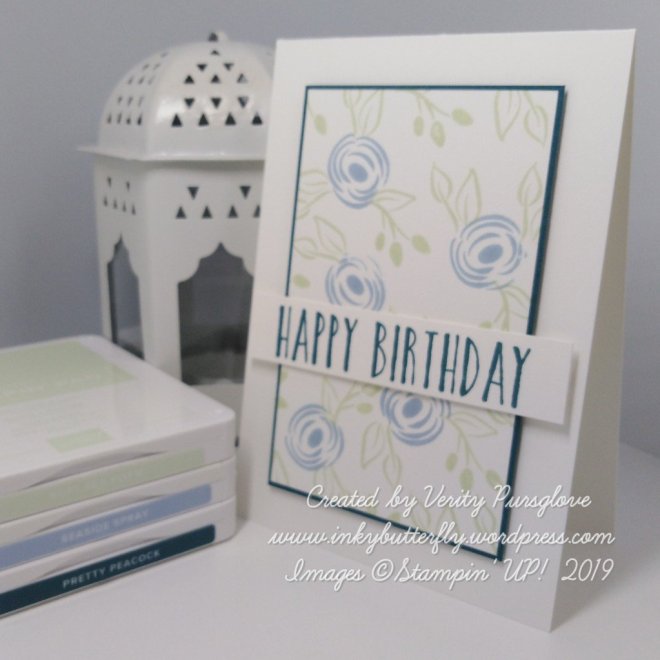
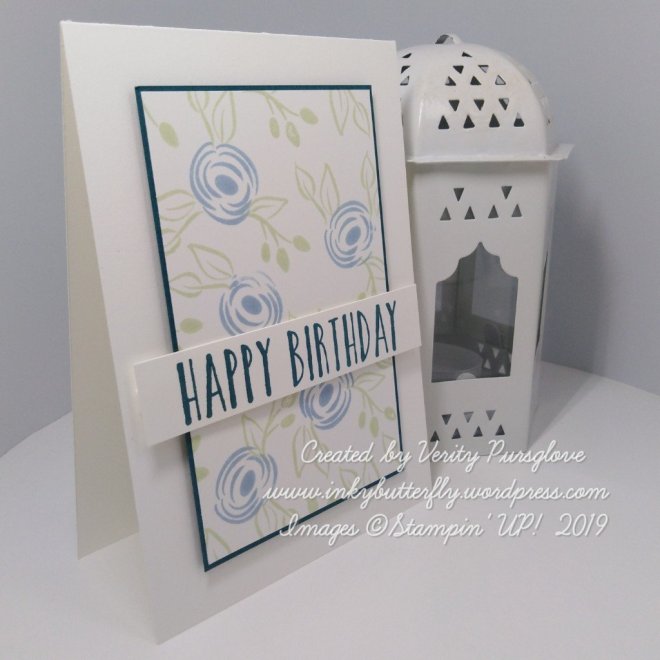
Blissful Future

Hello Everyone,

I really love using coordinating punches with stamps to make dimensional elements for my cards.

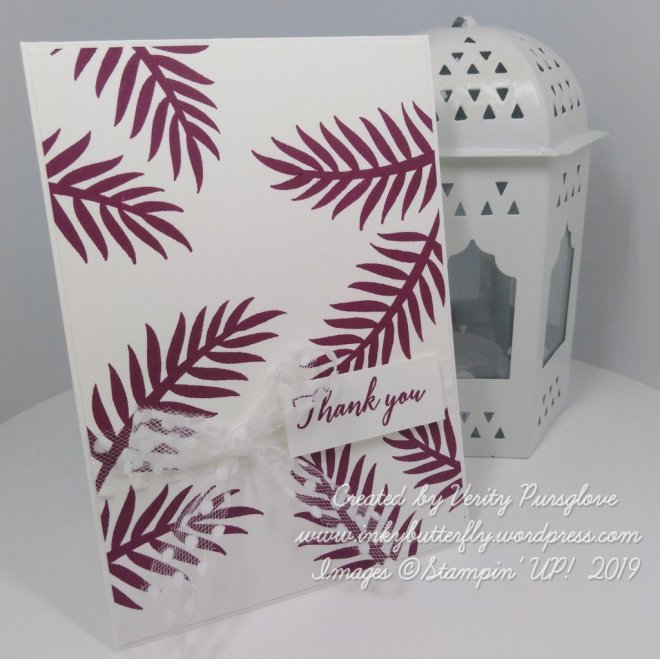
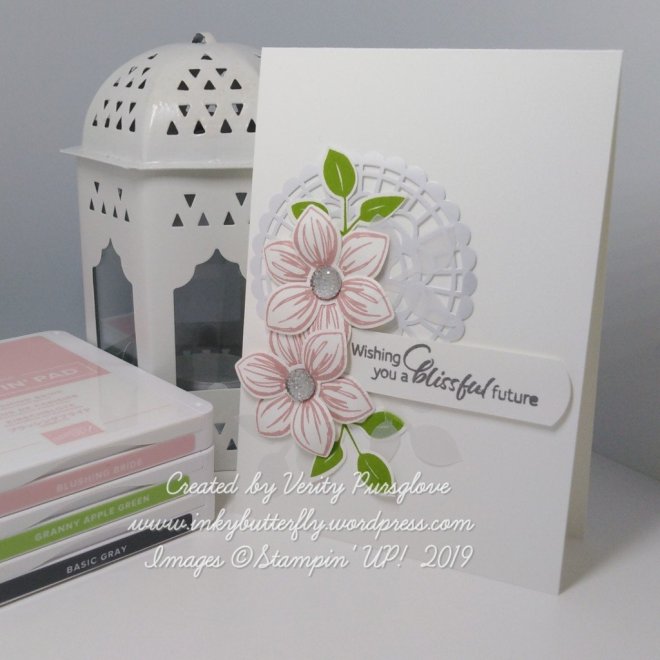
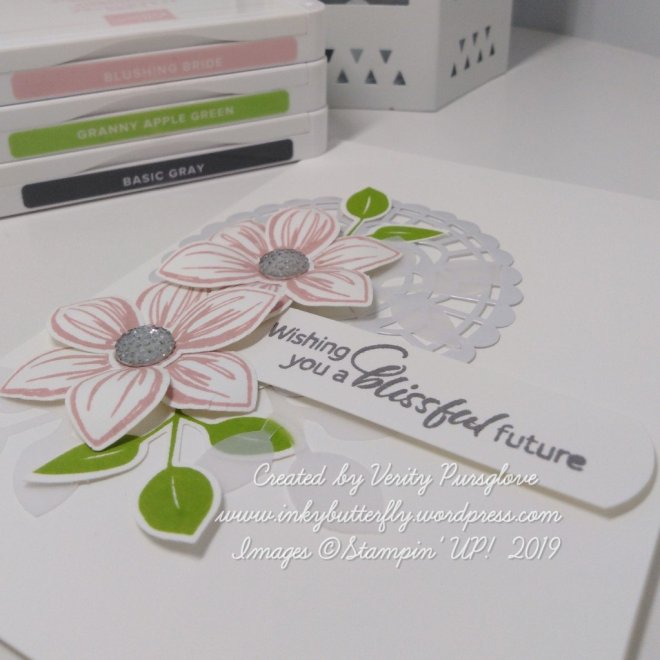
Today I am using the Floral Essence bundle.

Blushing Bride Ink was used to stamp the petals and punched. A ball tool was used to shape each part before adhering together with Multipurpose glue.

I also stamped and punched some leaves.

A pearlized doily was added to a white card base. The sentiment was stamped with Basic Gray ink and adhered with dimensionals.

The flowers were added next overlapping the sentiment, followed by the leaves.

A clear faceted gem was placed in the centre of the flowers to complete the card.

I hope you enjoyed this project. The supplies used are listed and linked to the online store below.

I would love to be your demonstrator.

Thanks for stopping by today and happy Stampin’!

Verity xx

Product List

Leaf Punch

[144667]

£15.00

Keeping it Simple – Part 3

Hello Everyone,

Here’s another keep it simple card….

This time I have added a punch to the supply list and used a simple stamping technique to get more from a single ink pad.

The background panel has been stamped with second generation ink…. This means inking the stamp, stamping on to scrap card and then using the second impression on the project. This gives a lighter shade without buying extra ink colours.

The Tailored Tag Punch was used to cut the sentiment.

I hope you enjoyed this project. The supplies used are listed and linked to the online store below.

I would love to be your demonstrator.

Thanks for stopping by today and happy Stampin’!

Verity xx

Product List

Embossed Delightful Birthday

Hello Everyone,

I thought I would get my embossing powders out today to create these simple stamping cards.

For the background stamping I used the Artisan Textures stamp set with a trio of ink colours, working from light to dark.

An embossing buddy ensured the ink was completely dry before adding the sentiment with versamark ink.

Embossing powder was sprinkled over the stamped sentiment and heated until melted.

The toppers were adhered to white card bases with dimensionals.

I hope you enjoyed this project. The supplies used are listed and linked to the online store below.

I would love to be your demonstrator.

Thanks for stopping by today and happy Stampin’!

Verity xx

Product List

Garden of Life

Hello Everyone,

I love the colour palette that made this card…. Rococco Rose fits in perfectly.

I used A Big Thank You to stamp the background and layered this on to Rich Razzleberry card stock.

The sentiment was cut using the Pretty Label Punch.

Petal Pink ribbon tied in a bow completed the card.

I hope you enjoyed this project. The supplies used are listed and linked to the online store below.

I would love to be your demonstrator.

Thanks for stopping by today and happy Stampin’!

Verity xx

Product List

Project Share Project

Hello Everyone,

Welcome to this week’s Project Share. As always my friends have created some lovely work. Please use the links to visit their blogs and read more about their projects.

Jill has made this lovely card. Sympathy cards are so difficult to make. The soft colour palette of the Magnolia Lane paper is perfect for this delicate occasion.

Visit Jill’s blog here

Heather has also used Designer Series Paper as the base for her card. This goes together with the Crafting Forever stamp set. This is a great card to send to crafting friends.

Visit Heather’s blog here

Gez is a whizz with a one sheet wonder. This is a great way to make multiple cards in a short space of time. The hand stamped paper can be made with any stamp set and ink colour.

Visit Gez’s blog here

I hope you enjoyed these projects. The supplies used are listed and linked to the online store below.

I would love to be your demonstrator.

Thanks for stopping by today and happy Stampin’!

Verity xx

Product List

Make a Wish

Hello Everyone,

Today’s card features the Broadway Birthday stamp set.

I love the little dot detail stamps that can be used to add some showbiz bling to the bold lettering. I decided to heat emboss these with gold powder.

I hope you enjoyed this project. The supplies used are listed and linked to the online store below.

I would love to be your demonstrator.

Thanks for stopping by today and happy Stampin’!

Verity xx

Product List

More Perennial Birthday

Hello Everyone,

Perennial Birthday is a great go to set for a beautiful but quick birthday card.

For today’s card I have used combined some of the new In Colours with a favourite from the Stampin Up colour palette.

The flowers were stamped on to a card layer using Seaside Spray and Mint Macaron inks.

This was layered with Pretty Peacock card stock and adhered to a Whisper White card base.

Pretty Peacock ink was used to stamp the sentiment.

I hope you enjoyed this project. The supplies used are listed and linked to the online store below.

I would love to be your demonstrator.

Thanks for stopping by today and happy Stampin’!

Verity xx

Product List

Inspire.Create #048

Hello Everyone,

Welcome to my blog. Every other Monday I share my project that I have used as my entry for the Inspire.Create challenge.

This time it’s a theme challenge. The design team have made some wonderful samples as inspiration. You can see them here.

And this is what I created!

I have used the Beautiful Day stamp set for a simple feminine card.

The butterfly was coloured with watercolour pencils and a blender pen.

The image is easy to cut out. The wings were shaped with a bone folder. Dimensionals were placed behind the wings to keep the shape.

For a multi coloured sentiment, the stamp was inked with Stampin’ Write Markers.

Double dimensionals added extra lift against the butterfly.

I hope you enjoyed this project. The supplies used are listed and linked to the online store below.

I would love to be your demonstrator.

Thanks for stopping by today and happy Stampin’!

Verity xx

Product List

Blender Pens

[102845]

£11.25

Let your Dreams Soar

Hello Everyone,

I really love the Above the Clouds stamp set.

So here’s another simple card usjng this set and the coordinating punch.

The layout began with the sentiment which was stamped with black ink and cut with a Stitched Rectangle Die. This was layered on to Purple Posy card stock.

I used Rococo Rose ink (stamped off) for the balloon which was cut with the punch.

The elements were adhered to the card with dimensionals. Some smaller balloons were added to the background.

I hope you enjoyed this project. The supplies used are listed and linked to the online store below.

I would love to be your demonstrator.

Why not join my team and enjoy discounted prices on your favourite Stampin’ supplies!

Thanks for stopping by today and happy Stampin’!

Verity xx

Product List

Keeping it Simple – Part 2

Hello Everyone,

You may well remember a recent post where I used minimal supplies – Keeping it simple.

Today’s card uses the same products, but added coloured card stock and an extra embellishment.

I stamped the leaves first overlapping the edges of a small card layer. This was adhered to Rich Razzleberry card stock.

The Tulle ribbon was added toward the bottom and tied in a knot.

This topper was adhered using dimensionals to a Rich Razzleberry card base pre-prepared by adding a white card layer.

The sentiment was stamped next on to a strip of card stock and adhered with dimensionals.

Some scattered rhinestones added some bling to complete the card.

I hope you enjoyed this project. The supplies used are listed and linked to the online store below.

I would love to be your demonstrator.

Why not join my team and enjoy discounted prices on your favourite Stampin’ supplies!

Thanks for stopping by today and happy Stampin’!

Verity xx

Product List

Project Share Project

Hello Everyone,Welcome to this week’s Project Share. As always my friends have created some lovely work. Please use the links to visit their blogs and read more about their projects.

This week is all about Designer Series Paper!

Jill’s lovely little treat holders look good enough to eat with the Noble Peacock foiled DSP.Visit Jill’s blog here.

Heather has used the gorgeous Magnolia Lane paper for her card. All it needs is a sentiment.Visit Heather’s blog here.

Gez has combined the Mosaic Mood stamp bundle and coordinating papers to create her layered card.Visit Gez’s blog here.

I hope you enjoyed these projects. The supplies used are listed and linked to the online store below.I would love to be your demonstrator.

Thanks for stopping by today and happy Stampin’!

Verity xx

Product List

Birthday Sails

Hello Everyone,

I hope you has a great weekend!

Today’s project features the Lilypad Lake stamp set with a sentiment from Well Said.

I wanted a soft colour palette so I stamped the outline of the boats with Basic Grey ink. The sails were coloured with Stampin Blends markers.

Pool Party ink was used to stamp the ‘water’ on to a card layer.

The sentiment was stamped and die cut and adhered to the card first, followed by the boats, using dimensionals.

I hope you enjoyed this project. The supplies used are listed and linked to the online store below.I would love to be your demonstrator.

Why not join my team and enjoy discounted prices on your favourite Stampin’ supplies!

Thanks for stopping by today and happy Stampin’!

Verity xx

Product List

Lakeside Dies

[146351]

£25.00

Hugs & Prayers

Hello Everyone,

Sometimes we have to send cards for sad occasions too.

This sympathy card was made for lovely friend with the Inspiring Iris stamp set.

The outline image was stamped with black ink leaving room to add the sentiment.

Highland Heather and Pear Pizzazz inks were used to add the coloured portions.

The sentiment was cut with the Timeless Label Punch and adhered with dimensionals.

I hope you enjoyed this project. The supplies used are listed and linked to the online store below.

I would love to be your demonstrator.

Why not join my team and enjoy discounted prices on your favourite Stampin’ supplies!

Thanks for stopping by today and happy Stampin’!

Verity xx

Product List

Project Share Project

Hello Everyone,

Welcome to this week’s Project Share. As always my friends have created some lovely work. Please use the links to visit their blogs and read more about their projects.

Jill has used a card sketch to inspire this lovely card.

Visit Jill’s blog here

Heather’s card is perfect to send to crafting friends!

Visit Heather’s blog here

Gez is thinking of animal lovers with this sympathy card.

Visit Gez’s blog here

I hope you enjoyed these projects. The supplies used are listed and linked to the online store below.

I would love to be your demonstrator.

Thanks for stopping by today and happy Stampin’!

Verity xx

Product List

Great Places

Hello Everyone,

There are so many ways to colour stamped images…. Today I am using watercolour pencils.

I prepped a card base by stamping the clouds images with Pool Party ink.

As I was watercolouring, the balloons were stamped on a separate piece of card stock with Stazon Ink.

Colour was applied to the images, concentrating on the lines. A blender pen smoothed out the lines and pulled the colour in to the rest of the image.

I used the coordinating punch to cut the balloons which were adhered with dimensionals.

I hope you enjoyed this project. The supplies used are listed and linked to the online store below.

I would love to be your demonstrator.

Why not join my team and enjoy discounted prices on your favourite Stampin’ supplies!

Thanks for stopping by today and happy Stampin’!

Verity xx

Product List

Blender Pens

[102845]

£11.25

In My Thoughts

Hello Everyone,

I really love the simplicity of this faceted heart. Last time I used it, I “coloured” the heart with the accompanying brushstroke image. This time I wanted to colour the image with my Stampin’ Blends.

I opted for a Pool Party colour theme, stamping the image with with Classic ink first.

I then coloured each section with my Markers, deciding where peaks and troughs would be.

I had to add some Wink of Stella for some extra bling.

The sentiment was added below the heart.

The panel was die cut with a Stitched Rectangle die. A larger rectangle was cut from Pool Party card stock.

The layers were finally adhered to a Whisper White card base.

I hope you enjoyed this project. The supplies used are listed and linked to the online store below.

I would love to be your demonstrator.

Why not join my team and enjoy discounted prices on your favourite Stampin’ supplies! During July get even more value from your Starter Kit!

Thanks for stopping by today and happy Stampin’!

Verity xx

Product List

Inspire.Create #047

Hello Everyone,

Welcome to my blog. Every other Monday I share my project that I have used as my entry for the Inspire.Create challenge.

This time it’s a sketch challenge.

The design team have made some wonderful samples as inspiration. You can see them here.

And this is my card…

The sketch reminded me of the sun so I cut a circle from some scrap paper and used it as a stencil.

I added Daffodil Delight ink first, working from the edge of the stencil to the centre. I then moved to Pumpkin Pie and then a touch of Poppy Parade around the edges.

To continue the tropical sunset feel, I chose to add the palm trees from the Friend Like You stamp set using Memento Ink. The sentiment in the set fitted in nicely too.

I hope you enjoyed this project. The supplies used are listed and linked to the online store below.

I would love to be your demonstrator.

Thanks for stopping by today and happy Stampin’!

Verity xx

Product List

Keeping it Simple

Hello Everyone,

There was a little challenge set in our team Facebook group this weekend…. Keep it simple – one stamp set, one colour and one embellishment.

I picked out;

  • Tropical Chic,
  • Rich Razzleberry ink,
  • Polka Dot Tulle ribbon.

And this is what I came up with… Super easy to achieve whether you are a beginner or more experienced stamper.

I stamped the leaves first overlapping the edges of the card layer.

The Tulle ribbon was added toward the bottom and tied in a bow. The layer was added to a white card base.

The sentiment was stamped next on to a strip of card stock and adhered with dimensionals.

I hope you enjoyed this project. The supplies used are listed and linked to the online store below.

I would love to be your demonstrator.

Why not join my team and enjoy discounted prices on your favourite Stampin’ supplies!

Thanks for stopping by today and happy Stampin’!

Verity xx

Product List

Greatest Gift

Hello Everyone,

Today’s card features the To a Wild Rose bundle.

This stamp set and coordinating dies are perfect for making beautiful cards quickly and easily.

All the elements were stamped on to Whisper White card stock.

The outline images were stamped with full strength Ink. The fill in used second generation ink for a slightly lighter shade.

I chose the darker Gorgeous Grape ink for the sentiment.

The images were all die cut and adhered to he card with dimensionals.

I hope you enjoyed this project. The supplies used are listed and linked to the online store below.

I would love to be your demonstrator.

Why not join my team and enjoy discounted prices on your favourite Stampin’ supplies!

Thanks for stopping by today and happy Stampin’!

Verity xx

Product List

Birthday Bugs!

Hello Everyone,

I thought I would try something clean and Simple with fun Wiggle Worm stamp set for today’s project.

The bugs were stamped with Memento Ink so I could colour them with Stampin’ Blends.

I used the coordinating dies to cut the out the images.

On a Whisper White card base, I stamped the happy birthday greeting in Bermuda Bay Ink.

The insects were then adhered with mini dimensionals.

I hope you enjoyed this project. The supplies used are listed and linked to the online store below.

I would love to be your demonstrator.

Why not join my team and enjoy discounted prices on your favourite Stampin’ supplies!

Thanks for stopping by today and happy Stampin’!

Verity xx

Product List