Inspire.Create #024

Good Morning,

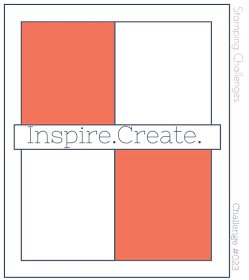
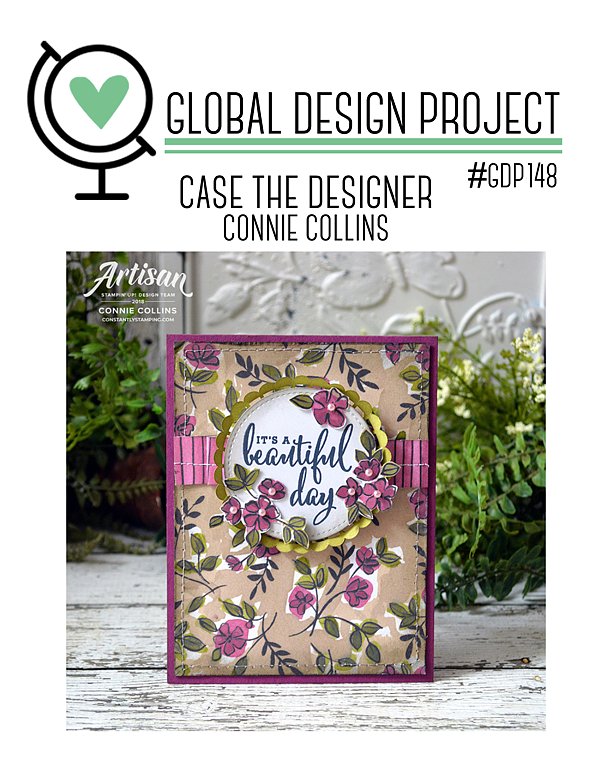
I was spoiled for choice when it came to designing this card for this week’s Inspire.Create challenge.

The design team have made some fabulous pretty cards that you can on the Inspire.Create blog here!

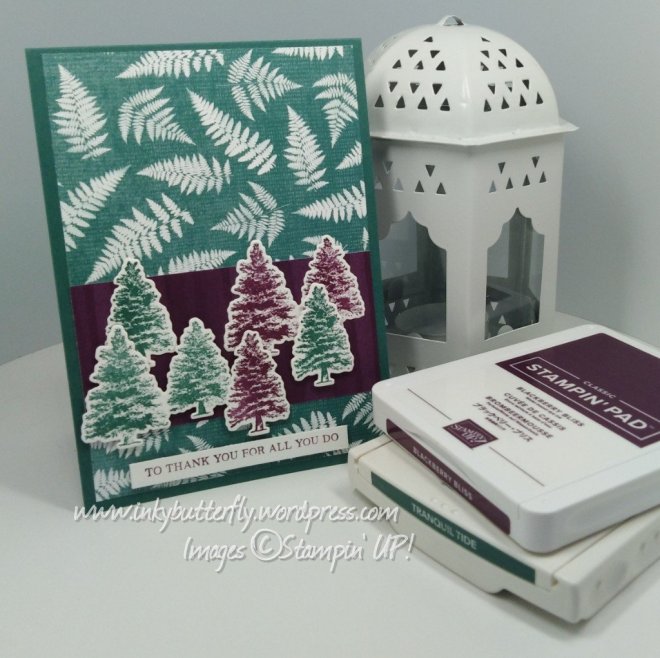
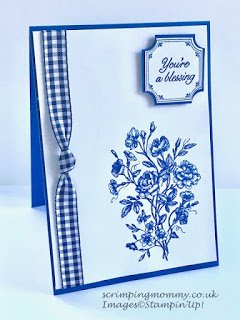
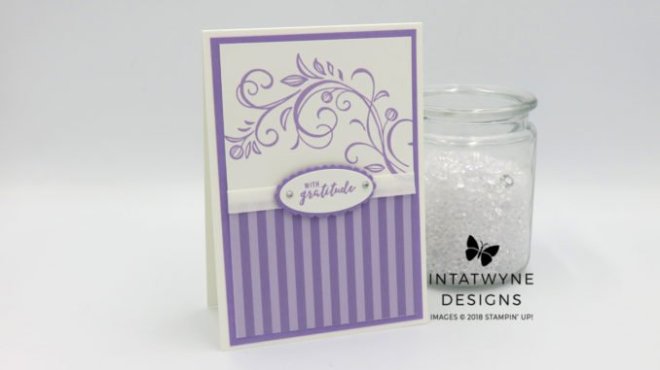
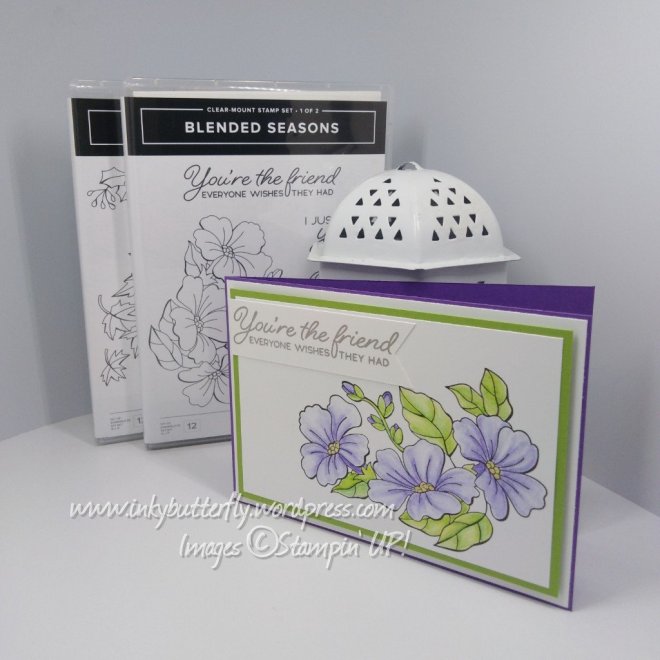
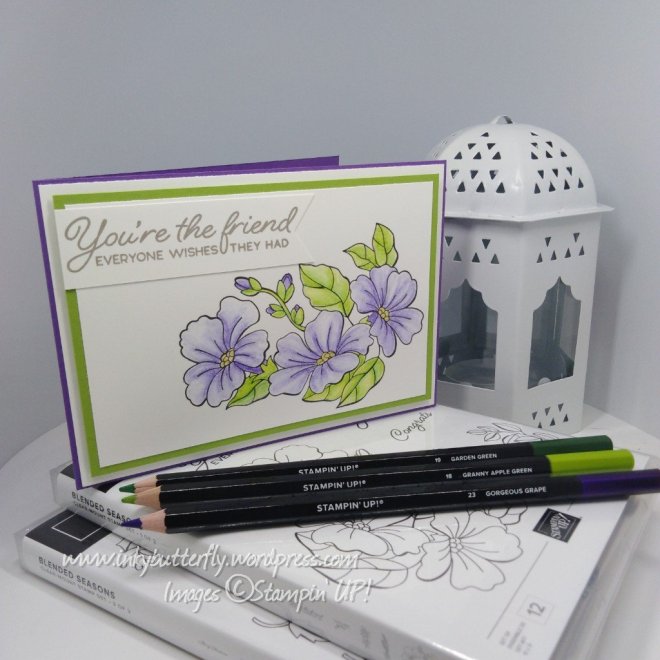
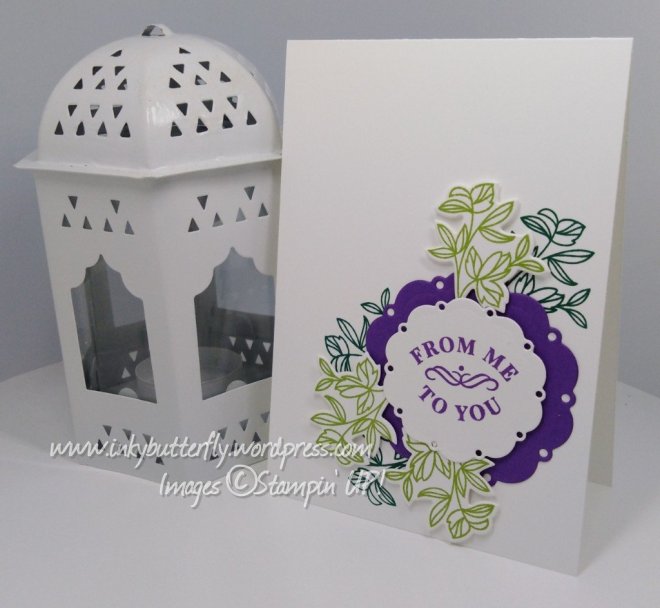
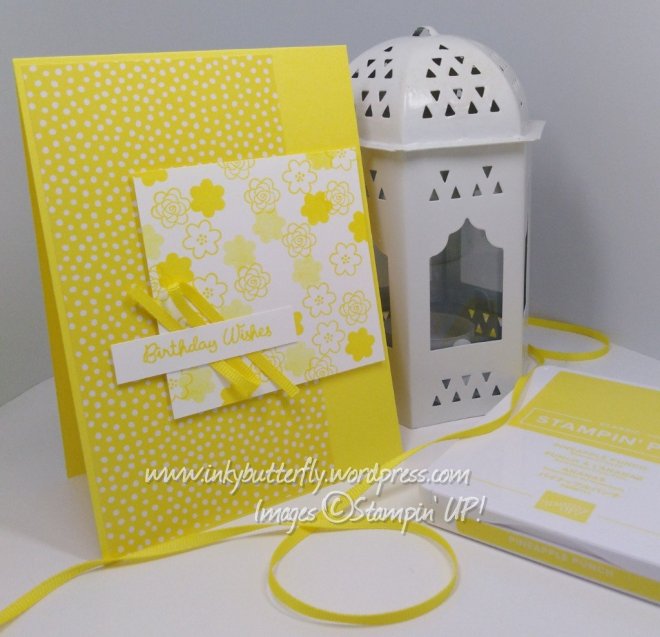
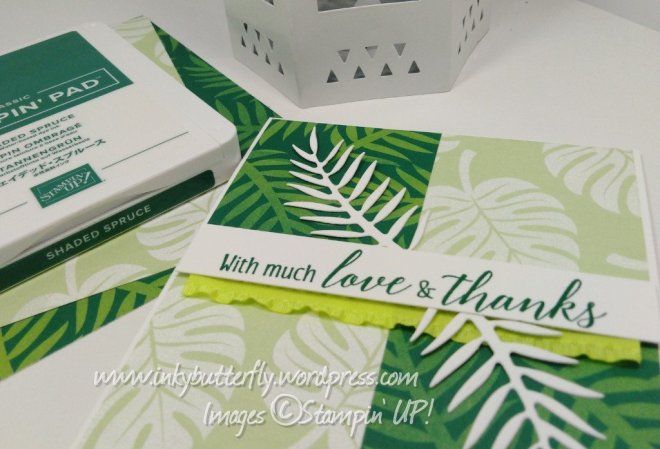
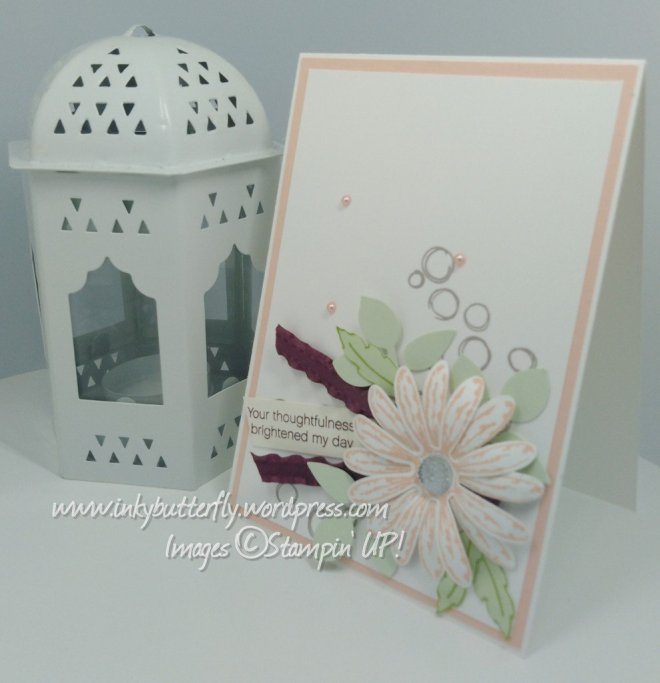
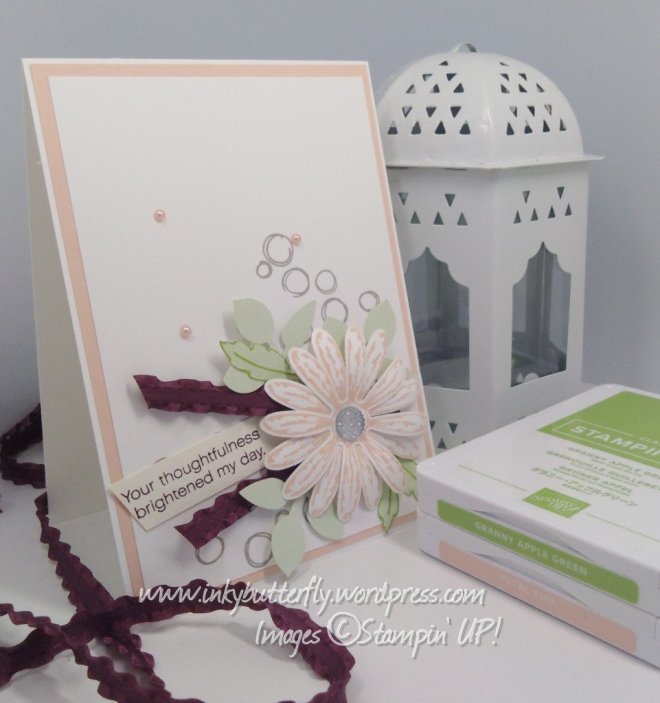
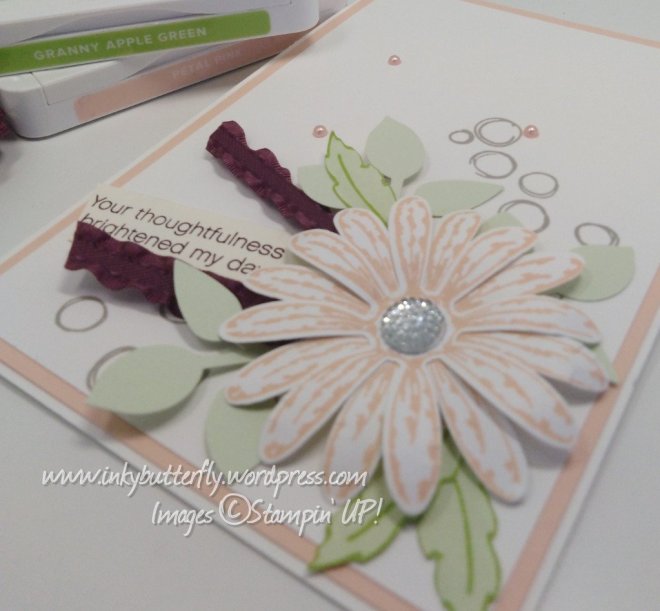
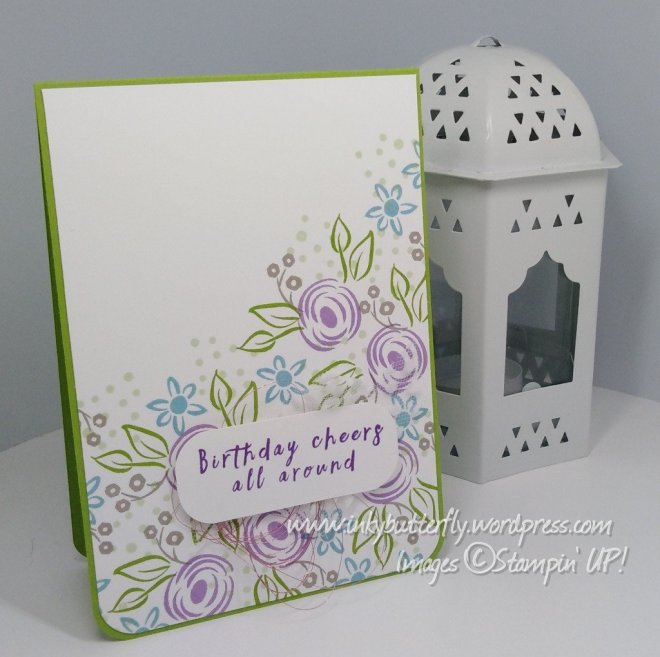
I plumped for the Perennial Birthday stamp set. At first, I thought I would use pink ink, but finally settled on purple and blue.

I began by Stamping the florals on to a white card layer, (4 by 5-3/4 inches).

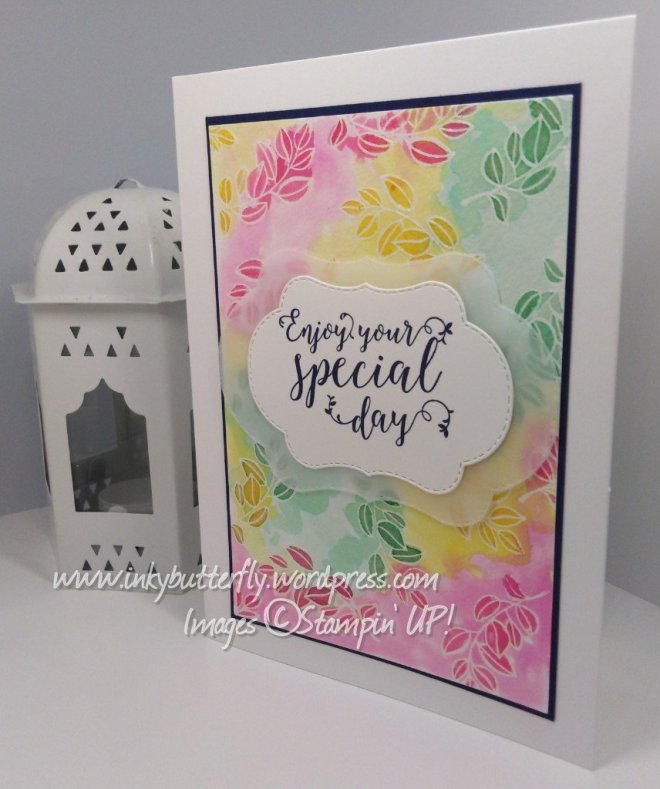
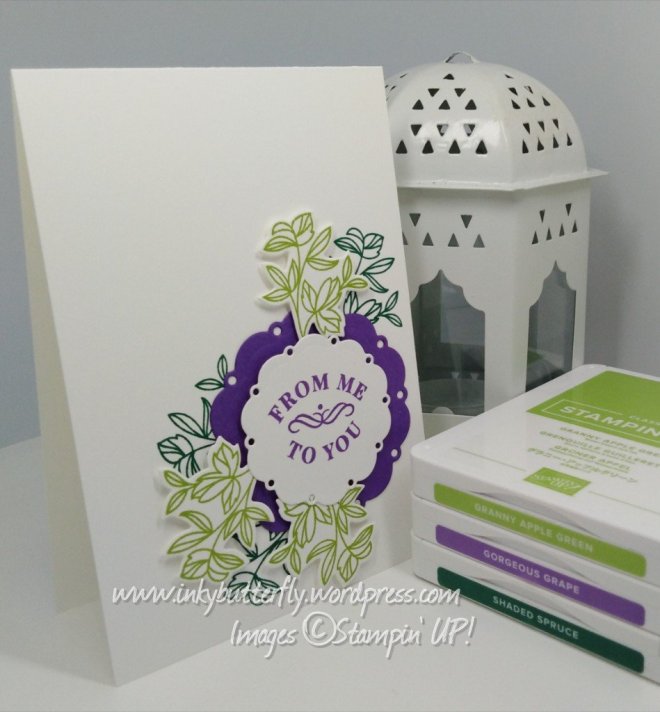
Highland Heather, Granny Apple Green, Gray Granite and Balmy Blue ink built the background. Some speckles of Soft Sea Foam filled in the white spaces and added some texture.

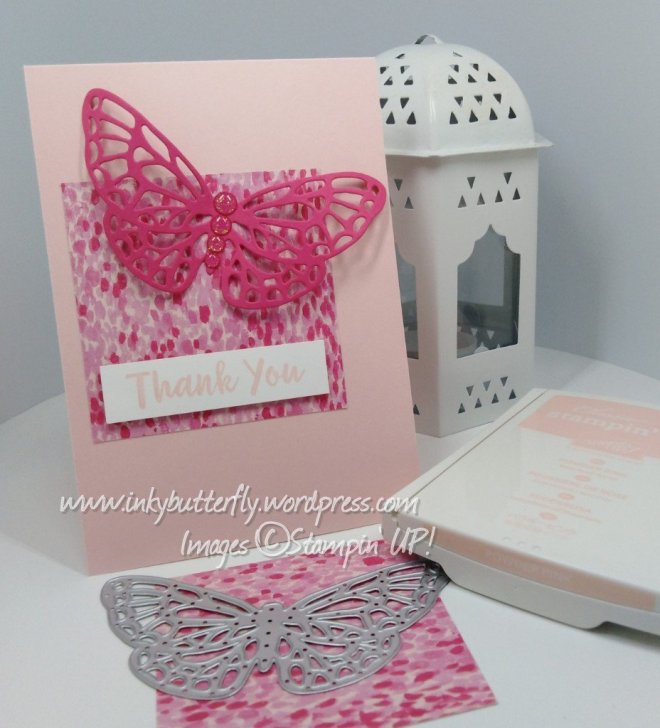
The bottom corners were rounded before adhering to a Granny Apple Green card base.

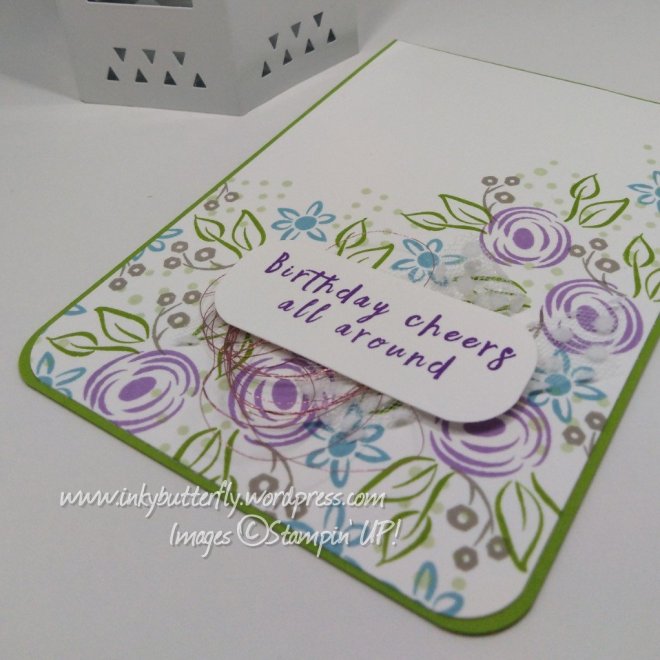
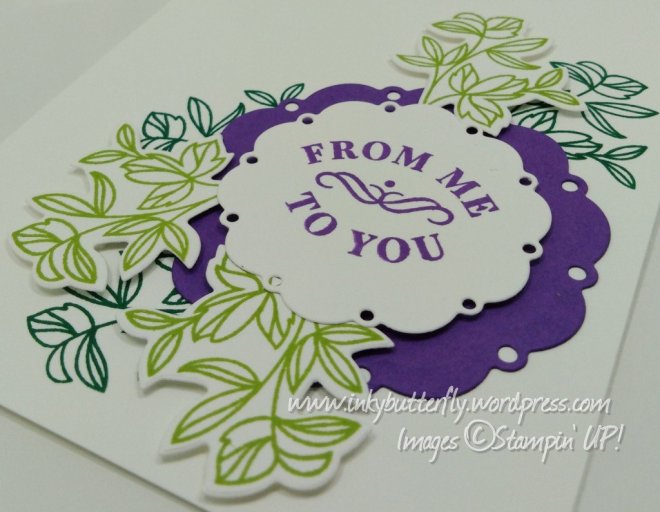
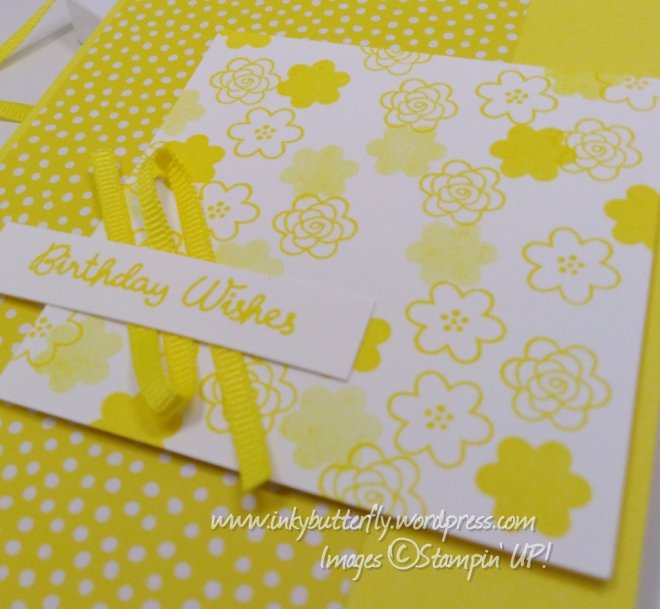
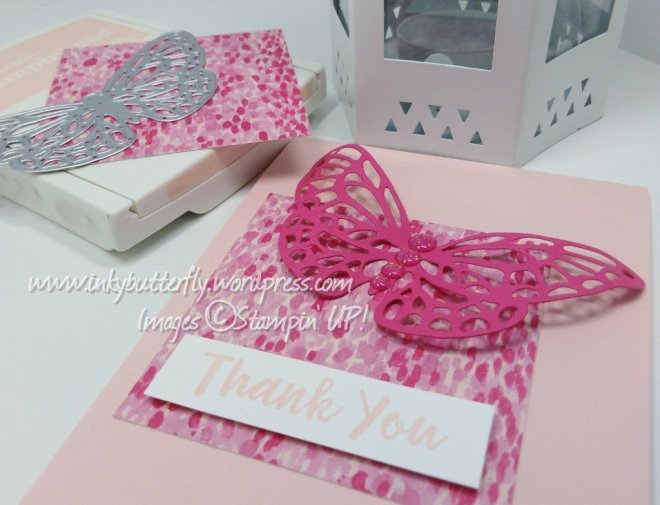
White Polka Dot Tulle ribbon and Rose metallic thread were looped and secured on to the card. The sentiment was added over the top with dimensionals.

I hope you enjoyed this project. The supplies used are listed below.

Thanks for stopping by today and happy Stampin’!

Verity xx

Product List

For All You Do

Good Morning Everybody,

I have revisited one of my favourite bundles in the Stampin’ Up! Annual catalogue today… The stunning Rooted in Nature and Nature’s Poem Designer Series Paper.

The card base was prepared using Tranquil Tide card stock. I picked out a coordinating patterned paper from the Nature’s Poem collection and adhered that to the front.

I love the combination of Tranquil Tide and Blackberry Bliss, so I added a 2 inch strip across the card towards the bottom.

Coordinating inks were used to stamp the trees and these were Die cut. These were then arranged on the card and secured with snail and dimensionals.

The sentiment was stamped with Blackberry Bliss ink and added to the bottom of the card.

I hope you enjoyed this project. The supplies used are listed and linked to the online store below.

Thanks for stopping by today and happy Stampin’!

Verity xx

Product List

Falling Leaves

Hello again Everyone,

I am just loving the Blended Seasons bundle… Make sure you order quickly, it is only available during August and while stocks last!

I started by Die cutting two of the Stitched shapes from the Framelits to make a frame.

The centre portion was stamped with a sentiment and leaves from the stamp set.

The card base was also stamped with leaves before adding the Die cuts. The outer frame was popped up using mini dimensionals.

Additional leaves were Die cut from Lemon Lime Twist and Tranquil Tide card stock.

I hope you enjoyed this project. The supplies used are listed and linked to the online store below.

I would love to be your demonstrator.

Don’t forget the any purchases over £45 will qualify for a voucher to spend in September… Just in time for the seasonal catalogue launch!

If you can’t wait to see the new seasonal catalogue why not become a demonstrator? There’s no pressure to sell, get a discount on future purchases and enjoy bei g part of a larger crafting community.

Find out more about joining my team here!

Thanks for stopping by today and happy Stampin’!

Verity xx

Autumnal Thank You #FMS349

Hi Everyone,

Welcome back to my usual Friday post when I create a project using a sketch from the Freshly Made Sketches challenge.

This one leaves plenty of room for creativity…. The design team have made some great inspirational projects. You can them all on the FMS blog here!

I couldn’t resist getting out the Blended Seasons stamp set once again for this challenge.

I started by using post it notes to section off the portion at the bottom. The section was coloured with Daffodil Delight ink and a sponge dauber. The leaves from the stamp set were then added using Stazon black ink.

I then coloured the leaves with Crushed Curry and Cajun Craze watercolour Pencils. A blender pen was used to smooth out the lines.

Stazon black ink was then used to add the sentiment across the top.

The panel was adhered to a Pumpkin Pie card base.

I hope you enjoyed this project. The supplies used are listed below.

Thanks for stopping by today and happy Stampin’!

Verity xx

Product List

Blender Pens

[102845]

£10.75

Project Share Project

Hello Everyone,

Welcome to this week’s Project Share. This week the ladies have designed some lovely monochromatic cards.

It just goes to show what can be achieved with minimal supplies. I have enjoyed using this technique too.

Amanda has used shades of blue with the Very Vintage stamp set for this beautifully simply and elegant card.

See more about how the card was made on Amanda’s blog here

Angelina has treated her customers to this wonderful card design. This demonstrates the exquisite coordination of Stampin’ Up! Designer Series Papers and ink pads.

See more cards using a number of other colour combinations here

Heidi has used one of my favourite sets of Stampin’ Up! 2018 Annual Catalogue. The combination of greens makes the dream catcher really pop from the background.

See more from Heidi here

I hope you have enjoyed all these projects.

Thanks for stopping by today and happy Stampin’!

Verity xx

Product List

Sssh! Merry Christmas #GDP150

Hi Everyone,

I missed out on taking part in last week’s colour challenge as I was away on holiday…. I did have craft withdrawal though!

So I am pleased to be bringing you another Global Design Project entry.

The team have a sketch challenge for us this time. You can see all of their wonderful ideas here!

So I gone (ssshh!) Christmas, and featured the fabulous Blended Seasons stamp set and Under the Mistletoe Designer Series Paper.

I prepared a card base using Shaded Spruce card stock. This is nota colour featured in the paper but thought it provided some extra colour tones.

Three strips of paper were cut to 4 inches by 1 inch and layered on to Old Olive card stock. Starting with the outer most pieces these were secured with snail adhesive.

Tranquil Tide mini Ruffled Ribbon was added over the top of the panels. An additional 1/2 inch strip of paper, (the reverse design), was added with dimensionals.

The Merry Christmas sentiment was stamped in black ink and also added with dimensionals.

The little Christmas bell was stamped and then coloured with Daffodil Delight and Poppy Parade Stampin’ Blends markers. This was die cut with the coordinating Framelits.

Additional sprigs were cut from Old Olive card stock and added with Multipurpose glue.

I hope you enjoyed this project. The supplies used are listed below.

Thanks for stopping by today and happy Stampin’!

Verity xx

Product List

Gorgeous Blended Seasons

Good Morning Everybody,

Today’s project is a simple presentation of the Blended Seasons stamp set. I have also used the new collection of watercolour Pencils.

These beautiful products are only available during August.

Even better, purchasing this bundle will also qualify for a Bonus Day voucher to spend during September.

To make the card, the floral image was stamped with Stazon Ink and allowed to dry.

Gorgeous Grape, Granny Apple Green and Garden Green watercolour Pencils were used to shade the image. A blender pen was used to smooth out the Colouring.

The panel was adhered to a Granny Apple Green layer, which in turn was added to a Gorgeous Grape card base with dimensionals.

Gray Granite ink was used to stamp the lovely sentiment.

I hope you enjoyed this project.

The supplies used are listed and linked to the online store below…. I would love to be your demonstrator.

Thanks for stopping by today and happy Stampin’!

Verity xx

Product List

Just Add Ink #420

Good Morning Everybody,

How about this for inspiration this week? Such a bright palette of colour.

The design team have made some great inspirational projects. You can see them here

For me the colours that show the most are pink-red, green and yellow. The botanical aspect is carried over in to my design with the use of leaves.

I opted for an Emboss resist watercolour card.

The leaves from the Blended Season stamp set were stamped with versamark ink on to watercolour paper. Clear embossing powder was added and this was heat set.

Lovely Lipstick, Pineapple Punch and Call Me Clover ink was pressed on to a silicon sheet and an aqua painter was used to colour over the card stock.

Once this was completely dry, extra ink was applied to the leaves. This brought out the detail of the stamped images.

The piece was adhered to some Night of Navy card stock and mounted on to a white card base.

A sentiment from Stitched All Around was stamped with Night of Navy ink and die cut with Blended Season coordinating Framelits. This was layered onto a larger Die cut from vellum and then adhered to the card base with dimensionals.

I hope you enjoyed this project. The supplies used are listed below.

Thanks for stopping by today and happy Stampin’!

Verity xx

Product List

Aqua Painters

[103954]

£15.50

Quick Cards featuring Twinkle Twinkle DSP (part 2)

Hi there,

On Friday I shared some quick cards using the Twinkle Twinkle DSP. Today’s card use the same technique with a slightly different layout.

I have picked three sheetsof Twinkle Twinkle DSP with a predominant base colour, (Whisper White, Pool Party and Night of Navy).

Each of the coordinating card stock colours were used to make a standard card base. The front was then embossed with the Subtle Embossing folder.

DSP was cut to 3 inches by 2 inches. A piece of white card was cut to make a layer behind the paper. The panel was then adhered towards the top right corner of the card base.

I wanted a bold sentiment so I picked out “thanks” from the Friendly Expressions Stamp set. This was stamped with coordinating ink, trimmed to size and added to the card.

I hope you enjoyed this project. The supplies used are listed and linked to the online store below.

Also check out the Blended Season bundle available during August, while stocks last.

Thanks for stopping by today and happy Stampin’!

Verity xx

Product List

From Me To You

Good Morning,

I am sharing another simple card today featuring the Time for Tea bundle.

A card base was made from Whisper White card stock.

On a separate piece of card stock, the sentiment was stamped with Gorgeous Grape ink and the leaves in Granny Apple Green.

The Framelits were used to cut these out along with the larger doily from a scrap of Gorgeous Grape card stock.

Shaded Spruce ink was used to stamp three sets of leaves onto the card base. The purple doily was adhered over the top.

The smaller doily with the sentiment was added using dimensionals.

The die cut leaves were tucked in between the layers and secured with mini dimensionals.

I hope you enjoyed this project. The supplies used are listed and linked to the online store below.

Thanks for stopping by today and happy Stampin’!

Verity xx

Product List

Quick Cards featuring Twinkle Twinkle DSP (part 1)

Good Morning!

Today I am using Designer Series Paper and an bossing folder to create simple cards.

I have picked three sheetsof Twinkle Twinkle DSP with a predominant base colour, (Soft Sea Foam, Petal Pink and Gray Granite).

Each of the coordinating card stock colours were used to make a standard card base. The front was then embossed with the Maps Embossing folder.

DSP was cut to 3 inches by 2 inches. A piece of white card was cut to make a layer behind the paper. The panel was then adhered in the bottom right corner of the card base.

I wanted a bold sentiment for the front. The “congratulations” from Friendly Expressions was perfect. This was stamped with coordinating ink, trimmed to size and added to the card.

I hope you enjoyed this project. The supplies used are listed and linked to the online store below.

Also check out the Blended Season bundle available during August, while stocks last.

Making a £45 purchase during August earns a £4.50 voucher to spend in September, just in time for the seasonal catalogue release!

Thanks for stopping by today and happy Stampin’!

Verity xx

Product List

Project Share Project

Hi Everyone,

Welcome to a other Project Share.

This week there have been some great projects from the ladies. Please click the links to see how they were made.

Hannah’s card shows a great colour combination of Pineapple Punch and Basic Gray. I really love the quirky layout too.

See more on this project on Hannah’s blog here

I thought this was fabulous from Sally. Fully customisable pencil tidies… Genius! Great idea to keep the kids amused during the holidays too.

See more on Sally’s blog here

And Jill is showing how one stamp set can be used to make cards in a number of different colour ways. This is a great example of getting the best value from products when crafting on a budget.

See more on Jill’s blog here

I hope you enjoyed these projects.

Thanks for stopping by today and happy Stampin’!

Verity xx

Product List

Pineapple Punch Blooms

Good Morning!

Today’s card really packs a punch… Lol!

For the card base, a 3 inch piece of Pineapple Punch Designer Series Paper was adhered to the left hand side of a card base.

A 3 inch square of Whisper White card stock was stamped using the small flowers from the Varied Vases set. This was adhered to the right hand side with dimensionals.

A sentiment from the same set was stamped on to a strip of white card stock. Some Grosgrain ribbon was looped behind the sentiment before adding it to the card.

I hope you enjoyed this project. The supplies used are listed and linked to the online store below.

Thanks for stopping by today and happy Stampin’!

Verity xx

Product List

For George

Hello Everyone,

Last week we said goodbye to one of our colleagues who was moving on to pursue her dream career.

As she loves butterflies, I knew exactly which set to use.

The large butterfly from the Beautiful Day was stamped with Stazon ink and allowed to dry completely.

In the meantime, the base was prepared by layering Whisper White card stock on to Gray Granite card stock. Some Bermuda Bay ink was used to add some texture to the background.

The sentiment was stamped with Melon Mambo ink and layered on to Smoky Slate card stock. The corners were rounded with the Detailed Trio punch.

The butterfly was coloured using watercolour pencils and blender pens. A bone folder was used to add shape the wings which were secured with dimensionals.

I hope you enjoyed this project.

The supplies used are listed and linked to the online store below.

Today is also the last day to enjoy the Designer Series Paper sale and take advantage of the amazing joining offer.

Thanks for stopping by today and happy Stampin’!

Verity xx

Product List

Inspire.Create #023

Good Morning,

Welcome to another Inspire. Create challenge post. The team have a sketch challenge this time. All of their inspirational ideas can be seen here!

And this my creation featuring Tropical Escapes Designer Series Paper.

I started with a Whisper White card base.

Two pieces of paper were selected from the pack, I went with the complementary greens. A 2 inch strip was cut from each.

Each strip was cut down to 5-3/4 inches to fit the card base. Then again a 2-1/2 inches.

The pieces were then secured to the card base with snail adhesive.

A length of Lemon Lime Twist mini Ruffled ribbon was adhered along the join.

A sentiment from the coordinating stamp set was stamped on to a strip of white card stock using Shaded Spruce ink. This was added with dimensionals.

Some die cut leaves added some extra texture.

I hope you enjoyed this project. The supplies used are listed below.

Thanks for stopping by today and happy Stampin’!

Verity xx

Product List

Big Shot

[143263]

£102.00

Pink Impressions #FMS347

Hey Everyone,

Wow it is Friday again which means another sketch challenge. The design team have some created some beautiful projects as further inspiration. You can see them here!

This is my project.

I decided to substitute the circle for this lovely die cut butterfly from the Abstract Impressions bundle.

For the square element, I chose some designer series paper from the same suite. This then determined the colour scheme for the rest of the card.

I chose Powder Pink card stock for the base. The paper was cut to 3 inches square and adhered to the left of centre to the card.

The butterfly was cut from Melon Mambo card stock and adhered across the top corner of the square. Some Glitter Enamel Dots were added to the body of the butterfly.

The sentiment from the Abstract Impressions Stamp set was stamped with Powder Pink ink on to a small strip of white card stock. This was applied to the card with dimensionals.

I hope you enjoyed this project. The supplies used are listed below.

Thanks for stopping by today and happy Stampin’!

Verity xx

Product List

Keeping Me Together #GDP148

Good Morning g,

The Global Design Project team are casing Connie Collins this week.

See their creations here!

This is my project.

Animal Expedition design series paper was adhered to the card base. A 1 inch strip was then added over the top with dimensionals.

The sentiment from Love You To Pieces was stamped in Basic Grey ink and cut with a 2 inch punch.

This added to a Smoky Slate Starburst and then a 2-1/4 inch circle of Lemon Lime Twist.

A pearlised doily was adhered behind the topper.

Jigsaw pieces were die cut from white card stock to replace the flowers.

A few rhinestones finished the card.

I hope you enjoyed this project.

The supplies are listed below

Happy Stampin’!

Verity xx

Product List

Daisy Delight C.A.S.E. Card

Hi Everyone,

Today’s post is a little different. I have cased another member of the team, Carol Ann Pendleton. She had made a beautiful card with the Daisy Delight stamp set, I wanted to make my own version.

The overall layout had been kept the same.

To make the background, Gray Granite ink was used to stamp the bubbles from the Playful Backgrounds stamp set.

Petal Pink Ink was used to stamp the Daisy. I also used this colour for the layering.

The small leaves were stamped with Granny Apple Green and Soft Sea Foam and fussy cut. Additional leaves were made with the Leaf punch.

Fresh Fig Ruffled ribbon was adhered behind the Daisy.

A sentiment was stamped in Fresh Fig ink and tucked under the flower.

Finally, a clear faceted gem was adhered to the Daisy centre and Petal Pink pearls were added to the background.

I hope you enjoyed this project.

The supplies used are listed and linked to the store below.

Thanks for stopping by today and happy stampin’!

Verity x

Product List

Daisy Punch

[143713]

£17.00

Leaf Punch

[144667]

£15.00

Thinking of You – Just Add Ink #418

Good Morning Everybody!

Today I am sharing my entry for this week’s Just Add Ink challenge.

The design team have made some great inspirational projects. You can see them here!

I found this set of colours tricky… The Daffodil Delight is very bright compared to the other colours in the palette.

This is what I created.

I decided to use Daffodil Delight designer series paper for the background. A 4 inch square was cut diagonally, each portion being adhered into the corners of a Whisper White card base.

Soft Sea Foam ink was used to add some leaves to the gap.

I wanted a bold sentiment. I picked out “thinking of you” from the Rooted in Nature Stamp set. This was stamped with Daffodil Delight ink and cut with a 2-1/4 inch circle punch.

Three flowers from the Pop of Petals stamp set were stamped with Blushing Bride ink and cut with the coordinating punch.

I used the Leaf punch to cut three sets of leaves from Soft Sea Foam card stock.

I hope you enjoyed this project.

The supplies used are listed below.

Thanks for stopping by today and happy stampin’!

Verity x

Product List

Leaf Punch

[144667]

£15.00

Tropical Greatness

Hi there,

I just love the Tropical Chic bundle and matching papers.

Two pieces of patterned paper were cut diagonally to create the background.

The centre piece was made using a 2-1/4 inch circle of Shaded Spruce card stock, a Starburst punch from Soft Sea Foam and a 2 inch circle.

The sentiment was stamped with Shaded Spruce ink.

Some Powder Pink ruffled ribbon was looped between the layers.

Finally, some extra leaves were die cut from Shaded Spruce card stock.

I hope you enjoyed this project. The supplies used are listed and linked to the online store below.

Thanks for stopping by today and happy Stampin’!

Verity x

Product List