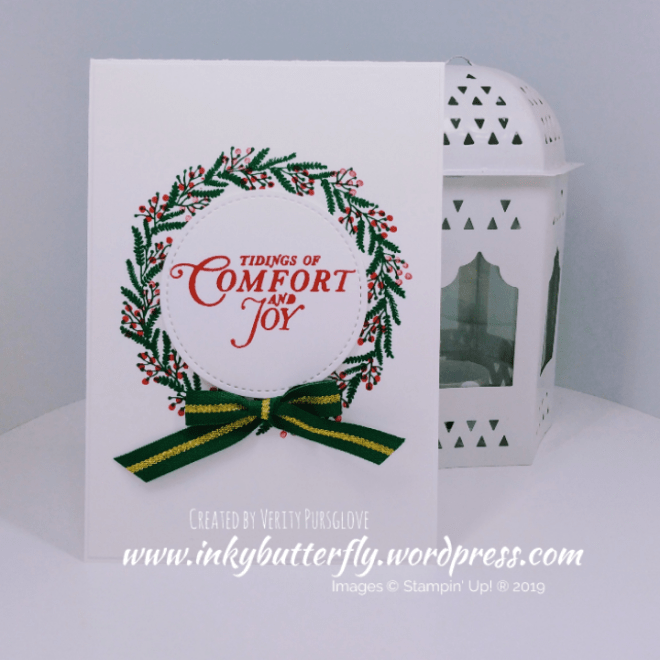
Label Me Bold

Hello Everyone,

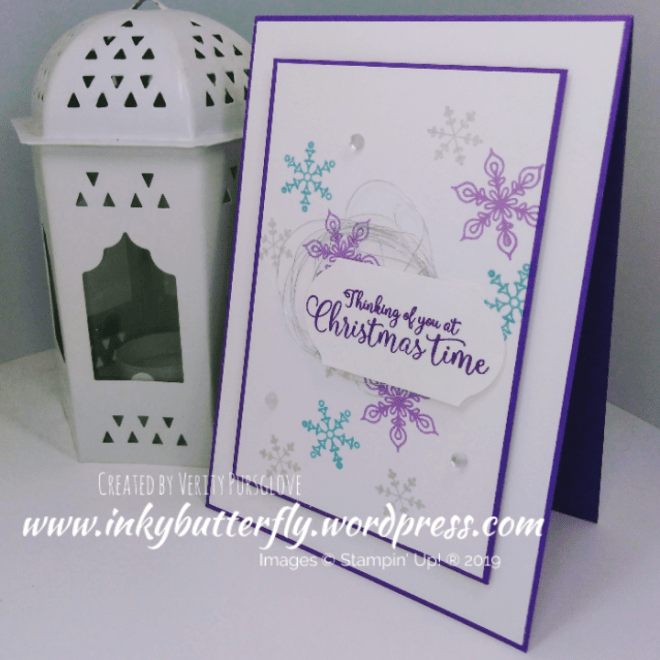
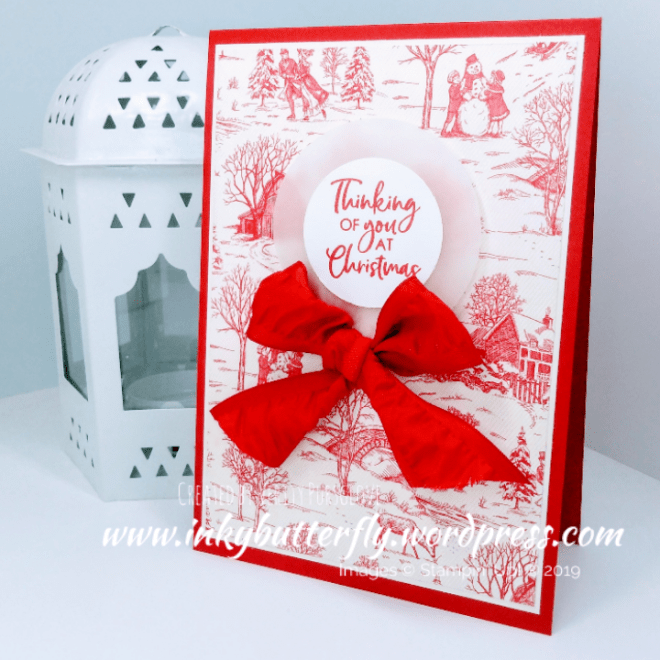
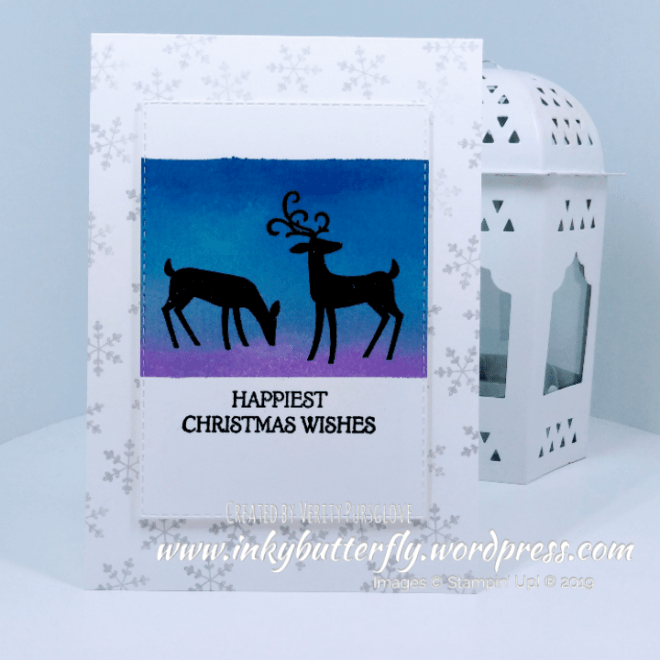
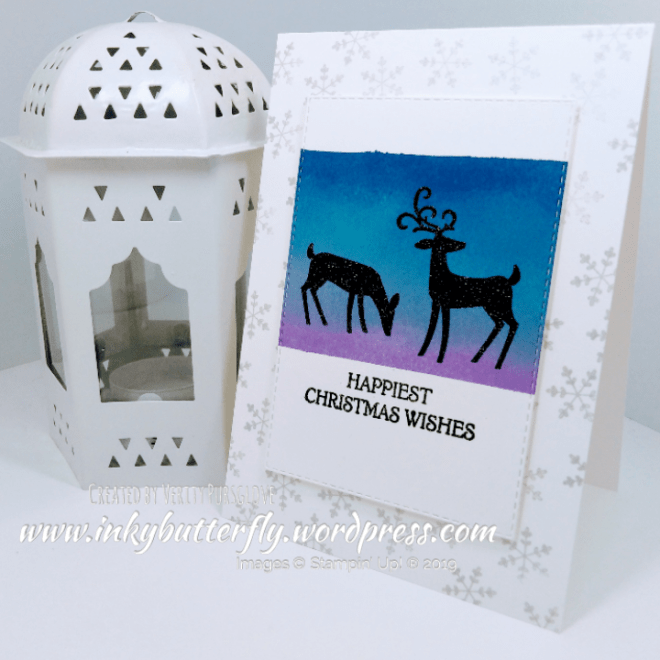
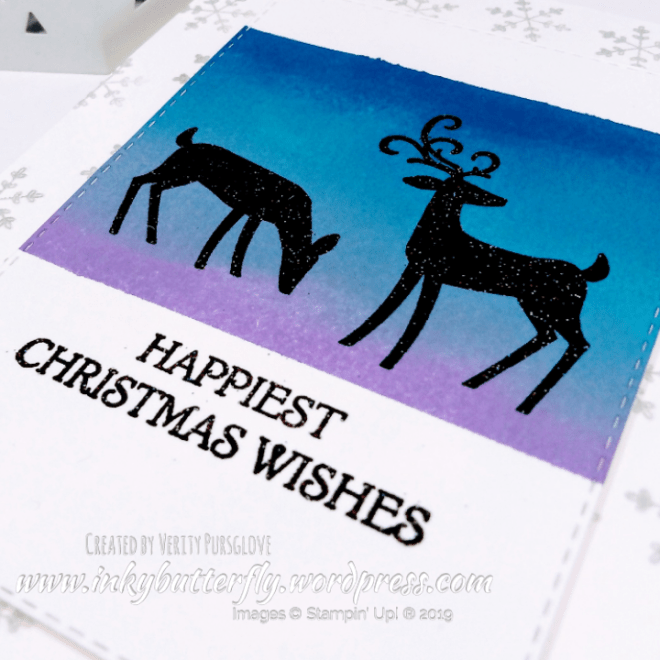
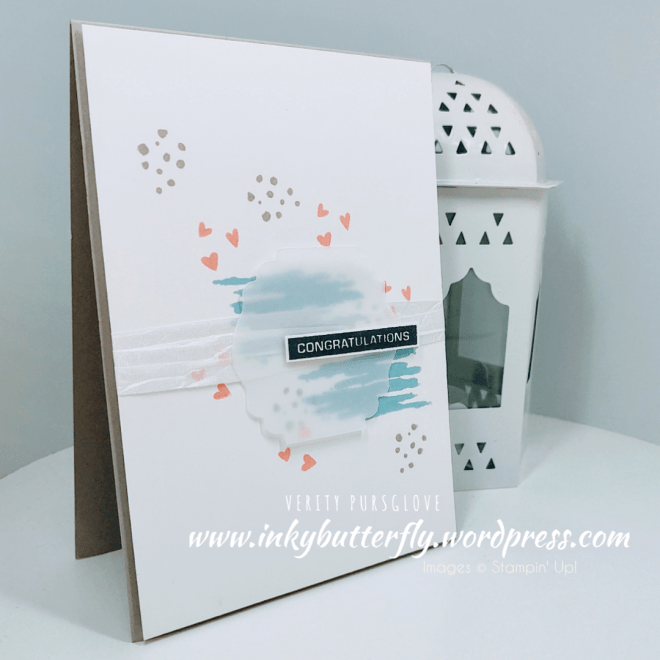
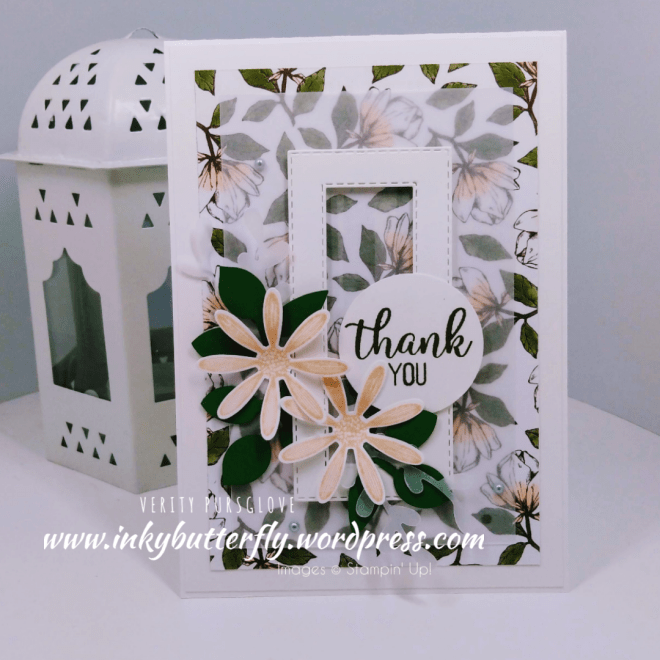
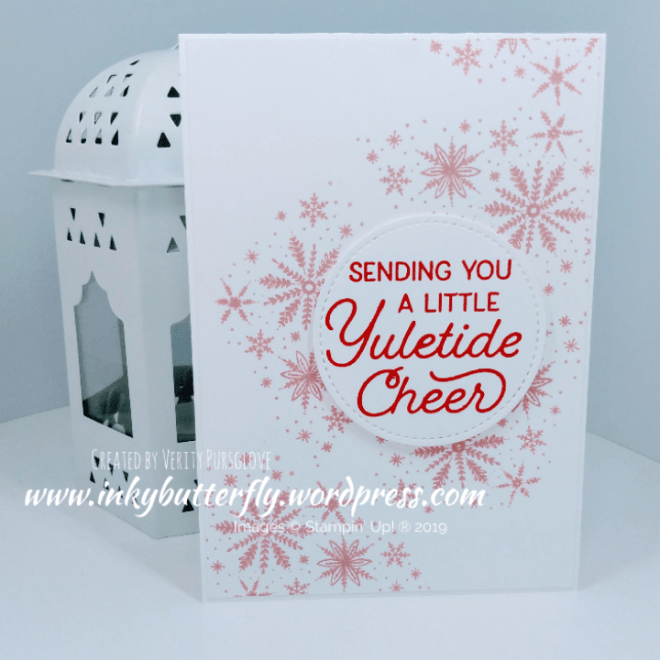
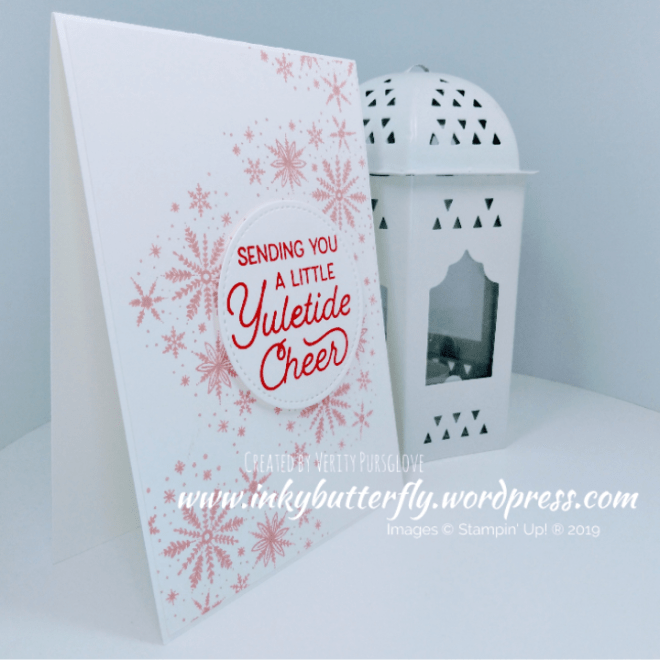
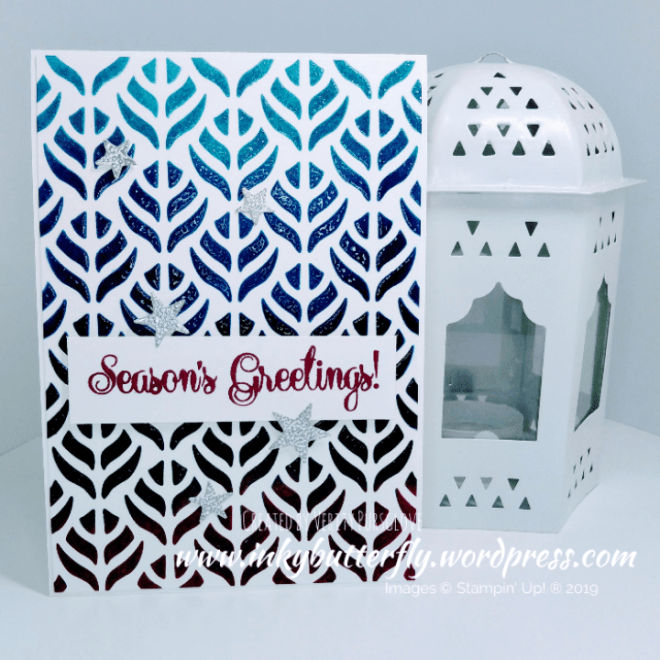
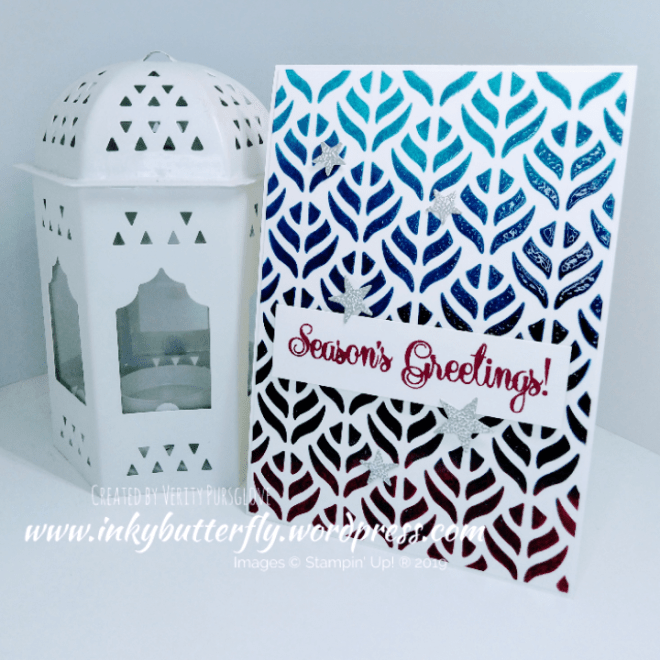
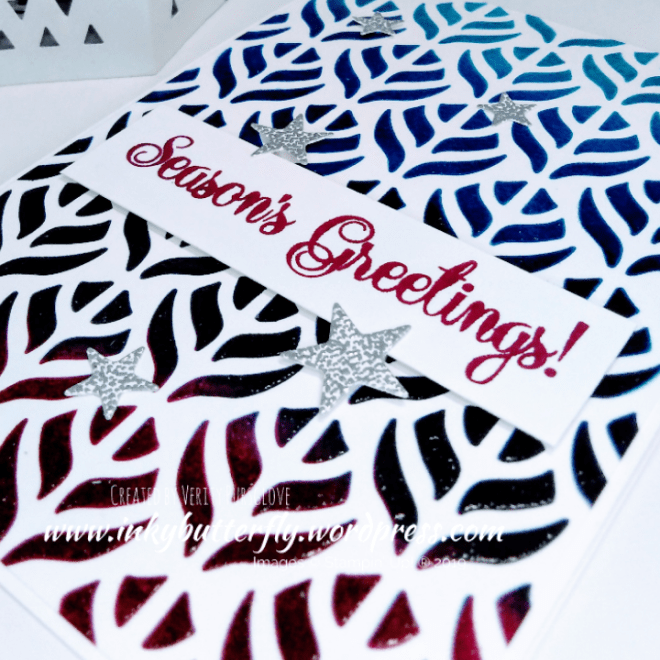
For my first project of 2020, I just had to use this stamp set, Label Me Bold. This is exactly the kind of set I love to work with.

I have 2 examples here, but of course you can use whatever colours you like!

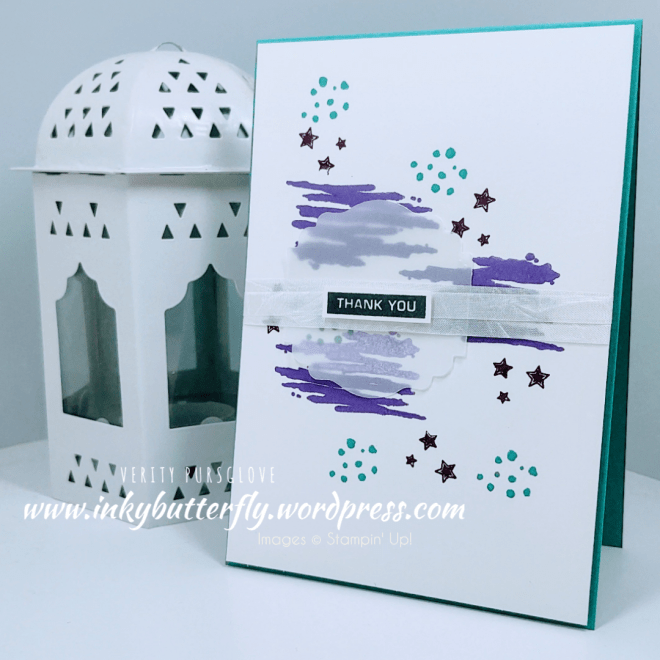
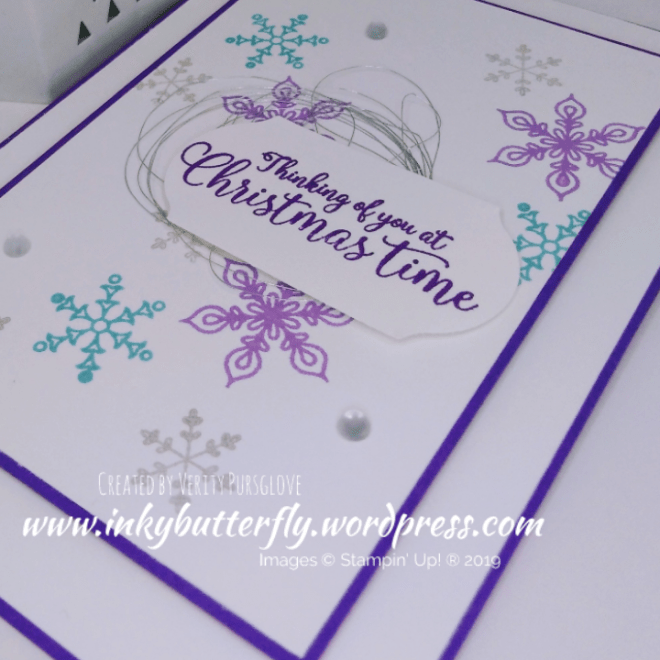
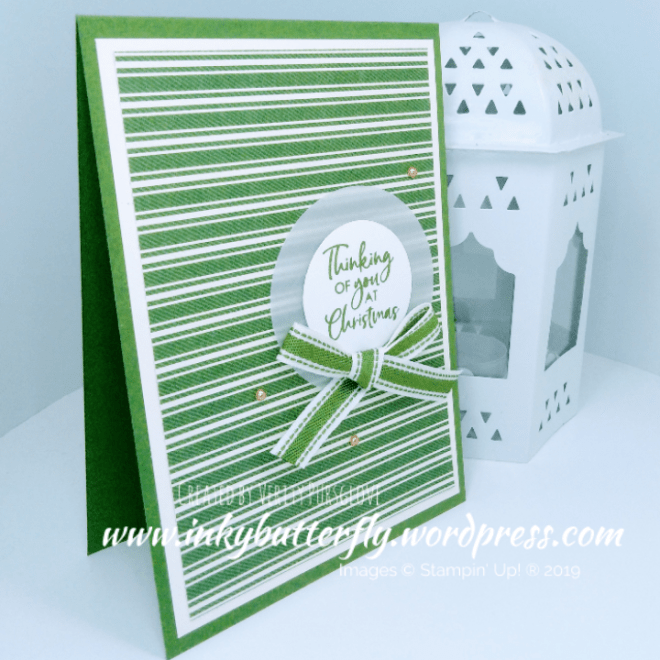
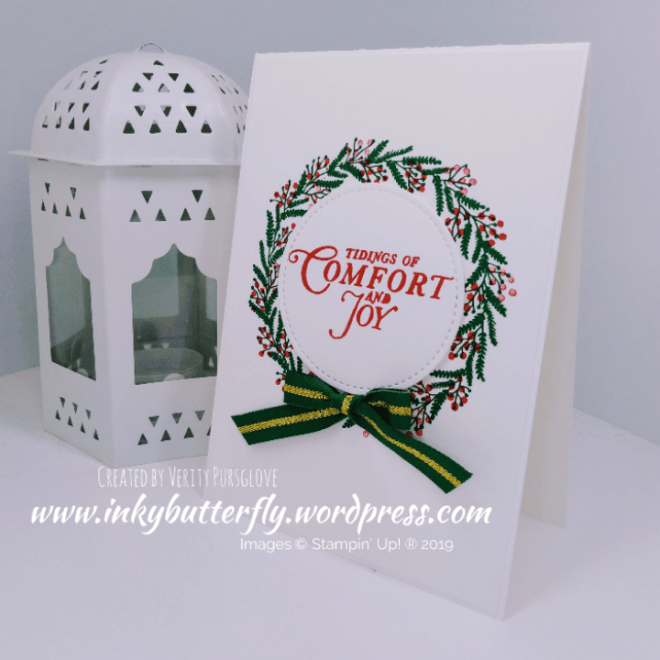
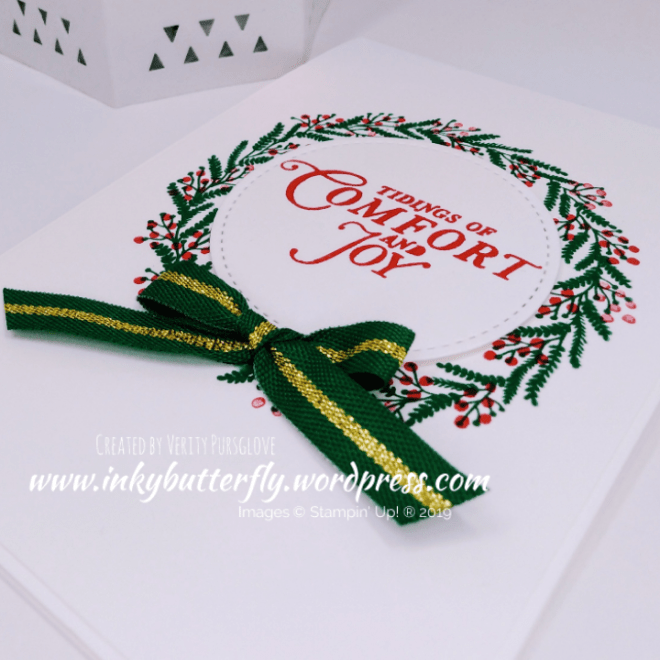
I picked out three colour combos and began building each background starting with the largest image.

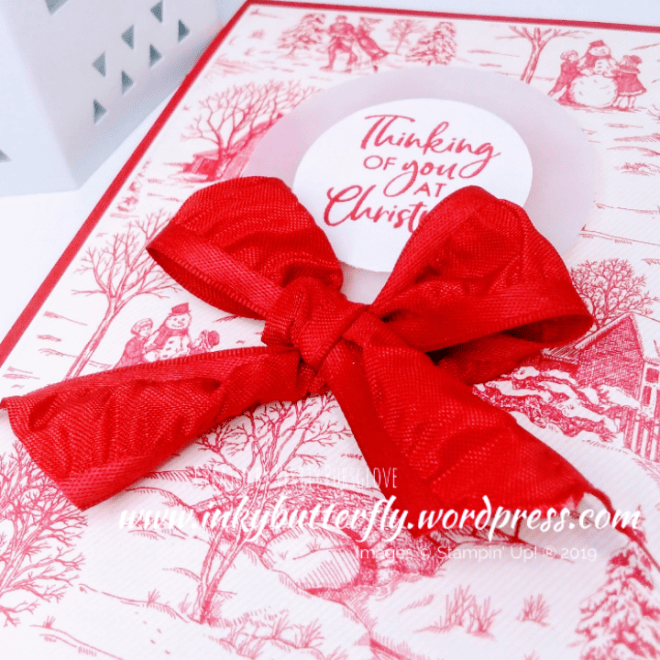
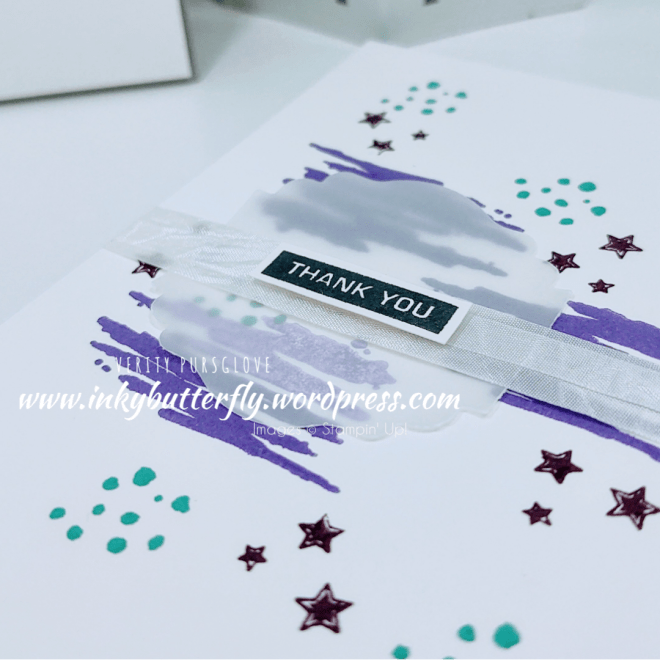
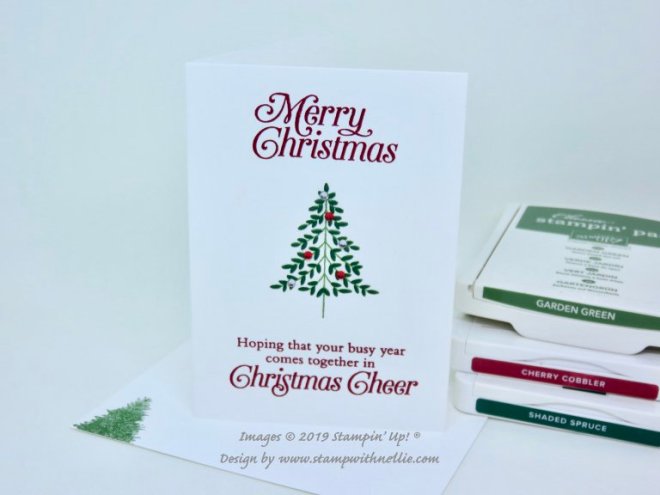
Each panel was wrapped with seam binding ribbon and adhered to a coordinating card base.

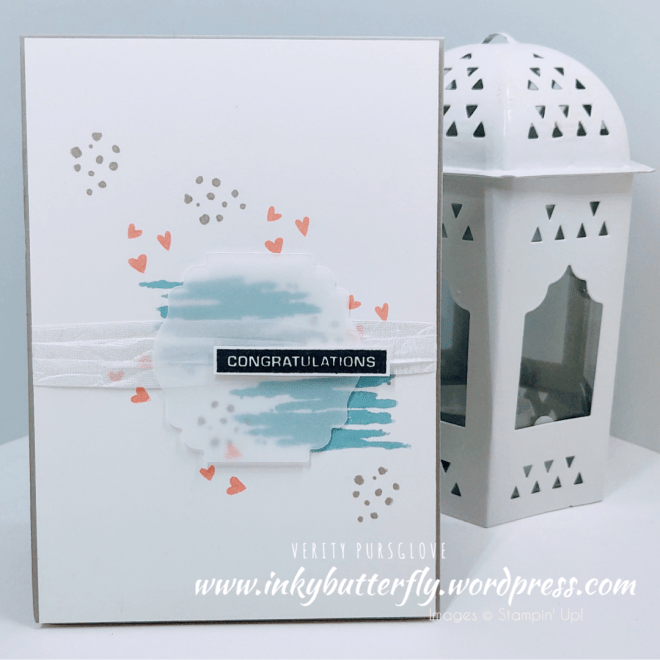
A vellum label was punched and secured over the ribbon.

A sentiment was stamped and fussy cut then added with mini dimensionals.

I hope you enjoyed this project. The supplies used are listed and linked to the online store below.

I would love to be your demonstrator.

Thanks for stopping by today and happy Stampin’!

Verity xx

Product List

Paper Trimmer

[152392]

£23.00

Project Share Project

Hello Everyone,

Welcome to this week’s Project Share. As always my friends have created some lovely work. Please use the links to visit their blogs and read more about their projects.

All the projects featured use Designer Series Paper as the main focus. Each can be recreated with the design that suits your particular needs.

Jill’s money envelope is a perfect gift for the person who has everything. The foiled DSP makes this look extra special. This is embellished with one of my favourite sets too.

Visit Jill’s blog here for more information.

Heather has made this cute Dino card. I just love all the bright colour combinations that can be used. The stamp set has some “rawr-some” sentiments too.

Visit Heather’s blog here

Gez’s little gift box looks beautiful made with this lovely DSP. The Daisy Topper really finishes off the box. I like the way she has curled the petals in different directions.

Visit Gez’s blog here

I hope you enjoyed these projects. The supplies used are listed and linked to the online store below.

I would love to be your demonstrator.

Thanks for stopping by today and happy Stampin’!

Verity xx

Product List

Tropical Dies

[146831]

£25.00

Simply Scored

[122334]

£28.00

Project Share Project

Hello Everyone,

Welcome to this week’s Project Share. As always my friends have created some lovely work. Please use the links to visit their blogs and read more about their projects.

Jill made this rainbow background for her card. It is great to see other ways of using stamps to create something completely different!

Visit Jill’s blog here

Heather has made this beautiful gift. Switch the designer series paper and cardstock to suit the recipient! Find all the measurements in her blog post!

Visit Heather’s blog here

Gez’s project is designed to hold some sweet treats. This would make a lovely thank you gift!

Visit Gez’s blog here

I hope you enjoyed these projects. The supplies used are listed and linked to the online store below.

I would love to be your demonstrator.

Thanks for stopping by today and happy Stampin’!

Verity xx

Product List

Project Share Project

Hello Everyone,

Welcome to this week’s Project Share. As always my friends have created some lovely work. Please use the links to visit their blogs and read more about their projects.

This week I am going through the archives and sharing projects made with products from the annual catalogue.

Jill has used a touch of watercolour on these pretty flowers from the Perennial Essence stamp set.

Visit Jill’s blog here

Heather has used the Daisy Lane stamp set combining clear and gold embossing for her card.

Visit Heather’s blog here

Gez is making the most of the beauty of Designer Series Paper to make her card. Less is so often more.

Visit Gez’s blog here

I hope you enjoyed these projects. The supplies used are listed and linked to the online store below.

I would love to be your demonstrator.

Thanks for stopping by today and happy Stampin’!

Verity xx

Product List

Project Share Project

Hello Everyone,

Welcome to this week’s Project Share. As always my friends have created some lovely work. Please use the links to visit their blogs and read more about their projects.

Jill’s card uses beautifully detailed dies as a focal point. The clean and simple design makes it suitable for any occasion.

Visit Jill’s blog here to see how this card was made.

Heather’s gift bag is perfect for gift giving all year round. The coordination of Stampin’ Up! products means perfectly matching handles and tag.

Visit Heather’s blog here to see more about this project.

Gez has made this cute treat holder. Wouldn’t these look wonderful on the Christmas table as favours or place settings.

Visit Gez’s blog here for details and her inspiration for the project.

I hope you enjoyed these projects. The supplies used are listed and linked to the online store below.

I would love to be your demonstrator.

Thanks for stopping by today and happy Stampin’!

Verity xx

Product List

Simply Scored

[122334]

£28.00

Magnolia Thank You

Hello Everyone,

Taking a break from Christmas with this thank you card.

I used Magnolia Lane designer series paper as the background layer. Vellum was added over the top to soften the colours a little.

A frame was cut with the Stitched Rectangle dies which was then adhered with dimensionals.

Old Olive ink was used to stamp the sentiment taken from the Modern Heart set. This was cut with a circle punch and added to the card.

Daisies were stamped with Petal Pink ink and cut with the coordinating punch. Leaves and sprigs were cut from Old Olive card stock and vellum.

The punched elements were adhered the card with multipurpose glue.

I hope you enjoyed this project. The supplies used are listed and linked to the online store below.

I would love to be your demonstrator.

Thanks for stopping by today and happy Stampin’!

Verity xx

Product List

Leaf Punch

[144667]

£15.00

Sprig Punch

[148012]

£17.00

Paper Trimmer

[152392]

£23.00

Joyful Christmas

Hello Everyone,

For today’s card I am using the gorgeous Beauty and Joy stamp set. This set will retire after Christmas, don’t miss adding this to your crafty stash!

The images were stamped on to Whisper White card stock. The stamps have a textured finish to give a realistic look.

The Cherry Cobbler sentiment frames the tree and the gold stars add some glitz.

I hope you enjoyed this project. The supplies used are listed and linked to the online store below.

I would love to be your demonstrator.

Thanks for stopping by today and happy Stampin’!

Verity xx

Product List

Paper Trimmer

[152392]

£23.00

Project Share Project

Hello Everyone,

Welcome to this week’s Project Share. As always my friends have created some lovely work. Please use the links to visit their blogs and read more about their projects.

Jill has created this beatifully simple card with this season’s favourite snowman. Just love the embossed background.

Visit Jill’s blog here to see how to make the card.

Heather has mad this sweet milk carton perfect for gift giving. Did you notice this paper in the Perfectly Plaid collection? So cute!

Visit Heather’s blog here for more.

Gez has also used the Perfectly Plaid papers, this time to make lids for this fantastic stack of boxes. What would you put in these?

Visit Gez’s blog here for more details.

I hope you enjoyed these projects. The supplies used are listed and linked to the online store below.

I would love to be your demonstrator.

Thanks for stopping by today and happy Stampin’!

Verity xx

Product List

Simply Scored

[122334]

£28.00

More Yuletide Cheer

Hello Everyone,

This card was made completely spontaneously using supplies I had with me whilst crafting with my team.

I wouldn’t normally use so many stamp sets on one project but look how lovely it is!

The card design is reasonably self explanatory, building the background with the images as shown in the photo. The gold snowflakes were a late addition but really help tie the layout together.

A Stitched circle die was used the cut the sentiment which adhered with dimensionals.

I hope you enjoyed this project. The supplies used are listed and linked to the online store below.

I would love to be your demonstrator.

Thanks for stopping by today and happy Stampin’!

Verity xx

Product List

Family, Friends & Happiness

Hello Everyone,

I haven’t used this image from the Frosted Foliage stamp set, so I created this simple card.

The outline image was stamped on to a card layer with Gray Granite ink and coloured with a Cherry Cobbler watercolour pencil.

Some little dots from the Beauty and Joy set we’re added to fill in the background.

Cherry Cobbler Ink was added to the edge of the card stock before adhering to the card base.

The sentiment was added at the bottom with dimensionals.

I hope you enjoyed this project. The supplies used are listed and linked to the online store below.

I would love to be your demonstrator.

Thanks for stopping by today and happy Stampin’!

Verity xx

Product List

Blender Pens

[102845]

£11.25

Blush Snowflakes

Hello Everyone,

As the Christmas season is drawing ever nearer, I thought I would share a quick card idea.

This card was simply stamped using the Frosted Foliage stamp set and Blushing Bride ink.

The sentiment is from the same set and stamped with Real Red ink. This was cut with a Stitched Circle Die and adhered to the card with dimensionals.

Simples! But very pretty!

I hope you enjoyed this project. The supplies used are listed and linked to the online store below.

I would love to be your demonstrator.

Thanks for stopping by today and happy Stampin’!

Verity xx

Product List

Project Share Project

Hello Everyone,

Welcome to this week’s Project Share. As always my friends have created some lovely work. Please use the links to visit their blogs and read more about their projects.

Jill has made this stunning white on white layered card. I think this gives a great faux embossed look.

Visit Jill’s blog here for more details.

Heather has made this cute chocolate slider, a really fun way to give a sweet treat as a gift.

Visit Heather’s blog here to see how to make one yourself.

Gez’s playful penguins are looking cosy in their hats and scarves in this layered card.

Visit Gez’s blog here to see more about this project.

I hope you enjoyed these projects. The supplies used are listed and linked to the online store below.

I would love to be your demonstrator.

Thanks for stopping by today and happy Stampin’!

Verity xx

Product List

Spruce Wreath

Hello Everyone,

This stamp set has to be one of my favourites from the Autumn Winter catalogue.

Shaded Spruce ink was used to stamp the wreath on to a white card base. The “berries” were added using Real Red ink.

The sentiment was stamped with Real Red ink and cut with Stitched Circle die. This was adhered in the centre of the wreath with dimensionals.

A bow was tied from Shaded Spruce Gold striped ribbon and added to the bottom.

I hope you enjoyed this project. The supplies used are listed and linked to the online store below.

I would love to be your demonstrator.

Thanks for stopping by today and happy Stampin’!

Verity xx

Product List

Seasons Greetings

Hello Everyone,

I thought I would share this non traditional Christmas card design with you today.

The colour combination I used is Balmy Blue, Pacific Point, Night of Navy and Rich Razzleberry.

Whisper White card stock was coloured through a decorative mask using Stampin’ Sponges.

Before removing the mask, versamark ink was pressed over the panel. (The ink pad will get stained, so using an older pad might be a good idea).

I applied some clear embossing powder and heat set this to give a shiny design. This was adhered to a white card base.

A sentiment was added using Rich Razzleberry ink.

The stars were heat embossed with silver powder and die cut with the coordinating dies.

I hope you enjoyed this project. The supplies used are listed and linked to the online store below.

I would love to be your demonstrator.

Thanks for stopping by today and happy Stampin’!

Verity xx

Product List

Paper Trimmer

[152392]

£23.00

Project Share Project

Hello Everyone,

Welcome to this week’s Project Share. As always my friends have created some lovely work. Please use the links to visit their blogs and read more about their projects.

Jill has used one of my davourites card layouts to create her festive card.

Visit Jill’s blog here

Heather has made use of the hostess stamp set to make her card.

Visit Heather’s blog here

Gez is going shabby chic with Very Versailles!

Visit Gez’s blog here

I hope you enjoyed these projects. The supplies used are listed and linked to the online store below.

I would love to be your demonstrator.

Thanks for stopping by today and happy Stampin’!

Verity xx

Product List

Paper Trimmer

[152392]

£23.00

Project Share Project

Hello Everyone,

Welcome to this week’s Project Share. As always my friends have created some lovely work. Please use the links to visit their blogs and read more about their projects.

Jill

Visit Jill’s blog here

Heather

Visit Heather’s blog here

Gez

Visit Gez’s blog here

I hope you enjoyed these projects. The supplies used are listed and linked to the online store below.

I would love to be your demonstrator.

Thanks for stopping by today and happy Stampin’!

Verity xx

Product List

Glittered Winter Woods

Hello Everyone,

I thought I would revisit the festive stamp sets in the Annual catalogue for today’s project.

The trees were stamped with Early Espresso Ink onto a Very Vanilla card layer.

Dabs of glue were added to the image which were covered with Ice Glitter. The excess was was tapped off and allowed to dry before adhering to a Crumb Cake card base.

The sentiment was heat embossed with gold powder and added below the trees with dimensionals.

I hope you enjoyed this project. The supplies used are listed and linked to the online store below.

I would love to be your demonstrator.

Thanks for stopping by today and happy Stampin’!

Verity xx

Product List

Christmas Time

Hello Everyone,

This stamp set is one of my favourites in the Autumn Winter catalogue – especially these snowflakes!

I chose a slightly different colour palette and like the end result.

I started with the largest snowflake and Highland Heather ink. Next I added Balmy Blue and then Silvery Shimmer inks.

The panel was adhered to some Gorgeous Grape card stock and then to a pre-prepared card base with dimensionals.

Loops of silver thread were secured to the card. The sentiment was stamped with Gorgeous Grape ink and cut with the Timeless Label punch. This was added with dimensional adhesive to complete the card.

I hope you enjoyed this project. The supplies used are listed and linked to the online store below.

I would love to be your demonstrator.

Thanks for stopping by today and happy Stampin’!

Verity xx

Product List

Paper Trimmer

[152392]

£23.00

Toile Tidings

Hello Everyone,

It seems that we are already hurtling through November so during this busy period quick cards are the order of the day.

These feature the Toile Tidings papers in traditional Real Red and, Garden Green.

The card base was made the coordinating card stock colour.

The Designer Series Paper was layered on to a Very Vanilla card layer and then to the card base with snail adhesive.

I picked out a, sentiment from the Itty Bitty Christmas stamp set. Matching ink was used to stamp on to Whisper White card stock in contrast to the Vanilla.

The sentiment was cut with a 1-1/2 inch circle punch and adhered to a 2-1/4 inch circle of vellum. This was added to the card with dimensionals.

A bow was tied from matching ribbon and secured with glue dots.

This is the Garden Green version. On this card I moved the sentiment to the side and added some metallic pearls.

I hope you enjoyed this project. The supplies used are listed and linked to the online store below.

I would love to be your demonstrator.

Thanks for stopping by today and happy Stampin’!

Verity xx

Product List

Silhouette Deer

Hello Everyone,

For today’s card I used a combination of mask and ink blending to create a background.

Using post-it notes, I masked off a section of card stock.

With sponge daubers I applied ink starting with Balmy Blue.

Pacific Point was added next along the top, then Highland Heather along the bottom.

The deer and sentiment were stamped with versamark ink and heat embossed with Shimmer Black powder.

A Stitched Rectangle Die was used to cut the panel. This, was adhered to a card base that had been stamped with snowflakes in Silvery Shimmer Ink.

I hope you enjoyed this project. The supplies used are listed and linked to the online store below.

I would love to be your demonstrator.

Thanks for stopping by today and happy Stampin’!

Verity xx

Product List