Project Share Project

Hello Everyone,

Welcome to this week’s Project Share. As always my friends have created some lovely work. Please use the links to visit their blogs and read more about their projects.

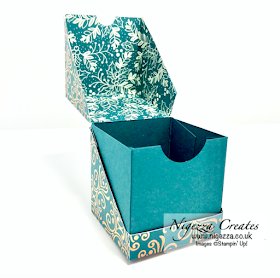
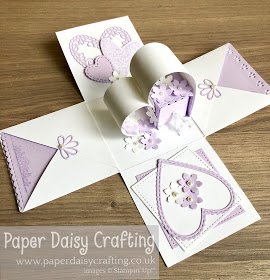
Jill has recreated this delightful exploding box. We learned to make these at our recent team retreat. I love Purple Posy!

Visit Jill’s blog here for the directions and credits.

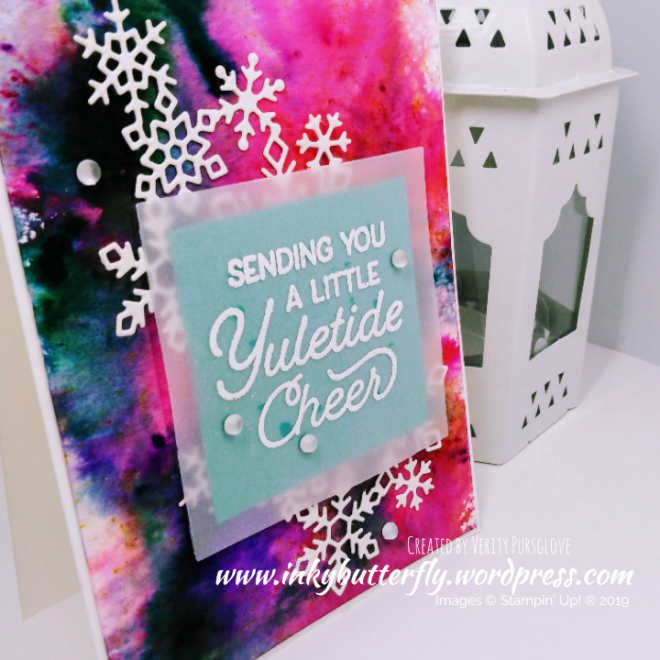
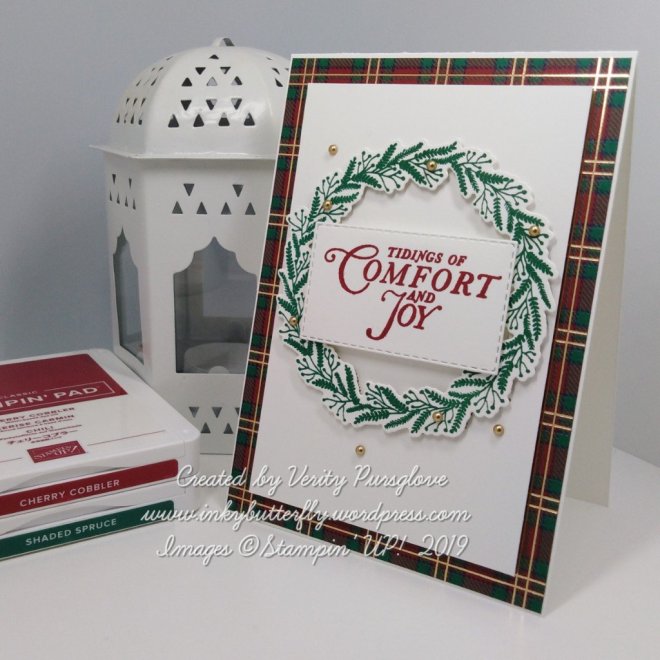
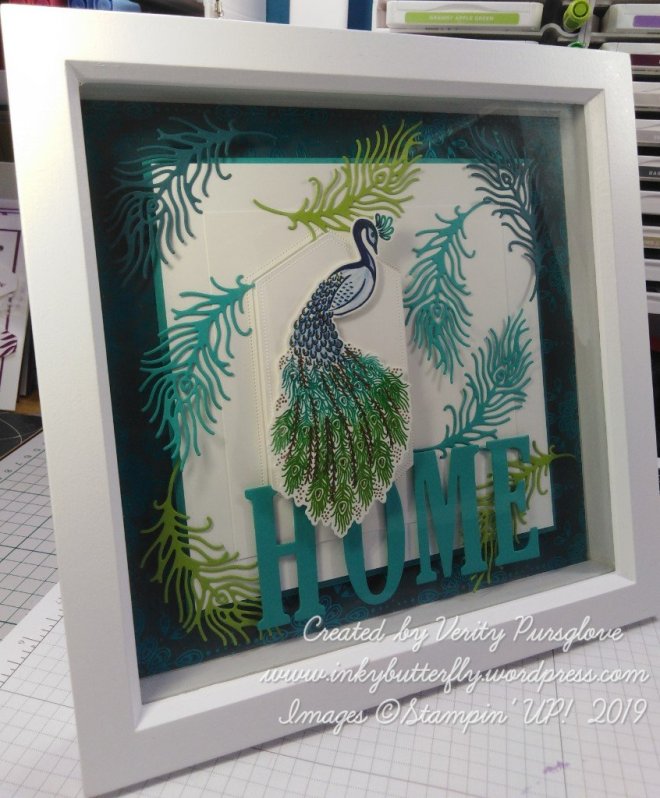
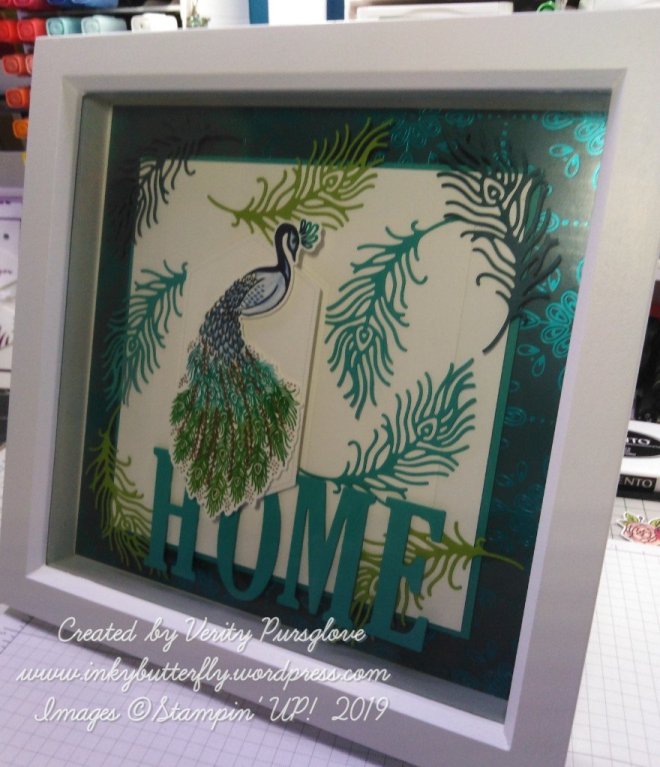
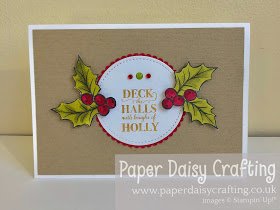
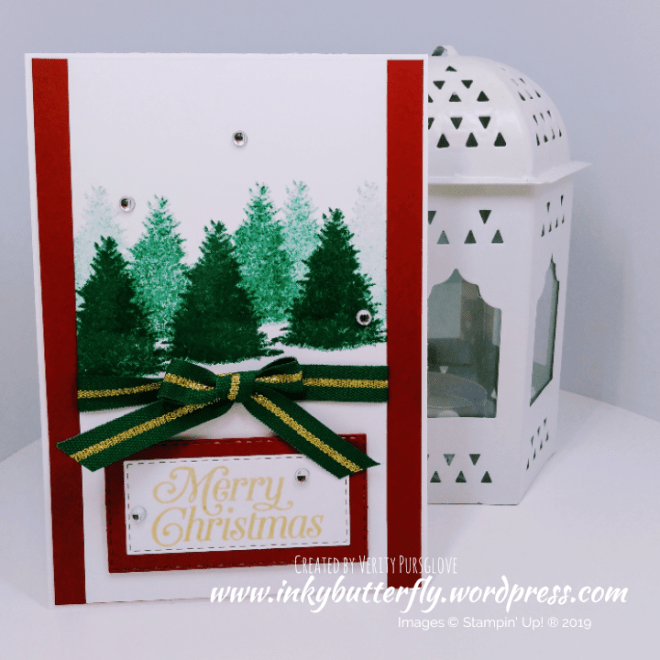
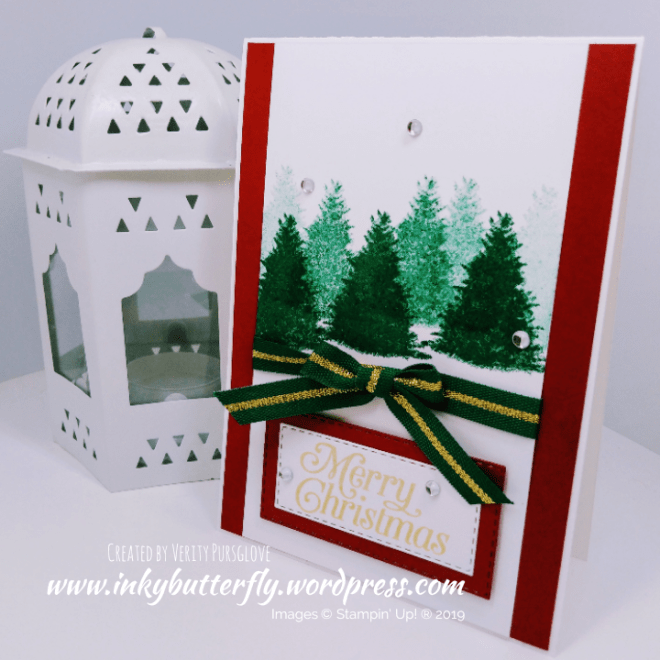
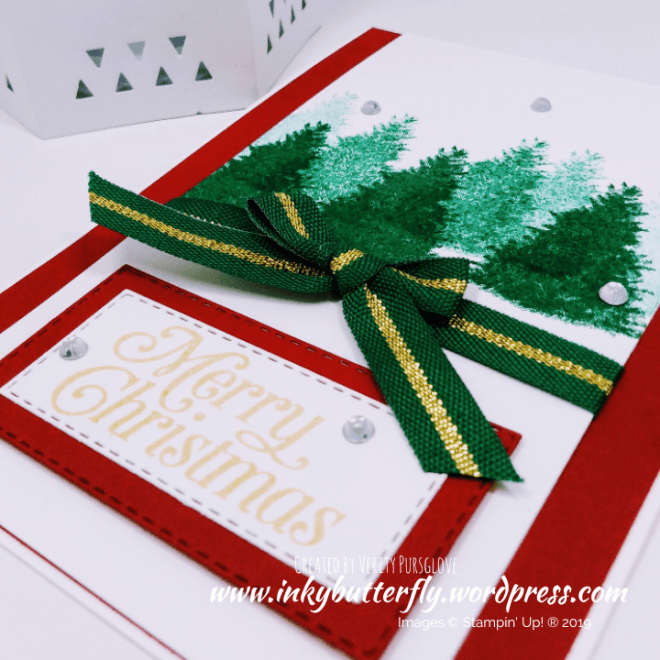
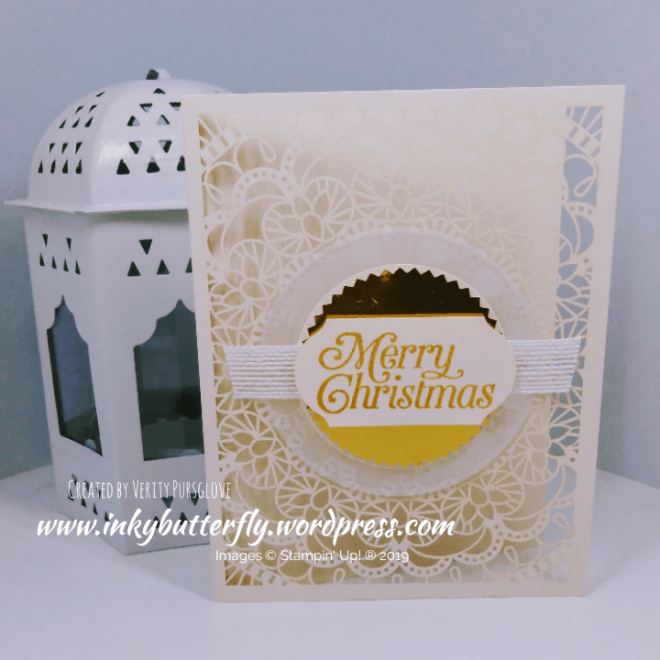
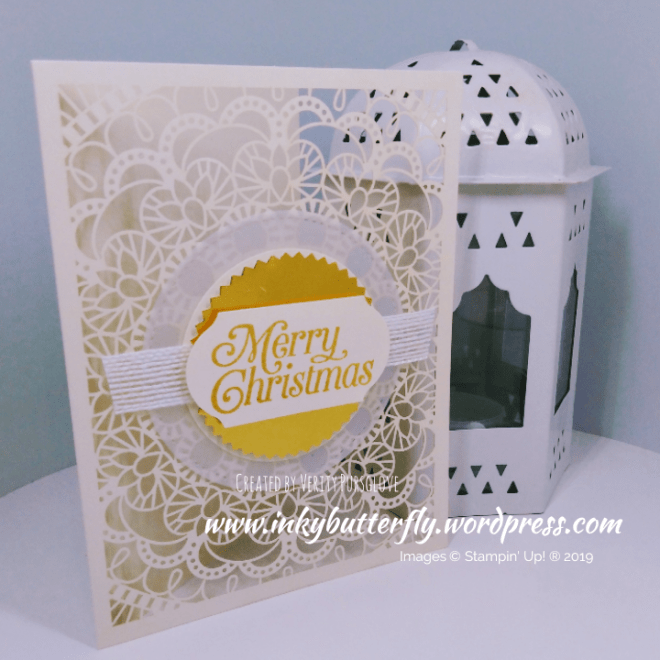
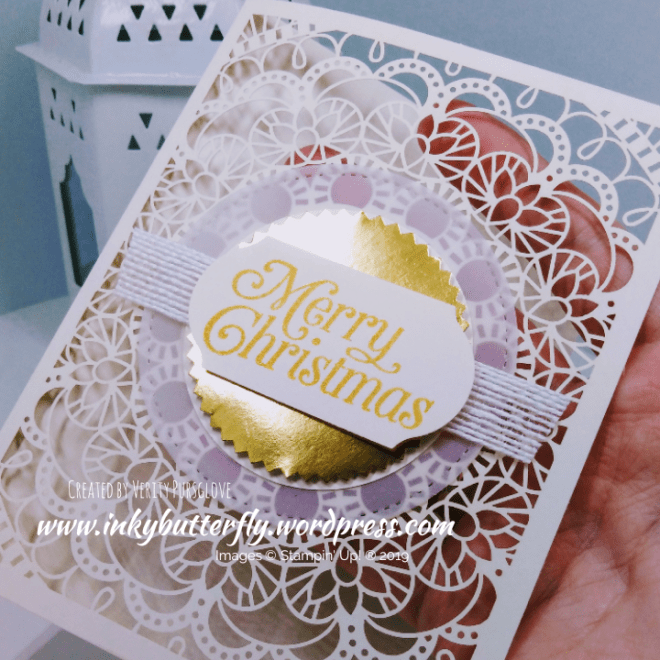
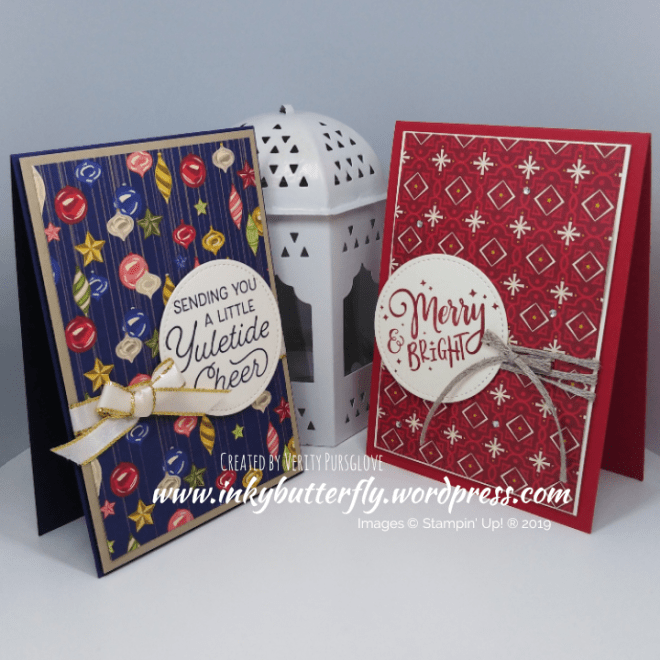
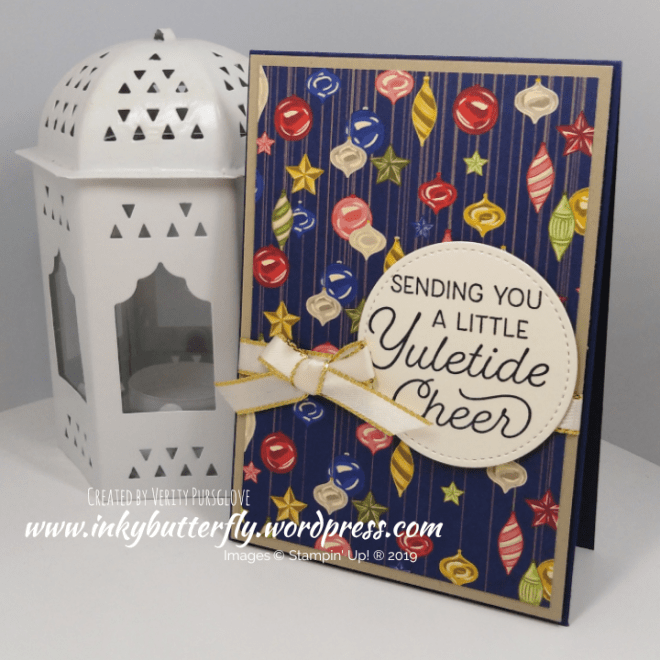
Heather has combined these beautiful Christmas dies with the stunning Speciality Designer Series Paper in the annual catalogue. The colours work so well for this Yuletide project.

Visit Heather’s blog here to see how this card was created.

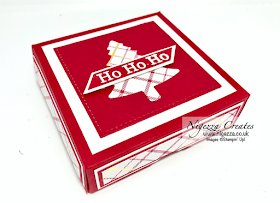
Gez has spruced up one of the pizza boxes to make a cute craft fair item; they are the perfect size for coordinating 3×3 cards.

Visit Gez’s blog here for all the measurements you need!

I hope you enjoyed these projects. The supplies used are listed and linked to the online store below.

I would love to be your demonstrator.

Thanks for stopping by today and happy Stampin’!

Verity xx

Product List

Starry Seasons Greetings

Hello Everyone,

This week I’ll be sharing some super simple cards that can be made quickly and easily.

For this card, the star is the most complicated element, but this can sped up using the Stamparatus if required.

For the two tone look, the decorative image was stamped first with Real Red ink.

The outline was stamped next with versamark and then heat embossed with gold powder.

The coordinating dies were used to cut the image.

The sentiment was added to a white card base with Real Red ink and the star adhered with dimensionals.

I hope you enjoyed this project. The supplies used are listed and linked to the online store below.

I would love to be your demonstrator.

Thanks for stopping by today and happy Stampin’!

Verity xx

Product List

Project Share Project

Hello Everyone,

Welcome to this week’s Project Share. As always my friends have created some lovely work. Please use the links to visit their blogs and read more about their projects.

Jill’s card shows the versatility of stamp sets. Sometimes it’s the smaller accent images that make the prettiest projects.

Visit Jill’s blog here to see how this card was put together.

Heather has a whole series using the Most Wonderful Time product medley. Aren’t these place settings cute!

Visit Heather’s blog here to see how to make your own.

Gez is sharing some of her hints and tips for hiding little ink mishaps.

Visit Gez’s blog here to see how this card evolved.

I hope you enjoyed these projects. The supplies used are listed and linked to the online store below.

I would love to be your demonstrator.

Thanks for stopping by today and happy Stampin’!

Verity xx

Product List

Comfort and Joy

Hello Everyone,

Here’s another card using this stunning wreath from the Tidings All Around stamp set.

Shaded Spruce Ink was used to stamp the wreath which was then die cut.

Before adhering the wreath to the card, two of the additional sprigs were stamped with Crumb Cake Ink.

Golden Glitz ink was used to add the sentiment.

Every wreath needs a bow, so I used the Real Red Ruched Ribbon to tie a bow which was secured with a glue dot.

I hope you enjoyed this project. The supplies used are listed and linked to the online store below.

I would love to be your demonstrator.

Thanks for stopping by today and happy Stampin’!

Verity xx

Product List

Inspire.Create #053

Hello Everyone,

Welcome to my blog. Today I am sharing my Inspire.Create challenge entry.

This time it’s a sketch challenge. The design team have made some wonderful samples as inspiration. You can see them here.

And this is what I created!

I used Shaded Spruce ink to stamp the pine trees. Several generations of ink created depth.

I added some ribbon and adhered this to some Cherry Cobbler card stock.

The sentiment was stamped with gold ink and die cut with a Stitched Rectangle Die, which was then added with dimensionals.

Some epoxy dots completed the card.

I hope you enjoyed this project. The supplies used are listed and linked to the online store below.

I would love to be your demonstrator.

Thanks for stopping by today and happy Stampin’!

Verity xx

Product List

No Sentiment Required

Hello Everyone,

Beauty & Joy is a stamp set that is easily overlooked in the Autumn Winter catalogue. I love this set!

I kept the card simple. The tree was stamped on to Whisper White card stock starting with the pot using Merry Merlot, Crumb Cake and Garden Green inks.

The image was die cut with a Stitched Rectangle and layered on to a Merry Merlot Stitched Rectangle.

A card base was made with Merry Merlot card stock. A Whisper White card layer was stamped with the tiny dots in the set using Crumb Cake ink.

The topper was added with dimensionals. I decided not to add a sentiment, so the image remained the focal point of the card.

I hope you enjoyed this project. The supplies used are listed and linked to the online store below.

I would love to be your demonstrator.

Thanks for stopping by today and happy Stampin’!

Verity xx

Product List

Laser Cut Merry Christmas

Hello Everyone,

For today’s card I wanted to use the transparency of the laser cut cards as a feature.

It is not shown in the photos, but I started by adhering a 2 inch punched circle on the inside of the card to hide glue used on the front.

The layers for the topper added as follows;

  • Vellum cut with a Stitched Circle Die,
  • White Flax ribbon,
  • Very Vanilla card stock cut with 2-1/4 inch circle punch,
  • Gold foil card stock cut with the Starburst Punch,
  • Very Vanilla ard stock cut with the Timeless Label punch prestamped with Golden Glitz Delicata ink.

I hope you enjoyed this project. The supplies used are listed and linked to the online store below.

I would love to be your demonstrator.

Thanks for stopping by today and happy Stampin’!

Verity xx

Product List

Project Share Project

Hello Everyone,

Welcome to this week’s Project Share. As always my friends have created some lovely work. Please use the links to visit their blogs and read more about their projects.

This week I am bringing you three Christmas projects.

Jill’s card is a simple layout but looks extra special in this black and gold colour combo!

Visit Jill’s blog here for details on how to make this project.

Heather has made this wonderful momento for a first Christmas. Such a lovely gift.

Visit Heather’s blog here to see how this was put together.

Gez gas been using this happy little snowman for her cards. The coordinating paper is so much fun.

Visit Gez’s blog here to see how you can make this card.

I hope you enjoyed these projects. The supplies used are listed and linked to the online store below.

I would love to be your demonstrator.

Thanks for stopping by today and happy Stampin’!

Verity xx

Product List

Sip Sip Hooray!

Hello Everyone,

If you need a stamp set to cover all kinds of celebrations this could be the one for you!

This card was simple to put together.

The flutes were stamped first, I used Crumb Cake, but could easily be Smoky Slate or even Balmy Blue.

The liquid, (champagne in this case) was stamped with Daffodil Delight Ink. Some bubbles were added with 2nd generation Crumb Cake Ink. Some Wink of Stella Glitter also helped add some fizz.

All the glasses were die cut. Three glasses were adhered first flat to the card. The remaining two were added with dimensionals.

Finally, the sentiment was stamped and die cut. A double layer of dimensionals lifted this from the rest of the elements.

I hope you enjoyed this project. The supplies used are listed and linked to the online store below.

I would love to be your demonstrator.

Thanks for stopping by today and happy Stampin’!

Verity xx

Product List

Night Before Christmas

Hello Everyone,

Designer Series Paper is your best friend for making lots of cards fast!

The Night Before Christmas pack has designs to suit different tastes.

This is what I would consider to be quite traditional. I matted this with Crumb Cake card stock and added to a Night of Navy card base.

The metallic edge ribbon adds some bling and texture.

The sentiment from Frosted Foliage was stamped with Night Of Navy ink and die cut, (you could also use a punch).

For this less traditional design I used Very Vanilla layers and Real Red card stock and ink.

The ribbon was substituted for the Braided Linen Trim.

The sentiment was from the Everything Festive stamp set.

I hope you enjoyed this project. The supplies used are listed and linked to the online store below.

I would love to be your demonstrator.

Thanks for stopping by today and happy Stampin’!

Verity xx

Product List

Frosted Foliage

Hello Everyone,

There’s a frosty feel to today’s card project which features the Frosted Foliage bundle.

I used Balmy Blue card stock to make the card base and added a Whisper White card layer.

The beautiful frame was die cut from Balmy Blue card stock.

The sentiment was stamped with Balmy Blue ink and die cut with the stitched label in the set. snowflakes were added with Silver Delicata ink and adhered to the frame.

The completed Topper was adhered to the card with dimensionals.

I hope you enjoyed this project. The supplies used are listed and linked to the online store below.

I would love to be your demonstrator.

Thanks for stopping by today and happy Stampin’!

Verity xx

Product List

Pigment Sprinkled Yuletide Cheer

Hello Everyone,

Do you like “messy” crafting? This is the technique for you!

Pigment Sprinkles are water reactive crystals packed with colour so a little goes a long way! They come in a pack of 6, Bermuda Bay, Daffodil Delight, Granny Apple Green, Gorgeous Grape, Melon Mambo and Mango Melody.

To create a background, I misted some watercolour paper with clean water. Pigment was sprinkled over the top.

The piece was dried thoroughly with a heat gun. The paper will curl but is easily flattened under a heavy book.

Snowflakes were die cut from Shimmery White card stock.

The sentiment was stamped with versamark and heat embossed with white powder on Vellum.

A piece of Bermuda Bay card stock was adhered behind the sentiment to make it stand out.

Some frosted epoxy dots finished the card.

I hope you enjoyed this project. The supplies used are listed and linked to the online store below.

I would love to be your demonstrator.

Thanks for stopping by today and happy Stampin’!

Verity xx

Product List

Project Share Project

Hello Everyone,

Welcome to this week’s Project Share. As always my friends have created some lovely work. Please use the links to visit their blogs and read more about their projects.

Jill’s card shows how even the smallest scraps of Designer Series Paper can be used to make a really pretty card!

Visit Jill’s blog here to see more on how this was made.

Heather has made this adorable little handbag style mini bag. It’s small but perfectly formed to hold a treat!

Visit Heather’s blog here to see what she used it for.

Gez made this card for a team swap. These trees look great heat embossed in copper. I am sure everyone loved receiving them.

Visit Gez’s blog here to see how this card was put together.

I hope you enjoyed these projects. The supplies used are listed and linked to the online store below.

I would love to be your demonstrator.

Thanks for stopping by today and happy Stampin’!

Verity xx

Product List

Pretty Peacock Layers

Hello Everyone,

I tried something a little different for today’s project.

You will know I like to use a lot of white card stock so I sort of turned this one inside out, using coloured card layers instead.

I have used Pretty Peacock for my card layers. The smaller panel was adhered with dimensionals.

Feathers from the Royal Peacock die set were added to the topper.

I used a sentiment from the coordinating stamp set and cut this with a Stitched Square die.

I hope you enjoyed this project. The supplies used are listed and linked to the online store below.

I would love to be your demonstrator.

Thanks for stopping by today and happy Stampin’!

Verity xx

Product List

Inspire.Create #051

Hello Everyone,

Welcome to my blog. Every other Monday I share my project that I have used as my entry for the Inspire.Create challenge.

This time it’s a themed challenge. The design team have made some wonderful samples as inspiration. You can see them here.

And this is what I created!

I chose to work with the Good Morning Magnolia bundle and matching Designer Series Paper.

The background was kept simple using the paper with a vellum Stitched Rectangle over the top.

The sentiment was cut with the Tailored Tag Punch. Two black shapes were secured behind the first and adhered with dimensionals.

I added a bow tied from Petal Pink Striped Organdy Ribbon.

A small bloom was coloured with Stampin’ Blends and die cut before adding to the card with dimensionals.

I hope you enjoyed this project. The supplies used are listed and linked to the online store below.

I would love to be your demonstrator.

Thanks for stopping by today and happy Stampin’!

Verity xx

Product List

Tidings All Round

Hello Everyone,

I love this wreath stamp set in the new catalogue! Teamed with the Wrapped in Plaid Designer Series Paper this makes a simple traditional card.

The card base was made with Whisper White card stock and layered with the DSP.

The wreath was stamped with Shaded Spruce ink and die cut. This, was adhered to a white layer with dimensionals before adding to the card.

The sentiment was added with Cherry Cobbler ink and cut with a Stitched Rectangle Die. I used “double dimensionals” to raise this in the centre of the wreath.

Finally, a scattering of gold pearls completed the card.

I hope you enjoyed this project. The supplies used are listed and linked to the online store below.

I would love to be your demonstrator.

Thanks for stopping by today and happy Stampin’!

Verity xx

Product List

Project Share Project

Hello Everyone,

Welcome to this week’s Project Share. As always my friends have created some lovely work. Please use the links to visit their blogs and read more about their projects.

Jill has enjoyed adding to her series of wedding cards with this design. The foil card stock is so luxurious, perfect for the special day.

Visit Jill’s blog here

Heather hS made this delightful exploding treat box. Now this would be fun as a wedding favour, it would certainly entertain the guests.

Visit Heather’s blog here

Gez has recreated this beautiful gift box. I can imagine this being used to house a special gift for the Maid of Honour and Best Man.

Visit Gez’s blog here

I hope you enjoyed these projects. The supplies used are listed and linked to the online store below.

I would love to be your demonstrator.

Thanks for stopping by today and happy Stampin’!

Verity xx

Product List

Proud of You

Hello Everyone,

Here’s a card to offer some encouragement to a loved one.

I am using products from the Nonle Peacock suite with Pretty Peacock ink.

I used the letterpress technique for the background of the topper panel. This is done by applying ink to the folder first. The ink transfers when it is rolled through a die cut machine.

The piece was layered on to Oretyy Peacock card stock, and adhered to a white card base with dimensionals.

The sentiment was stamped and die cut with a Stitched Square. I used dimensionals to add this to a larger vellum square.

A die cut feather and matching rhinestones completed the card.

I hope you enjoyed this project. The supplies used are listed and linked to the online store below.

I would love to be your demonstrator.

Thanks for stopping by today and happy Stampin’!

Verity xx

Product List

A Wonderful Couple

Hello Everyone,

Wedding season is in full swing and this card has been made with a special couple in mind.

The background layer was stamped with Verdant Garden and heat embossed with silver powder.

A vellum layer softened the background a little before adding a final layer of Whisper White. This had been stamped with the sentiment using Smoky Slate ink.

The large Magnolia was stamped and coloured with watercolour pencils. After die cutting the image, I applied versamark ink over the top and heat embossed it with clear powder to give a glazed effect.

I hope you enjoyed this project. The supplies used are listed and linked to the online store below.

I would love to be your demonstrator.

Thanks for stopping by today and happy Stampin’!

Verity xx

Product List

Blender Pens

[102845]

£11.25

Home

Hello Everyone,

I was so pleased to be asked to make this piece as a house warming gift.

The gorgeous Noble Peacock foiled DSP was used as the background.

The white panel was die cut with a Stitched Nested Die and added to a Bermuda Bay mat and adhered in centre.

I used my Stamparatus to create the peacock with Night Of Navy, Bermuda Bay and Granny Apple Green inks. The details were added with versamark and heat emboss in gold.

This was adhered to the Die cut Nested shape with dimensionals and then on to project.

Letters were die cut from Bermuda Bay card stock and positioned below the peacock. Feathers were cut from Pretty Peacock, Bermuda Bay and Granny Apple Green card stocks and added with liquid glue.

I hope you enjoyed this project. The supplies used are listed and linked to the online store below.

I would love to be your demonstrator.

Thanks for stopping by today and happy Stampin’!

Verity xx

Product List

Stamparatus

[148187]

£46.00