Embossed Modern Heart

Hello Everyone.

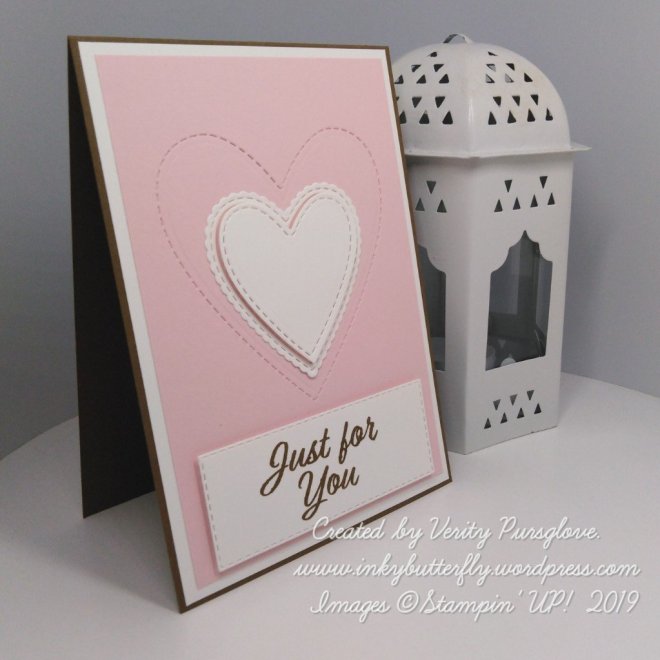
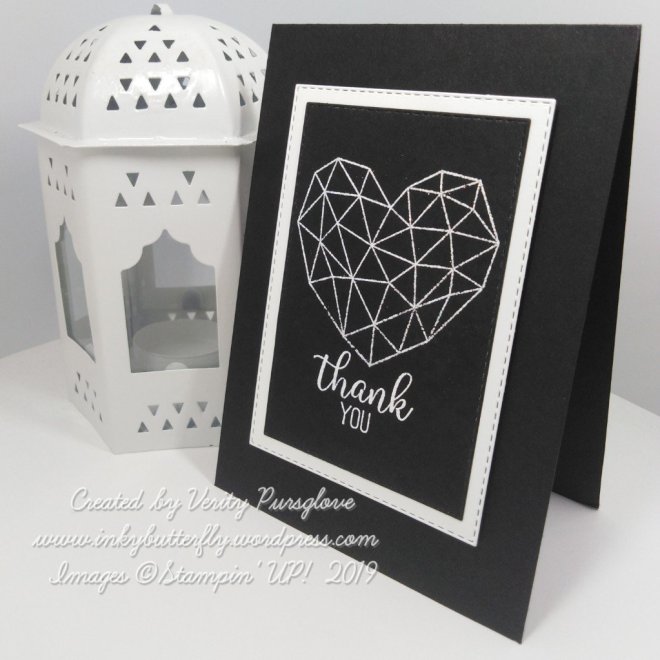
Those of you who follow me, will know I usually use white card bases, so today I am switching it up…. with black!

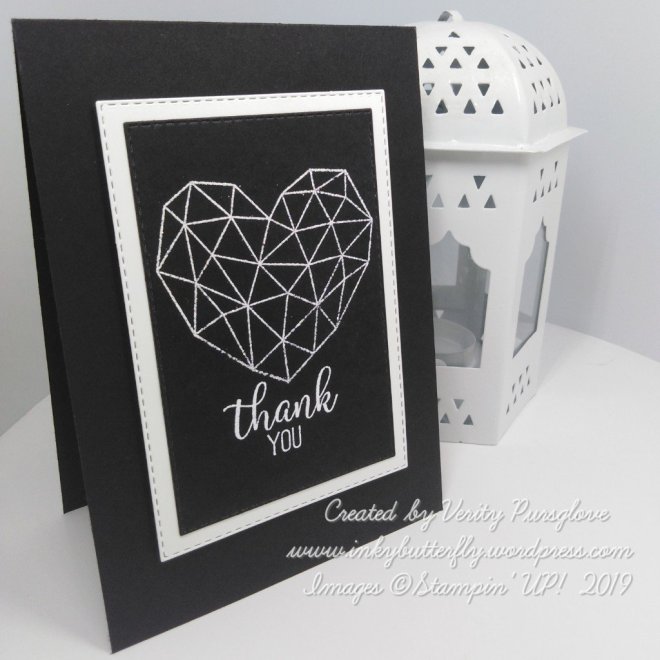
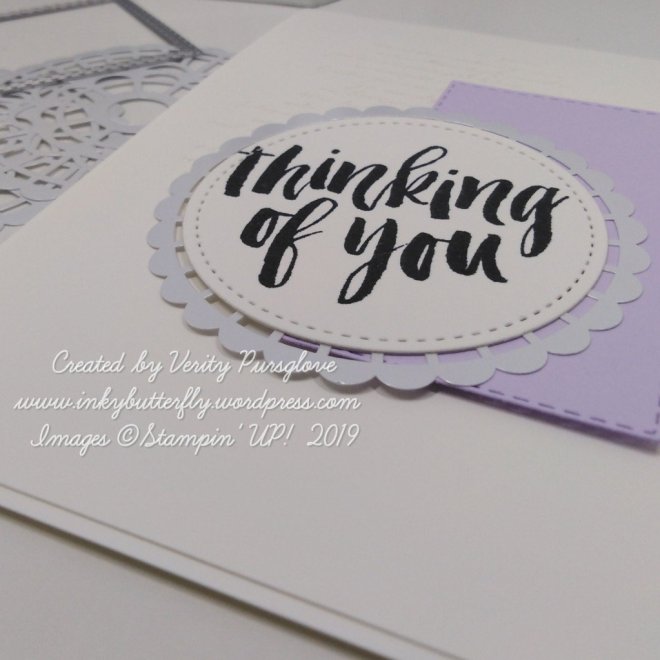
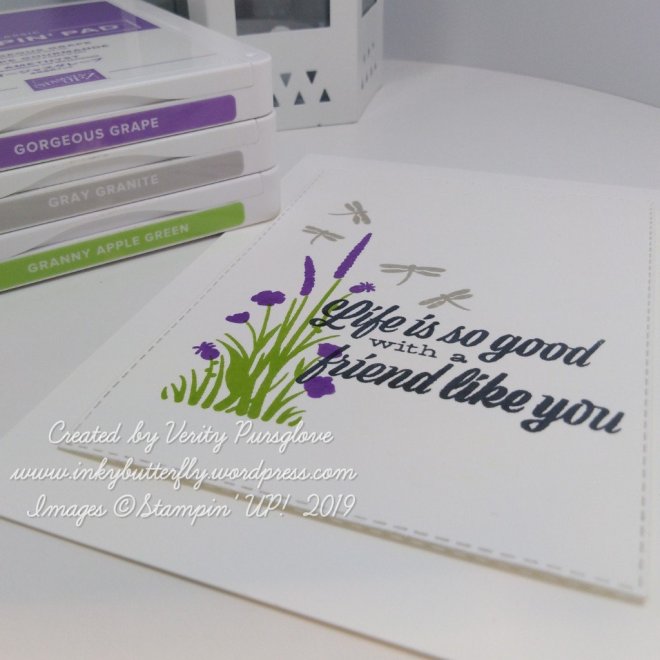
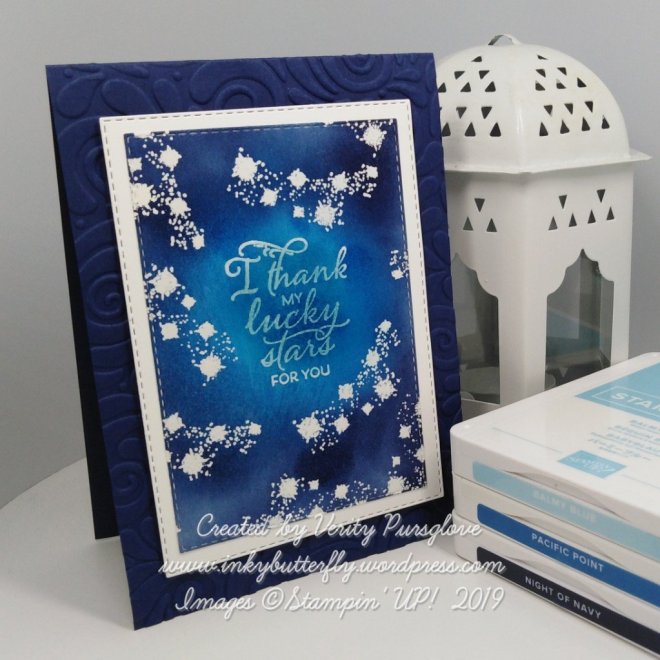
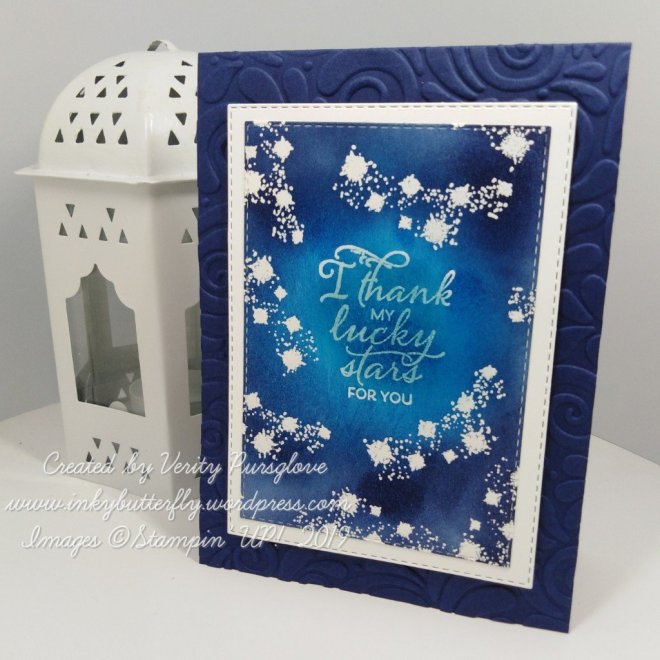
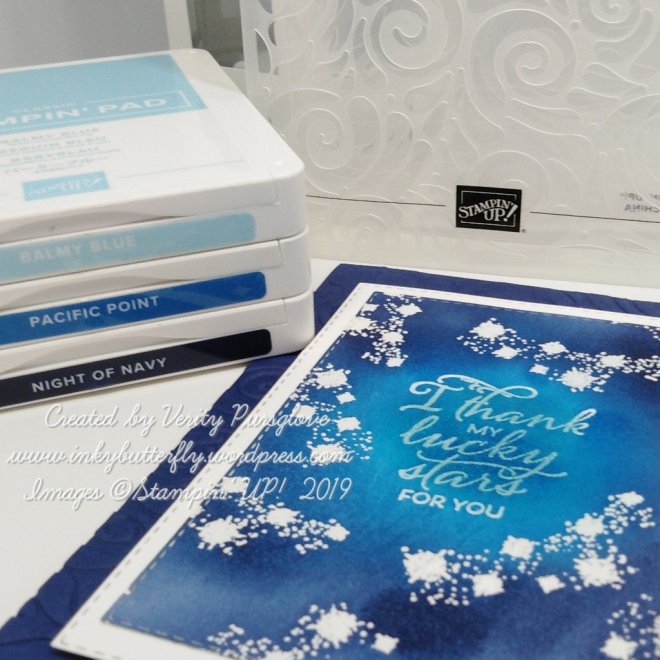
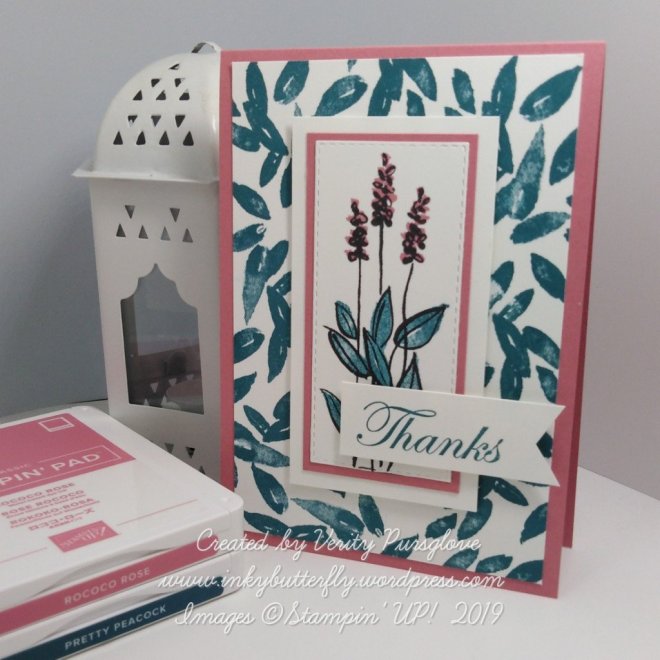
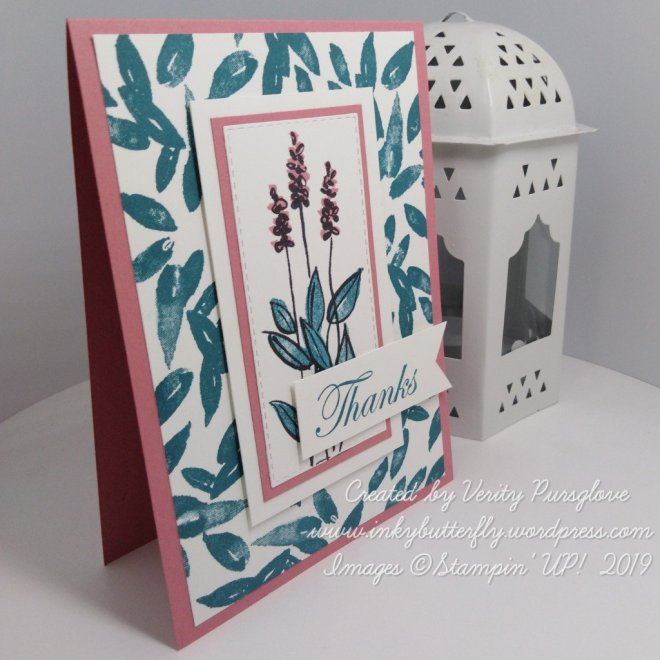
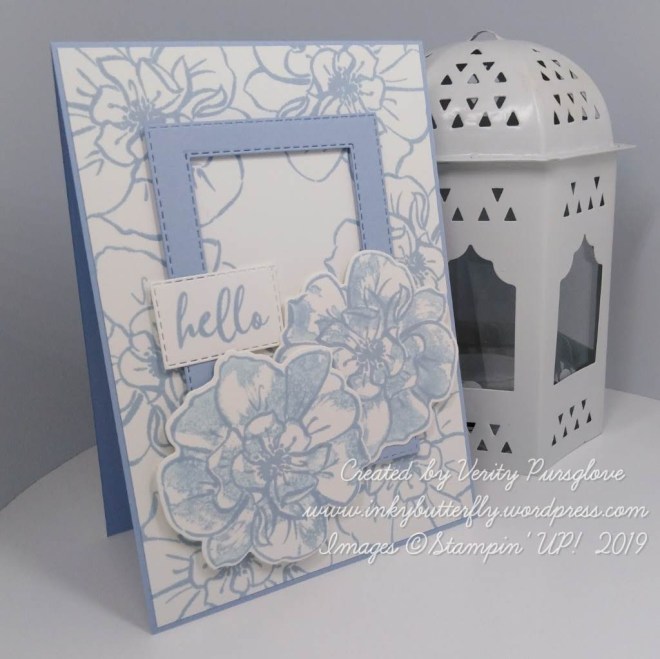
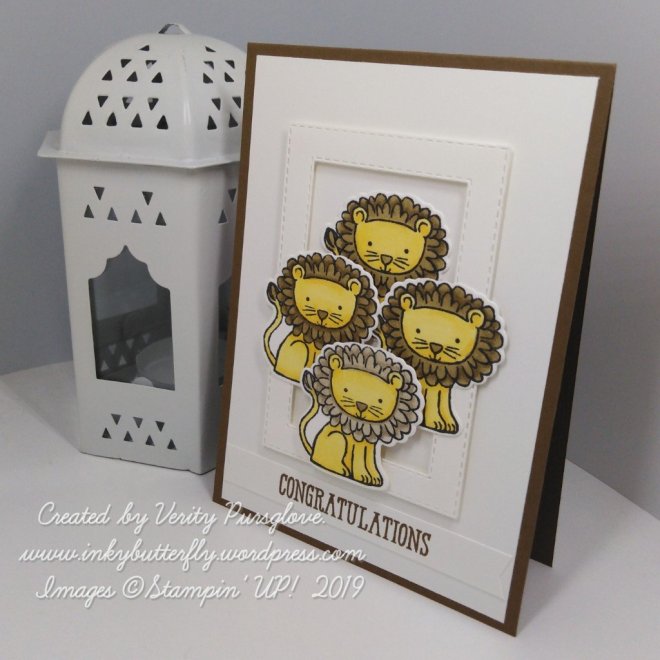
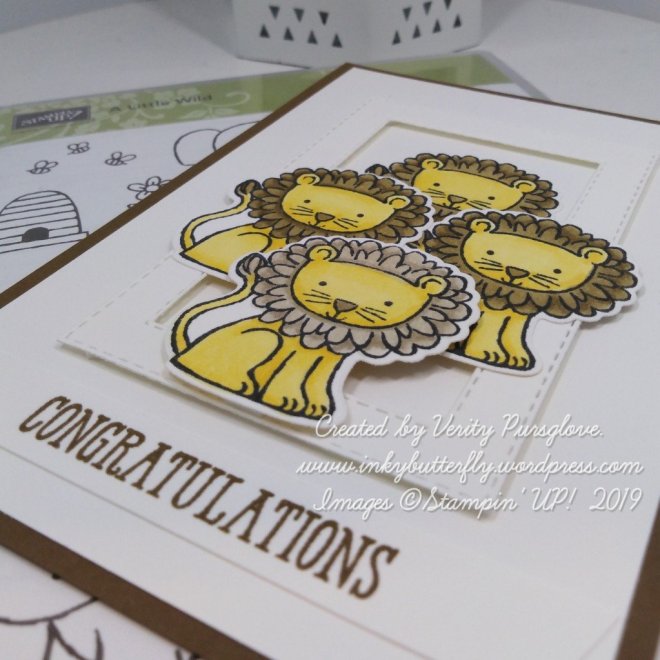
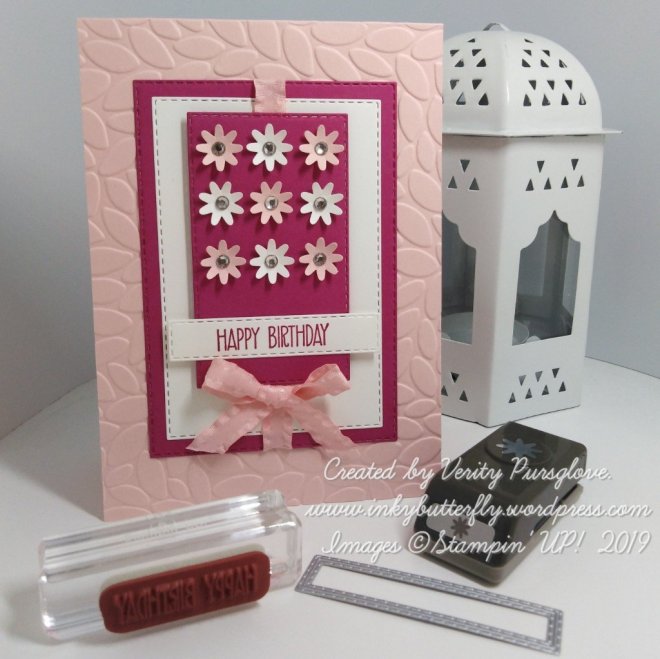
I fancied trying to emboss this lovely heart image with white powder. I really liked the look but thought it needed some layers to carry it off.

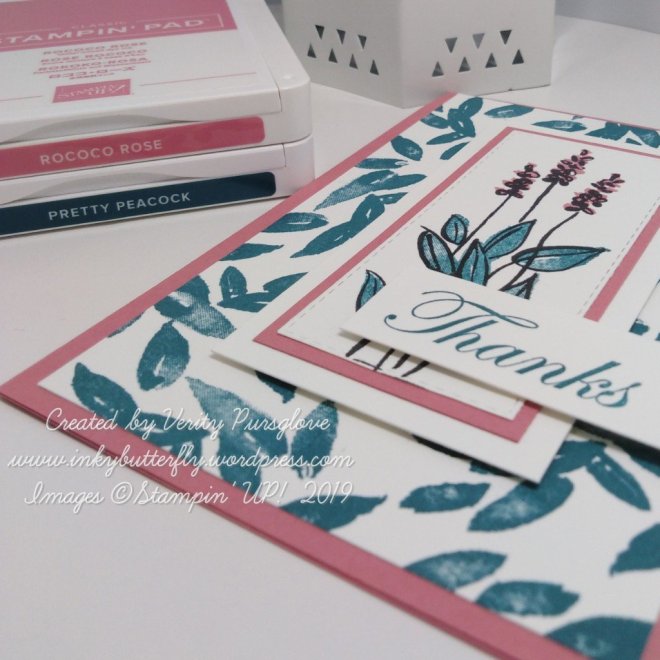
I added the sentiment first also heat embossed in white, the die cut with a Stitched Rectangle.

This was layered on to a white rectangle cut from white card stock before adhering to the card base.

I hope you enjoyed this project. The supplies used are listed and linked to the online store below.

I would love to be your demonstrator.

Thanks for stopping by today and happy Stampin’!

Verity xx

Product List

So Much to Love

Hello Everyone,

Today I am using die cuts to create a faux embossed look.

The die I have used for the background is from the Wild Rose set. It was cut 4 times and adhered to the card evenly spaced. The overhanging pieces were then trimmed away.

I picked out a sentiment from the Abstract Impressions stamp set. This was heat embossed with silver powder and cut with a Stitched Rectangle Die.

I didn’t like the sentiment on the card as it was, so I added a layer of vellum behind it which looked much better.

I hope you enjoyed this project. The supplies used are listed and linked to the online store below.

I would love to be your demonstrator.

Thanks for stopping by today and happy Stampin’!

Verity xx

Product List

Inspire.Create #046

Hello Everyone,

Welcome to my blog. Every other Monday I share my project that I have used as my entry for the Inspire.Create challenge.

This time it’s a colour challenge. The design team have made some wonderful samples as inspiration. You can see them here.

And this is what I created!

If I’m honest I wasn’t sure what I wanted to create to begin with, I don’t have all the ink colours. But I have the card stock! I already had these Stitched Rectangles left over from another project.

For some added interest, though it is not clear on the photos, I stamped the script image from the Very Versaille stamp set with versamark and heat embossed with clear powder.

The coloured rectangle was added towards the right hand side of the card with dimensionals.

I wanted a bold sentiment, I picked this one from Rooted in Nature.

This was stamped with Memento ink and die cut with a Stitched Circle. Each circle was mounted on to a Pearlized Doily.

I hope you enjoyed this project. The supplies used are listed and linked to the online store below.

I would love to be your demonstrator.

Thanks for stopping by today and happy Stampin’!

Verity xx

Product List

Gratitude

Hello Everyone,

If you love Colouring, you will love the Seaside Notions stamp set. I really enjoyed using my Stampin’ Blends for this card.

For the background, the seaweed was stamped with Soft Sea Foam ink on to a Stitched Rectangle.

This, was adhered to the centre of a white card base. A frame was added with dimensionals.

The seahorse and shells were stamped with Basic Gray ink and coloured in with Stampin’ Blends. The images were fussy cut.

The sentiment was cut with the Timeless Label Punch.

I hope you enjoyed this project. The supplies used are listed and linked to the online store below.

I would love to be your demonstrator.

Why not join my team and enjoy discounted prices on your favourite Stampin’ supplies!

Stampin’ Storage is back in stock!

Thanks for stopping by today and happy Stampin’!

Verity xx

Product List

Life is So Good

Hello Everyone,

I love the flexibility that two-step Stamping offers…. These flowers could be any colour to suit any recipient.

I originally stamped the images on to a Whisper White card layer starting with the foliage.

The flower heads were added next, these were easy to line up by looking through the clear block.

The sentiment was stamped next with Memento black ink. Once this was in place, I added the little dragonflies.

I opted to die cut the images with a Stitched Rectangle Die. I adhered this to a white card base with dimensionals.

I hope you enjoyed this project. The supplies used are listed and linked to the online store below.

I would love to be your demonstrator.

Thanks for stopping by today and happy Stampin’!

Verity xx

Product List

Inspire.Create #045

Hello Everyone,

Welcome to my blog. Every other Monday I share my project that I have used as my entry for the Inspire.Create challenge.

This time it’s a theme challenge.

The design team have made some wonderful samples as inspiration. You can see them here.

I have used the emboss resist technique for my project;

I picked out the Stargazing stamp set…. I thought the stars would be perfect for this technique.

First, I applied Balmy Blue ink to some white card stock where the sentiment would be. I then used versamark ink to stamp the images. These were embossed with clear powder.

I then added Pacific Point and Night of Navy ink over the top. A damp cloth rubbed away the excess ink.

The panel was die cut with a Stitched Rectangle and layered on to Whisper White card stock.

A Night of Navy card base was embossed with the Swirls & Curls embossing folder before adding the topper with dimensionals.

I hope you enjoyed this project. The supplies used are listed and linked to the online store below.

I would love to be your demonstrator.

Thanks for stopping by today and happy Stampin’!

Verity xx

Product List

Project Share Project

Hello Everyone,

Welcome to this week’s Project Share. As always my friends have created some lovely work. Please use the links to visit their blogs and read more about their projects.

Jill has combined bright colours with white embossing, made all the more striking by using a black background!

Visit Jill’s blog here

Heather has made this lovely card using her Stampin.’ Blends to colour the focal image. The Stitched Rectangle dies frame it perfectly.

Visit Heather’s blog here

Gez has used tone on tone layering to make this great Father’s Day card. Mixing and matching several sets of dies really extends their use.

Visit Gez’s blog here

I hope you enjoyed these projects. The supplies used are listed and linked to the online store below.

I would love to be your demonstrator.

Thanks for stopping by today and happy Stampin’!

Verity xx

Product List

Soft Spring

Hello Everyone,

A new annual catalogue means lots of brand new products and long shopping list.

The stamp set I have used today is a hostess set which can be purchased with orders over £150.

Club together with your friends or host a party. Find out more here

My card today used the Soft Spring host stamp set with two new In Colours. This is a two-step stamp set allowing images to be layered together.

I started by stamping a background with Pretty Peacock ink and adhering this to Rococo Rose card base.

The flowers were stamped in Memento Ink and “coloured” with the coordinating stamps from the set.

This was cut with a Stitched Rectangle die and layered with Rococo Rose and Whisper White card stock and adhered with dimensionals.

The sentiment was added with Pretty Peacock ink.

I hope you enjoyed this project. The supplies used are listed and linked to the online store below.

I would love to be your demonstrator.

If you would like a Free copy of the new Stampin’ Up! catalogue please contact me.

Thanks for stopping by today and happy Stampin’!

Verity xx

Product List

Pootlers Blog Hop – New Catalogue 2019

Hello Everyone,

Today’s project is part of a team blog hop where we have all used our shiny new products from Stampin’ Up!’s Annual Catalogue!

This one is terrific with some gorgeous stamp sets, bundles and full suites of products to choose from.

My project showcases product from the Magnolia Lane Suite. We had an enormous Magnolia in our front garden when I was a child and I always remember how stunning the flowers were.

The Designer Series Paper has been used as the background for my card. It is so lovely I wanted this to remain a feature.

The topper was kept small using the Stitched Rectangles dies. A larger layer was added by die cutting vellum, so the pattern could still be seen.

The white panel was stamped with a sentiment in black ink, and embellished using the small Magnolia image from the stamp set with Gray Granite ink.

Some silver thread was looped between the layers for some extra texture.

Please click on the blue box below to see all the other fantastic creations

You are invited to the Inlinkz link party!

Click here to see the other projects

I hope you enjoyed this project. The supplies used are listed and linked to the online store below.

I would love to be your demonstrator.

Thanks for stopping by today and happy Stampin’!

Verity xx

Product List

2019 In Colour Wild Roses

img_20190603_210518_wm

Hello Everyone,

It’s new annual catalogue launch day!

If you would like a Free copy of the new Stampin’ Up! catalogue please contact me.

The focus for today are the new In Colours.

Rococo Rose, Seaside Spray, Pretty Peacock and Terracotta Tile. Purple Posy will follow later. 

I have used the gorgeous NEW To a Wild Rose stamp set.

img_20190603_210413_wm

For each card the line image was used to make the background.

A coordinating card stock frame was die cut and adhered with mini dimensionals.

img_20190603_210458_wm

Two additional flowers were stamped in each colour. The images were “coloured” with the complementary stamps in the set.

The sentiment was cut with a Stitched Rectangle Die.

img_20190603_210329_wm

I hope you enjoyed this project. The supplies used are listed and linked to the online store below.

I would love to be your demonstrator.

Thanks for stopping by today and happy Stampin’!

Verity xx

Product List

Just for You

Hello Everyone,

There are some exciting limited time only products available until the end of May, while stocks last!

Paper Pumpkin is popular in other USA market as a subscription box. This month the UK also has the chance to order this kit as a one off payment. The contents are a surprise!

Everything is Rosy product medley contains fully coordinating products to create beautiful projects.

My project for today uses the Meant to Be bundle. The stamp set and dies are currently available as a bundle with a 10% saving.

For the card base, white card stock was adhered to a Soft Suede card base. A Powder Pink layer was embossed with the largest stitched heart die.

Two smaller dies were used to cut the white hearts which were adhered to the centre.

The sentiment was stamped with Soft Suede ink and die cut with a Stitched Rectangle.

I hope you enjoyed this project. The supplies used are listed and linked to the online store below.

I would love to be your demonstrator.

Don’t miss out on these last chance items…. When they’re gone, they’re gone!

Thanks for stopping by today and happy Stampin’!

Verity xx

Product List

So Much to Love #GDP188

Hello Everyone,

This week is a Case the Designer challenge!

See what the Design Team have created here

I picked out the use of Designer Series Paper, flowers and rectangular layers.

A piece of DSP was layered on to a Whisper White card base.

Stitched Rectangle dies were used to cut a frame and an additional smaller rectangle.

The sentiment from the Abstract Impressions set was stamped on to the rectangle with Flirty Flamingo ink.

The frame and sentiment were added to the card with dimensionals.

Blooms from the Pop of Petals stamp set were stamped in Flirty Flamingo ink and punched out. These were adhered with Multipurpose glue.

Leaves were punched from vellum for added texture.

I liked this so much I made this version with Highland Heather.

I hope you enjoyed this project. The supplies used are listed below.

Thanks for stopping by today and happy Stampin’!

Verity xx

Product List

Leaf Punch

[144667]

£15.00

Wild Congratulations

Hello Everyone,

Here’s something a bit different from me today. Isn’t it cute!

This stamp set is called A Little Wild and will be retiring at the end of May.

The lions were stamped in Memento ink and coloured with Stampin’ Blends.

A rectangular frame was die cut and added to the card with dimensionals.

The lions were arranged in and around the frame.

A simple sentiment was added to the bottom.

I hope you enjoyed this project. The supplies used are listed and linked to the online store below.

I would love to be your demonstrator.

Don’t miss out on these last chance items…. When they’re gone, they’re gone!

Thanks for stopping by today and happy Stampin’!

Verity xx

Product List

Bermuda Leaves

Hello Everyone,

This card was inspired by a card I saw by Karen Varley at Donemark Papercrafts. You can see the original here.

I just love Bermuda Bay so I used this as a starting point to make the frame with my Stitched Rectangles dies.

I knew I wanted a sentiment for the middle. I picked out this one from the Seize the Day stamp set. This fitted perfectly onto one of the smaller rectangles.

After fiddling around with the layout, I decided I wanted to stamp around the frame. I used the Stamparatus for this so I could use 2 ink colours. I find this works best using sponge daubers to apply each colour. This stamp was from the same set. I was so pleased with the result.

I layered this panel on to Bermuda Bay card stock and then to a white card base.

The frame and sentiment were added with dimensionals.

To complete the card I added some vellum leaves. This softened the edges of the frame without being distracting.

I hope you enjoyed this project. The supplies used are listed and linked to the online store below.

I would love to be your demonstrator.

Don’t miss out on these last chance items…. When they’re gone, they’re gone!

Thanks for stopping by today and happy Stampin’!

Verity xx

Product List

Leaf Punch

[144667]

£15.00

Stamparatus

[148187]

£46.00

Neutral Thank You

Hello Everyone,

The colours chosen for this card were inspired by some art I saw on Instagram by @calliandco

The white card base was stamped first with Sahara Sand ink and the Wishing You Well stamp set.

The main image was stamped with Crumb Cake ink using the Stamparatus. Some areas were reinked to deepen the colour.

The blooms were added first using Cherry Cobbler and then Merry Merlot ink. The image was die cut with a Stitched Rectangle.

The same die and one 2 sizes larger were used to cut a frame. This was adhered flat to the card with Multipurpose glue.

The main image was added to the centre with dimensionals.

The sentiment from the Kindness and Compassion stamp set was stamped with Merry Merlot ink and also die cut with a Stitched Rectangle Framelit.

I hope you enjoyed this project. The supplies used are listed and linked to the online store below.

I would love to be your demonstrator.

*****AVAILABLE NOW*****

Brand new storage solutions for your favourite Stampin’ Up! products now available. Order what you need to create a bespoke solution, add more as your collection grows!

Thanks for stopping by today and happy Stampin’!

Verity xx

Product List

Project Share Project

Hello Everyone,

Welcome to this week’s Project Share. As always my friends have created some lovely work. Please use the links to visit their blogs and read more about their projects.

Please note that some products or offers may no longer be available.

Gez has been colouring! Whilst this paper is no longer available, the technique she has used is stunning.

Read more about Gez’s project here

Helzie has made this wonderful silhouette card by stamping over a watercoloured background.

See more about Helzie’s project here

Jill is keeping things simple by using complementary products. This laser cut DSP, is very effective over coloured backgrounds

See more about this product on Jill’s blog here

Heather has made this lovely notebook cover with one of my favourite suites, and I love Blackberry Bliss!

See more about making this project at Heather’s blog here

I hope you enjoyed these projects. The supplies used are listed below.

Thanks for stopping by today and happy Stampin’!

Verity xx

Product List

Aqua Painters

[103954]

£16.00

Project Share Project

Hello Everyone,

Welcome to this week’s Project Share. As always my friends have created some lovely work. Please use the links to visit their blogs and read more about their projects.

Helzie has made this stunning card by using white ink on Crumb Cake card stock!

See how to achieve this look at Helzie’s blog here

Heather has used this laser cut paper for a simple design that suits any occasion.

See more about making this project at Heather’s blog here

Jill has revisited one of her projects…. no stamping on this one!

See the details of this project on Jill’s blog here

Gez has also used laser cut paper for this project. This has been sponged with colour and used to make a series of cards.

See the more on Gez’s blog here

I hope you enjoyed this project. The supplies used are listed below.

Thanks for stopping by today and happy Stampin’!

Verity xx

Product List

Daisy Punch

[143713]

£17.00

Simply Scored

[122334]

£28.00

Nine Blooms #GDP182

Hello Everyone,

This week is a sketch challenge!

See what the Design Team have created with the sketch here

And this is my interpretation of the sketch. I love how it turned out.

The card base was made with Powder Pink card stock. The front was embossed with the Petal Burst embossing folder.

Stitched Rectangle Framelits were used to build the topper. Powder Pink ribbon was tied around the first two layers.

The third later was adhered with dimensionals. Nine Bitty Blooms were punched and added to the card. A rhinestone was placed in each of the centres.

A final rectangle was used to cut a sentiment that was stamped with Berry Burst ink.

I hope you enjoyed this project. The supplies used are listed below.

Thanks for stopping by today and happy Stampin’!

Verity xx

Product List

Inspire.Create #039

Hello Everyone,

Welcome to my blog. Every other Monday I share my project that I have used as my entry for the Inspire.Create challenge.

This time it’s a theme challenge. The design team have made some wonderful samples as inspiration. You can see them here.

Well this is a challenge… After a rummage in my stash, I found a goldfish image in the Jar of Love stamp set, so I made a tank for them.

The back drop was made with a stamp from the Lily Pad Lake set. The weeds are partially stamped foliage from Jar of Love.

A Stitched Rectangle was used to cut an aperture in a white card layer. This was added over top with dimensionals.

The fishes were stamped and die cut and added to the ‘tank’.

By chance, the greeting “best fishes” was included in the set. I added this with Pumpkin Pie ink.

I hope you enjoyed this project. The supplies used are listed and linked to the online store below.

I would love to be your demonstrator.

Don’t forget to check out Sale-a-bration and the free products available when you spend multiples of £45.

If your shopping wish list gets to £99, there’s no better time to join my team. You can choose £170 worth of products to be included in your personal starter kit; add a little extra and receive an exclusive Stampin’ Up! Craft & Carry tote.

Thanks for stopping by today and happy Stampin’!

Verity xx

Product List

Spring Flowers

Hello Everyone,

This morning’s project is for a Facebook theme challenge from Jill. She has chosen spring flowers for the challenge.

I picked out the In Every Season stamp set and worked with the little bluebells.

I started by die cutting some Pool Party and vellum card stocks with the Stitched Rectangles dies.

The vellum was then embossed with the Layered Leaves folder and adhered to the Pool Party piece. Adhesive was applied knowing it would be covered by other elements of the card. Some Polka Dot Tulle was added to the piece before adding to the card.

The flowers were stamped with Stazon Ink to allow the use of watercolour pencils. These were then fussy cut and adhered on the left hand side. A small bow was secured over the untidy stems.

The sentiment was stamped and die cut. This adhered with dimensionals. Some matching glitter enamel dots completed the card.

I hope you enjoyed this project. The supplies used are listed and linked to the online store below.

I would love to be your demonstrator.

Don’t forget to check out Sale-a-bration and the free products available when you spend multiples of £45.

If your shopping wish list gets to £99, there’s no better time to join my team. You can choose £170 worth of products to be included in your personal starter kit; add a little extra and receive an exclusive Stampin’ Up! Craft & Carry tote.

Thanks for stopping by today and happy Stampin’!

Verity xx

Product List