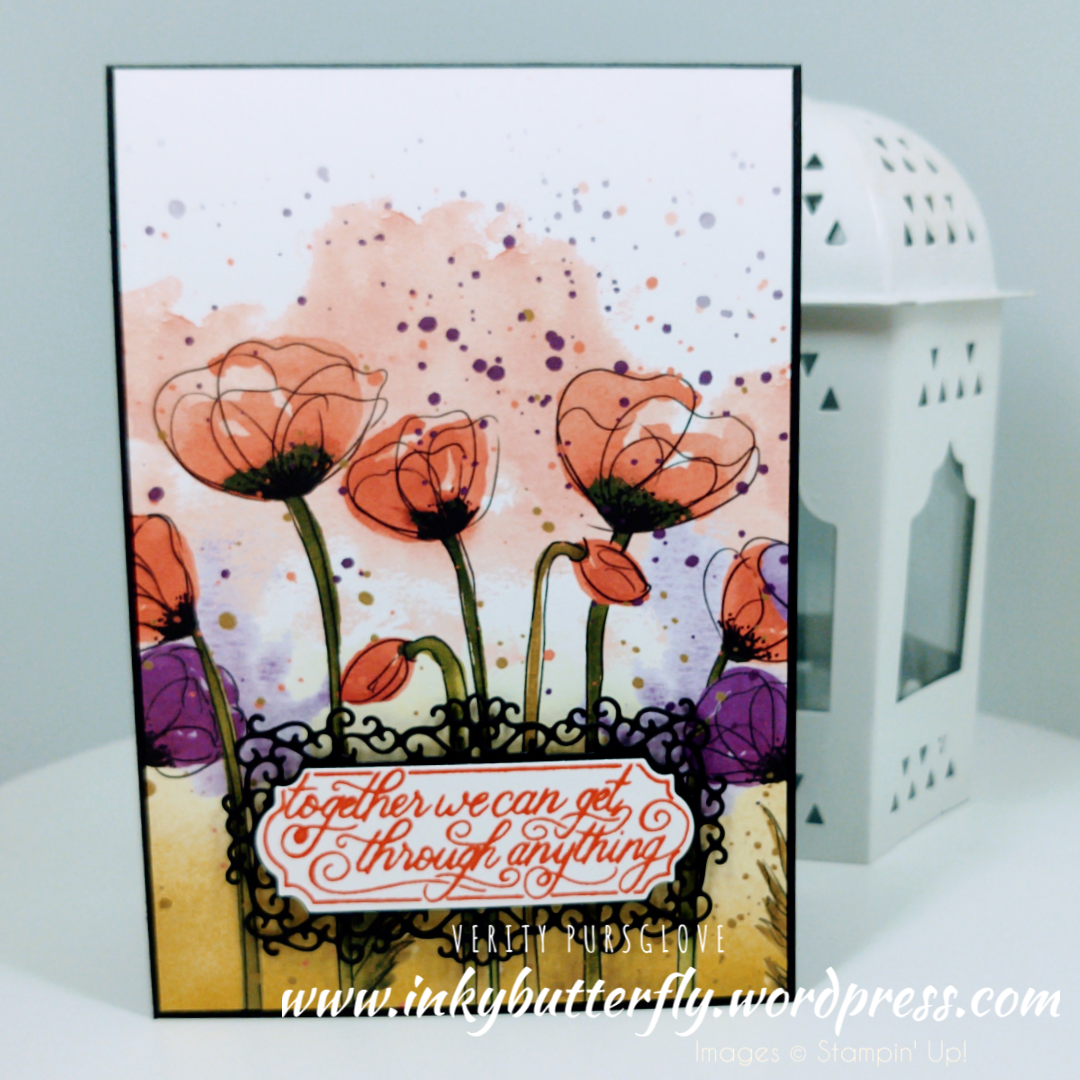
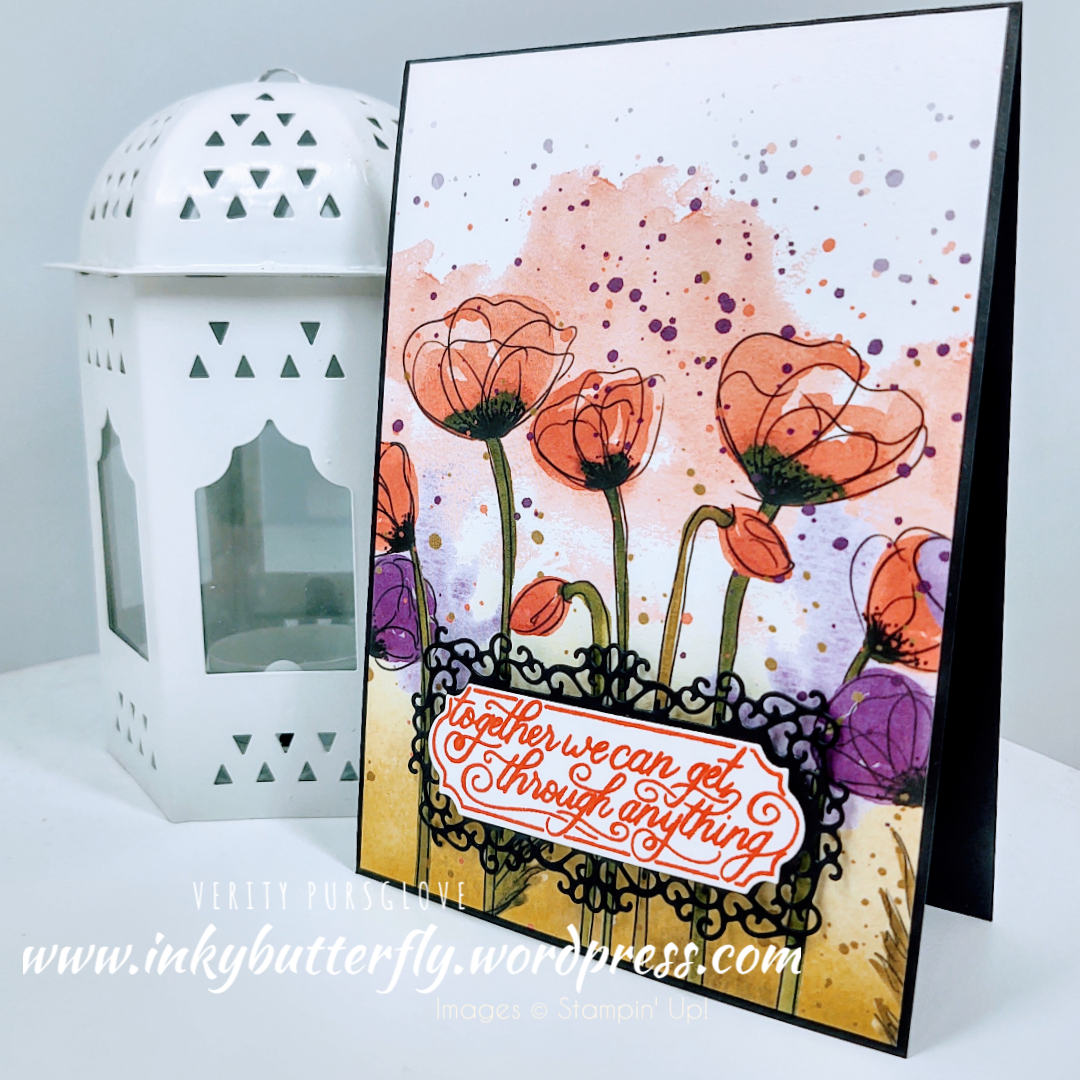
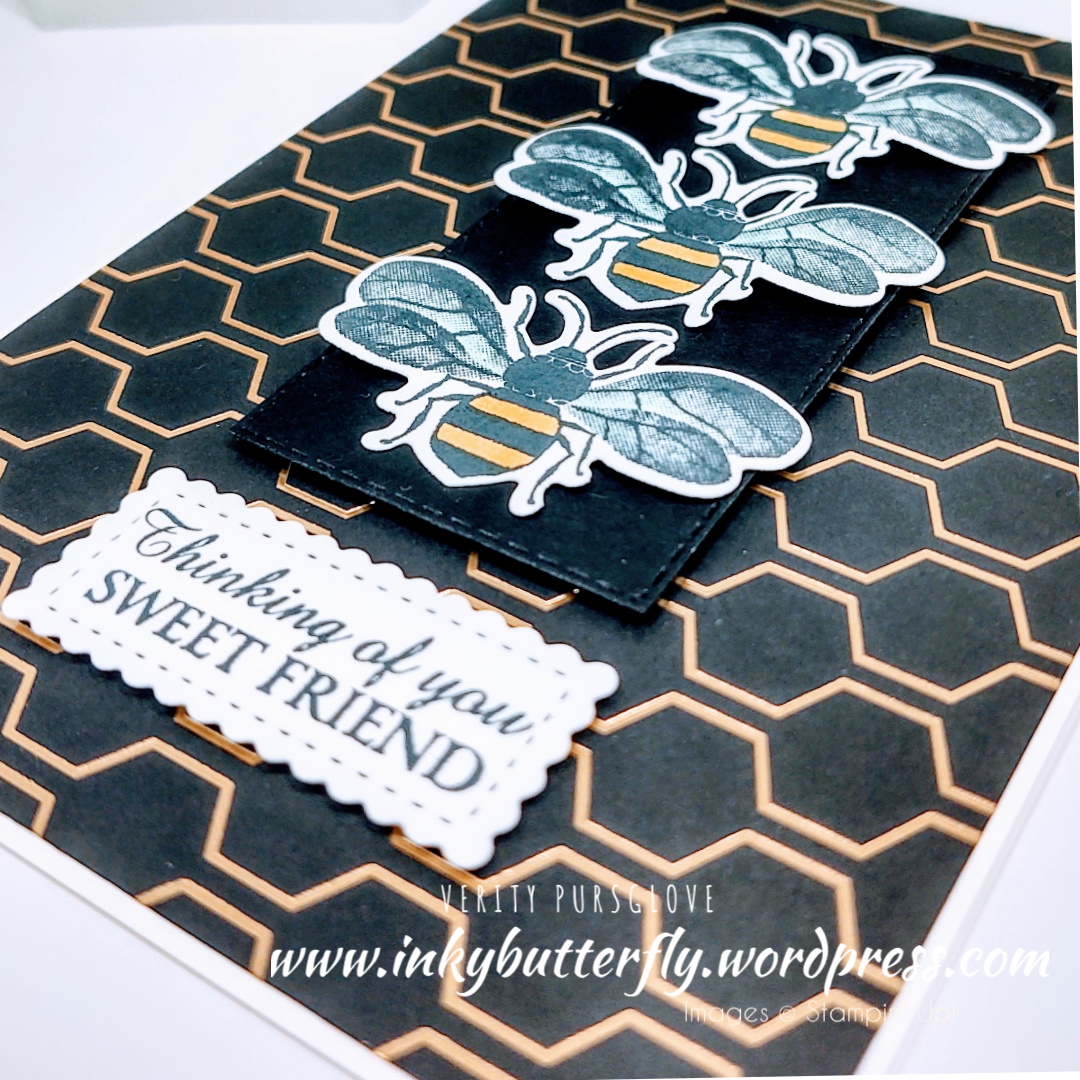
More Thoughtful Blooms

Hello Everyone,

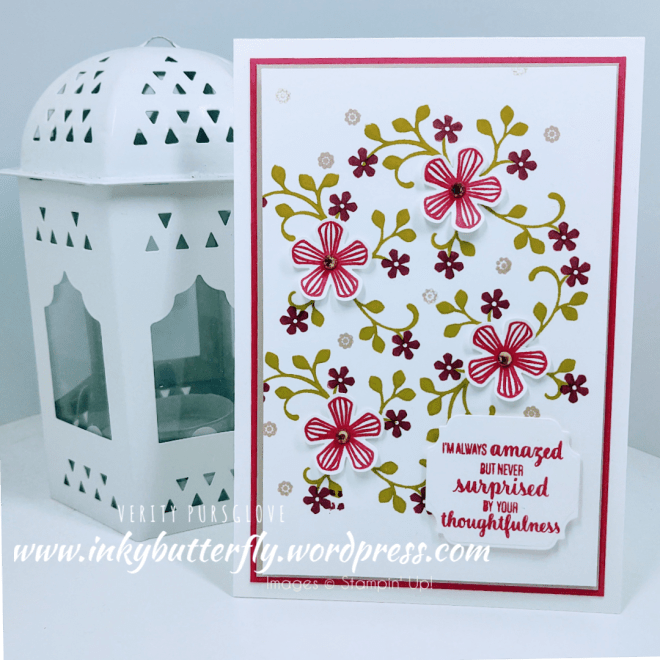
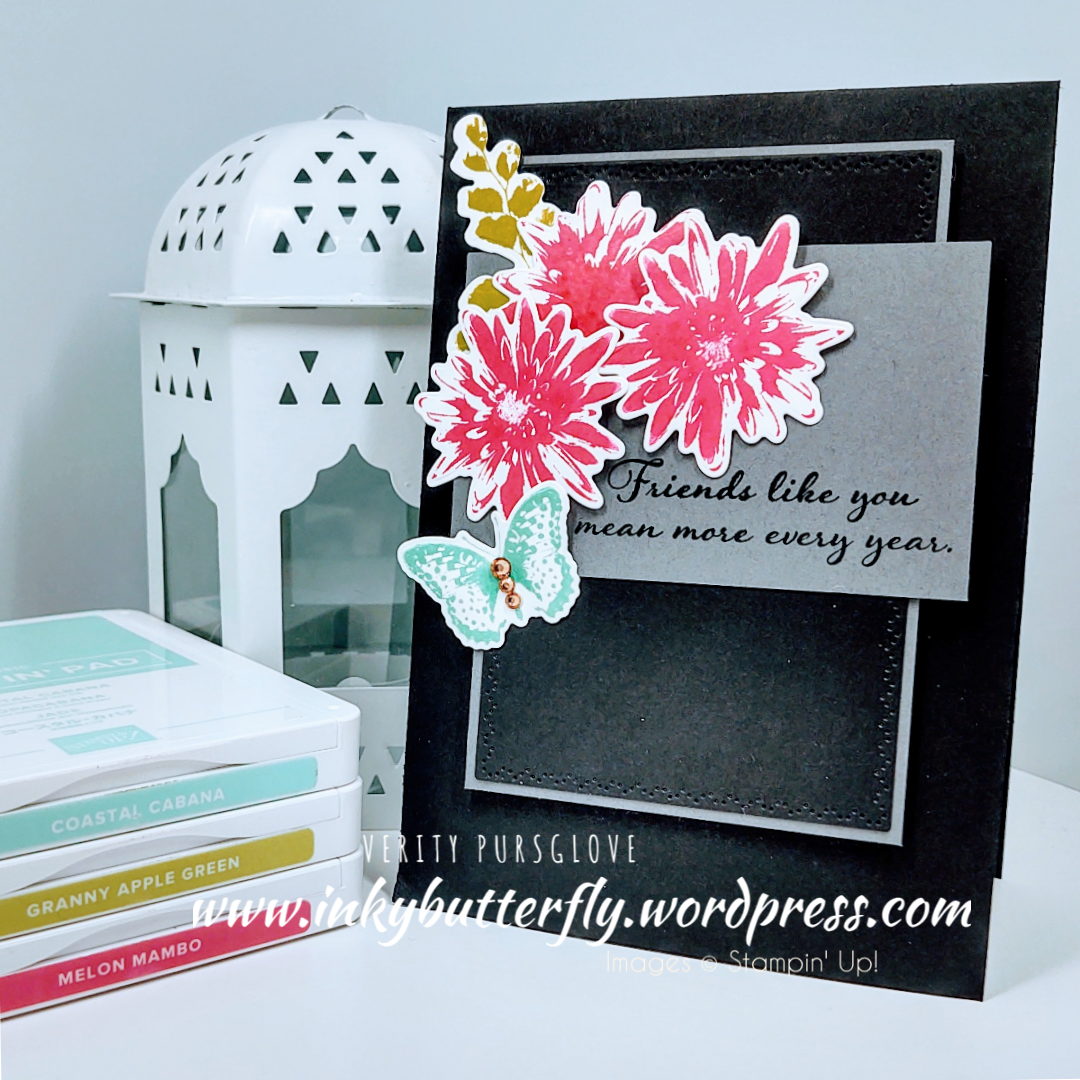
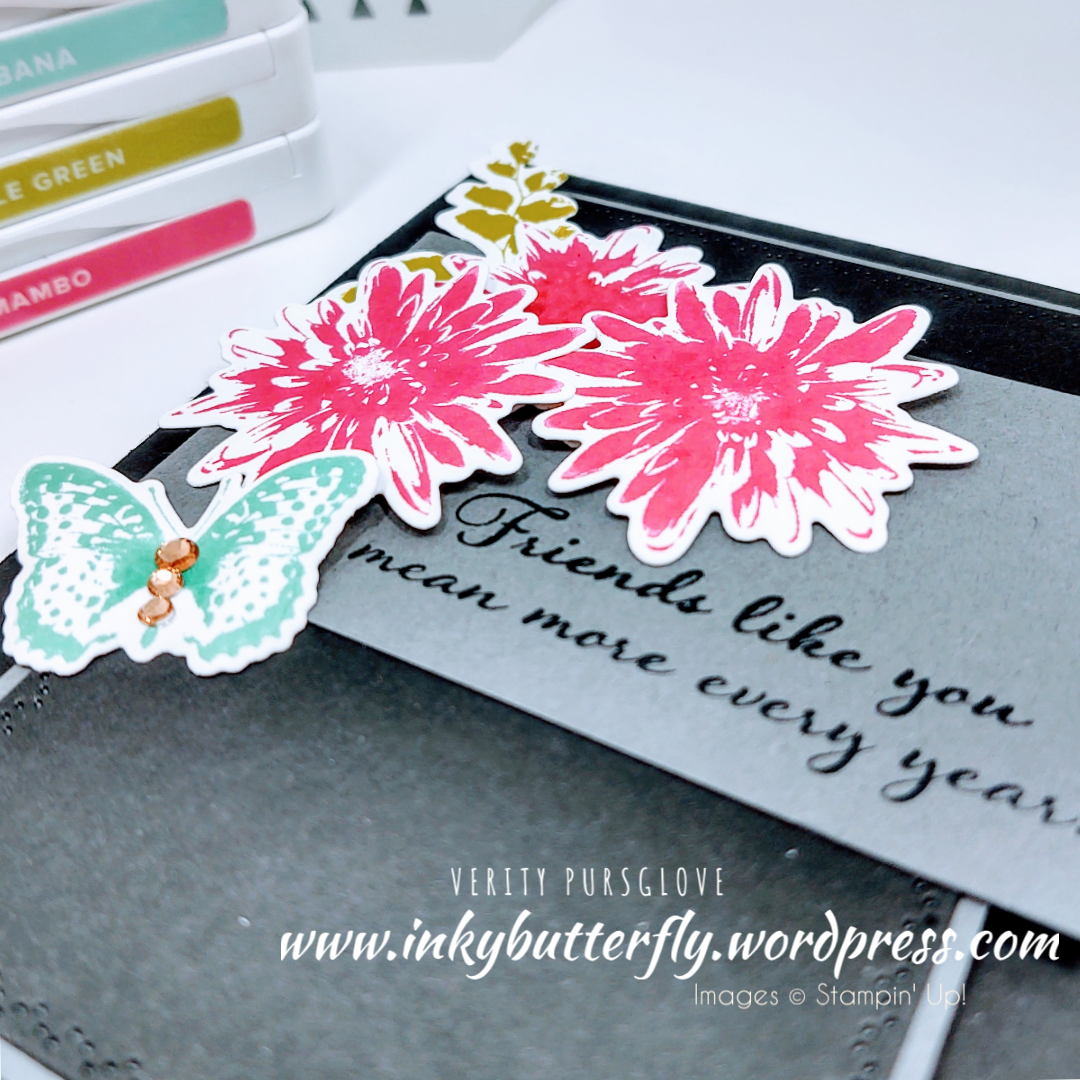
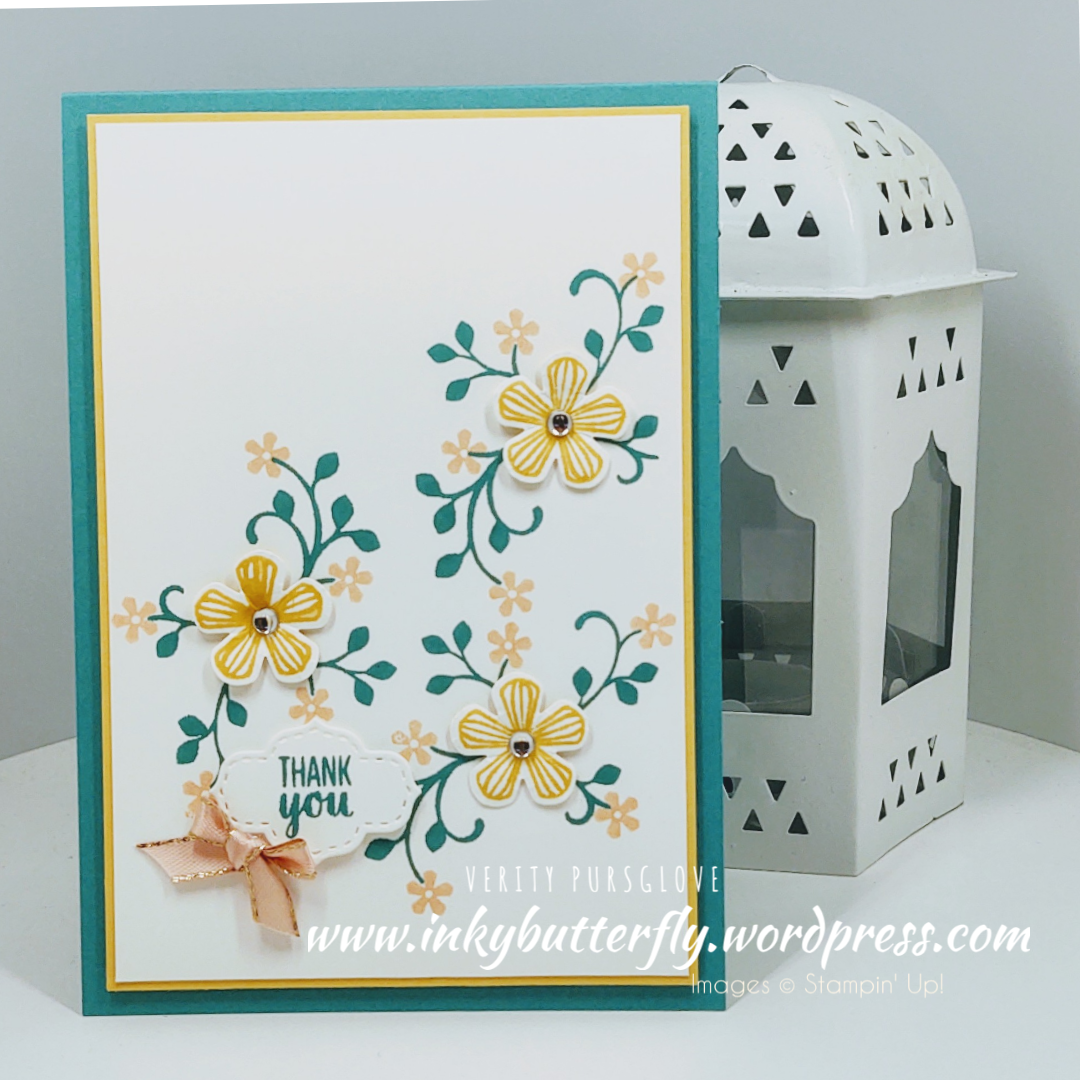
I just love this stamp set and punch! There are so many colour combinations I want to try. This combo was suggested by the SU colour challenge Facebook group!

Merry Merlot, Lovely Lipstick, Sahara Sand & Granny Apple Green.

I started with Granny Apple Green, stamping the leaf clusters over some Whisper White card stock.

Merry Merlot was used to add the small flowers to the open stems. The spaces were filled with the tiny elements in the stamp set using Sahara Sand ink.

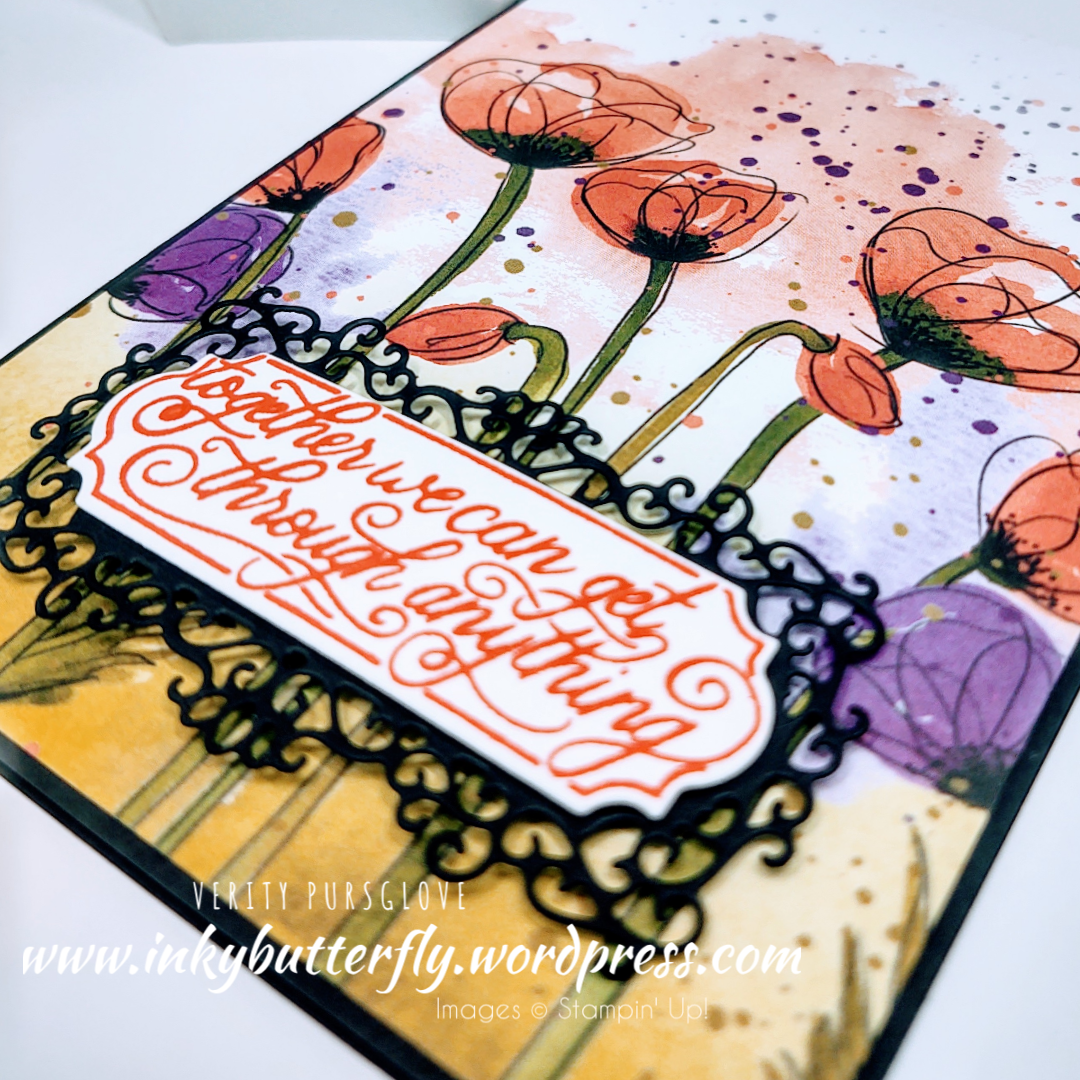
Lovely Lipstick and Sahara Sand card stock was added to a white card base. The stamped panel was trimmed down and adhered with dimensionals.

The blooms were stamped with Lovely Lipstick ink and punched out. Champagne rhinestones were added to the centres.

The sentiment was die cut using the Ornate Frames set. This was adhered with dimensionals.

I hope you enjoyed this project. The supplies used are listed and linked to the online store below.

I would love to be your demonstrator.

Thanks for stopping by today and happy Stampin’!

Verity xx

Product List

Snail Adhesive

[104332]

£6.50

Thank You Blooms

Hello Everyone,

Here’s another card using the Parisian Blossoms Designer Series Paper. This time teamed with the Thoughtful Blooms Sale-a-bration stamp set and matching punch.

The topper is made simply, layering the paper with Cherry Cobbler card stock. This was added to a Petal Pink layer with dimensionals before adhering to a white card base.

Cherry Cobbler ink was used to stamp the sentiment and blooms. Petal Pink ink was added to the flowers to coordinate with the DSP. The sentiment was die cut with the Stitched So Sweetly set and the blooms were punched out.

The elements were assembled on to the card front. Champagne rhinestones were added to the flowers to finish.

I hope you enjoyed this project. The supplies used are listed and linked to the online store below.

I would love to be your demonstrator.

Thanks for stopping by today and happy Stampin’!

Verity xx

Product List


CAS Colours and Sketches #353

Hello Everyone,

Welcome to my blog. Today I am sharing my project for this week’s CAS Colours and Sketches challenge.

This time it’s a sketch challenge. The design team have made some wonderful samples as inspiration. You can see them here

And this is what I created!

This is quite different from my usual makes, but I am very pleased with how it turned out.

The base was made with Basic Black card stock. The Nature’s Thoughts dies were used to cut more black card which was layered with Basic Grey card before adding with dimensionals.

For the topper Basic Grey card stock was cut to size. The sentiment from the Positive Thoughts stamp set was added in black ink.

Other elements from the set were stamped on to Whisper White card stock and die cut.

The pieces were adhered to the card with glue and dimensionals.

Some champagne rhinestones were added to the butterfly for some extra sparkle.

I hope you enjoyed this project. The supplies used are listed and linked to the online store below.

I would love to be your demonstrator.

Thanks for stopping by today and happy Stampin’!

Verity xx

Product List

Paper Trimmer

[152392]

£23.00

Together

Hello Everyone,

More Designer Series Paper in use today with this stunning Peaceful Poppies collection.

The paper makes card making so easy, just add a sentimental and it’s done!

I opted for a black card base, it really compliments the design.

Poppy Parade ink was used to stamp the sentiment from the Perfectly Framed stamp set. The set coordinates with the Ornate frames.

The die cut was added with dimensionals.

I hope you enjoyed this project. The supplies used are listed and linked to the online store below.

I would love to be your demonstrator.

Thanks for stopping by today and happy Stampin’!

Verity xx

Product List


Always and Forever

Hello Everyone,

Today’s project features the Parisian Blossoms Designer Series Paper. This is very pretty with Petal Pink, Pool Party and Champagne foil.

The paper compliments the Forever Blossoms bundle. Even better, purchasing this bundle will qualify for a FREE Sale-a-bration item!

The topper was made with the Stitched So Sweetly dies, layering Pool Party and Whisper White and raising this with dimensionals.

The sentiment was cut with a Stitched Oval die and also adhered with dimensionals.

Some extra blossoms were stamped, coloured and die cut as embellishments.

I hope you enjoyed this project. The supplies used are listed and linked to the online store below.

I would love to be your demonstrator.

Thanks for stopping by today and happy Stampin’!

Verity xx

Product List

Snail Adhesive

[104332]

£6.50


Sweet Friend

Hello Everyone,

My card today uses the Honey Bee bundle alongside the Golden Honey Speciality Designer Series Paper. The paper is one of the items available for free with a qualifying order during Sale-a-bration!

The paper was cut to size to cover the front of a white card base.

Black card stock was cut with a Stitched Rectangle die and adhered to the card with dimensionals.

The sentiment was positioned below this panel. This was cut with the smallest die from the Stitched So Sweetly set.

Three bees were stamped, coloured with Mango Melody and Pool Party blends markers and die cut. These were added to the black rectangle with multipurpose glue.

I hope you enjoyed this project. The supplies used are listed and linked to the online store below.

I would love to be your demonstrator.

Thanks for stopping by today and happy Stampin’!

Verity xx

Product List

Honey Bee Bundle

[153792]

£38.50

Pootlers Blog Hop – Heartfelt

Hello Everyone,

Here we are blog hopping again with the Pootlers Team! The theme is the new Mini Catalogue and Sale-a-bration!

There is a blue box at the end of this post with a link to all the other featured projects. There are so many entries that the links cover two pages! Please take a look, like and subscribe!

I have chosen to work with the Heartfelt bundle to make this layered card.

The card base is made with Real Red card stock. Layers of Whisper White and Flirty Flamingo card stock were adhered with Snail adhesive.

The next layer was cut with the largest rectangular die from the Stitched So Sweetly set. Two vellum hearts were attached toward the top and bottom of the die cut. This was then adhered with dimensionals.

The heart punches were used to cut Real Red and Whisper White card stock.

Two red hearts were sandwiched together with dimensionals.

A sentiment was stamped on to the white heart with Flirty Flamingo ink and added to the others.

I hope you enjoyed this project. The supplies used are listed and linked to the online store below.

You are invited to the Inlinkz link party!

Click here to see the other projects


Thanks for stopping by today and happy Stampin’!

Verity xx

Product List

Paper Trimmer

[152392]

£23.00

Snail Adhesive

[104332]

£6.50

CAS Colours and Sketches #352

Hello Everyone,

Welcome to my blog. Today I am sharing my project for the CAS Colours and Sketches challenge.

This time it’s a colour challenge. The design team have made some wonderful samples as inspiration. You can see them here.

And this is what I created!

The card features the Thoughtful Blooms stamp set and coordinating Small Bloom Punch available during Sale-a-bration.

To make the card I used Bermuda Bay and Petal Pink inks to create the background. This was layered on to So Saffron card stock and then to a Bermuda Bay card base with dimensionals.

Blooms were stamped with So Saffron ink and punched out. Each was shaped with a ball stylus and adhered to the card. A clear Epoxy dot was added to the centres.

The sentiment was die cut with the smallest shape from the Stitched So Sweetly set.

A Petal Pink bow completed the card.

I hope you enjoyed this project. The supplies used are listed and linked to the online store below.

I would love to be your demonstrator.

Thanks for stopping by today and happy Stampin’!

Verity xx

Product List

Layered Floral Birthday

Hello Everyone,

I like to create something different with my products and thought that these punch shapes could be used as petals.

The image was stamped a number of times with Flirty Flamingo ink and punched. Multipurpose glue was used to attached them together.

Two white daisies were punched next and added to the centre.

Medium daisies were stamped with Petal Pink ink and also added to create a large dimensional flower.

A simple sentiment completed the card.

I hope you enjoyed this project. The supplies used are listed and linked to the online store below.

I would love to be your demonstrator.

Thanks for stopping by today and happy Stampin’!

Verity xx

Product List

Daisy Punch

[143713]

£17.00

Paper Trimmer

[152392]

£23.00

Snail Adhesive

[104332]

£6.50

No Matter the Weather

Hello Everyone,

Today’s card uses some favourite supplies from the annual catalogue with a new punch bundle.

Gorgeous Grape and Whisper White card stock was die cut with Stitched Rectangle dies.

Raindrops from the Under My Umbrella stamp set were added to the white panel.

The umbrella handles were stamped next at different heights across the panel.

Gorgeous Grape ink was used to stamp the brollies. These were lightly coloured by pulling some of the ink from the outline with Wink of Stella, and cut with the coordinating punch. These were adhered to the card with dimensionals.

I hope you enjoyed this project. The supplies used are listed and linked to the online store below.

I would love to be your demonstrator.

Thanks for stopping by today and happy Stampin’!

Verity xx

Product List

Snail Adhesive

[104332]

£6.50

Label Me Bold

Hello Everyone,

For my first project of 2020, I just had to use this stamp set, Label Me Bold. This is exactly the kind of set I love to work with.

I have 2 examples here, but of course you can use whatever colours you like!

I picked out three colour combos and began building each background starting with the largest image.

Each panel was wrapped with seam binding ribbon and adhered to a coordinating card base.

A vellum label was punched and secured over the ribbon.

A sentiment was stamped and fussy cut then added with mini dimensionals.

I hope you enjoyed this project. The supplies used are listed and linked to the online store below.

I would love to be your demonstrator.

Thanks for stopping by today and happy Stampin’!

Verity xx

Product List

Paper Trimmer

[152392]

£23.00

Magnolia Thank You

Hello Everyone,

Taking a break from Christmas with this thank you card.

I used Magnolia Lane designer series paper as the background layer. Vellum was added over the top to soften the colours a little.

A frame was cut with the Stitched Rectangle dies which was then adhered with dimensionals.

Old Olive ink was used to stamp the sentiment taken from the Modern Heart set. This was cut with a circle punch and added to the card.

Daisies were stamped with Petal Pink ink and cut with the coordinating punch. Leaves and sprigs were cut from Old Olive card stock and vellum.

The punched elements were adhered the card with multipurpose glue.

I hope you enjoyed this project. The supplies used are listed and linked to the online store below.

I would love to be your demonstrator.

Thanks for stopping by today and happy Stampin’!

Verity xx

Product List

Leaf Punch

[144667]

£15.00

Sprig Punch

[148012]

£17.00

Paper Trimmer

[152392]

£23.00

Joyful Christmas

Hello Everyone,

For today’s card I am using the gorgeous Beauty and Joy stamp set. This set will retire after Christmas, don’t miss adding this to your crafty stash!

The images were stamped on to Whisper White card stock. The stamps have a textured finish to give a realistic look.

The Cherry Cobbler sentiment frames the tree and the gold stars add some glitz.

I hope you enjoyed this project. The supplies used are listed and linked to the online store below.

I would love to be your demonstrator.

Thanks for stopping by today and happy Stampin’!

Verity xx

Product List

Paper Trimmer

[152392]

£23.00

Snail Adhesive

[104332]

£6.50

More Yuletide Cheer

Hello Everyone,

This card was made completely spontaneously using supplies I had with me whilst crafting with my team.

I wouldn’t normally use so many stamp sets on one project but look how lovely it is!

The card design is reasonably self explanatory, building the background with the images as shown in the photo. The gold snowflakes were a late addition but really help tie the layout together.

A Stitched circle die was used the cut the sentiment which adhered with dimensionals.

I hope you enjoyed this project. The supplies used are listed and linked to the online store below.

I would love to be your demonstrator.

Thanks for stopping by today and happy Stampin’!

Verity xx

Product List

Family, Friends & Happiness

Hello Everyone,

I haven’t used this image from the Frosted Foliage stamp set, so I created this simple card.

The outline image was stamped on to a card layer with Gray Granite ink and coloured with a Cherry Cobbler watercolour pencil.

Some little dots from the Beauty and Joy set we’re added to fill in the background.

Cherry Cobbler Ink was added to the edge of the card stock before adhering to the card base.

The sentiment was added at the bottom with dimensionals.

I hope you enjoyed this project. The supplies used are listed and linked to the online store below.

I would love to be your demonstrator.

Thanks for stopping by today and happy Stampin’!

Verity xx

Product List

Blender Pens

[102845]

£11.25

Snail Adhesive

[104332]

£6.50

Blush Snowflakes

Hello Everyone,

As the Christmas season is drawing ever nearer, I thought I would share a quick card idea.

This card was simply stamped using the Frosted Foliage stamp set and Blushing Bride ink.

The sentiment is from the same set and stamped with Real Red ink. This was cut with a Stitched Circle Die and adhered to the card with dimensionals.

Simples! But very pretty!

I hope you enjoyed this project. The supplies used are listed and linked to the online store below.

I would love to be your demonstrator.

Thanks for stopping by today and happy Stampin’!

Verity xx

Product List

Spruce Wreath

Hello Everyone,

This stamp set has to be one of my favourites from the Autumn Winter catalogue.

Shaded Spruce ink was used to stamp the wreath on to a white card base. The “berries” were added using Real Red ink.

The sentiment was stamped with Real Red ink and cut with Stitched Circle die. This was adhered in the centre of the wreath with dimensionals.

A bow was tied from Shaded Spruce Gold striped ribbon and added to the bottom.

I hope you enjoyed this project. The supplies used are listed and linked to the online store below.

I would love to be your demonstrator.

Thanks for stopping by today and happy Stampin’!

Verity xx

Product List

Seasons Greetings

Hello Everyone,

I thought I would share this non traditional Christmas card design with you today.

The colour combination I used is Balmy Blue, Pacific Point, Night of Navy and Rich Razzleberry.

Whisper White card stock was coloured through a decorative mask using Stampin’ Sponges.

Before removing the mask, versamark ink was pressed over the panel. (The ink pad will get stained, so using an older pad might be a good idea).

I applied some clear embossing powder and heat set this to give a shiny design. This was adhered to a white card base.

A sentiment was added using Rich Razzleberry ink.

The stars were heat embossed with silver powder and die cut with the coordinating dies.

I hope you enjoyed this project. The supplies used are listed and linked to the online store below.

I would love to be your demonstrator.

Thanks for stopping by today and happy Stampin’!

Verity xx

Product List

Versamark Pad

[102283]

£8.75

Paper Trimmer

[152392]

£23.00

On Stage live 2019

Hello Everyone,

It’s Monday and back to the day job after spending a wonderful few days with my Stampin family at On Stage live in Germany.

Thankfully we had a contingency of German speakers who were so helpful when it came to getting around and translating menus!

Thank you so much lovely ladies!

One of the best things is meeting up with other team members, Hillery drove in from the Netherlands for her first On Stage.

It is amazing to see so many Stampers in the same room! And boy they are noisy!

I was recognised for Leadership and Recruiting with these ribbons.

And my Prize Patrol gift was this beautiful tropical set ready for the Summer!

It was an honour to see Sophie walk the stage for her achievements.

And here is the incredible Sam getting her hug from Shelli!

Sam also presented to the audience… The Pootlers were extra noisy to alleviate her nerves.

Sean was only too happy to be the cameraman for the stream of people wanting a picture with Sara and Shelli!

It was a blast!

And of course we got to see the new mini catalogue, with presentations through the day from other demonstrators from across Europe.

Another first timer… Leah who did eventually pluck up the courage to give out her swaps.

And this is my wonderful downline Tina! She had an amazing time at her first live event!

I would love to take even more team members to the next event – if that sounds good to you, click below to see more information.

Thanks for stopping by today and happy Stampin’!

Verity xx

Ho Ho Ho

Hello Everyone,

This card really shows how beautifully Stampin’ Up! colours match across the product range… Ink, paper and card stock!

A Garden Green card base was layered with a strip of Very Vanilla, Garden Green card stock and a scrap of Toile Tidings DSP.

I didn’t measure these, I just used off cuts and trimmed to the correct width.

Garden Green ink was used to stamp the sentiment and trees on to Very Vanilla card stock. These were adhered with dimensionals.

I hope you enjoyed this project. The supplies used are listed and linked to the online store below.

I would love to be your demonstrator.

Thanks for stopping by today and happy Stampin’!

Verity xx

Product List

Paper Trimmer

[152392]

£23.00

Snail Adhesive

[104332]

£6.50