Simple Stamping with Botanical Layers

Hello Everyone,

I have a bit of simple stamping to share today. I’ve used Botanical Layers with Blackberry Bliss and Fresh Freesia…. I’m so glad we are keeping this colour!

You can see how I made this card in my video tutorial

Using second generation ink adds another shade without using another inkpad!

This combo uses Soft Seafoam and Shaded Spruce – another great Regal and Subtle combination!

I hope you enjoyed this project.

The supplies used are listed and linked to the online store below.

I would love to be your demonstrator.

Thanks for stopping by today and happy Stampin’!

Verity xx

Product List

My Pootlers Craft Retreat Swaps

Hello Everyone,

This post is a little overdue, but better late than never.

Followers will know 3D projects aren’t my thing, but here is a little something I made for the rest of the team at our retreat organised by my upline, Sam aka Pootles Papercraft.

These needed to be simple to make as a batch!

You can see how I made them in my video tutorial….

I used a selection of colours to stamp the image and Hues of Happiness designer series paper inside. You can make 12 of the wraps from one sheet of paper!

I hope you enjoyed this project.

The supplies used are listed and linked to the online store below.

I would love to be your demonstrator.

Thanks for stopping by today and happy Stampin’!

Verity xx

Product List

Punched Floral Card Inspired by Kaye

Hello Everyone,

Here’s another card made using inspiration from our recent craft retreat and colour challenge chucked in too!

I’ve used a bunch of punches for dimension and texture!

You can see how I made this card in my video tutorial….

Some Wink of Stella and rhinestones in the flower centres add some glitz!

This is the card we made with Kaye over the weekend! It was so much fun!

I hope you enjoyed this project.

The supplies used are listed and linked to the online store below.

I would love to be your demonstrator.

Thanks for stopping by today and happy Stampin’!

Verity xx

Product List

Project Share Project Blog Hop – Black & White

Good Morning Everybody,

Welcome to this month’s Project Share Project blog hop.

Our theme for October is “black and white”!

Please use the links below to see the other projects, or use the “Next” button at the bottom of this post.

Gez – Nigezza Creates

Heather – Stamp with Nellie

Jill – Paper Daisy Crafting

I had made this layered card with the Shaded Summer stamp set.

You can see how I made this card in my video tutorial …..

This is so quick and easy to make!

Coloured ribbon and mattte black dots finish the card!

Click below to see Gez’s project …

I hope you enjoyed this project.

The supplies used are listed and linked to the online store below.

I would love to be your demonstrator.

Thanks for stopping by today and happy Stampin’!

Verity xx

Product List

Inspire.Create.Challenge #115 Colour Challenge

Hello Everyone,

Welcome to my blog post today showcasing my Design Team project for the new Inspire.Create.Challenge.

This time we are using a colour challenge…

Stop by the Inspire.Create.Challenges blog to see all the Design Team projects and upload your entry. We’d love to see your creations.

I have chosen to work with Shaded Summer and Watercolour Shapes stamp sets.

The background was created with first, second and third generation stamping similar to a Bokeh effect.

The stamparatus helped to get a good solid black image by stamping it at least twice.

Using the Double Oval punch was perfect to accompany the layout.

********************

I hope you enjoyed this project.

The supplies used are listed and linked to the online store below.

I would love to be your demonstrator.

Thanks for stopping by today and happy Stampin’!

Verity xx

Product List

Using Retiring In Colours with the Dragonfly Garden Stamp Set

Hello Everyone,

The 2021-2022 annual catalogue will retire in a few weeks time and that means we will be losing this wonderful set of In Colours!

It’s not all bad news…. We get five brand new ones to replace them!

So for today’s card I’m using them all! I’ve picked out the Dragonfly Garden Stamp Set, another annual catalogue favourite!

You can see how I made this card in my video tutorial….

Curling the wings of the punched dragonflies gives them movement and adds some dimension to the finished project.

I popped in a layer of Basic Black to lift the stamped layer from the base card.

I hope you enjoyed this project.

The supplies used are listed and linked to the online store below.

I would love to be your demonstrator.

Thanks for stopping by today and happy Stampin’!

Verity xx

Product List

Using Punches to Create Pretty Floral Cards

Hello Everyone,

Today’s card is all about punches! They are quick and easy to use and even better, some coordinate with stamps too.

I’m using two different flowers from the Sweet Strawberry and Flowers of Friendship stamp sets.

You can see how I made this card in my video tutorial…..

The colour combination is inspired by a recent challenge that I missed out on participating in. It’s so pretty!

The vellum doilies create an interesting backdrop for the layout. They can be coloured to match your project too!

I hope you enjoyed this project.

The supplies used are listed and linked to the online store below.

If your order is less than £150, use the Hostess Code PBNW9JZN when placing your order to get an extra gift from me!

I would love to be your demonstrator.

Thanks for stopping by today and happy Stampin’!

Verity xx

Product List

Creating Subtle Backgrounds with Decorative Masks & Pastels

Hello Everyone,

Today I am sharing a technique to create backgrounds using the Soft Pastel Assortment.

Using this medium gives a much softer colour to the background than can be achieved with inks.

You can see how I made this card in my video tutorial….

The piece was simply layered with coordinating cardstock with a die cut sentiment added with dimensionals

This card used a different mask but the same pastel colours. This time the sentiment was cut with the Double Oval punch.

I hope you enjoyed this project.

The supplies used are listed and linked to the online store below.

If your order is less than £150, use the Hostess Code PBNW9JZN when placing your order to get an extra gift from me!

I would love to be your demonstrator.

Thanks for stopping by today and happy Stampin’!

Verity xx

Product List

Creative Colour Challenges #8

Hello Everyone,

Today’s card is for teammate Vickie’s Creative Colour Challenge….

Find out more and participate HERE

I have made my card using the Very Versailles stamp set. The muted colours lent themselves to a vintage look, so I stamped on to Very Vanilla cardstock.

Second generation ink softens the images and adding some ink around the edges gives an aged feel.

You can see how I made this card in my video tutorial…..

The Real Red ribbon and sentiment introduces a pop of colour to the design.

I hope you enjoyed this project.

The supplies used are listed and linked to the online store below.

If your order is less than £150, use the Hostess Code PBNW9JZN when placing your order to get an extra gift from me!

I would love to be your demonstrator.

Thanks for stopping by today and happy Stampin’!

Verity xx

Product List

Project Share Project

Hello Everyone,

Welcome to this week’s Project Share. As always my friends have created some lovely work. Please use the links to visit their blogs and read more about their projects.

***** ***** ***** ***** *****

Jill’s card uses the classic combination of black and gold for this graduation card. Change the sentiment for any occasion!

Visit Jill’s blog here

***** ***** ***** ***** *****

Heather has made this gorgeous home decor piece. The pearl Designer Series Paper makes the seashells look so realistic!

Visit Heather’s blog here

***** ***** ***** ***** *****

Gez is using a colour challenge as inspiration for her card. These black and white designs are perfect for colouring!

Visit Gez’s blog here

***** ***** ***** ***** *****

I hope you enjoyed these projects. The supplies used are listed and linked to the online store below.

I would love to be your demonstrator.

Thanks for stopping by today and happy Stampin’!

Verity xx

Product List

Simple Stamping with Treasured Medallion, (& Colour Challenge)

Hello Everyone,

Isn’t this stamp set gorgeous? I don’t recall seeing any samples using it and I am so sad I haven’t used it sooner…..

This colour challenge was a perfect opportunity to work with the set…

The colours I’ve used are;

  • Crumb Cake
  • Crushed Curry
  • Early Espresso

You can see how I made this card in my video tutorial….

What do you think? Which colour option do you prefer?

I love how the Wink of Stella add shimmer and colour at the same time!

I hope you enjoyed this project.

The supplies used are listed and linked to the online store below.

If your order is less than £150, use the Hostess Code F2QFV2PT when placing your order to get an extra gift from me!

I would love to be your demonstrator.

Thanks for stopping by today and happy Stampin’!

Verity xx

Product List

Bright Patchwork with the Right Triangle bundle

Hello Everyone,

To continue with the retiring product showcase this week, today’s project uses the Right Triangle and Rustic Retreat stamp sets.

Both sets are a little overlooked in the annual catalogue but I really enjoyed using them.

You can see how I made this card in my video tutorial….

I think this would make a great card for a guy too by switching Brights for neutrals!

I hope you enjoyed this project.

The supplies used are listed and linked to the online store below.

If your order is less than £150, use the Hostess Code F2QFV2PT when placing your order to get an extra gift from me!

I would love to be your demonstrator.

Thanks for stopping by today and happy Stampin’!

Verity xx

Product List

Project Share Project

Hello Everyone,

Welcome to this week’s Project Share. As always my friends have created some lovely work. Please use the links to visit their blogs and read more about their projects.

This week, the ladies are making sweet treat wrappers ready for Easter!

*************************

Jill’s Easter treats are perfect for table favours. These can be made in any of the wonderful Stampin’ Up! colours!

Visit Jill’s blog here

*************************

Heather has been very inventive with this little box. Perfect for these Hippo treats, but would make a lovely box for any occasion!

Visit Heather’s blog here

*************************

Gez has made these super cute treat sliders. These are great projects to use scraps of paper and leftover ribbon!

Visit Gez’s blog here

*************************

I hope you enjoyed these projects. The supplies used are listed and linked to the online store below.

I would love to be your demonstrator.

Thanks for stopping by today and happy Stampin’!

Verity xx

Product List

Using Die Cuts and Punches to Make Beautiful Cards

Hello Everyone,

Today I wanted to make something really special and extravagant.

I pulled out the gorgeously detailed Many Medallions dies and the coordinating stamp set.

With a trim, this die cut fits a UK card base perfectly. Adding some ink with a blending brush highlights the details!

See how I made this card in my video tutorial…..

This combination of punches makes quick and easy embellishments.

I love this version of the card made in Blushing Bride!

I hope you enjoyed this project.

The supplies used are listed and linked to the online store below.

If your order is less than £150, use the Hostess Code UYZ33U2J when placing your order to get an extra gift from me!

I would love to be your demonstrator.

Thanks for stopping by today and happy Stampin’!

Verity xx

Product List

Inspire.Create.Challenge #085

Hello Everyone,

Today I am delighted and honoured to be sharing my first project as an Inspire.Create challenge. Design Team member!

This time it’s a 3D theme challenge. The rest of the design team have made some wonderful samples as inspiration. You can see them here.

Why not give it a go? We’d love to see your 3D creations!

3D projects aren’t my forté… I hope you enjoy my effort with this mini album. I learned to make these many years ago. They make lovely gifts!

I made my samples with the Paper Blooms Sale-a-bration designer series paper pack. I just love the colour palette in this collection!

Each “page” uses a 6 by 6 piece of paper so you can get 4 out of each 12 by 12 sheet. This project requires 6 pages.

To make each square;

  • Fold in half and reopen, bring each side to the middle fold to create 4 sections
  • Turn 90 degrees and repeat. You should have 16 squares, measuring 1-1/2 inches, in your paper
  • I like to use a scoreboard to create these first set of squares, (score at 1-1/2, 3 and 4-1/2 inches)
  • Fold each corner to the centre point, crease and reopen
  • Turn in each corner to the first 1-1/2 inch intersection, then fold in to the centre

  • Turn over the folded paper
  • Fold each corner the the centre point and reopen
  • Turn it back over
  • On three sides, lift and fold back on itself – this is called a squash fold

  • Insert a square of cardstock that measures just under 3 inches.
  • Use the exposed points to join the pages together with wet glue

To make the cover;

  • Cut a piece of cardstock 7 by 3-1/4 inches
  • Score on the long side at 3-1/5 and 3-3/4 inches
  • Cut a layer in coordinating cardstock 3-1/8 square, and designer series paper 3 inches square
  • Round the corners and adhere the pieces to the front cover
  • Add ribbon across the inside of the cover
  • Add white cardstock to the inside back cover, over the ribbon
  • Decorate the front using the Double Oval, Small Bloom and Sprig Punches!

Adhere the pages to the inside front cover of the album. If preferred, the back page can also be adhered in place.

Tags and other embellishments can be added to the inside.

I hope you enjoyed this project.

I have created 2 videos showing the page folding and making the cover.

The supplies used are listed and linked to the online store below.

If your order is less than £150, use the Hostess Code UYZ33U2J when placing your order to get an extra gift from me!

I would love to be your demonstrator.

Thanks for stopping by today and happy Stampin’!

Verity xx

Product List

Project Share Project

Hello Everyone,Welcome to this week’s Project Share. As always my friends have created some lovely work. Please use the links to visit their blogs and read more about their projects.

******************************************

Jill’s card really caught my eye this week. Loads of texture from the stamping, layering and inking! I do love these colours together!Visit Jill’s blog here!

Heather has made this Designer Series Paper match her card project by adding some colour with Stampin’ Blends!Visit Heather’s blog here!

Gez has combined die cutting and ink blending to create this fabulous effect for her card. I love the purple colour it has made!Visit Gez’s blog here!

I hope you enjoyed these projects. The supplies used are listed and linked to the online store below.I would love to be your demonstrator.Thanks for stopping by today and happy Stampin’!Verity xx

Product List

Pootlers Blog Hop – Mini Catalogue Products!

Hello Everyone,

Welcome to our Mini Catalogue blog hop.

You will find loads of ideas to use your new mini catalogue products, just follow the links by clicking on the blue button below! There are two pages of links so be to check them all!

You are invited to the Inlinkz link party!

Click here to enter

https://fresh.inlinkz.com/js/widget/load.js?id=a3325ea8d75a7b860d96

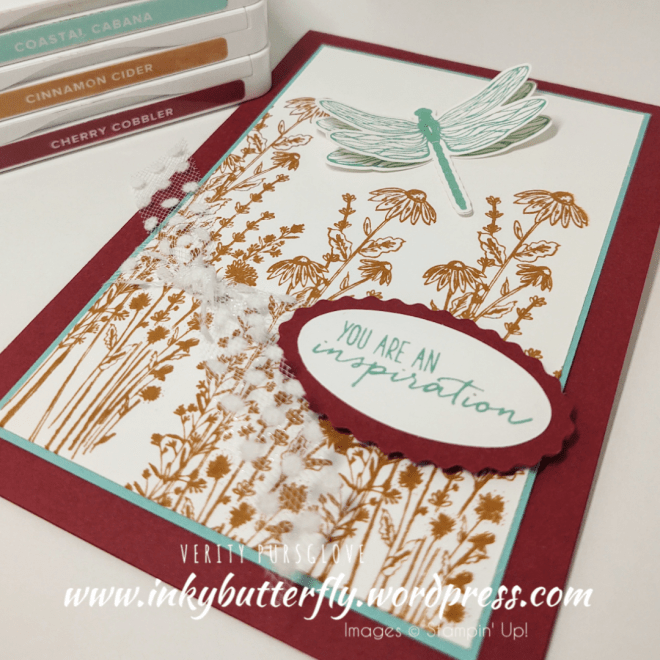
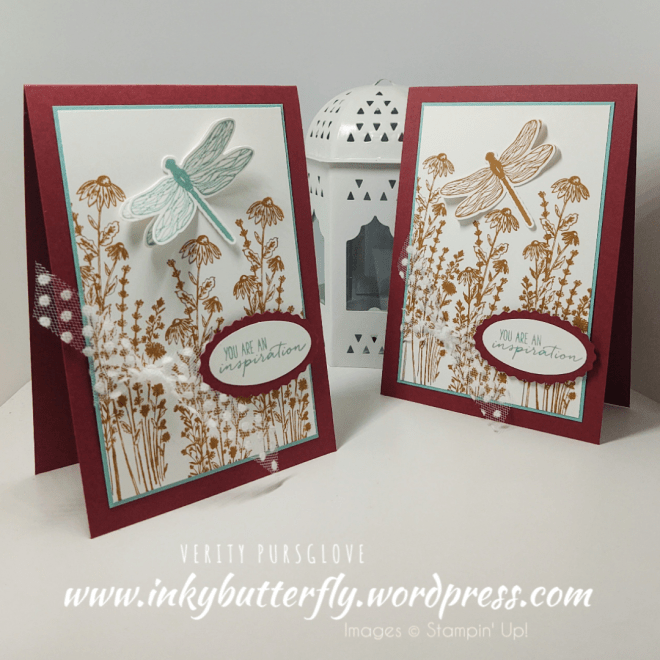
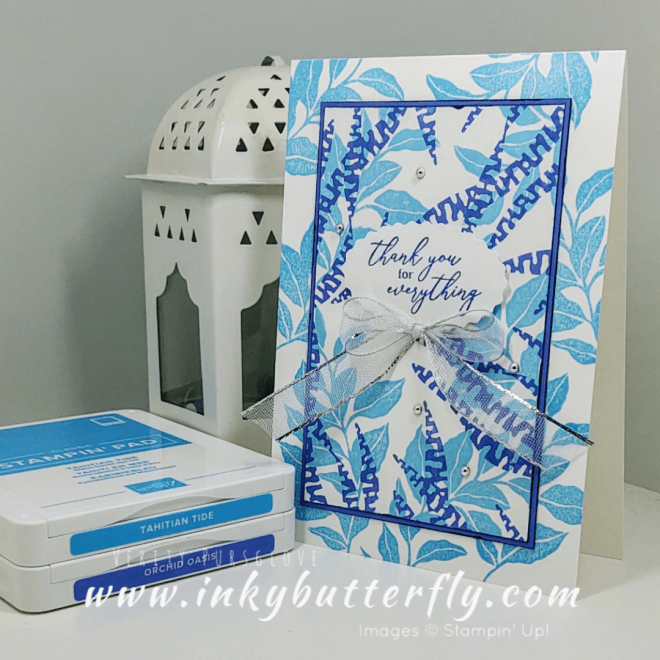
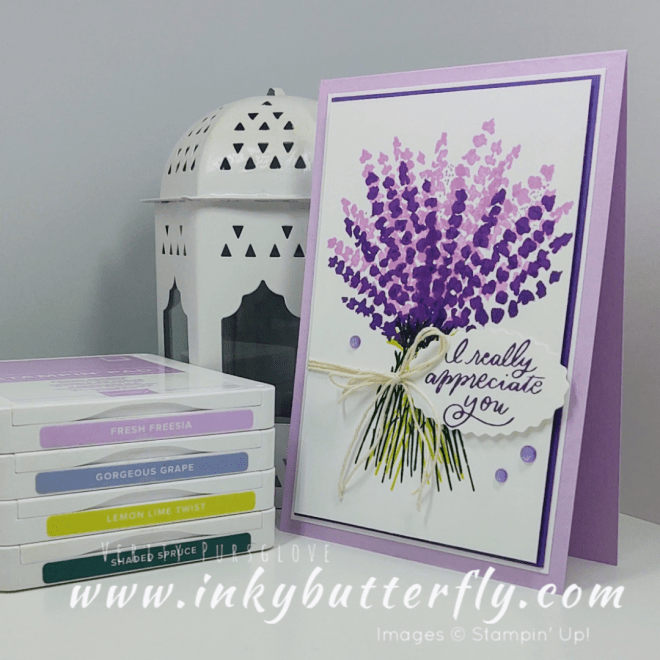
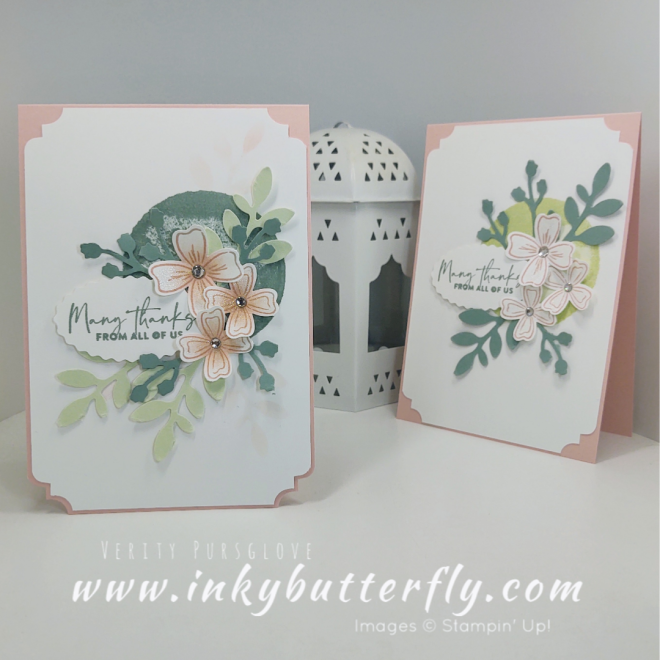
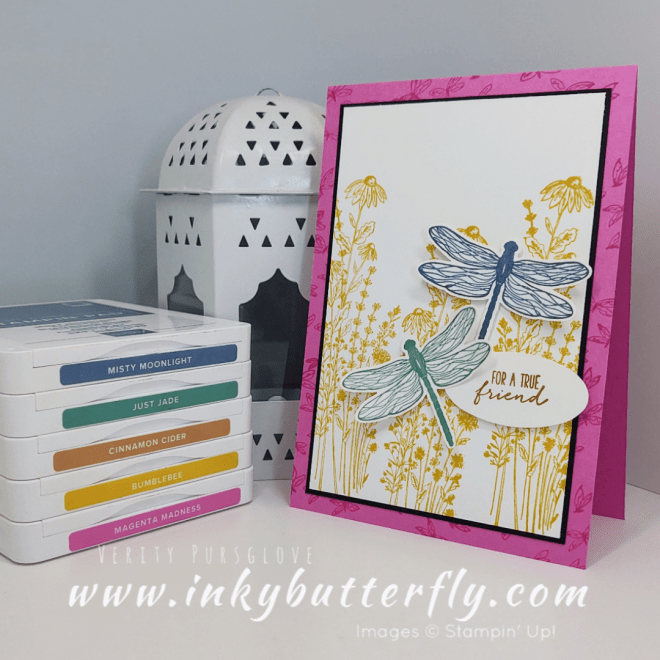
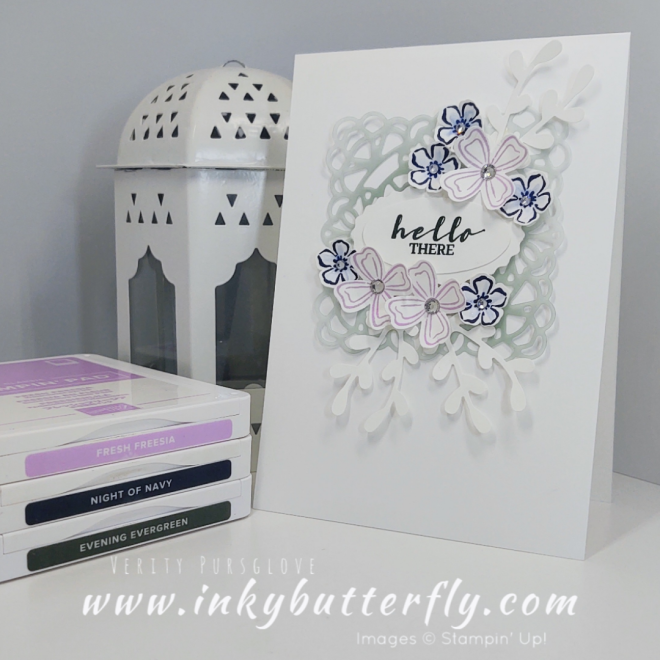
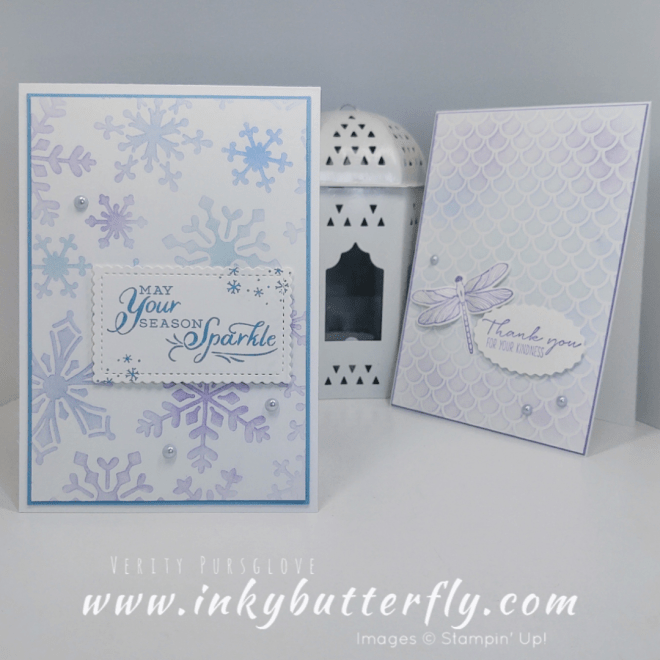
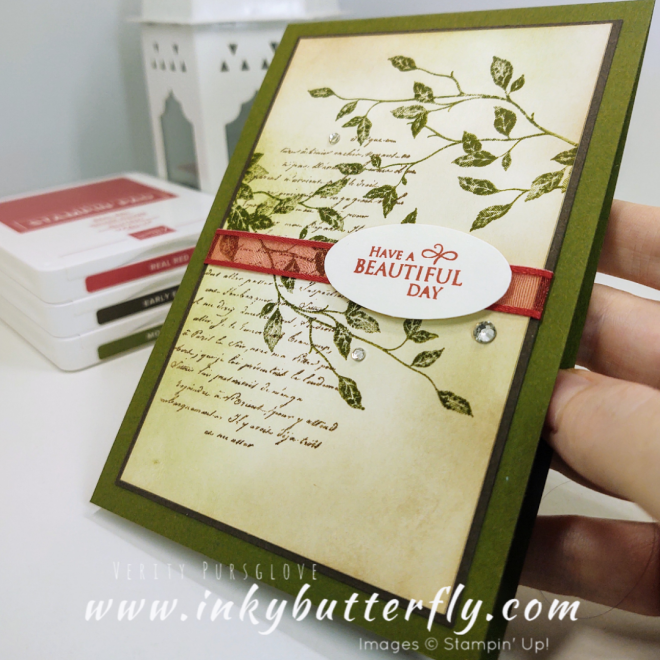
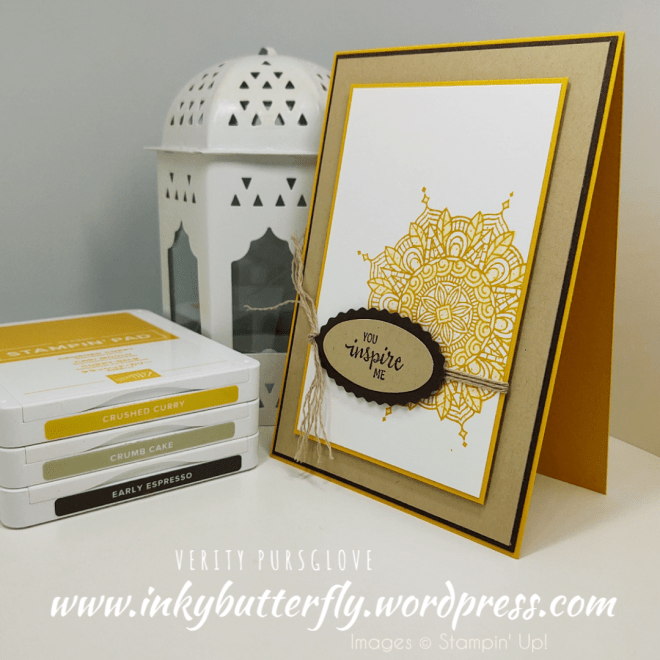
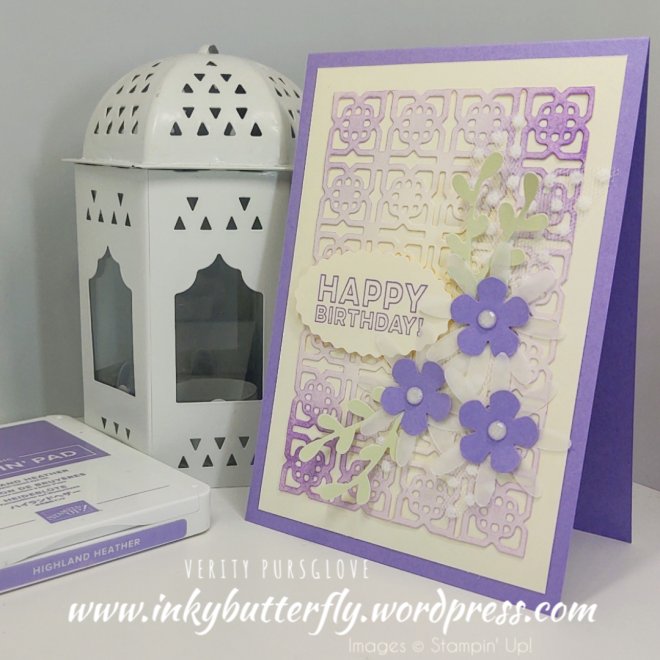
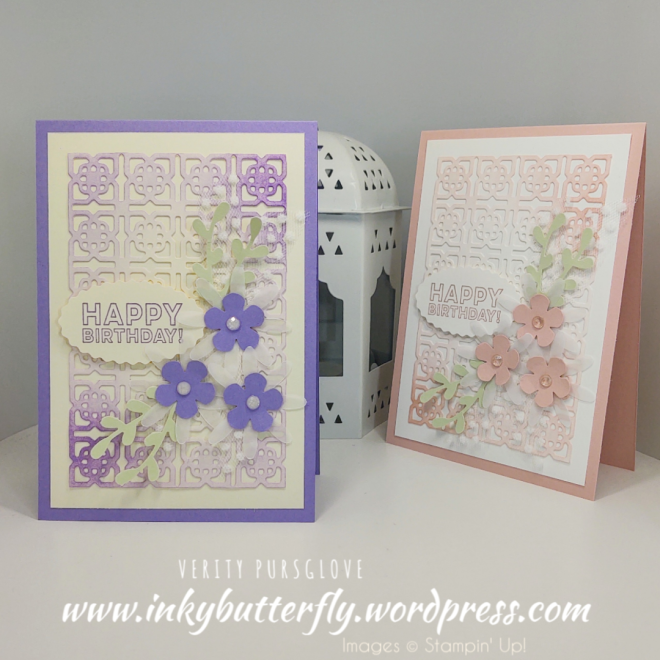
I chose to make my project using these fantastic products!

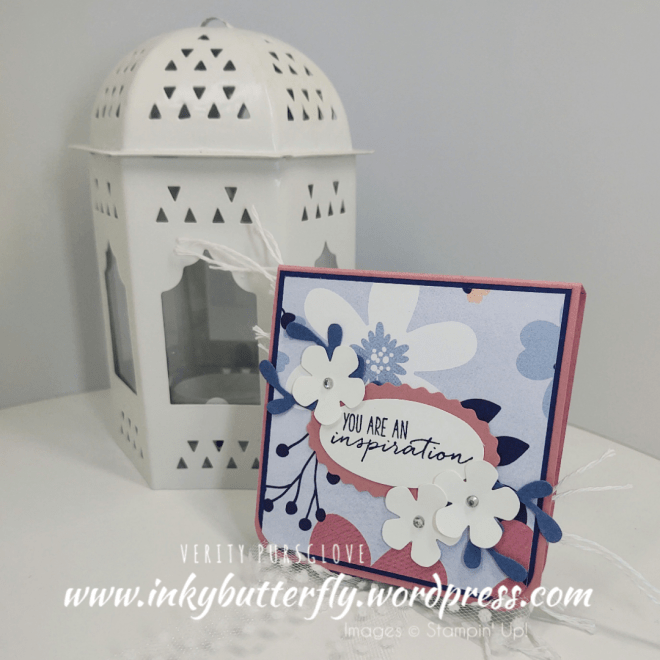
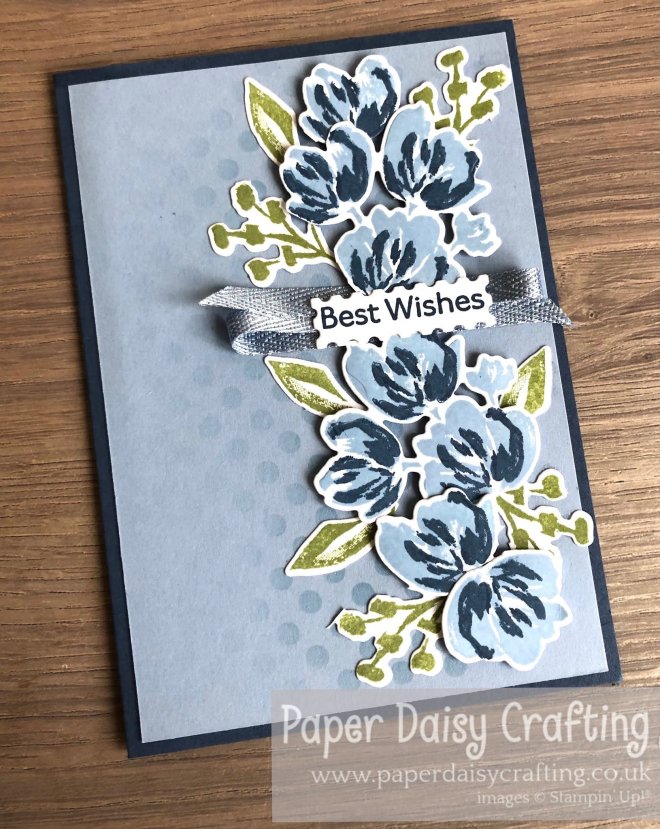
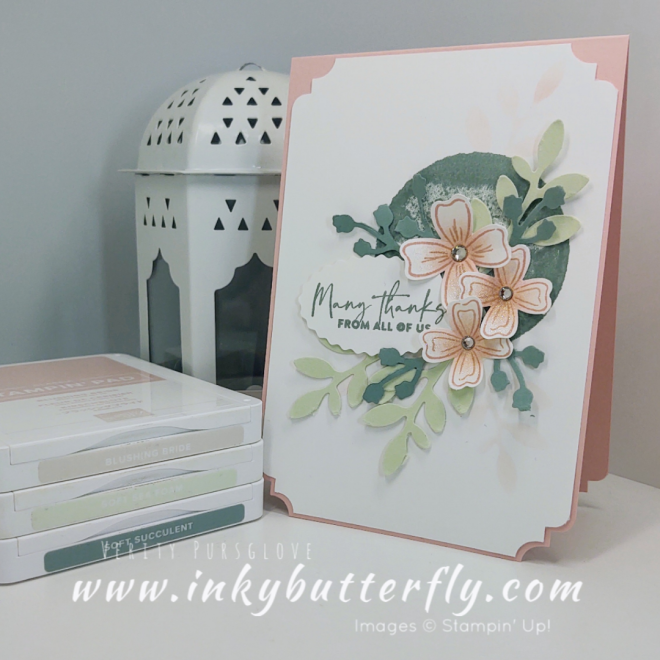
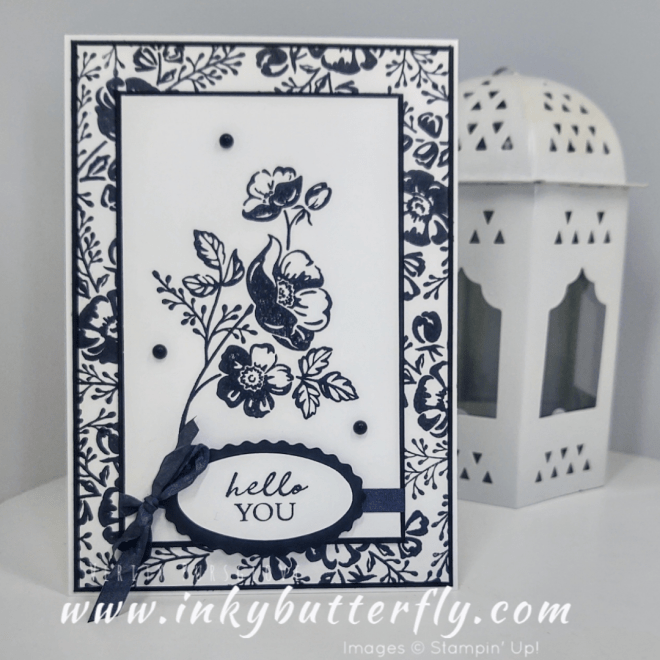
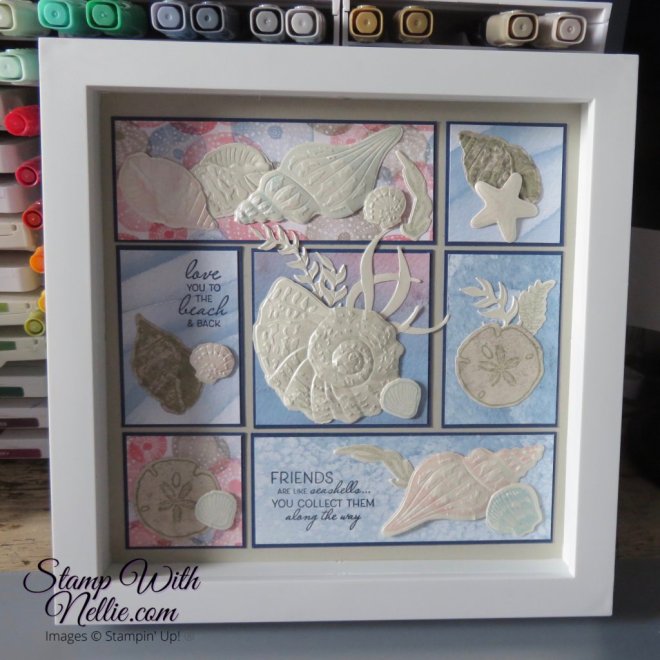
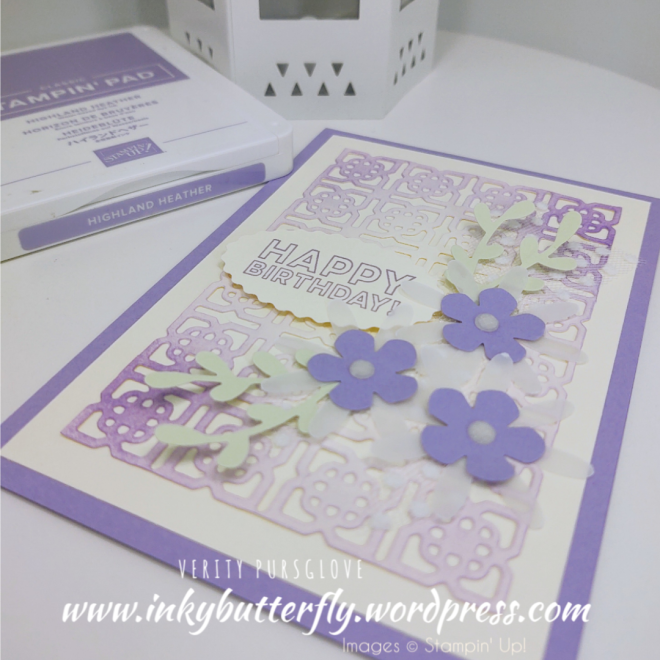
The Stitched with Whimsy dies added stunning detail to my background layer. The set has 6 dies, 3 squares and 3 rectangles!

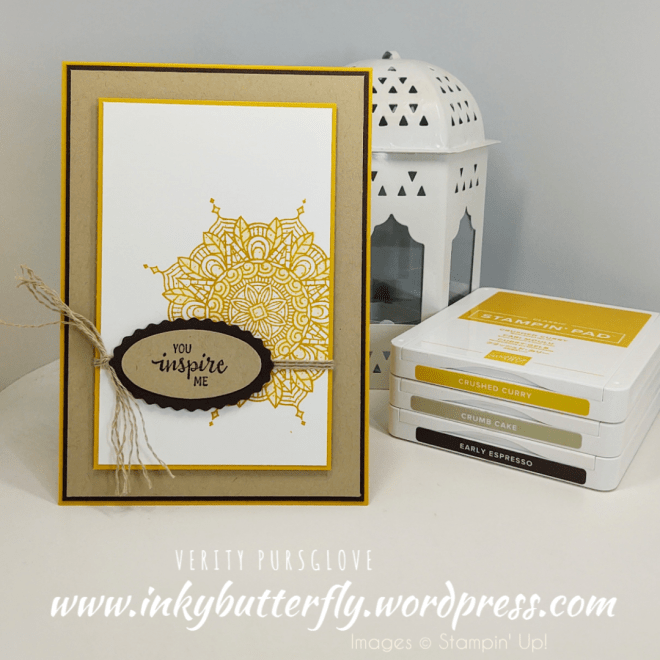
The layer was matted with black cardstock. Daffodil Delight ribbon was added before adhering to a Daffodil Delight card base with dimensionals.

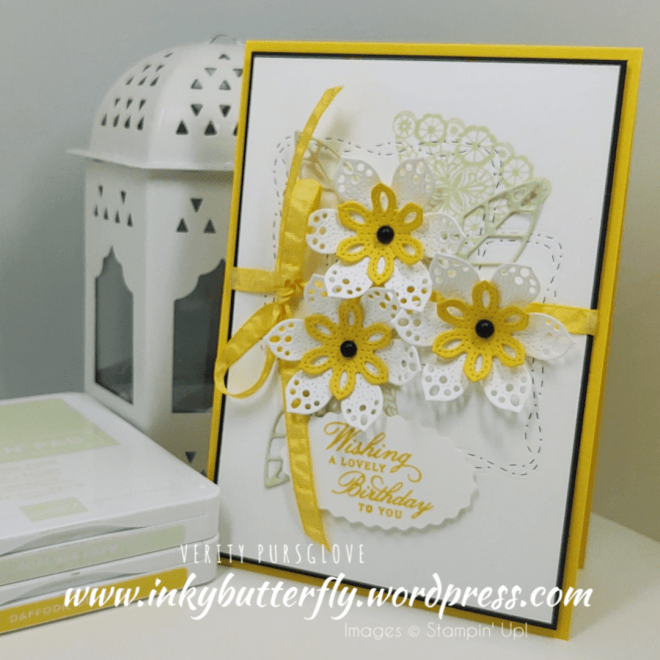
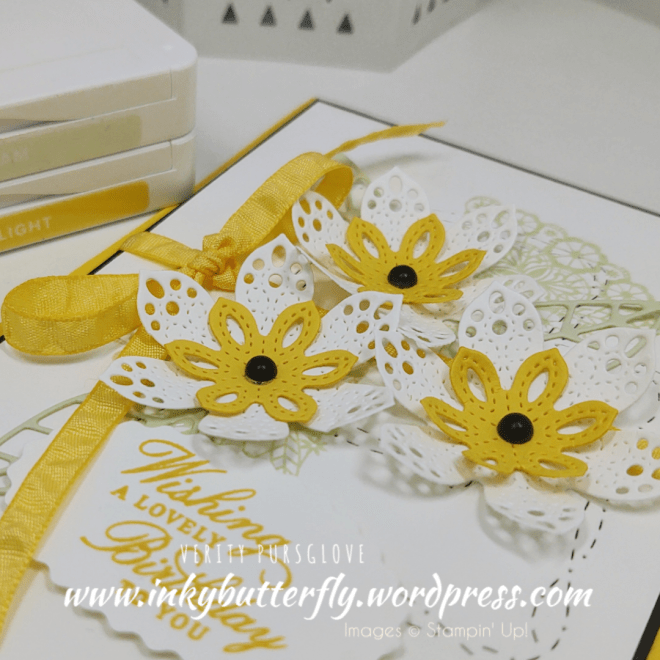
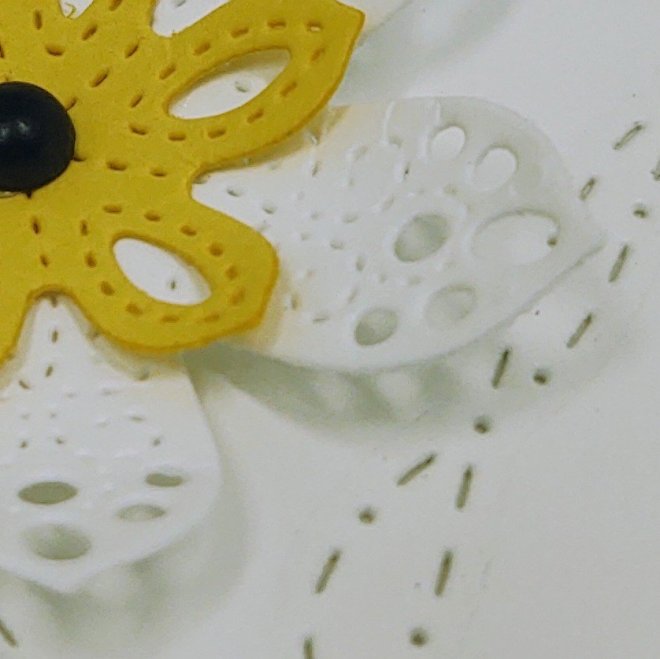
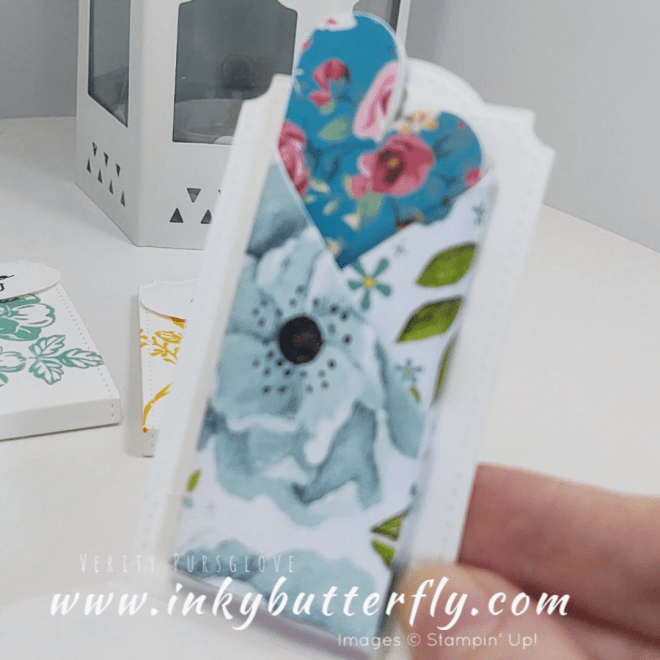
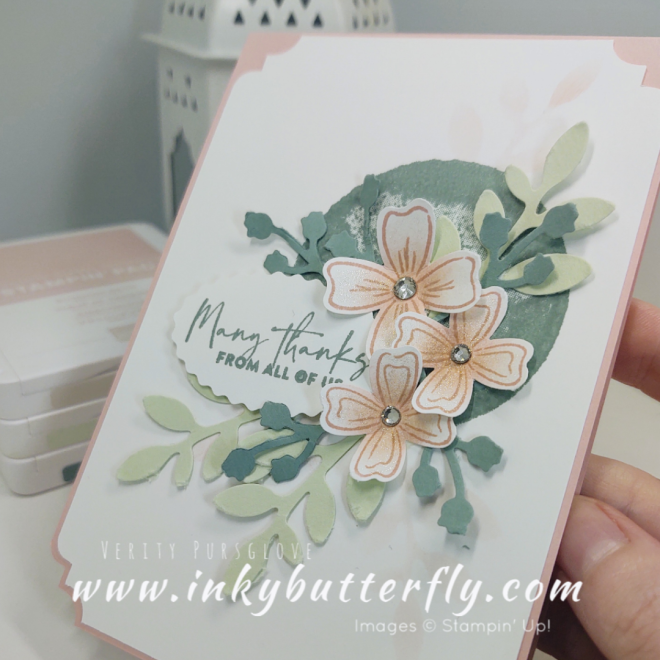
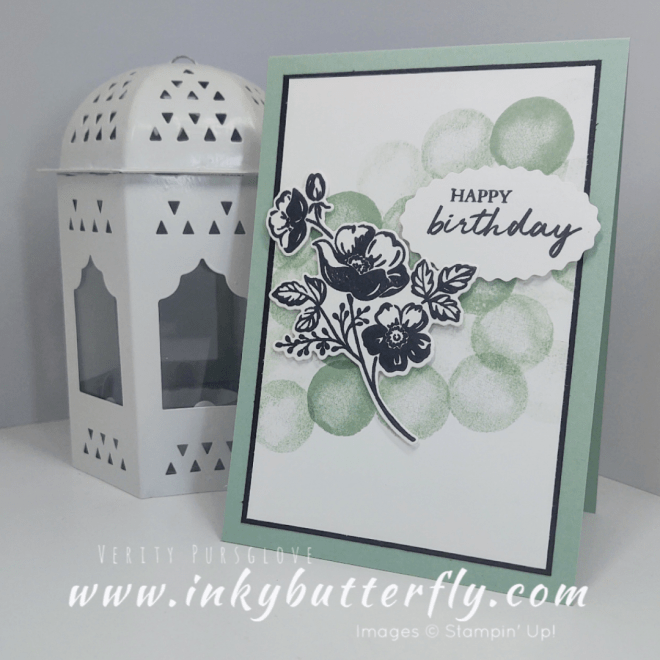
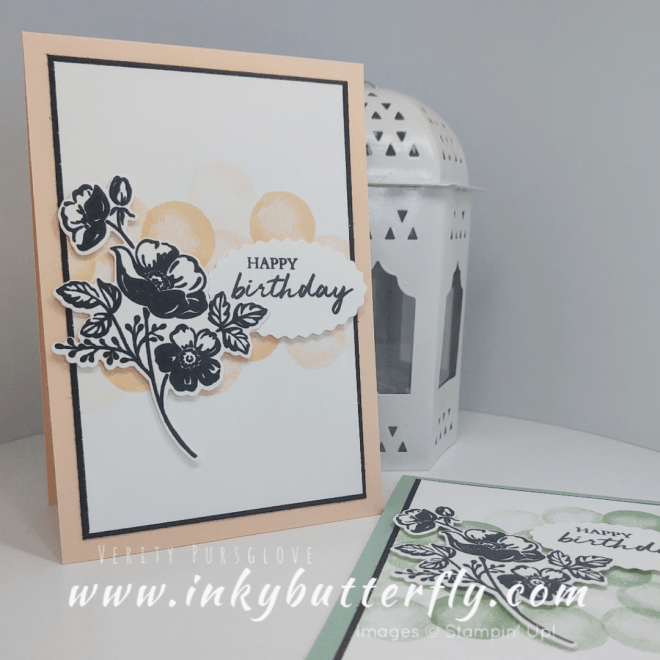
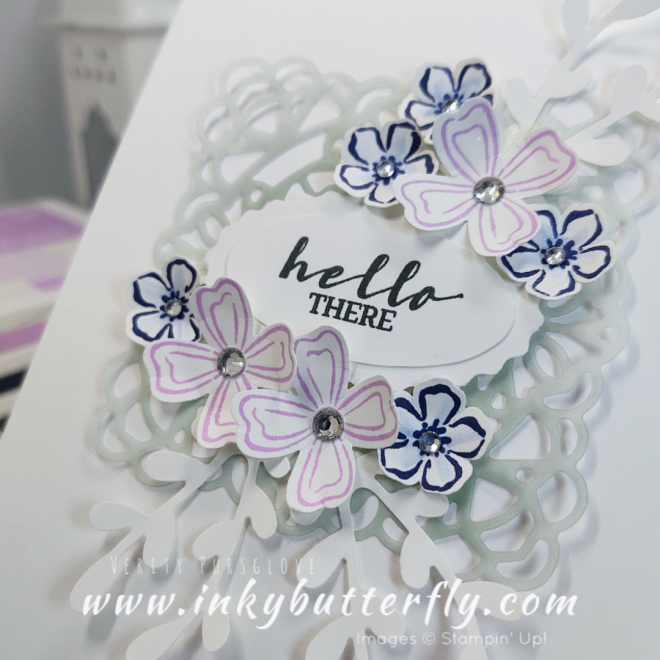
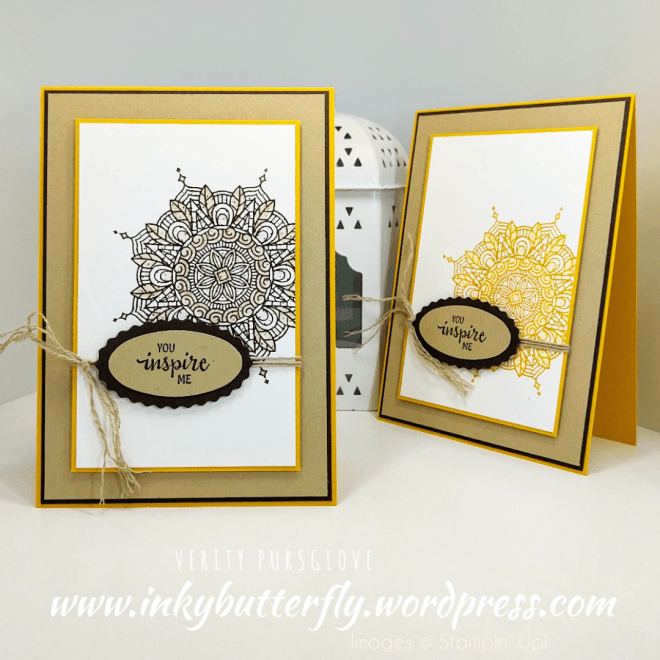
The Delicate Petals bundle has some beautiful stamps, but the dies are amazing! The dimensional flowered were easy to create with Basic White and Daffodil Delight cardstock. The stitched lacy details are incredible.

Soft Sea Foam ink was used to stamp over the background too.

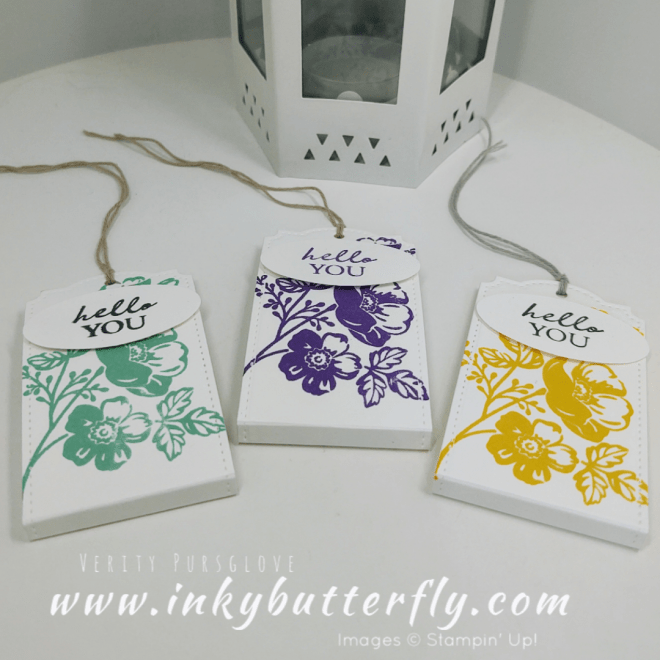
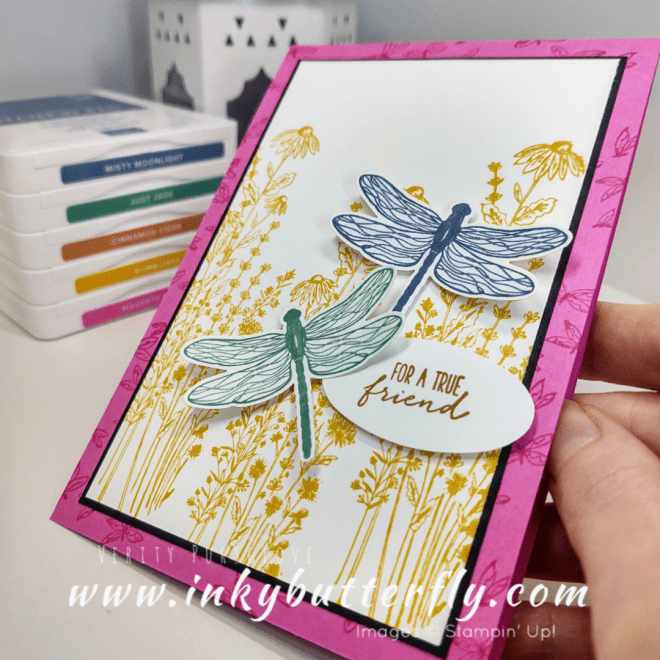
The sentiment was stamped in Daffodil Delight ink. This fitted nicely in the Double Oval punch. I love the wavy edge rather than a scallop.

I used the Black Matte Dots for the centres which pulled in the black layering. The matte finish makes these perfect for male cards too.

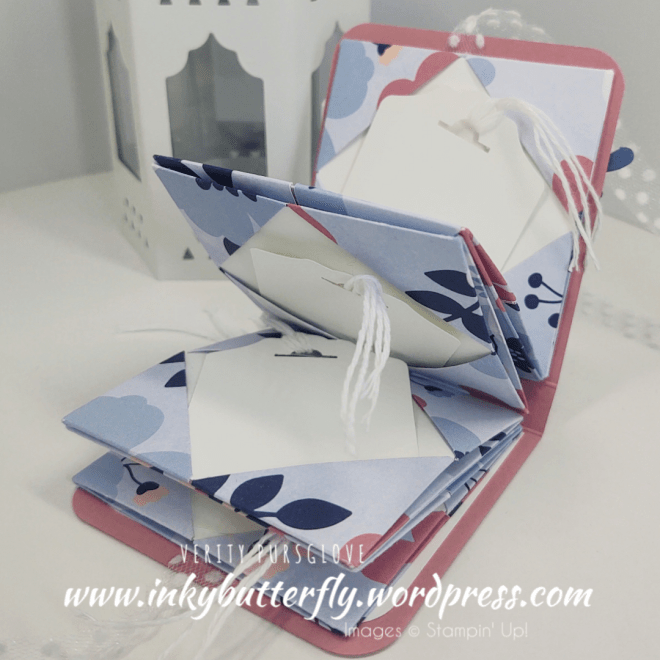
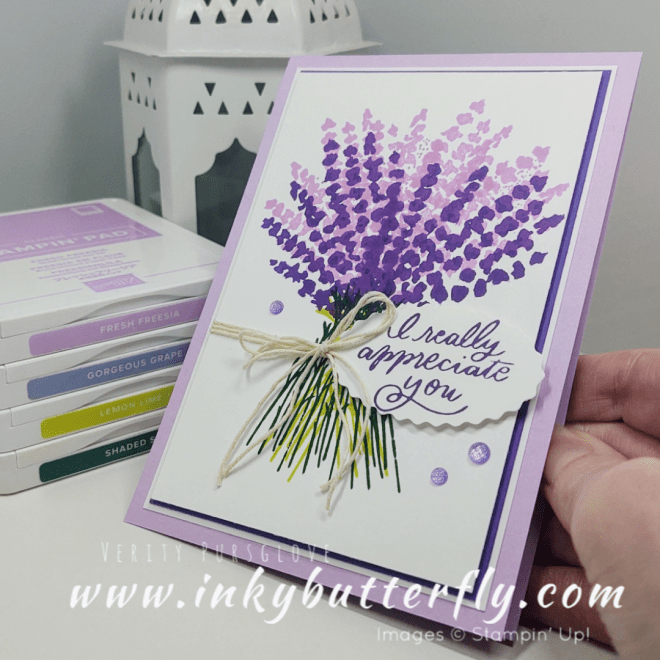
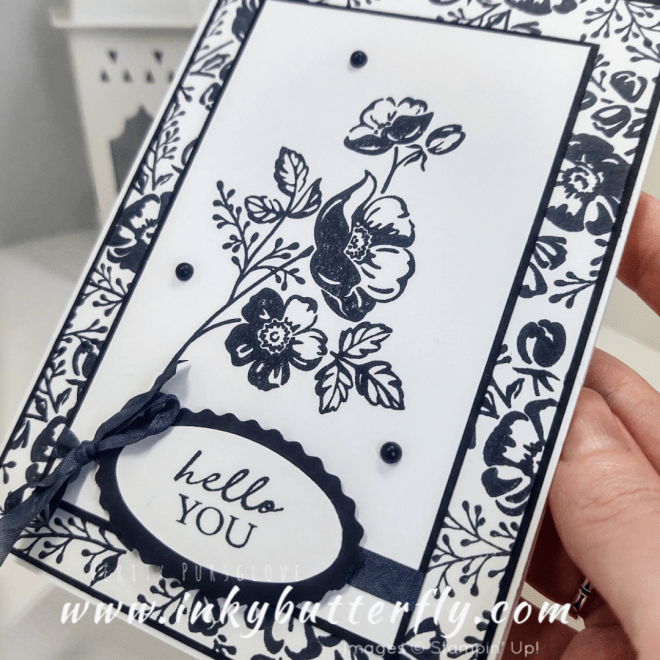
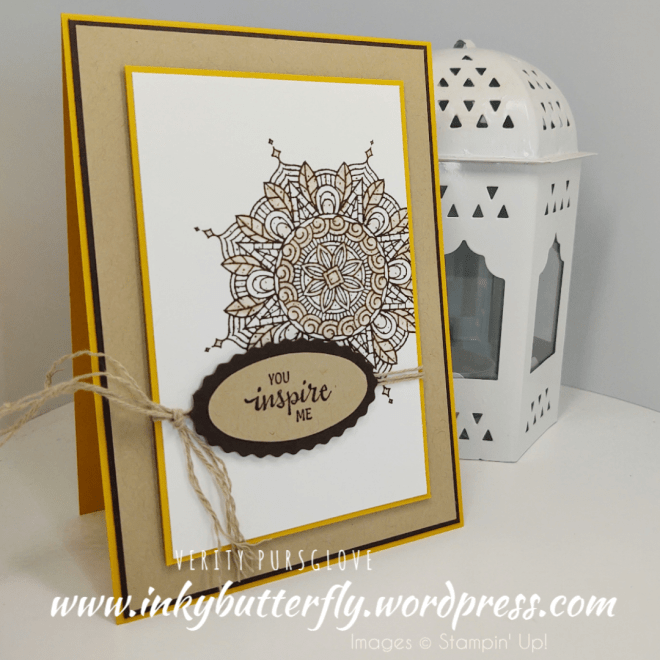
Here’s a close up of those stitched details!

I hope you enjoyed this project.

The supplies used are listed and linked to the online store below.

If your order is less than £150, use the Hostess Code UYZ33U2J when placing your order to get an extra gift from me!

I would love to be your demonstrator.

Thanks for stopping by today and happy Stampin’!

Verity xx

Product List

Dragonfly Garden Colour Challenge

Hello Everyone,

I love colour challenges… This time the challenge was to use Cherry Cobbler, Coastal Cabana and Cinnamon Cider!

I chose to work with the Dragonfly Garden bundle!

See how I made this card in my video tutorial….

I think I like the Coastal Cabana dragonfly best!

I hope you enjoyed this project.

The supplies used are listed and linked to the online store below.

If your order is less than £150, use the Hostess Code UYZ33U2J when placing your order to get an extra gift from me!

I would love to be your demonstrator.

Thanks for stopping by today and happy Stampin’!

Verity xx

Product List

Project Share Project

Hello Everyone,

Welcome to this week’s Project Share. As always my friends have created some lovely work. Please use the links to visit their blogs and read more about their projects.

Jill is sharing some Valentine’s Day ideas. I love this card which steps away from the traditional reds and pinks!

Visit Jill’s blog here

Heather has used a sketch challenge as inspiration for her card. This gorgeous paper is available for free with a qualifying order!

Visit Heather’s blog here

Gez is making her patterned paper go further with this one sheet wonder technique. Imagine how many cards you could make!

Visit Gez’s blog here

I hope you enjoyed these projects. The supplies used are listed and linked to the online store below.

I would love to be your demonstrator.

Thanks for stopping by today and happy Stampin’!

Verity xx

Product List

Using Watercolour Pencils with the Celebrating Sunflowers bundle

Hello Everyone,

This card project has been made for a colour challenge…. The colours were perfect to go with the Celebrate Sunflowers stamp set.

The flowers were coloured using watercolour pencils and blender pens!

See how this card was made in my video tutorial….

The Double Oval punch fitted the sentiment beautifully, this is such a useful punch!

I hope you enjoyed this project.

The supplies used are listed and linked to the online store below.

If your order is less than £150, use the Hostess Code UYZ33U2J when placing your order to get an extra gift from me!

I would love to be your demonstrator.

Thanks for stopping by today and happy Stampin’!

Verity xx

Product List