InspireINK Blog Hop – Tic Tac Toe Colour Challenge

Good Morning Everybody,

Welcome to this month’s InspireINK blog hop. This time we have a fun colour challenge.

Please be sure to click through all the projects in the hop by clicking on the link below.

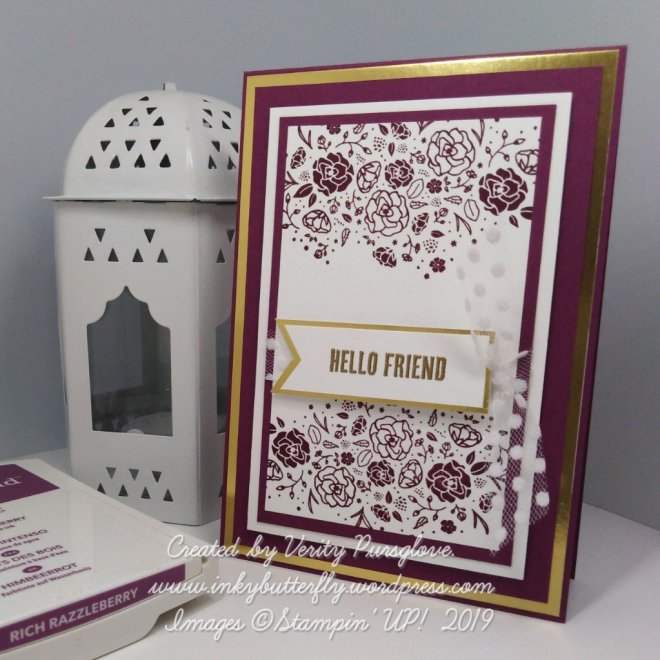
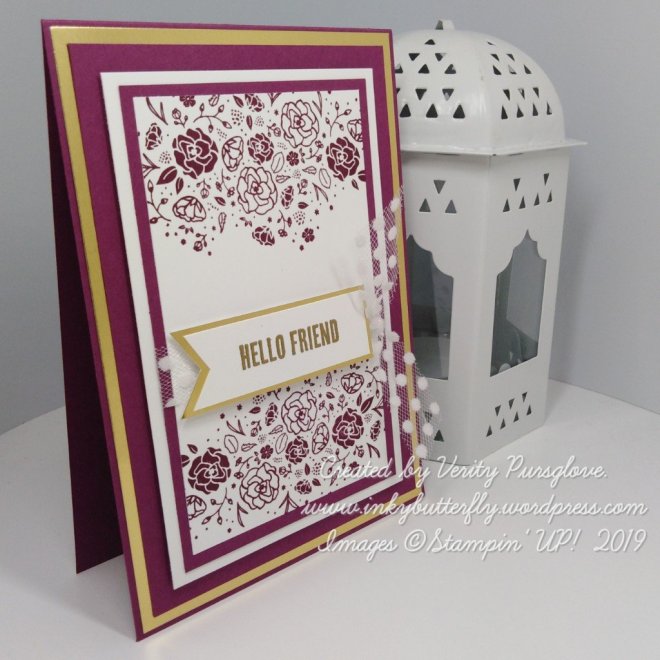
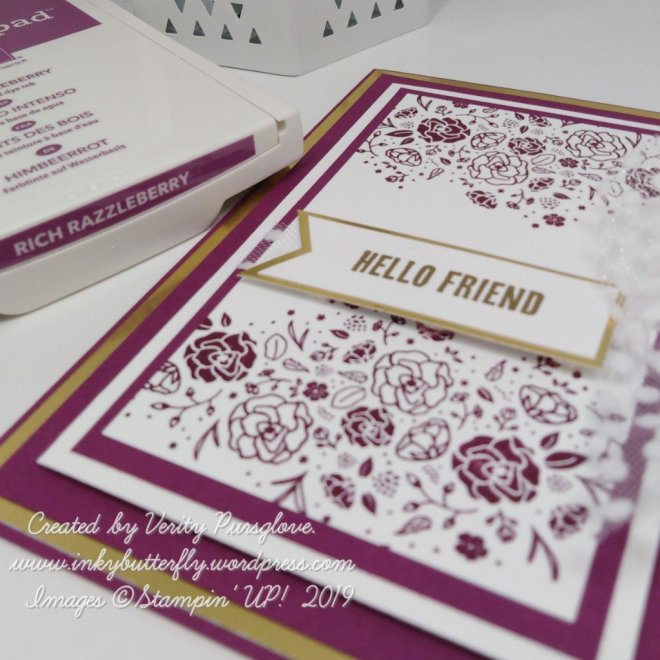
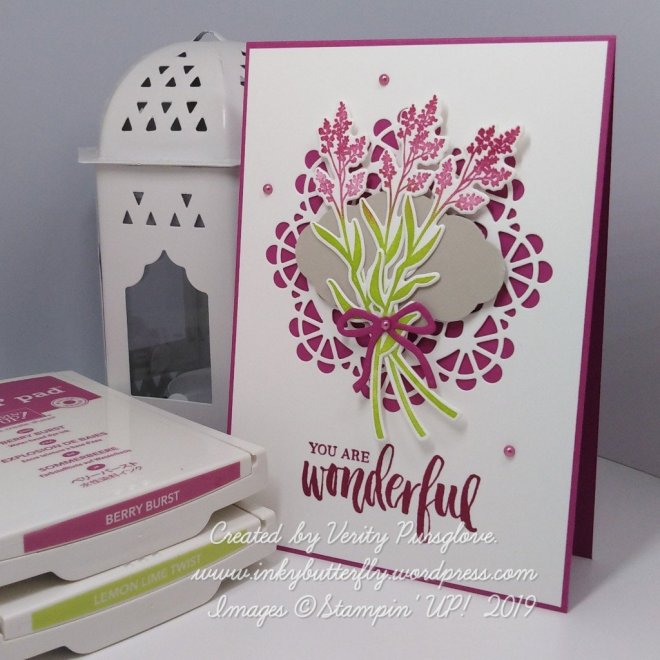
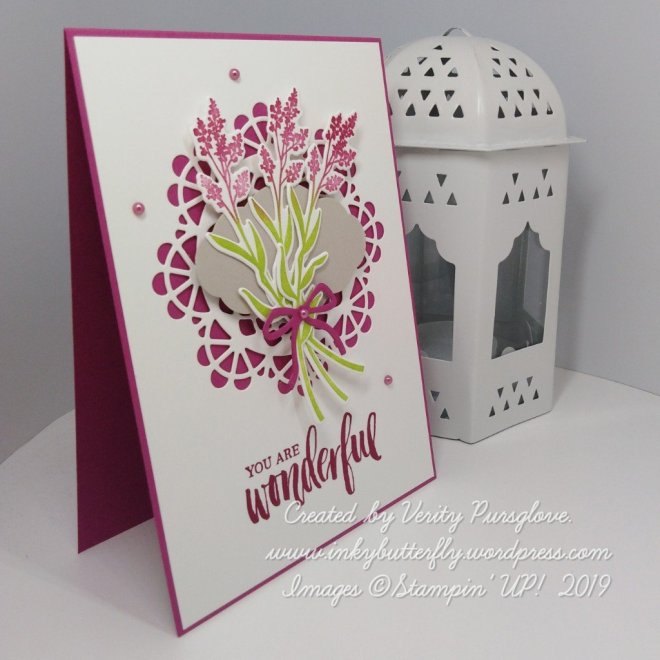
I have chosen two lovely retiring stamp sets for my card, Falling Flowers & Friendly Expressions.

A white card layer was first stamped with the large flourish image using Mango Melody ink.

Blackberry Bliss ink was used to stamp the sentiment on to some vellum. I secure this to the card layer by wrapping the ends behind.

Other elements were stamped on to Whisper White card stock. The images were “coloured” by moving the ink with a Wink of Stella Glitter brush. These were then die cut ready to be arranged on the card front.

A combination of Multipurpose glue and dimensionals were used to adhere the elements. Some faceted gems completed the card.

Click here for the other projects in the hop!

You are invited to the Inlinkz link party!

Click here to enter

I hope you enjoyed this project. The supplies used are listed below.

Thanks for stopping by today and happy Stampin’!

Verity xx

Product List

Courage

Hello Everyone,

Today I am featuring the Ribbon of Courage stamp set.

These ribbons are used to promote awareness for many different causes. I made this one for every person going through something right now… We all need a little courage from time to time.

I covered a Rich Razzleberry card base with a piece of All My Love DSP.

The ribbon was stamped with Memento ink to allow colouring with Stampin’ Blends.

Te panel was trimmed down and layered on to Rich Razzleberry card stock. This was added to the card with dimensionals.

I hope you enjoyed this project. The supplies used are listed and linked to the online store below.

I would love to be your demonstrator.

Don’t miss out on these last chance items…. When they’re gone, they’re gone!

Thanks for stopping by today and happy Stampin’!

Verity xx

Product List

Lifting Me Up #GDP186

Hello Everyone,

This week is a sketch challenge!

See what the Design Team have created here

I have used a bright colour palette for my project featuring the Lift Me Up stamp set.

Pacific Point Designer Series Paper was added to a Whisper White card base.

Two squares of Whisper White card stock were die cut. The first was adhered flat. A small strip of Mango Melody DSP was added to the bottom edge. The second square was added with dimensionals.

A balloon was stamped with Poppy Parade ink and die cut.

A sentiment was added with Bermuda Bay ink.

Finally, some vellum clouds were added to the background.

I hope you enjoyed this project. The supplies used are listed below.

Thanks for stopping by today and happy Stampin’!

Verity xx

Product List

Wild Congratulations

Hello Everyone,

Here’s something a bit different from me today. Isn’t it cute!

This stamp set is called A Little Wild and will be retiring at the end of May.

The lions were stamped in Memento ink and coloured with Stampin’ Blends.

A rectangular frame was die cut and added to the card with dimensionals.

The lions were arranged in and around the frame.

A simple sentiment was added to the bottom.

I hope you enjoyed this project. The supplies used are listed and linked to the online store below.

I would love to be your demonstrator.

Don’t miss out on these last chance items…. When they’re gone, they’re gone!

Thanks for stopping by today and happy Stampin’!

Verity xx

Product List

Hello Friend

Hello Everyone,

Today’s project features the Wood Words stamp set which is due to retire at the end of May.

I chose to use Rich Razzleberry and gold to make my card.

I used lots of layers to make up the card.

The uppermost layer was stamped top and bottom with the large image from the set.

Some polka dot tulle was tied around this panel and then adhered with dimensionals.

The greeting was heat embossed with gold powder. I cut this to a banner and layer this on to gold foil.

I hope you enjoyed this project. The supplies used are listed and linked to the online store below.

I would love to be your demonstrator.

Don’t miss out on these last chance items…. When they’re gone, they’re gone!

Thanks for stopping by today and happy Stampin’!

Verity xx

Product List

Monochrome Koi

Hello Everyone,

You will all know, I love this stamp set, it was one of the first I purchased when the current annual catalogue went live.

Sadly, this set will be retiring at the end of May, so if you love it too, grab it while you can.

So today, I thought I would try a monochrome look with this set.

Once again, with this detailed stamp, I used the Stamparatus tool to add layers of ink without the worry of misaligning the image.

I started with Smoky Slate, then used a dauber to add Tuxedo Black Memento to the areas I wanted it darker.

The layering was simple on to Basic Black card stock and them Smoky Slate with dimensionals.

I hope you enjoyed this project. The supplies used are listed and linked to the online store below.

I would love to be your demonstrator.

Don’t miss out on these last chance items…. When they’re gone, they’re gone!

Thanks for stopping by today and happy Stampin’!

Verity xx

Product List

Stamparatus

[148187]

£46.00

Bermuda Leaves

Hello Everyone,

This card was inspired by a card I saw by Karen Varley at Donemark Papercrafts. You can see the original here.

I just love Bermuda Bay so I used this as a starting point to make the frame with my Stitched Rectangles dies.

I knew I wanted a sentiment for the middle. I picked out this one from the Seize the Day stamp set. This fitted perfectly onto one of the smaller rectangles.

After fiddling around with the layout, I decided I wanted to stamp around the frame. I used the Stamparatus for this so I could use 2 ink colours. I find this works best using sponge daubers to apply each colour. This stamp was from the same set. I was so pleased with the result.

I layered this panel on to Bermuda Bay card stock and then to a white card base.

The frame and sentiment were added with dimensionals.

To complete the card I added some vellum leaves. This softened the edges of the frame without being distracting.

I hope you enjoyed this project. The supplies used are listed and linked to the online store below.

I would love to be your demonstrator.

Don’t miss out on these last chance items…. When they’re gone, they’re gone!

Thanks for stopping by today and happy Stampin’!

Verity xx

Product List

Leaf Punch

[144667]

£15.00

Stamparatus

[148187]

£46.00

Project Share Project

Hello Everyone,

Welcome to this week’s Project Share!

How do you like the new header? We were all finally together in one place so couldn’t pass up the opportunity for a picture of us all…

From the left….

Jill, Me, Gez, Heather & Helzie!

We all had an amazing time at on stage on Saturday and at our team day on Sunday!

Now…. Back to the projects. Please use the links to visit their blogs to read more.

Jill is #simplestamping with one of my favourite colours, Bermuda Bay! The monochrome look is so effective.

Visit Jill’s blog here

Heather is a Scots, so Highland Heather was just made for her! Teamed with Gorgeous Grape and Soft Sea Foam this card is beautiful.

Visit Heather’s blog here

Gez had made these cute rainbow pen pouches. Our Up line is quite the fan of rainbows so I am sure she loved seeing these.

Visit Gez’s blog here

Helzie is completing her series of projects with the Artfully Aware stamp set with this simple heartfelt greeting.

Visit Helzie’s blog here

I hope you enjoyed these projects. The supplies used are listed and linked to the online store below.

I would love to be your demonstrator.

Thanks for stopping by today and happy Stampin’!

Verity xx

Product List

Simply Scored

[122334]

£28.00

Dream #GDP185

Hello Everyone,

This week is a colour challenge with a twist…..

See what the Design Team have created here

I have opted to use one of the exiting in colours for my design. The lovely Berry Burst.

I have used a standard card base matted with Whisper White card stock.

Additional layers were added over the top with dimensionals.

The design elements were taken from the Chase Your Dreams die set.

The feathers and the word “dream” were coloured using a sponge dauber.

I hope you enjoyed this project. The supplies used are listed below.

Thanks for stopping by today and happy Stampin’!

Verity xx

Product List

To See Far

Hello Everyone,

This stamp set was on my Product Purchase Premiere last year! New products before anyone else is just one perk of being a Stampin’ Up! demonstrator that attends an On Stage event.

Find out about becoming a demonstrator here

I used some different colours for this one, plumping for Highland Heather for the watery background.

The sentiment was added next using Lovely Lipstick ink. I used the same colour card stock to layer on to. This was adhered to a Gray Granite card base.

The heron and water lilies were stamped with Gray Granite ink and coloured with Stampin’ Blends. I used the coordinating dies to cut the images and added them to the card front with dimensionals.

I hope you enjoyed this project. The supplies used are listed and linked to the online store below.

I would love to be your demonstrator.

Thanks for stopping by today and happy Stampin’!

Verity xx

Product List

Big Shot

[143263]

£102.00

Lots of Happy Birthday

Hello Everyone,

Have you seen the Stamparatus tool? I couldn’t have made this card front without it!

I started at the bottom of the card stock, stamping first with Night Of Navy ink.

Keeping the card in place, the stamp plate was moved up on the hinge. I stamped the next row with Pacific Point twice.

The plate was moved up again, and stamped with Pacific Point once.

The next two levels were stamped without reinking the stamp.

The rest of the card was made by matting and layering with glimmer paper and Twinkle Twinkle Designer Series Paper.

I hope you enjoyed this project. The supplies used are listed and linked to the online store below.

I would love to be your demonstrator.

Thanks for stopping by today and happy Stampin’!

Verity xx

Product List

Stamparatus

[148187]

£46.00

Petal Thanks

Hello Everyone,

Today’s project is about using up scraps. I had a bunch of Designer Series Paper strips left over from something else, (which you will see on Tuesday)!

The strips were trimmed slightly to 5-3/4 inches in length and adhered to a white card base.

A coordinating ink colour was used to stamp the bold sentiment from All Things Thanks. This was die cut with a Stitched Rectangle die and adhered with dimensionals.

The same inks were used to stamp the flowers which were cut with the coordinating punch.

Lastly, some leaves were punched from vellum. These were slotted behind the flowers and secured with Multipurpose glue.

I hope you enjoyed this project. The supplies used are listed and linked to the online store below.

I would love to be your demonstrator.

Thanks for stopping by today and happy Stampin’!

Verity xx

Product List

Wonderful Doily #GDP184

Hello Everyone,

This week is a Case the Designer challenge!

See what the Design Team have created with the sketch here

This is what I made…. I used the idea of layering a Doily, a label and another focal element and added a bold sentiment to the bottom.

I die cut the large doily from a white card layer and adhered this to a Berry Burst card base. The sentiment was stamped at the bottom of the card with Berry Burst ink.

A Pretty Label was punched from Sahara Sand card stock and added with dimensionals.

The blooms from the Dear Doily set were stamped using the Stamparatus tool with Lemon Lime Twist and Berry Burst inks. I secured these to the card with Multipurpose glue.

A die cut bow was added along with some pearls to complete the card.

I hope you enjoyed this project. The supplies used are listed below.

Thanks for stopping by today and happy Stampin’!

Verity xx

Product List

Stamparatus

[148187]

£46.00

Best Thing

Hello Everyone,

The Wonderful Romance bundle was instantly a favourite of mine when I first saw it in the catalogue back in November.

I haven’t used many of the dies, so this card is all about die cutting!

I used a piece of this fabulous Designer Series Paper as a backdrop for the white die cuts.

The decorative strip was adhered first by using mini dimensionals under each of the leaves.

The sentiment was stamped with Mossy Meadow ink. I love this oval Die, which was also adhered with dimensionals.

The leaves are so delicate and have great embossed details. These were slotted in behind the oval with multipurpose glue.

I hope you enjoyed this project. The supplies used are listed and linked to the online store below.

I would love to be your demonstrator.

Thanks for stopping by today and happy Stampin’!

Verity xx

Product List

Big Shot

[143263]

£102.00

Inspire.Create #040

Hello Everyone,

Welcome to my blog. Every other Monday I share my project that I have used as my entry for the Inspire.Create challenge.

This time it’s a colour challenge. The design team have made some wonderful samples as inspiration. You can see them here.

I have used Serene Garden for my card with a sentiment from Rooted in Nature.

The large stamp was added to opposite corners of a Whisper White card layer using the Stamparatus tool. This was adhered to a Basic Black card base.

The dove and flowers were stamped separately and die cut. The flowers were added to the card.

The sentiment was cut with a Stitched Shapes Framelit. This was positioned on the card with dimensionals. The dove was then adhered next to it.

Wink of Stella Glitter was added to the dove and the flowers to complete the card.

I hope you enjoyed this project. The supplies used are listed and linked to the online store below.

I would love to be your demonstrator.

Thanks for stopping by today and happy Stampin’!

Verity xx

Product List

Stamparatus

[148187]

£46.00

Tranquil Thank You

Hello Everyone,

Today’s project is made with the Love What You Do stamp set and some of the coordinating Share What You Love Specialty Designer Series Paper.

I started with a Tranquil Tide card base. Matching ink was used stamp the tiny flowers around the edge.

Layers of Berry Burst, Tranquil Tide and Mint Macaron card stocks were added to the front.

Square Framelits were used to cut the patterned paper. A frame was cut from Berry Burst card stock and wrapped around the paper and secured with adhesive.

This was added to the card with dimensionals.

The sentiment wS stamped on to Mint Macaron card and cut to a banner.

I added some flowers which I fussy cut from Berry Burst card stock.

I hope you enjoyed this project. The supplies used are listed and linked to the online store below.

I would love to be your demonstrator.

Thanks for stopping by today and happy Stampin’!

Verity xx

Product List

Big Shot

[143263]

£102.00

Here for You

Hello Everyone,

I am playing along with a Facebook colour challenge today!

I have used the Beautiful Promenade bundle to make my project. Isn’t the doily die cut stunning?

A white card layer was stamped randomly with leaves using first and second generation Mint Macaron ink. This was adhered to a white card base.

A smaller white layer was added with dimensionals. The doily was die cut from Mint Macaron card stock and adhered to the card.

Three sets of leaves and the flower were stamped on to a separate piece of card in Old Olive and Daffodil Delight inks. These were die cut and arranged on the card.

The sentiment was stamped with Old Olive ink and slotted in under the flower. A few rhinestones finished the project.

I hope you enjoyed this project. The supplies used are listed and linked to the online store below.

I would love to be your demonstrator.

*****AVAILABLE NOW*****

Brand new storage solutions for your favourite Stampin’ Up! products now available. Order what you need to create a bespoke solution, add more as your collection grows!

Thanks for stopping by today and happy Stampin’!

Verity xx

Product List

Adventure Begins #GDP183

Hello Everyone,

This week is a theme challenge!

See what the Design Team have created with the sketch here

And this is what I decided to make…. Let’s go fly a kite!

I prepared a white card base and stamped clouds with Smoky Slate ink.

The topper was made with Stitched Rectangle dies.

The kites from the Swirly Bird stamp set were stamped with the 2017 In Colours.

I picked out the sentiment from the Treehouse Adventure set which was stamped in Fresh Fig ink and cut with a Stitched Rectangle die.

I hope you enjoyed this project. The supplies used are listed below.

Thanks for stopping by today and happy Stampin’!

Verity xx

Product List

Hey Friend

Hello Everyone,Today I am playing with this card sketch for a Facebook challenge!
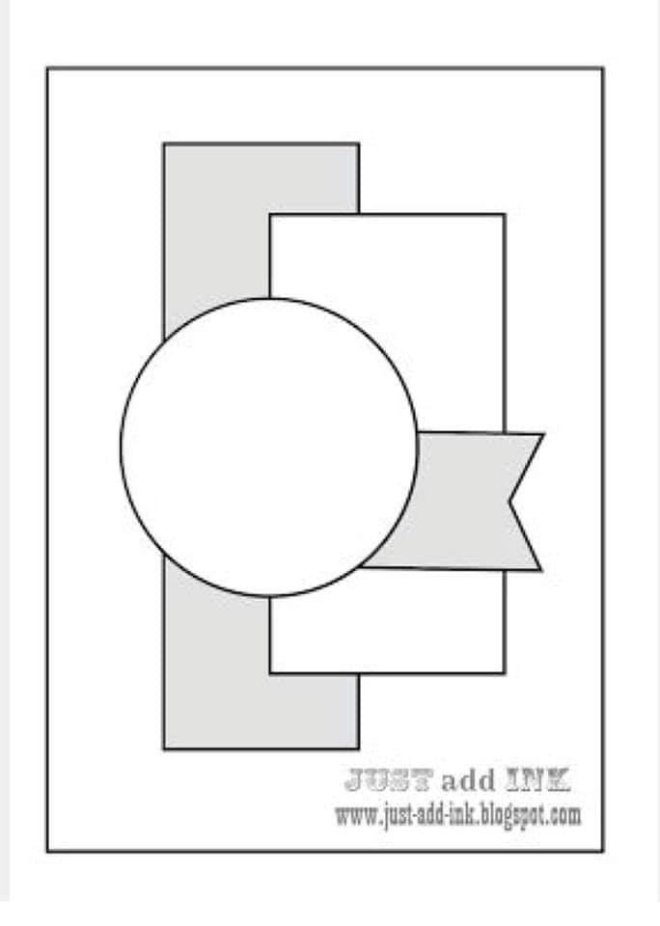
I have been meaning to work with the Time for Tea stamp bundle for a while. The sketch gave me an opportunity to use the Tea Room Designer Series Paper too.
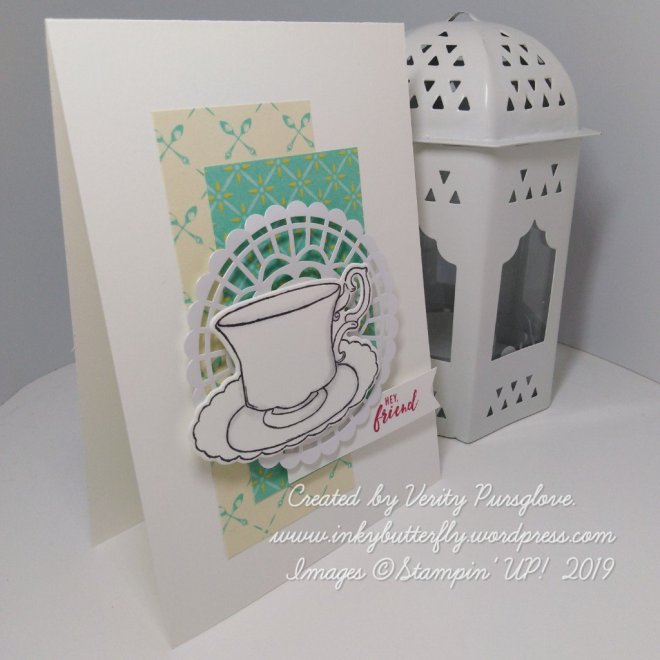
The centre was built up with a pearlized doily.The tea cup was stamped with Memento ink, a light Smoky Slate Stampin’ Blend marker was used to add some subtle shading.For a Pop of colour, I used Melon Mambo ink for the sentiment which was taken from the Itty Bitty Greetings set.I hope you enjoyed this project. The supplies used are listed and linked to the online store below.I would love to be your demonstrator.*****AVAILABLE NOW*****Brand new storage solutions for your favourite Stampin’ Up! products. Order what you need to create a bespoke solution, add more as your collection grows!Thanks for stopping by today and happy Stampin’!Verity xx

Seize the Day

Hello Everyone,

I have had this set for a while now and finally inked it! Isn’t is lovely! The sentiment is so meaningful.

I stamped the trees first with Granny Apple Green ink. Some ink was dabbed off the bottom so the deer would stand out.

The second image, with the deer, I stamped with the Stamparatus. Gray Granite was used first, then Soft Sea Foam for the misty lake.

For contrast, Blackberry Bliss ink was used the add the sentiment and the little birds.

I hope you enjoyed this project. The supplies used are listed and linked to the online store below.

I would love to be your demonstrator.

*****Available NOW!*****

Brand new storage solutions for your favourite Stampin’ Up! products. Order what you need to create a bespoke solution, add more as your collection grows!

Thanks for stopping by today and happy Stampin’!

Verity xx