InspireINK Blog Hop – Tic Tac Toe Colour Challenge

Good Morning Everybody,

Welcome to this month’s InspireINK blog hop. This time we have a fun colour challenge.

Please be sure to click through all the projects in the hop by clicking on the link below.

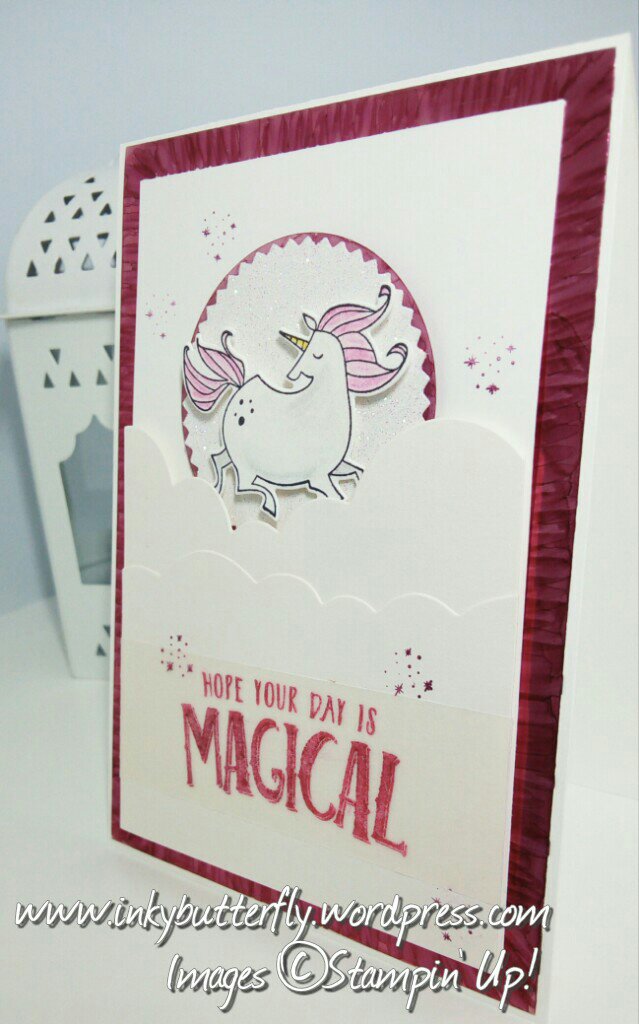
I have chosen two lovely retiring stamp sets for my card, Falling Flowers & Friendly Expressions.

A white card layer was first stamped with the large flourish image using Mango Melody ink.

Blackberry Bliss ink was used to stamp the sentiment on to some vellum. I secure this to the card layer by wrapping the ends behind.

Other elements were stamped on to Whisper White card stock. The images were “coloured” by moving the ink with a Wink of Stella Glitter brush. These were then die cut ready to be arranged on the card front.

A combination of Multipurpose glue and dimensionals were used to adhere the elements. Some faceted gems completed the card.

Click here for the other projects in the hop!

You are invited to the Inlinkz link party!

Click here to enter

I hope you enjoyed this project. The supplies used are listed below.

Thanks for stopping by today and happy Stampin’!

Verity xx

Product List

InspireINK Blog Hop – Easter.

Good Morning Everybody,

Welcome to this month’s InspireINK blog hop.

Please be sure to click through all the projects in the hop by clicking on the blue button below.

I don’t usually do 3D projects, so this was quite a challenge.

I made life easier by using this Window Box Die with it’s great hexagonal shape.

I decorated the sides with Botanical Butterfly Designer Series Paper.

Little flowers were punched from Whisper White card stock and vellum. A silver pearl was added to each of the centres. These were adhered with glue dots.

Click here for the other projects in the hop!

You are invited to the Inlinkz link party!

Click here to enter

I hope you enjoyed this project. The supplies used are listed below.

Thanks for stopping by today and happy Stampin’!

Verity xx

Product List

Glue Dots

[103683]

£5.00

InspireINK Blog Hop – For a Special Lady

Good Morning Everybody,

Welcome to this month’s InspireINK blog hop. If you have joined me from Jill’s lovely project, you will know the theme this time is…

Please be sure to click through all the projects in the hop by clicking the next button at the bottom of this post.

So for me, every special lady deserves flowers, and what could be better than stunning orchids.

I made the orchids first using the Climbing Orchid stamp set and coordinating dies. I chose Daffodil Delight and So Saffron inks for the petals. These were put together with Multipurpose glue.

The card base was made from Whisper White card stock. A panel was embossed using the Layered Leaves Dynamic Embossing folder. A strip of So Saffron card was added over the top.

I added the orchids and slipped a Starburst cut from vellum behind them.

Gray Granite ink was used to stamp the sentiment from the Part of my Story stamp set. This was cut with a Stitched Rectangle die. I secured this with dimensionals.

Some rhinestones finished off the card with a sparkle.

Next up is Hannah, just click below!

I hope you enjoyed this project. The supplies used are listed below.

Thanks for stopping by today and happy Stampin’!

Verity xx

Product List

Daisy Fancy Fold Card

Good Morning,

Welcome to February’s InspireInk blog hop. The theme for this month is:-

Fancy Fold

I decided to make a stepper style card and the Daisy Delight suite of products.

The card base was cut at the usual 4-1/8 (10.5cm).

Then score the long side as follows using the Stampin’ Trimmer:

At 12.5cm, 23.4cm and 25.8cm score down to 2.5cm.

Rotate the card 180 degrees and then score at 15cm down to 8cm.

Turn the card to the short side. Make a cut between upper and lower most short score lines.

Gently fold along the score lines and the card will take shape. Burnish the creases.

Mats were cut from Wisteria Wonder card stock. These measure;

7.6cm by 14.6cm

3.5cm by 9.8cm

2.1cm by 10.4cm

The corresponding DSP layers measure;

7.2cm by 14.2cm

9.5cm by 3.1cm

1.9cm by 10.1cm

Four daisies were stamped and punched. These were adhered together in pairs to form two full flowers.

The sentiments were stamped in Calypso Coral ink.

Click below to move on to the next blog. Enjoy the inspiration!

Thanks for stopping by and happy Stampin’!

Verity x

Supply List:

Product List

Daisy Punch

[143713]

£16.00

Magical Day

Good Morning!

I have the great pleasure of joining my crafting friends in the first InspirINK blog hop for 2018.

There’s lots of inspiration to be found for our January theme… Sparkle, Shimmer and Shine!

I just had to use the Magical Day stamp set.

The focal point uses the wonderful unicorn which was stamped in black ink. The mane and tail were coloured with Melon Mambo and Rich Razzleberry watercolour pencils, a touch of Daffodil Delight coloured the horn and a hint if Basic Grey to shade the body. Clear Wink of Stella added some magical shimmer!

My sparkles came from some Glimmer paper which I cut with the Starburst punch. I adhered this to a vellum circle that I coloured with a Rich Razzleberry Stampin’ Blend marker.

I prepared a white card base and cut some silver foil to add some shine! To tie in the colour scheme, I also coloured this with the Stampin’ Blend marker.

The unicorn was added to a white card stock layer and adhered to the card base.

Two additional pieces of white card stock were cut with the cloud border die from the Sunshine and Rainbows bundle. These were adhered together with Fast Fuse.

The sentiment was stamped with Rich Razzleberry ink on to a strip of vellum. Because the ink doesn’t dry straight away, there is time to apply some clear embossing powder and heat set the ink.

The vellum was added to the cloud layers and then to the card with dimensionals.

I hope you enjoyed this project.

Click below to continue along the hop – enjoy!

Product List