Just Add Ink #431 Sketch Challenge

Good Morning,

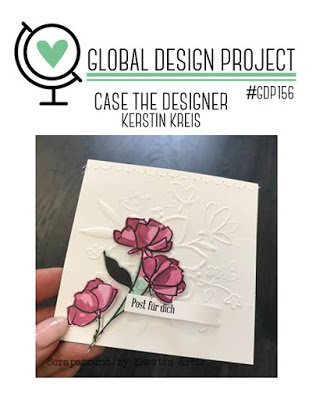
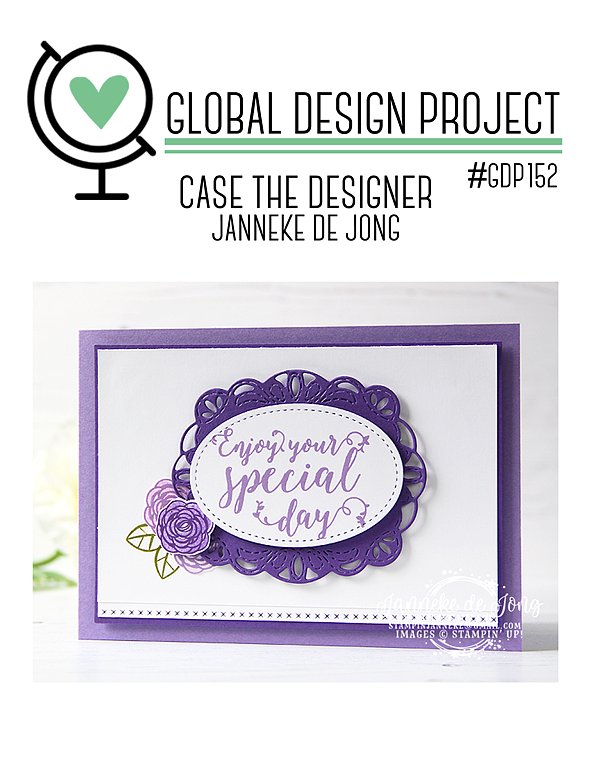
Another sketch challenge coming at ya today courtesy of the Just Add Ink team.

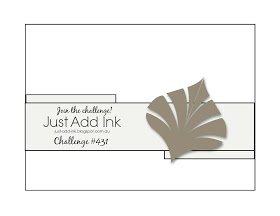
You can see what the design team have made on the blog here

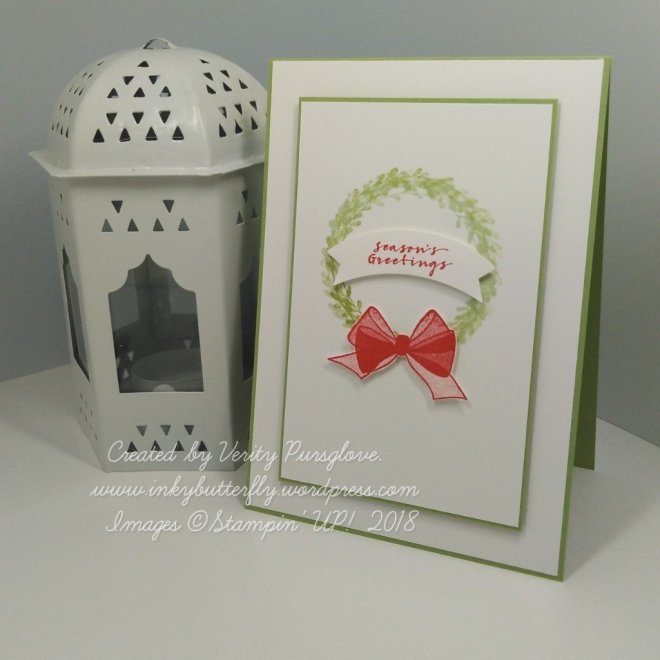
So….. I decided to put a “twist” on the sketch, mainly because I didn’t like the origin orientation with the design I chose.

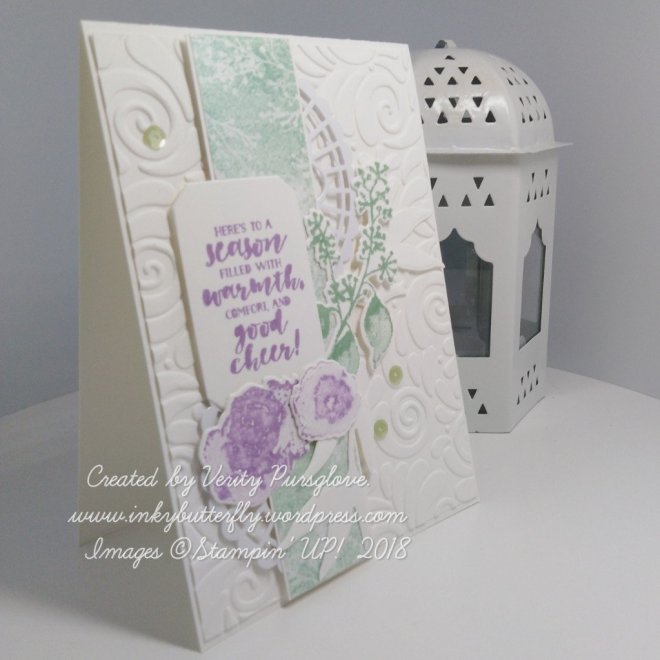
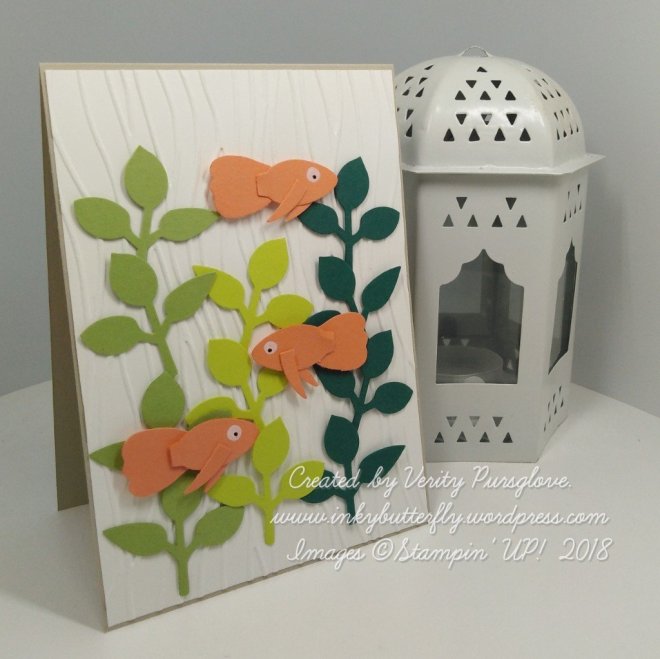
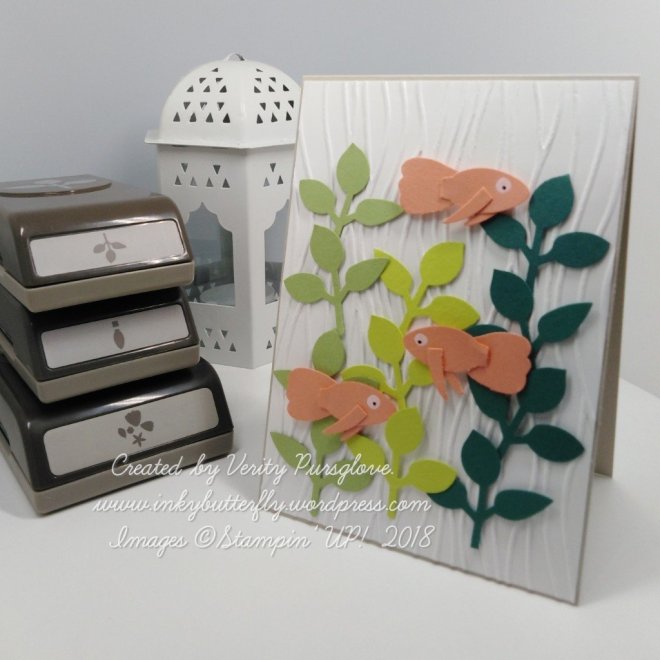
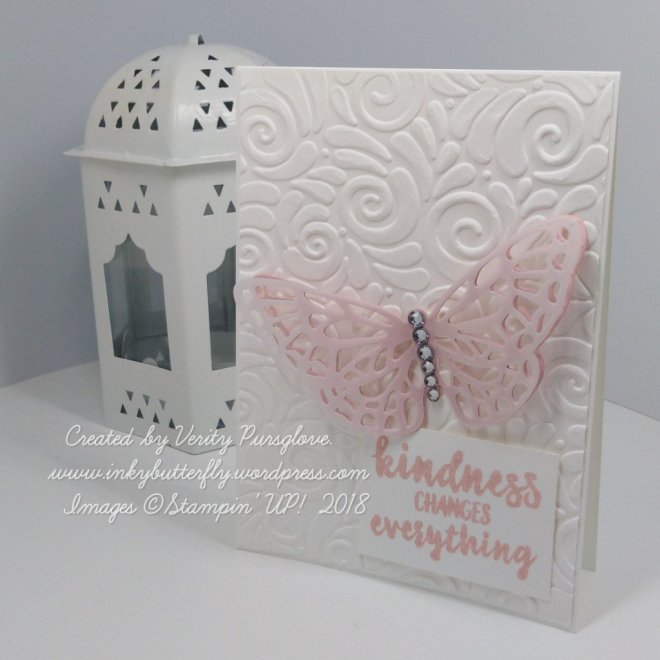
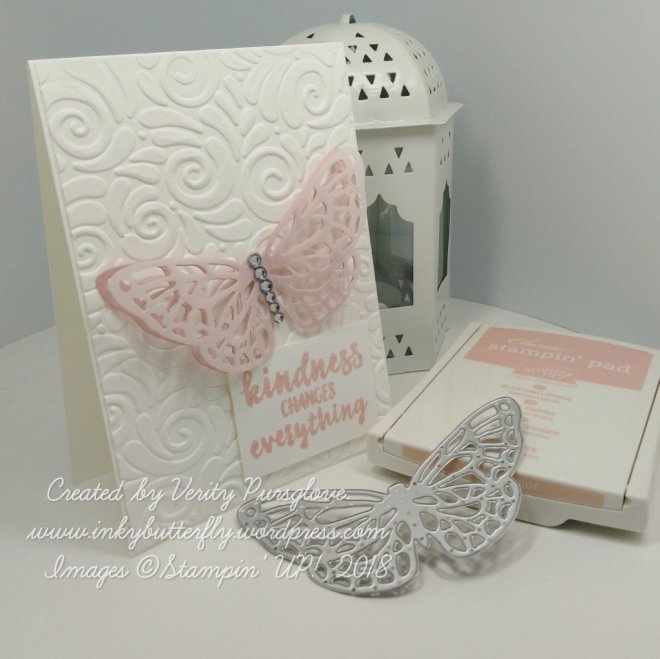
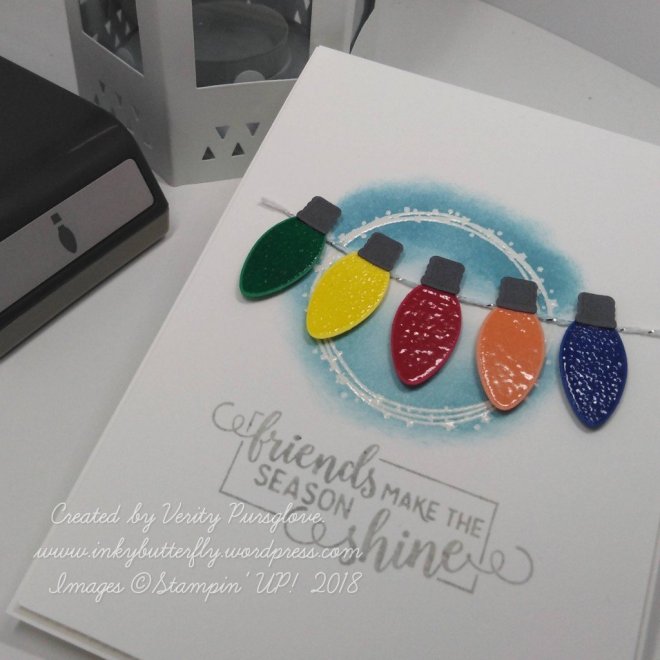
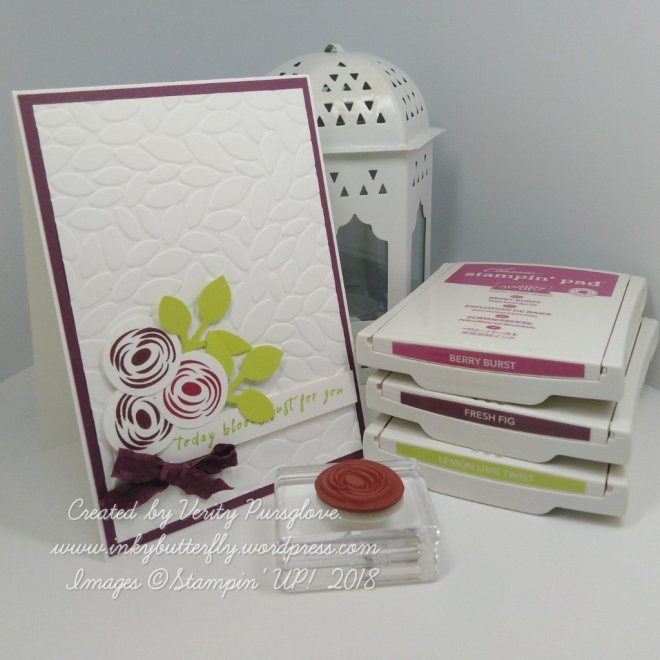
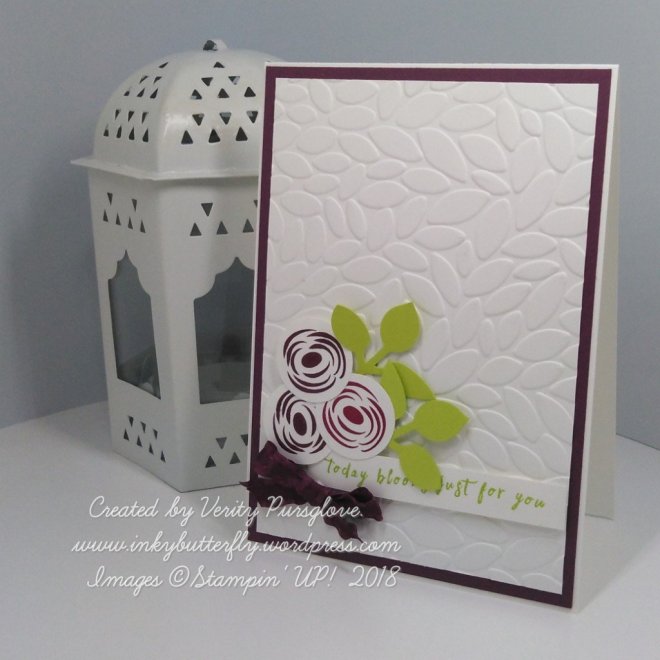
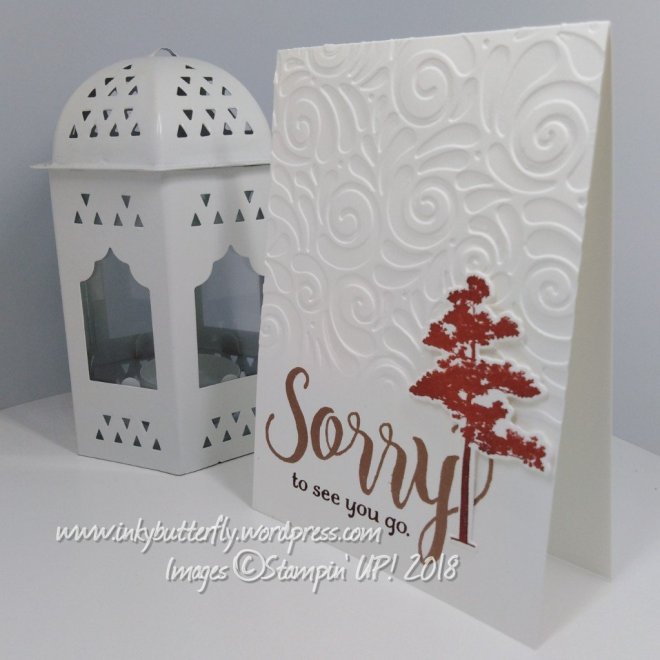
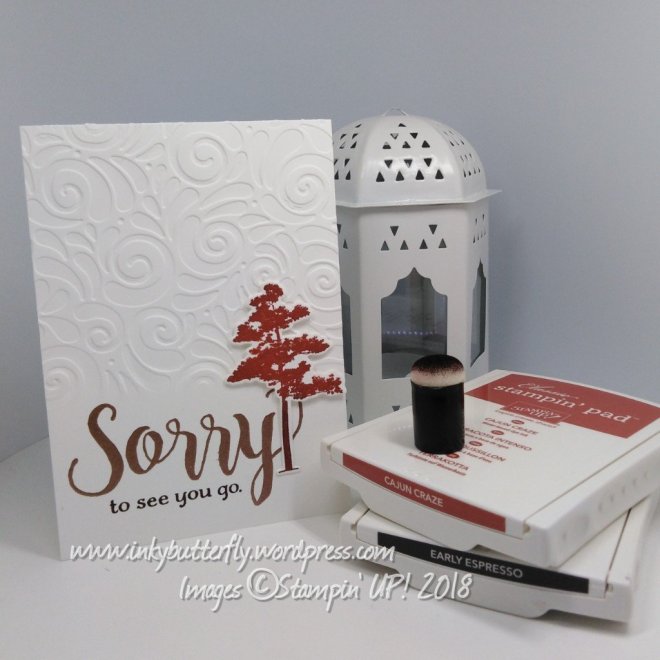
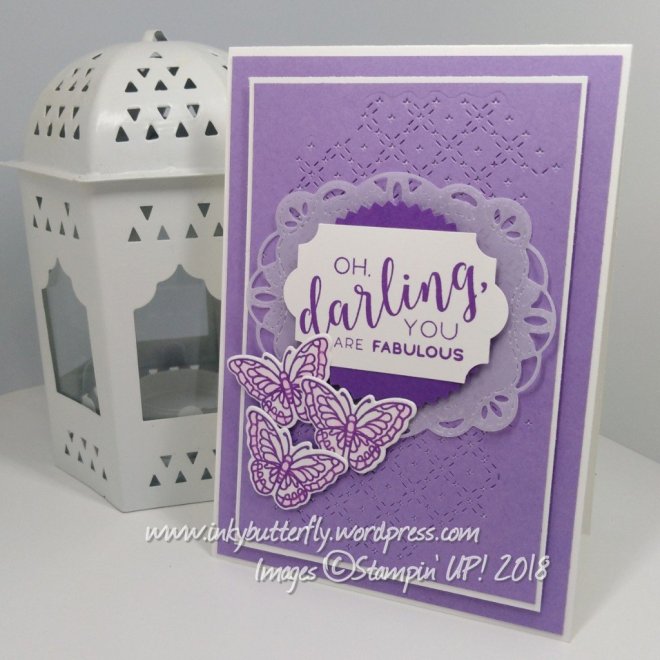
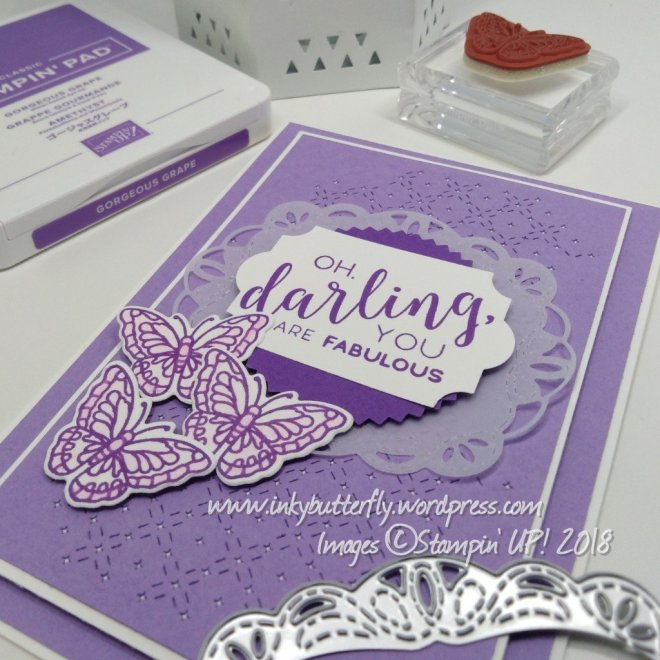
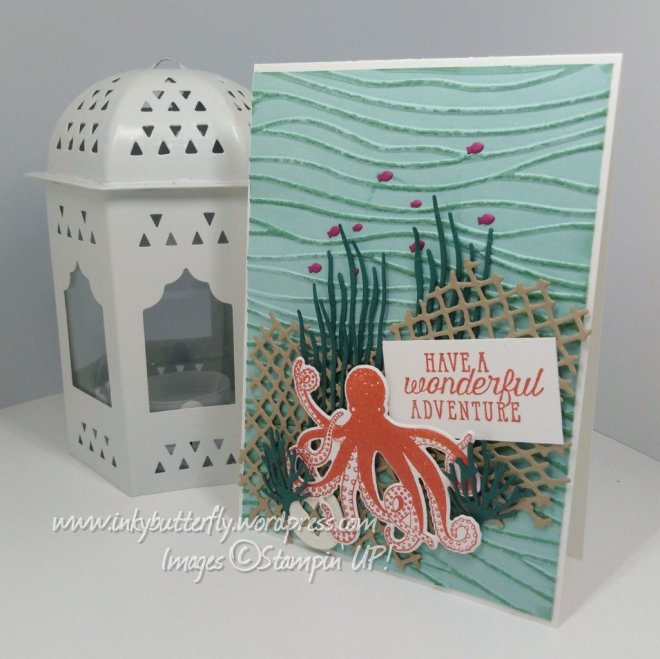
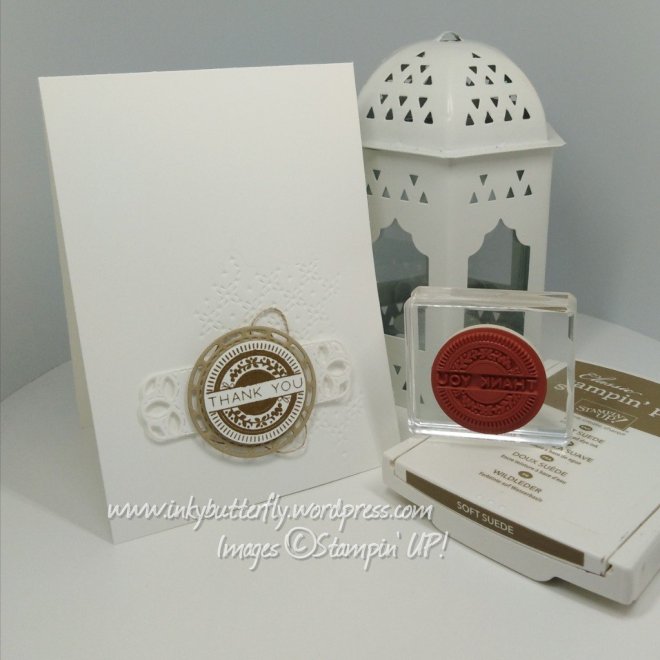
I began by embossing a card layer with the Curls and Swirls embossing folder, and adhering this to a white card base.

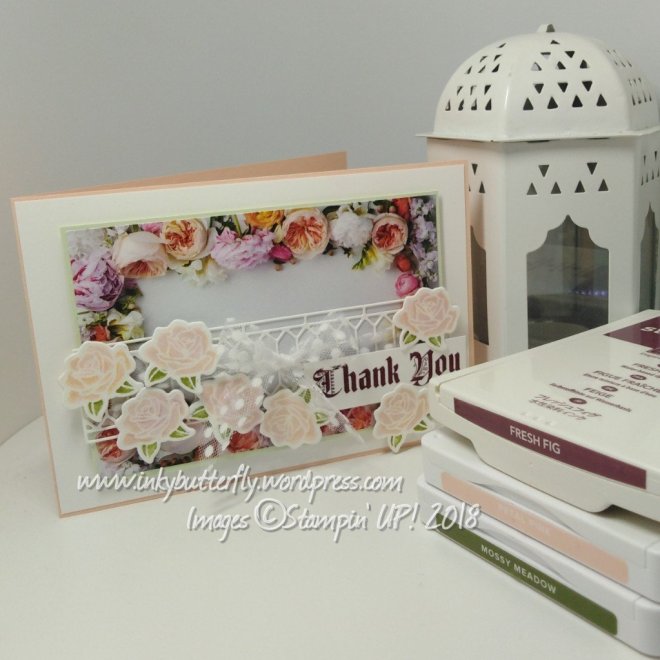
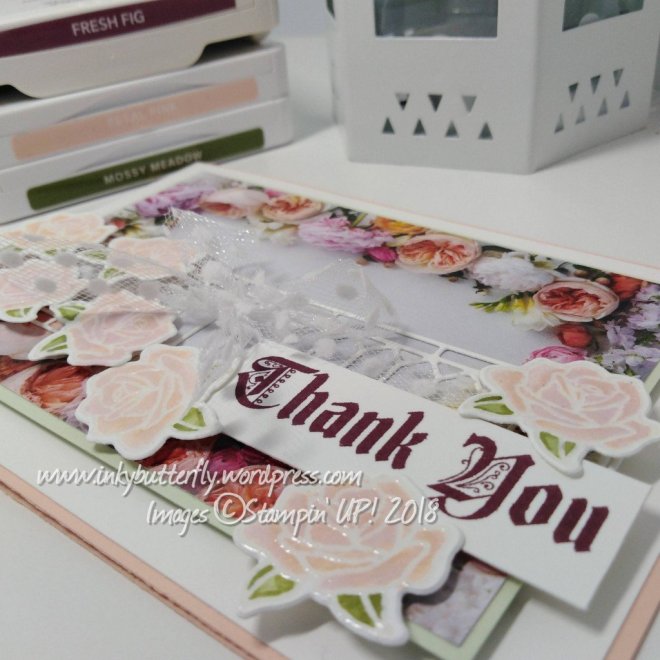
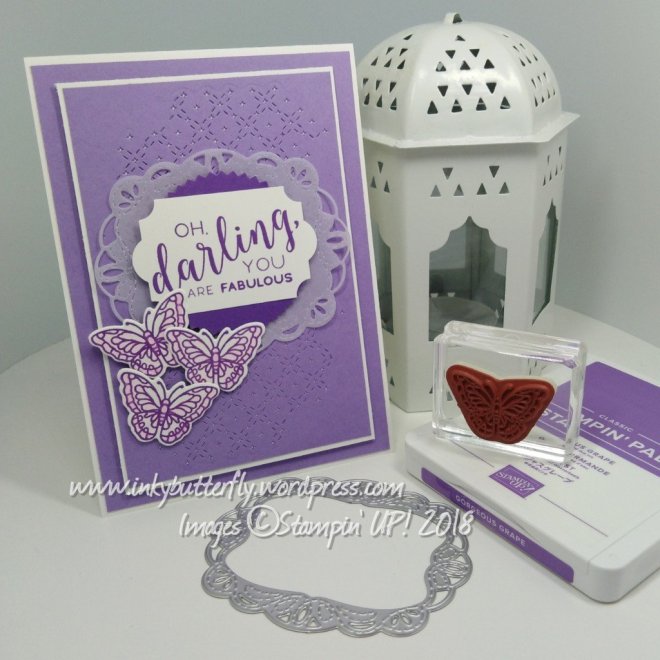
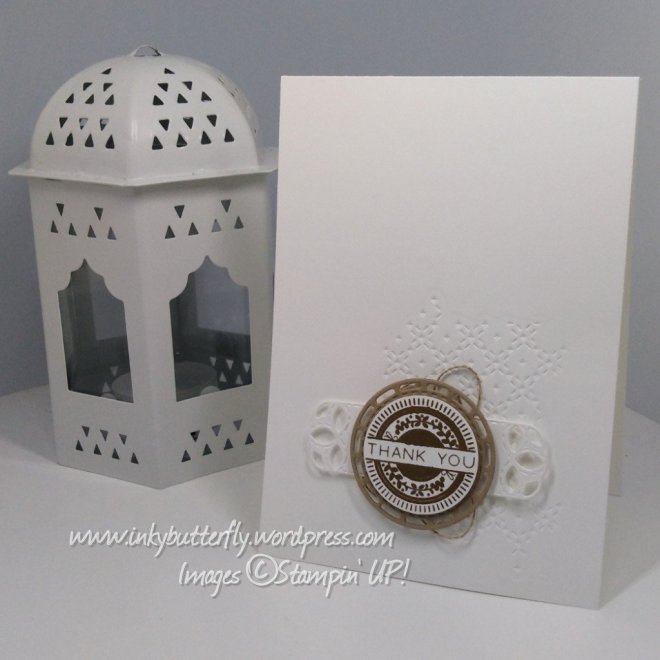
A 1-1/4 inch strip of Frosted Floral DSP was adhered to some white card stock. Half a pearlized doily was then added to the back. The strip was then added to the card with dimensionals.

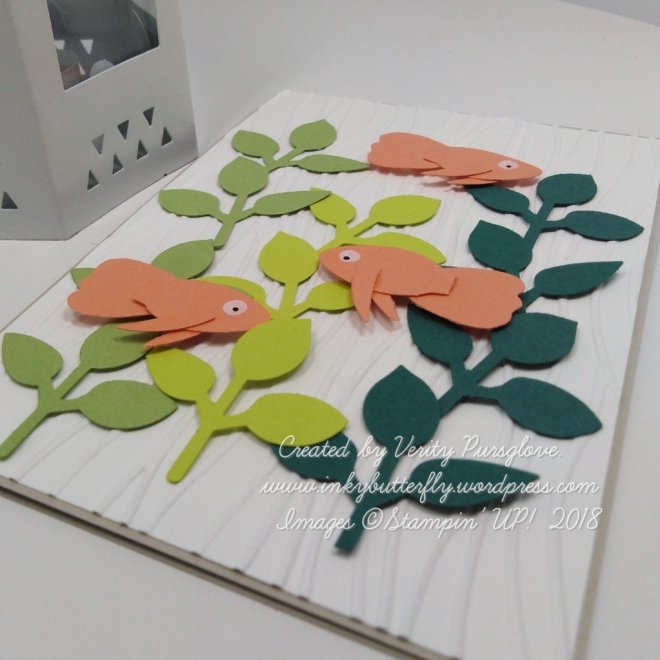
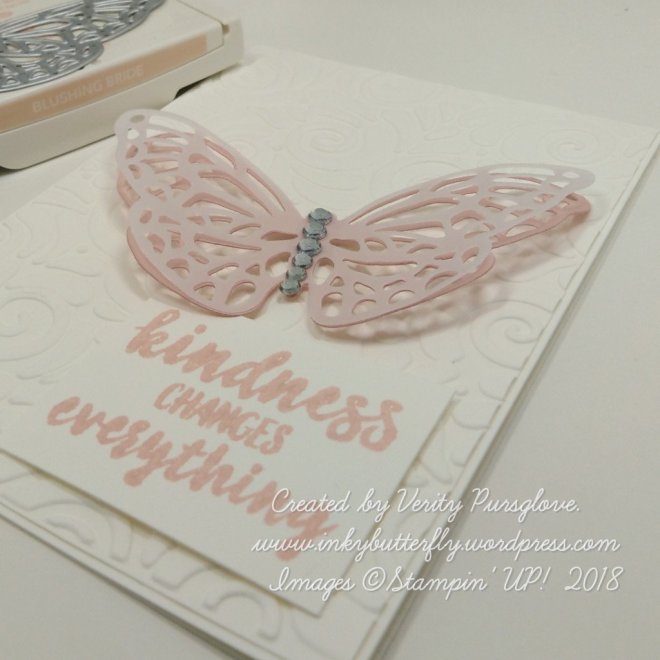
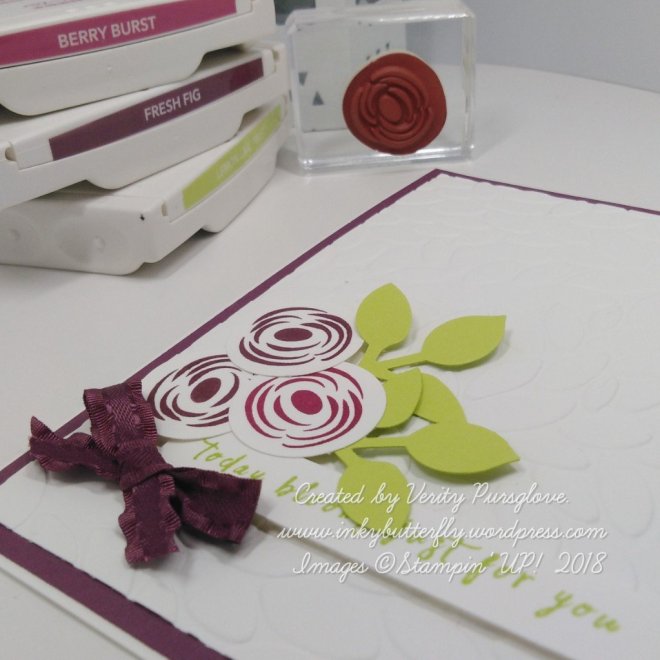
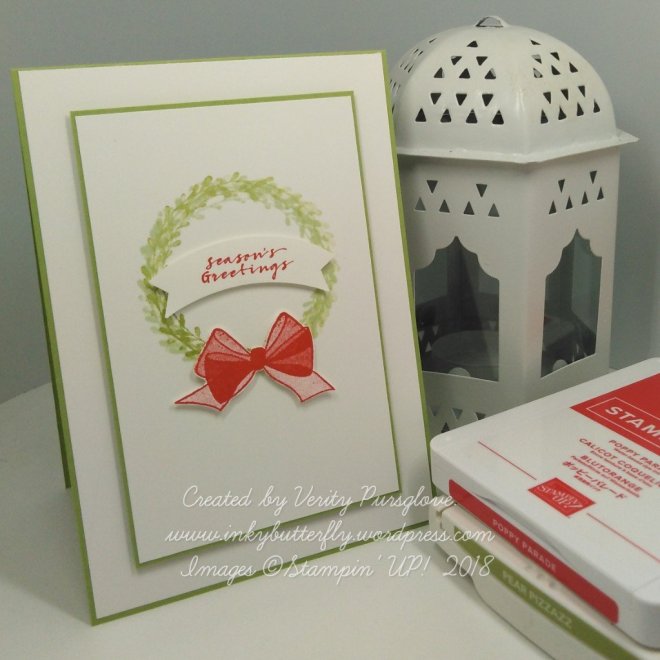
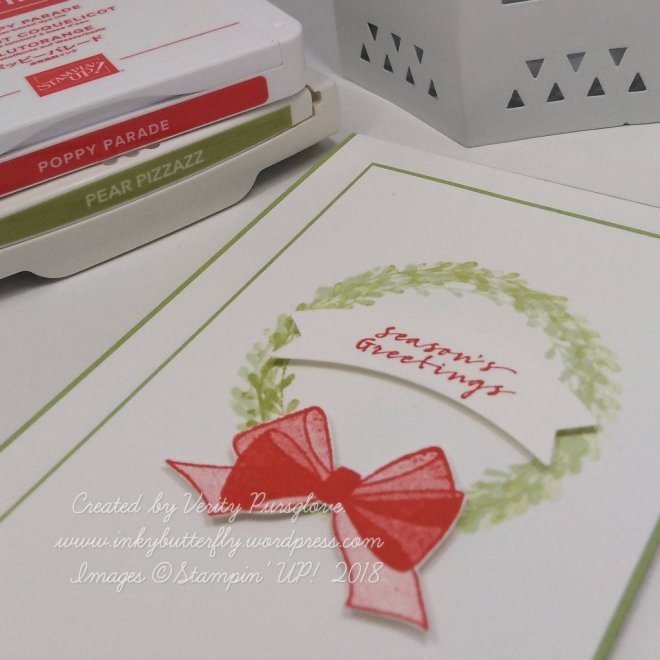
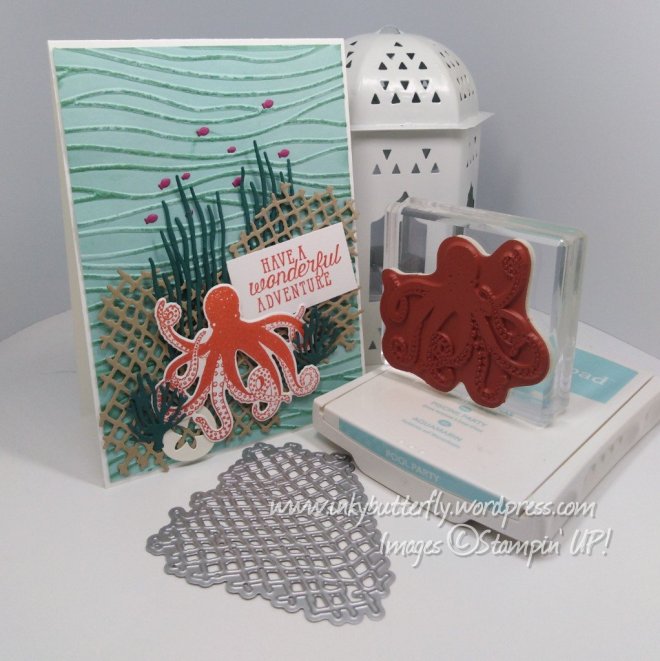
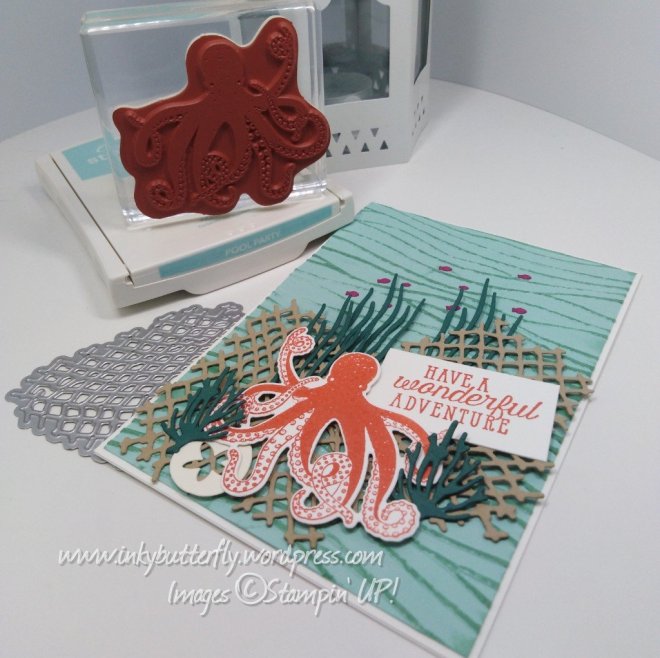
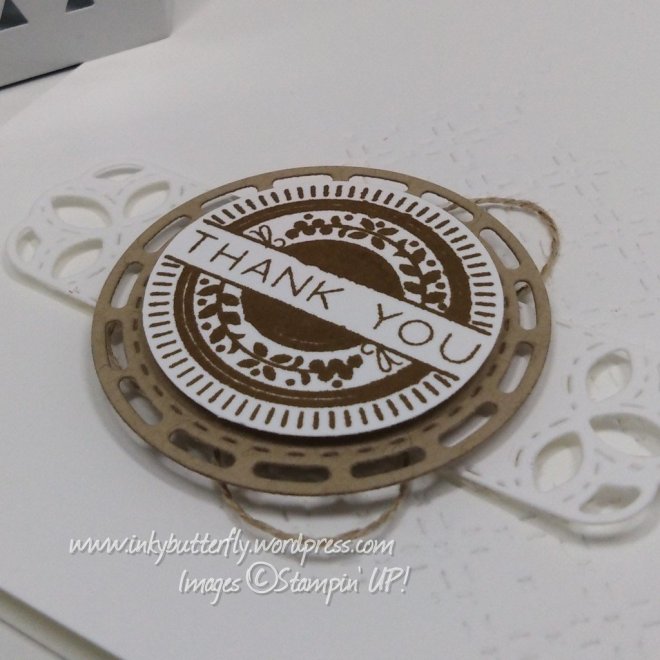
The additional elements were stamped with Mint Macaron or Highland Heather inks and Die cut with the coordinating Framelits. These were secured with a mix of Multipurpose glue and dimensionals.

Some basic adhesive sequins finished the card.

I hope you enjoyed this project.

The supplies used are listed below.

Thanks for stopping by today and happy Stampin’!

Verity xx

Product List

Fun with punch art

Hello Everyone,

I made this card for a card swap challenge.

I had never used this technique before. Love the result!

The fishes are made with Grapefruit Grove card stock.

These are light bulb bodies with petal tails. The fins are from the Vase Builder.

For the background, I used the seaside embossing folder. I then used the leaf punch to make the weeds.

I hope you enjoyed this project. The supplies used are listed and linked to the online store below.

I would love to be your demonstrator.

Thanks for stopping by today and happy Stampin’!

Verity xx

Product List

Leaf Punch

[144667]

£15.00

Three Wise Men

Hello & Happy Sunday,

Today I am using the Illuminated Christmas stamp set and doing some ink blending.

I started by heat embossing the star in the top corner.

Sponge daubers were used to blend in the background, beginning with So Saffron for the star and working through Pool Party, Balmy Blue and Night of Navy inks. A chalk marker was used to add some other tiny “stars” in the sky.

The three Kings were stamped and coloured with Stampin’ Blends. A stitched circle was used to die cut the image.

The final step was to add the sentiment. This was done simply by stamping in black ink, trimming to size and adhering with dimensionals.

I hope you enjoyed this project. The supplies used are listed and linked to the online store below.

I would love to be your demonstrator.

Thanks for stopping by today and happy Stampin’!

Verity xx

Product List

Project Share Project

Hi Everyone,

It’s Project Share time and we are welcoming two new members!

This week’s shares all feature the Peaceful Noel bundle! Click the images to see more about each project!

First up is Gez of Nigezza Creates; I just love the wreath effect of this project, great colours too.

Next is Heather of Stamp with Nellie; these tags are so adorable. The embossing is beautiful and the wash tape finishes the edge perfectly.

And finally for this week is Jill of Paper Daisy Crafting; Another card, another tag, but completely different! Such a versatile set.

I hope you enjoyed these projects.

Thanks for stopping by today and happy Stampin’!

Verity xx

Product List

Sprig Punch

[148012]

£17.00

Just Add ‘K’

Good Afternoon,

Popping in an extra post to share my entry for this week’s Just Add Ink challenge……

You can see what the design team have made here!

I thought “K” could be for kindness.

The card base is made with Whisper White card stock. A card layer was lightly spritzed with water before embossing with the Swirls and Curls embossing folder.

The kindness sentiment from the Abstract Impressions bundle was stamped with Blushing Bride Ink and cut down to size.

The butterfly die was used to cut Blushing Bride and Vellum card stock. These were adhered together and rhinestones added to the body.

I hope you enjoyed this project. The supplies used are listed below.

Thanks for stopping by today and happy Stampin’!

Verity xx

Product List

Shine

Hi Everyone,

For today’s project I thought I would use the Making Christmas Bright stamp & punch bundle.

On a Whisper White card layer I stamped the circular motif with versamark and heat embossed with white powder. Balmy Blue ink was sponged over the top.

The sentiment was added with Smoky Slate ink. The layer was mounted on to a white card base with dimensionals.

The bulbs were stamped on to each of the 2018 in colour card stocks with versamark, embossed with clear powder and punch out. The fixings were punched from Basic Gray card stock.

Silver baker’s twine was adhered to the card base with Multipurpose glue. The light bulbs were added with dimensionals.

I hope you enjoyed this project. The supplies used are listed and linked to the online store below.

I would love to be your demonstrator.

Thanks for stopping by today and happy Stampin’!

Verity xx

Product List

Project Share Project

Hi Everyone,

It’s been another wonderfully creative week… I am being a bit cheeky and showing four projects today.

I spent last weekend with all these lovely ladies at our team retreat so I wanted to give them all a shout out!

First up is this sponged card from Heidi. This technique allows for more control when creating backgrounds.

See more on Heidi’s blog here.

Helzie was kind enough to be my chauffeur. Here is a card showing how to use stamps in different ways.

See more at Helzie’s blog here

The lovely Jill has used the embossing mats with a Die to add texture to the card.

See more on Jill’s blog here

And then Angelina has used lovely purples to make her card with Designer Series Paper.

See more on Angelina’s blog here

I hope you enjoyed these projects.

Thanks for stopping by today and happy Stampin’!

Verity xx

Product List

Blooms for You #GDP156

Good Morning!

Wednesday means a Global Design Project entry. This week the challenge is to Case the Designer…. See what the design team have made here

I have made this card featuring the Petal Burst embossing folder and Perennial Birthday stamp set.

I kept the embossed background opting for the Petal Burst folder, though any design would fit with this project. This was adhered on to a Fresh Fig card layer and then to a Whisper White card base.

The sentiment was added next. This was stamped with Lemon Lime Twist ink.

Flowers were stamped in Berry Burst & Fresh Fig ink and punched out. Leaves were punched from Lemon Lime Twist card stock.

A bow was tied from Fresh Fig Ruffled ribbon.

I hope you enjoyed this project. The supplies used are listed below.

Thanks for stopping by today and happy Stampin’!

Verity xx

Product List

Leaf Punch

[144667]

£15.00

Dashing Z Fold card

Good Morning,

These cards are really easy to make and look amazing.

The card base is made in the usual way, but the front is folded back. The second strip of card stock is scored in exactly the same way.

The panels were decorated with Dashing Along Designer Series Paper. The strip was adhered to the card base.

The deer were stamped with versamark and heat embossed, or die cut directly from gold foil card stock.

The sentiment was also heat embossed and adhered inside the card.

I hope you enjoyed this project. The supplies used are listed and linked to the online store below.

I would love to be your demonstrator.

Thanks for stopping by today and happy Stampin’!

Verity xx

Product List

Simply Scored

[122334]

£27.00

Seasonal Wreath

Hi Folks,

Here is a super simple card for today.

The Wishing You Well stamp set is so easy to use.

I prepared a card base from Pear Pizzazz card stock and added a Whisper White card layer.

On a separate piece of card, I stamped the wreath with Soft Sea Foam and Pear Pizzazz inks.

This was Layered onto more Pear Pizzazz card stock.

The bow and sentiment were stamped with Poppy Parade Ink. The bow was fussy cut while the sentiment was cut with the Duet Banner punch.

I hope you enjoyed this project. The supplies used are listed and linked to the online store below.

I would love to be your demonstrator.

Thanks for stopping by today and happy Stampin’!

Verity xx

Product List

Pretty Floral Thank You – Just Add Ink #425

Hello Again,

Here is my entry for this week’s Just Add Ink challenge from Kelly.

The design team have made some great inspirational projects. You can see them here!

I immediately turned to the gorgeous Petal Promenade Designer Series Paper.

One of the sheets has these sweet frames that cropped out and layered on to Soft Sea Foam card stock.

The Painted Glass stamp set and coordinating dies were used to embellish the topper. Starting with the decorative strip to emulate the picket fence in the inspiration image.

Some white Polka Dot Tulle was tied to a bow around the topper which was then adhered to the card with dimensionals.

The roses were stamped and heat embossed with clear powder. Mossy Meadow, Petal Pink and a touch of Fresh Fig were used to watercolour the images. They were die cut with the matching framelits.

Fresh Fig ink was used to stamp the sentiment.

I hope you enjoyed this project. The supplies used are listed below.

Thanks for stopping by today and happy Stampin’!

Verity xx

Product List

Project Share Project

Hi Everyone,

Just look at what my crafty friends have been upto… Please click the links to see more details of each of the projects.

Jill has featured the wonderful new Dashing Deer in this beautifully simple card.

See how Jill made the card here

Heidi has been creating even more ways to gift some tea lights with this unusual closure.

See more on her blog here

Sally has made this stunning card. Neutral colours make this suitable for the guys too!

See more about this project here

I hope you enjoyed these projects.

Thanks for stopping by today and happy Stampin’!

Verity xx

Product List

With Love – Just Add Ink #424

Hello Everyone.,

Welcome to another challenge entry… I usually do these on Mondays, but this week has been a bit crazy getting ready for a new school term.

This week the challenge is…

You can see what the design team have made here.

My design features a new embossing folder called Tin Tile, it’s so pretty! I just used white card stock which I mounted on to a black card base.

The inner panel is 1-1/2 inches smaller so the the embossing is still visible.

A combination of Artisan Textures and Beautiful Blizzard was used to add the texture to this panel. Smoky Slate, Gray Granite and Black Memento Ink were used.

The sentiment also comes from Beautiful Blizzard… Just goes to show that there are uses beyond Christmas…. This was cut with the Darling Label punch.

Some black satin ribbon was added across the middle, with a small bow attached.

For a final bit of bling and extra texture a few pearl sequins were also used.

I hope you enjoyed this project. The supplies used are listed below.

Thanks for stopping by today and happy Stampin’!

Verity xx

Product List

Sorry…

Good Morning Everybody,

Today’s make is a clean and Simple card.

I began by embossing a white card base with the brand new Swirls and Curls embossing folder. The folder was not rolled through all the way, resulting in the bottom of the card remaining flat.

The word “sorry” was stamped with versamark ink and embossed with copper powder.

The partner sentiment was added with Early Espresso ink.

The tree was inked with Cajun Craze, a sponge was used to add some Early Espresso to the trunk. The image was die cut and adhered using mini dimensionals.

I hope you enjoyed this project. The supplies used are listed and linked to the online store below.

Look out for more Autumn Winter catalogue sneek peeks ahead of next week’s launch.

Thanks for stopping by today and happy Stampin’!

Verity xx

Product List

Just Add Ink #423

Hi Everyone,

I hope those of you in the UK are enjoying the Bank Holiday.

Today I am playing along with the Just Add Ink challenge.

This is an interesting combination, see what the design team have made here!

And this is what I have created featuring the Follow Your Dreams stamp set and dies.

I built the background first using the Artisan Textures stamp set. To soften this a little, a Vellum overlay was placed over the top. The panel was added to a Basic Grey card base.

There are lots of layers on the dream catcher.

First, the largest image was stamped in Basic Grey and Die cut.

The additional layers were cut from Bermuda Bay and Soft Suede card stock. These were secured together with a silver brad.

The large feathers were cut from white card stock and Soft Suede ink was added to the ends with a sponge dauber. The smaller feathers were stamped with Bermuda Bay ink on to matching card before Die Cutting and adding to the dream catcher.

The Friendly Expressions stamp set was used for the sentiment which was heat embossed with silver powder.

This was cut with the Pretty Label Punch and adhered with dimensionals. A few silver pearls completed the card.

I hope you enjoyed this project. The supplies used are listed below.

Thanks for stopping by today and happy Stampin’!

Verity xx

Product List

Oh Darling! #GDP152

Good Afternoon,

I am playing along with the Global Design Project today.

The challenge this time is to case the Designer. Janneke has created this beautiful card as inspiration.

The design team have made some fantastic interpretations of the card. You can see them here!

The inspiration card uses the Stitched All Around stem set, which I carried through to my design. I also kept the purple colour theme.

The card base was made by adding Highland Heather card stock.

A smaller layer was embossed with the stitching Die from the set. The layer was mounted on to Whisper White card stock and adhered to the base with dimensionals.

The Stitched label was cut from Vellum.

The sentiment was stamped with Gorgeous Grape ink and cut with the Everyday Label Punch. This was added to a a starburst punch shape and then on to the card with dimensionals.

Rather than flowers, I added butterflies from the Painted Glass stamp set. The outline was Blended slightly and Wink of Stella Glitter brush added some bling.

I hope you enjoyed this project. The supplies used are listed below.

Thanks for stopping by today and happy Stampin’!

Verity xx

Product List

Blender Pens

[102845]

£10.75

Embossed Thinking of You card

Hello and Happy Monday!

This week’s Just Add Ink challenge is all about embossing!

The design team have made some wonderful samples. You can see them here!

Quick Measurements:

Gray Granite card base, A4 cut lengthways at 4-1/8 inches (10.5cm) and scored at 5-7/8 inches (14.2cm).

Whisper White card layer for embossing, 5-3/4 inches (13.7cm) by 4 inches (10cm).

Watch the video:

This version uses Merry Merlot card stock for the base.

Both cards could be sent to male or female recipient just to let them know they are in your thoughts.

I hope you enjoyed this project. The supplies used are listed below.

Thanks for stopping by today and happy Stampin’!

Verity xx

Product List

Wonderful Adventure #GDP151

Hello Everyone,

Today I am taking part in the Global Design Project theme challenge this week.

You can see what the design team have here!

I have used the Sea of Textures bundle to create my card, building lots of layers.

The Seaside Embossing folder was used to Emboss some Pool Party card stock which was added to a Whisper White card base.

The netting was die cut from Crumb Cake card stock.

Calypso Coral ink was used to stamp the octopus and the sentiment. He was added to the card using dimensionals.

Some of the little fishes were cut from Berry Burst card stock and adhered to the background.

The weeds were cut from Tranquil Tide card stock and secured to the card with Multipurpose glue.

I hope you enjoyed this project. The supplies used are listed below.

Thanks for stopping by today and happy Stampin’!

Verity xx

Product List

Big Shot

[143263]

£102.00

Stitched Thank You

Good Morning,

Today’s project is a complete contrast to yesterday, using lots of white space.

I started by using the Big Shot Embossing mats with the Stitched All Around dies to add texture to a white card base.

The thank you motif was stamped with Soft Suede ink. This was die cut along with a Crumb Cake circle and a white label from the same Die set.

The elements were layered together using dimensionals and snail adhesive. Some linen thread added some texture.

I hope you enjoyed this project. The supplies used are listed and linked to the online store below.

Thanks for stopping by today and happy Stampin’!

Verity xx

Product List

Big Shot

[143263]

£102.00

Linen Thread

[104199]

£4.25

Just Add Ink #420

Good Morning Everybody,

How about this for inspiration this week? Such a bright palette of colour.

The design team have made some great inspirational projects. You can see them here

For me the colours that show the most are pink-red, green and yellow. The botanical aspect is carried over in to my design with the use of leaves.

I opted for an Emboss resist watercolour card.

The leaves from the Blended Season stamp set were stamped with versamark ink on to watercolour paper. Clear embossing powder was added and this was heat set.

Lovely Lipstick, Pineapple Punch and Call Me Clover ink was pressed on to a silicon sheet and an aqua painter was used to colour over the card stock.

Once this was completely dry, extra ink was applied to the leaves. This brought out the detail of the stamped images.

The piece was adhered to some Night of Navy card stock and mounted on to a white card base.

A sentiment from Stitched All Around was stamped with Night of Navy ink and die cut with Blended Season coordinating Framelits. This was layered onto a larger Die cut from vellum and then adhered to the card base with dimensionals.

I hope you enjoyed this project. The supplies used are listed below.

Thanks for stopping by today and happy Stampin’!

Verity xx

Product List

Aqua Painters

[103954]

£15.50