Birthday Blooms

Hello Everyone,

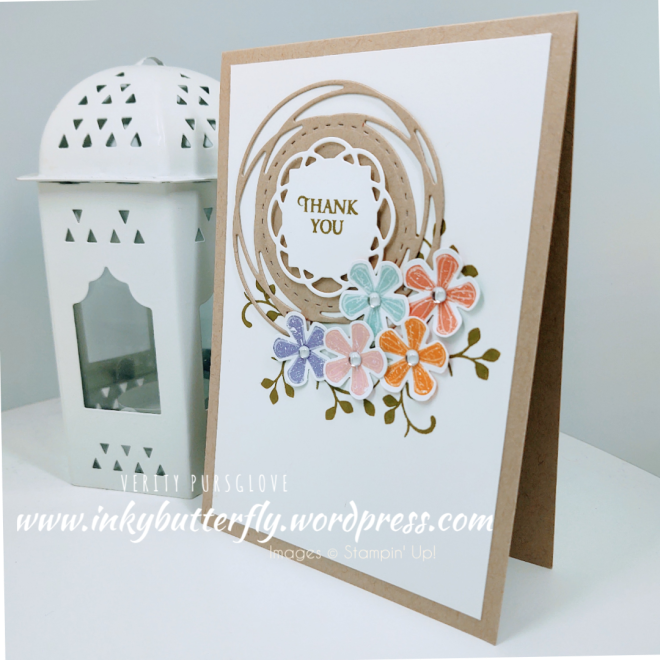
I can’t stop using the Thoughtful Blooms stamp set and Small Bloom punch!

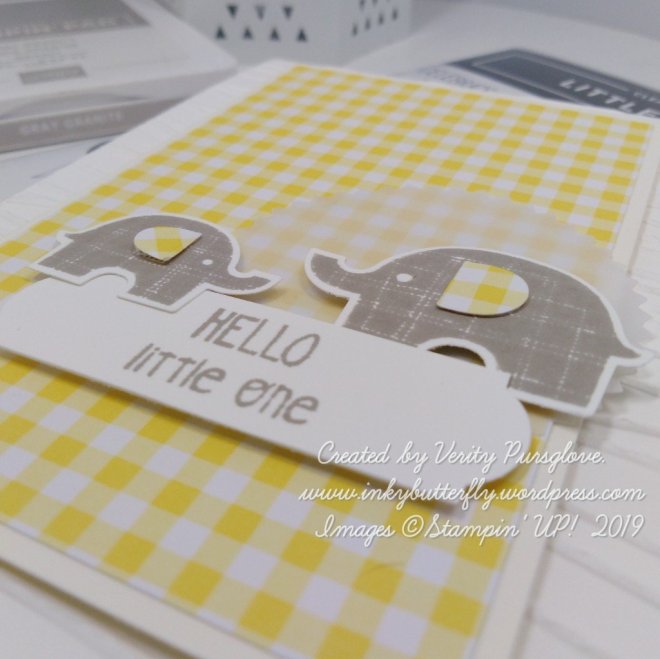
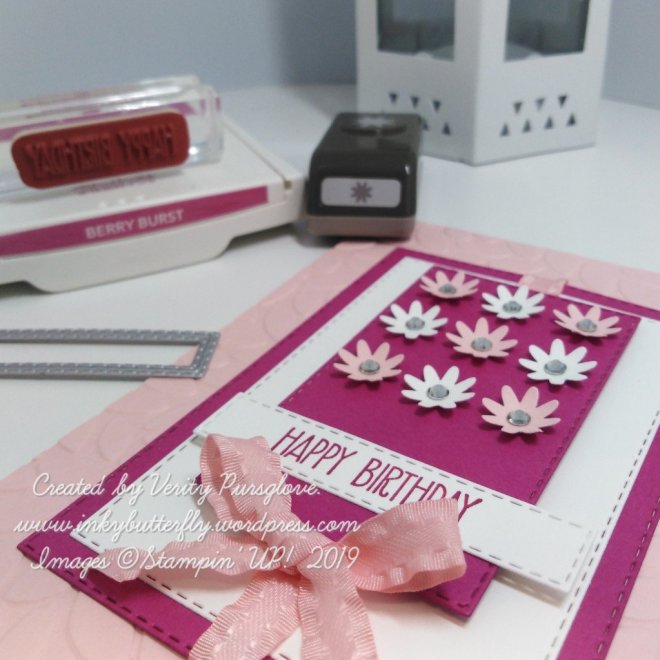
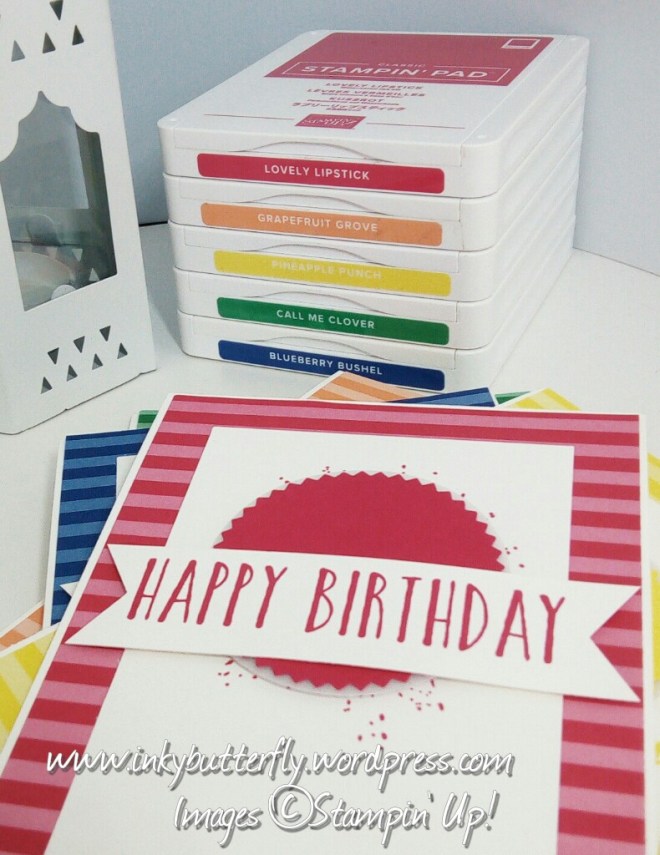
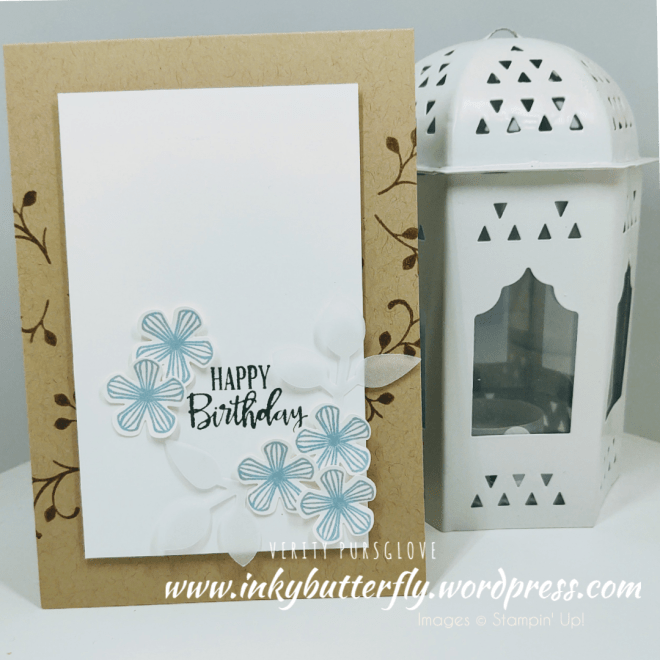
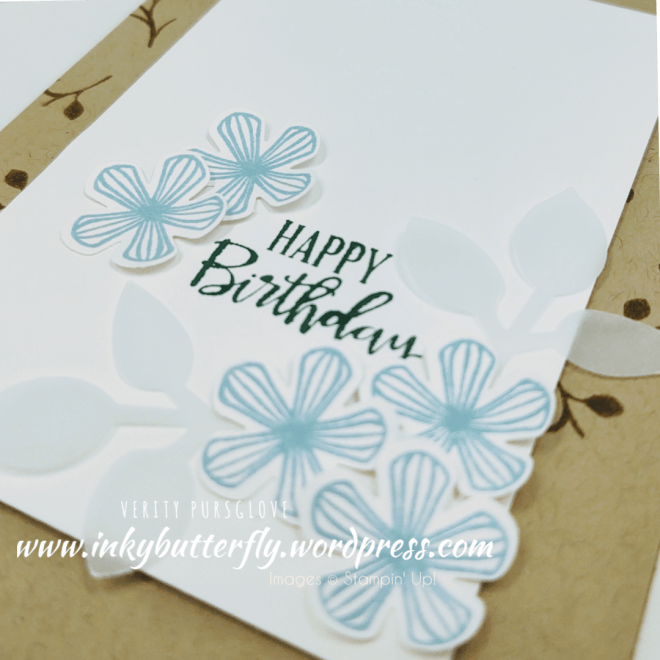
Today it’s for a birthday card.

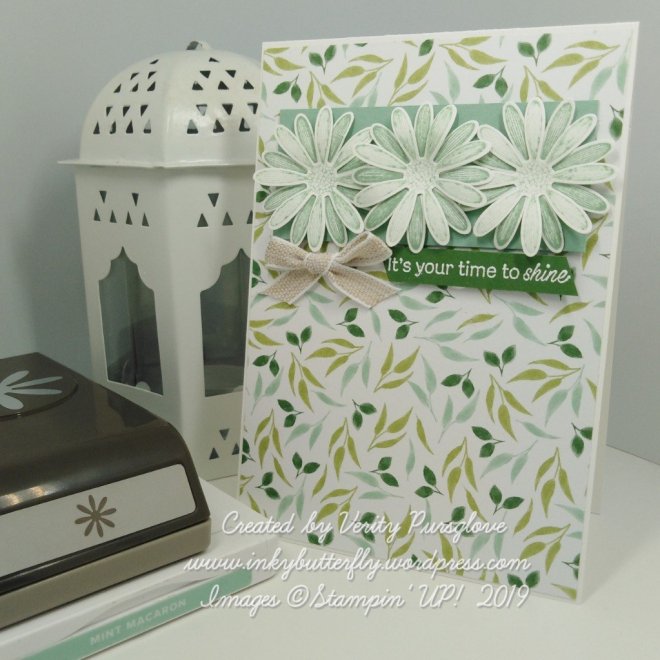
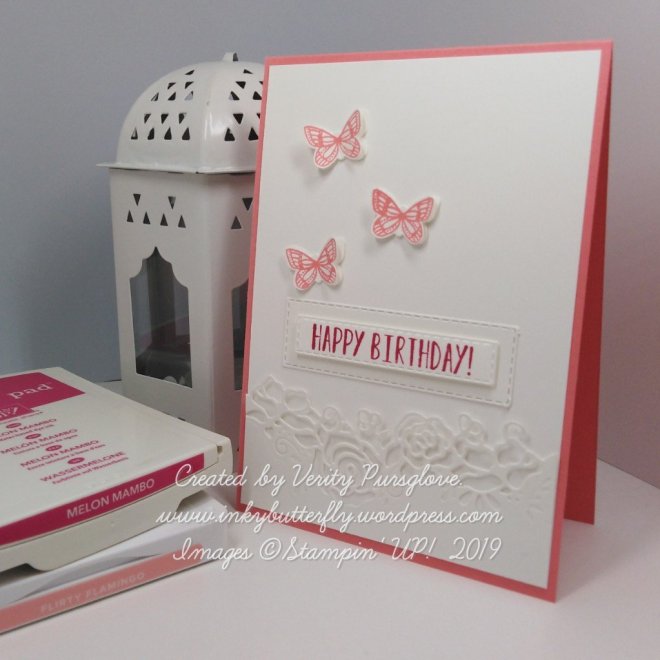
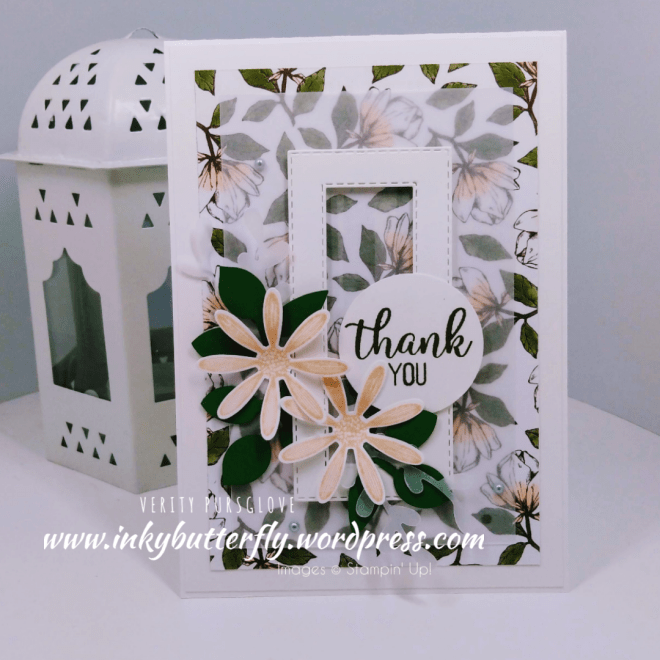
This one is really simple leaving lots of white space.

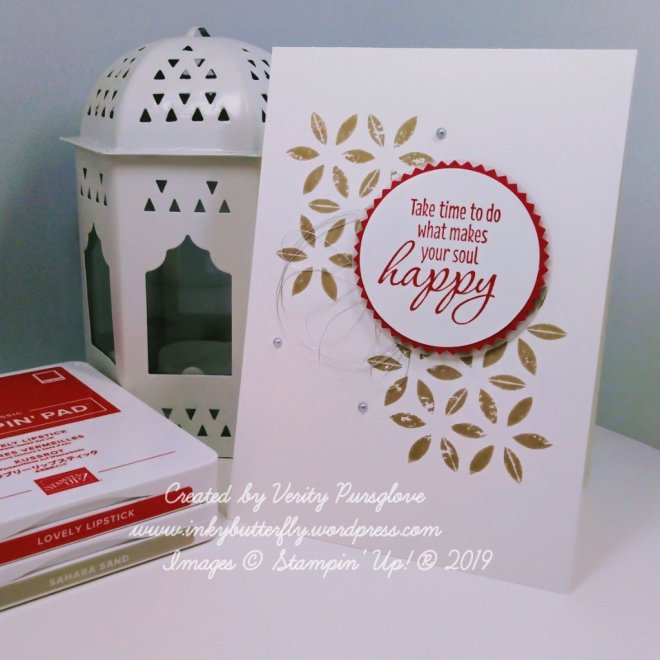
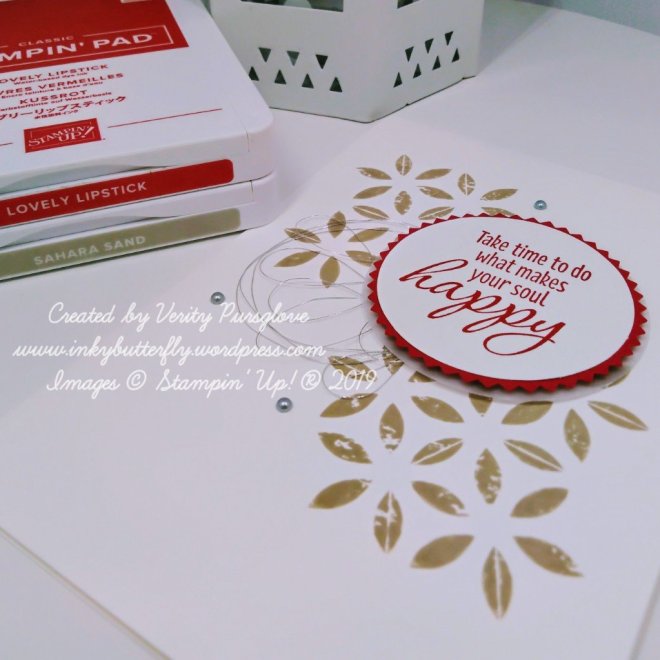
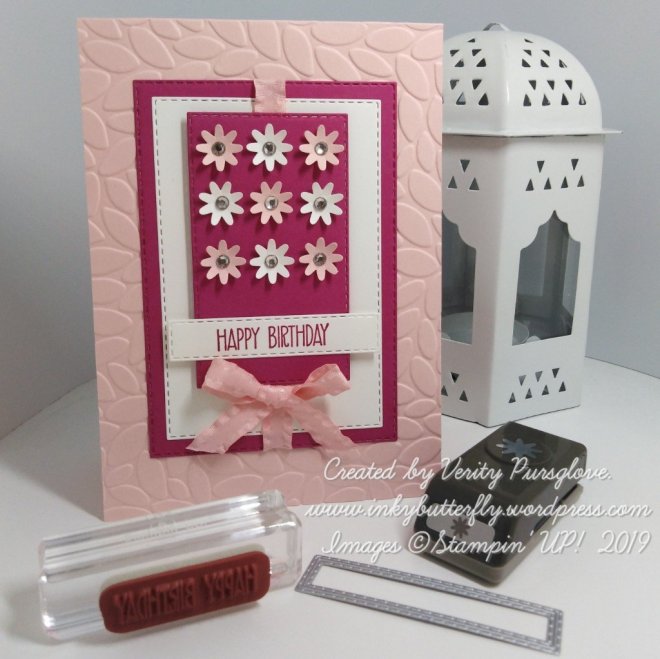
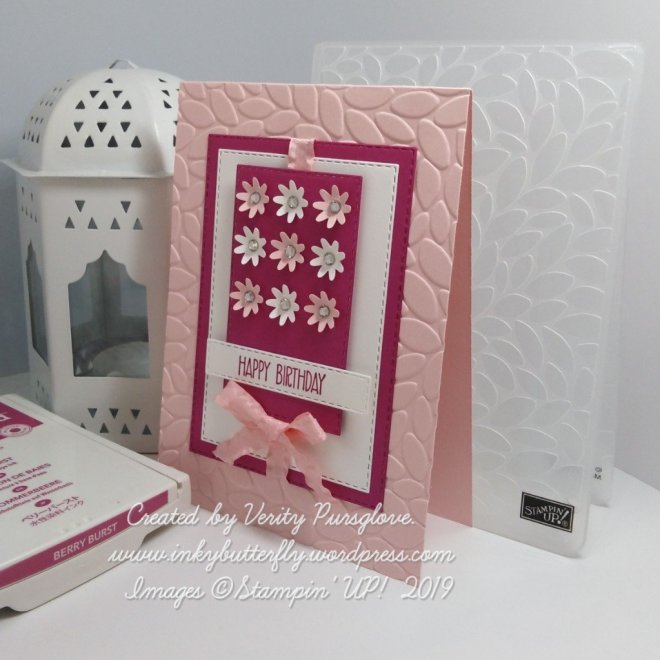
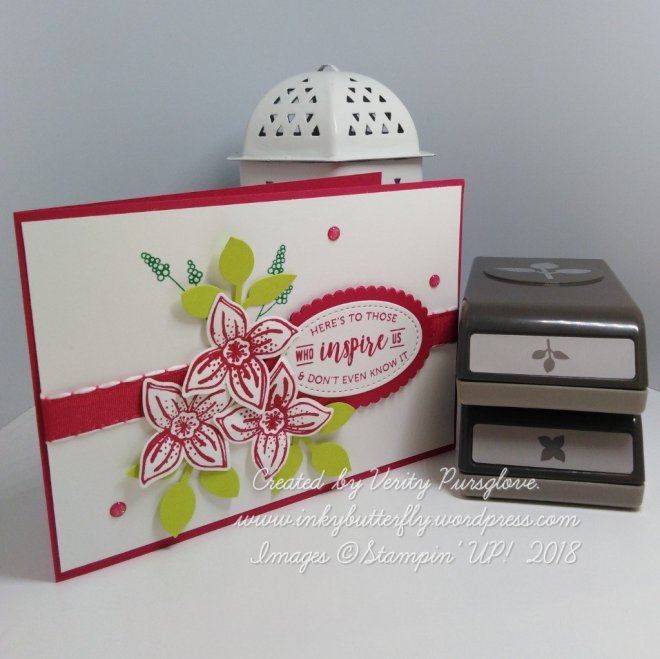
I added some foliage to the card base with Early Espresso ink.

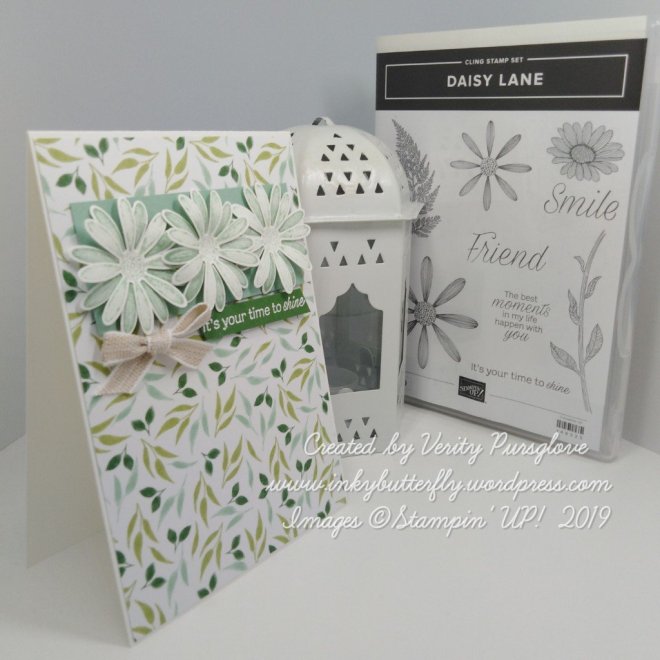
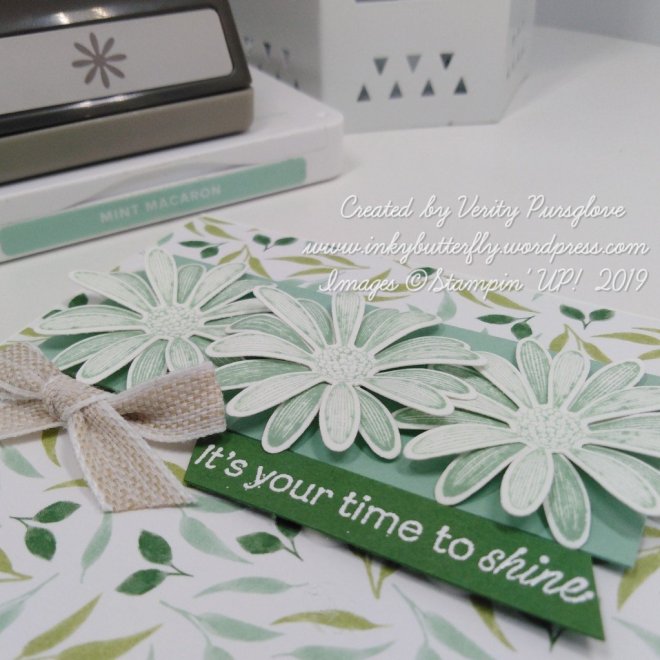
A white layer was stamped with a sentiment from Peaceful Moments using Shaded Spruce ink. This was adhered to the card base with dimensionals.

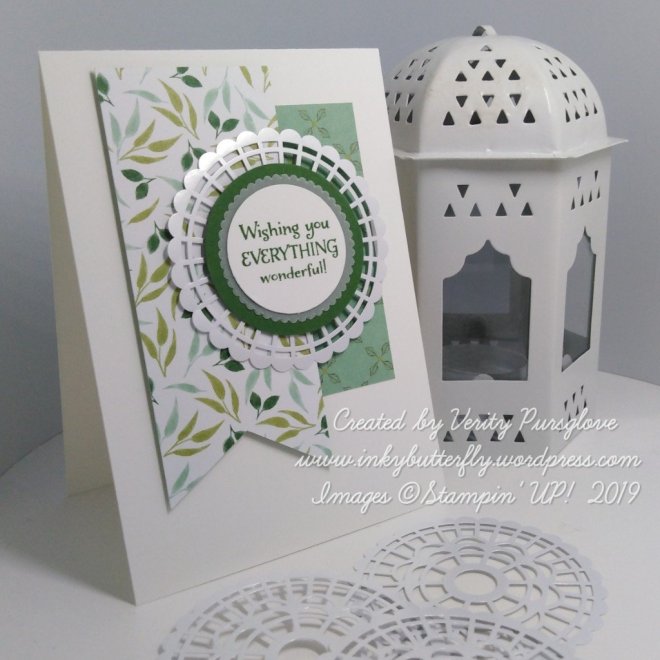
Blooms were stamped with Balmy Blue ink and punched out. These were added using multipurpose glue.

The Leaf punch was used to cut leaves from vellum and added around the flowers.

I hope you enjoyed this project. The supplies used are listed and linked to the online store below.

I would love to be your demonstrator.

Thanks for stopping by today and happy Stampin’!

Verity xx

Product List

Leaf Punch

[144667]

£15.00

Paper Trimmer

[152392]

£23.00

Bone Folder

[102300]

£6.50

Punched Blooms

Hello Everyone,

This project has a little Sneak Peek at a new product coming soon, the Pleased as Punch Designer Series Paper.

This is one of a collection of items specifically designed to coordinate with products already available.

The paper can be used with these items;

Product List

For this project I wanted to create a wreath look with the Painted Labels dies. These elements were cut from Crumb Cake and Whisper White card stock.

The sentiment from the Honey Bee set was stamped with Mossy Meadow ink.

The same ink was used to add the foliage on the white card layer.

The card was assembled using a Crumb Cake card base.

One each of the coloured flowers on the paper was punched and adhered to the card.

A rhinestone was added to each of the flower centres.

I hope you enjoyed this project. The supplies used are listed and linked to the online store below.

I would love to be your demonstrator.

Thanks for stopping by today and happy Stampin’!

Verity xx

Product List

Pootlers Blog Hop – Heartfelt

Hello Everyone,

Here we are blog hopping again with the Pootlers Team! The theme is the new Mini Catalogue and Sale-a-bration!

There is a blue box at the end of this post with a link to all the other featured projects. There are so many entries that the links cover two pages! Please take a look, like and subscribe!

I have chosen to work with the Heartfelt bundle to make this layered card.

The card base is made with Real Red card stock. Layers of Whisper White and Flirty Flamingo card stock were adhered with Snail adhesive.

The next layer was cut with the largest rectangular die from the Stitched So Sweetly set. Two vellum hearts were attached toward the top and bottom of the die cut. This was then adhered with dimensionals.

The heart punches were used to cut Real Red and Whisper White card stock.

Two red hearts were sandwiched together with dimensionals.

A sentiment was stamped on to the white heart with Flirty Flamingo ink and added to the others.

I hope you enjoyed this project. The supplies used are listed and linked to the online store below.

You are invited to the Inlinkz link party!

Click here to see the other projects


Thanks for stopping by today and happy Stampin’!

Verity xx

Product List

Paper Trimmer

[152392]

£23.00

CAS Colours and Sketches #352

Hello Everyone,

Welcome to my blog. Today I am sharing my project for the CAS Colours and Sketches challenge.

This time it’s a colour challenge. The design team have made some wonderful samples as inspiration. You can see them here.

And this is what I created!

The card features the Thoughtful Blooms stamp set and coordinating Small Bloom Punch available during Sale-a-bration.

To make the card I used Bermuda Bay and Petal Pink inks to create the background. This was layered on to So Saffron card stock and then to a Bermuda Bay card base with dimensionals.

Blooms were stamped with So Saffron ink and punched out. Each was shaped with a ball stylus and adhered to the card. A clear Epoxy dot was added to the centres.

The sentiment was die cut with the smallest shape from the Stitched So Sweetly set.

A Petal Pink bow completed the card.

I hope you enjoyed this project. The supplies used are listed and linked to the online store below.

I would love to be your demonstrator.

Thanks for stopping by today and happy Stampin’!

Verity xx

Product List

Project Share Project

Hello Everyone,

Welcome to this week’s Project Share. As always my friends have created some lovely work. Please use the links to visit their blogs and read more about their projects.

All the projects featured use Designer Series Paper as the main focus. Each can be recreated with the design that suits your particular needs.

Jill’s money envelope is a perfect gift for the person who has everything. The foiled DSP makes this look extra special. This is embellished with one of my favourite sets too.

Visit Jill’s blog here for more information.

Heather has made this cute Dino card. I just love all the bright colour combinations that can be used. The stamp set has some “rawr-some” sentiments too.

Visit Heather’s blog here

Gez’s little gift box looks beautiful made with this lovely DSP. The Daisy Topper really finishes off the box. I like the way she has curled the petals in different directions.

Visit Gez’s blog here

I hope you enjoyed these projects. The supplies used are listed and linked to the online store below.

I would love to be your demonstrator.

Thanks for stopping by today and happy Stampin’!

Verity xx

Product List

Tropical Dies

[146831]

£25.00

Simply Scored

[122334]

£28.00

Magnolia Thank You

Hello Everyone,

Taking a break from Christmas with this thank you card.

I used Magnolia Lane designer series paper as the background layer. Vellum was added over the top to soften the colours a little.

A frame was cut with the Stitched Rectangle dies which was then adhered with dimensionals.

Old Olive ink was used to stamp the sentiment taken from the Modern Heart set. This was cut with a circle punch and added to the card.

Daisies were stamped with Petal Pink ink and cut with the coordinating punch. Leaves and sprigs were cut from Old Olive card stock and vellum.

The punched elements were adhered the card with multipurpose glue.

I hope you enjoyed this project. The supplies used are listed and linked to the online store below.

I would love to be your demonstrator.

Thanks for stopping by today and happy Stampin’!

Verity xx

Product List

Leaf Punch

[144667]

£15.00

Sprig Punch

[148012]

£17.00

Paper Trimmer

[152392]

£23.00

Toile Tidings

Hello Everyone,

It seems that we are already hurtling through November so during this busy period quick cards are the order of the day.

These feature the Toile Tidings papers in traditional Real Red and, Garden Green.

The card base was made the coordinating card stock colour.

The Designer Series Paper was layered on to a Very Vanilla card layer and then to the card base with snail adhesive.

I picked out a, sentiment from the Itty Bitty Christmas stamp set. Matching ink was used to stamp on to Whisper White card stock in contrast to the Vanilla.

The sentiment was cut with a 1-1/2 inch circle punch and adhered to a 2-1/4 inch circle of vellum. This was added to the card with dimensionals.

A bow was tied from matching ribbon and secured with glue dots.

This is the Garden Green version. On this card I moved the sentiment to the side and added some metallic pearls.

I hope you enjoyed this project. The supplies used are listed and linked to the online store below.

I would love to be your demonstrator.

Thanks for stopping by today and happy Stampin’!

Verity xx

Product List

Inspire.Create #052

Hello Everyone,

Welcome to my blog. Every other Monday I share my project that I have used as my entry for the Inspire.Create challenge.

This time it’s a colour challenge. The design team have made some wonderful samples as inspiration. You can see them here.

And this is what I created!

I used the Modern Heart stamp set for my design, Stamping the outline with Gorgeous Grape and adding colour with Coastal Cabana. The panel was added to a Melon Mambo card base.

Melon Mambo Ink was used to stamp the sentiment which was cut with a 1-1/2 inch circle punch.

This was adhered to a 2″ circle of vellum and then to the card with dimensionals.

Gorgeous Grape glitter enamel dots completed the card.

I hope you enjoyed this project. The supplies used are listed and linked to the online store below.

I would love to be your demonstrator.

Thanks for stopping by today and happy Stampin’!

Verity xx

Product List

Happy Soul

Hello Everyone,

Today’s card features the Tasteful Textures stamp set. There are some great encouraging sentiments in the set too.

The white card base was stamped using Sahara Sand ink.

For the sentiment topper, I used Lovely Lipstick ink and cut this with a 2 inch punch.

This was adhered to Lovely Lipstick card stock cut with the Starburst Punch and then to a 2-1/4 inch circle of vellum.

Some silver thread was looped and added to the card base before adhering the topper.

Silver Metallic pearls completed the card.

I hope you enjoyed this project. The supplies used are listed and linked to the online store below.

I would love to be your demonstrator.

Thanks for stopping by today and happy Stampin’!

Verity xx

Product List

Wonderful Rococo Rose

Hello Everyone,

Do you like the flowers I have used on my card today?

Read on to find out how I made them.

I started by making a Whisper White card base and embossed it with the Subtle embossing folder.

The background leaves were cut from vellum using a die from the, Well Written Die set.

I chose the sentiment from the Rooted in Nature stamp set and cut this with a Stitched Rectangle Die.

For the flowers I first cut circles with the Scalloped circle punches. The circles were then cut again using the Medium Daisy Punch.

The smaller flower was adhered to the larger one and a Rococo Rose faceted gem was added to the centre.

Some Soft Sea Foam leaves completed the card.

I hope you enjoyed this project. The supplies used are listed and linked to the online store below.

I would love to be your demonstrator.

Thanks for stopping by today and happy Stampin’!

Verity xx

Product List

Leaf Punch

[144667]

£15.00

InspireINK Blog Hop – June Sketch Challenge

Good Morning Everybody,

Welcome to this month’s InspireINK blog hop. This time we have a sketch challenge to play with.

Please be sure to click through all the projects in the hop by clicking at the bottom of this post.

I reached for the beautiful Garden Lane Designer Series Paper to build the background layers. The banner was lifted on dimensionals.

The circular focal point was made by layering punched and die cut shapes on to a pearlized Doily.

The sentiment from the On To Adventure stamp set was stamped with Garden Green ink.

Click here for the other projects in the hop!

You are invited to the Inlinkz link party!

Click here to enter

I hope you enjoyed this project. The supplies used are listed below.

Thanks for stopping by today and happy Stampin’!

Verity xx

Product List

Daisy Trio #GDP194

Hello Everyone,

This week is a sketch challenge at the Global Design Project!
See what the Design Team have created here.

……. And this is my project…..

For this project, I have used the Daisy Lane bundle and teamed this with the Garden Lane Designer Series Paper.

The greens within the pattern inspired the use of Mint Macaron to stamp my daisies. These were punched out and shaped with a large ball stylus and adhered to a small piece of Mint Macaron card stock.

The DSP was adhered to a white card base, and the Daisy panel was secured towards the top.

The sentiment from the same stamp set was stamped on to Garden Green card stock, (a colour also featured in the paper) and heat embossed in white.

A small bow was tied from the Magnolia Lane Ribbon Combo to complete the card.

I hope you enjoyed this project. The supplies used are listed below.

Thanks for stopping by today and happy Stampin’!

Verity xx

Product List

Inspire.Create #042

Hello Everyone,

Welcome to my blog. Every other Monday I share my project that I have used as my entry for the Inspire.Create challenge.

This time it’s a theme challenge. The design team have made some wonderful samples as inspiration. You can see them here.

I have used the adorable Little Elephant bundle to make today’s project.

I opted for a gender neutral colour featuring the retiring Gingham Gala designer series paper.

The background panel was embossed with the Seaside folder.

The elephants were stamped with Gray Granite ink. These were cut with the coordinating punch. The ears were cut separately in matching gingham DSP.

The sentiment was stamped on to a strip of card stock and cut with the Everyday Label Punch.

I hope you enjoyed this project. The supplies used are listed and linked to the online store below.

I would love to be your demonstrator.

Thanks for stopping by today and happy Stampin’!

Verity xx

Product List

Petal Thanks

Hello Everyone,

Today’s project is about using up scraps. I had a bunch of Designer Series Paper strips left over from something else, (which you will see on Tuesday)!

The strips were trimmed slightly to 5-3/4 inches in length and adhered to a white card base.

A coordinating ink colour was used to stamp the bold sentiment from All Things Thanks. This was die cut with a Stitched Rectangle die and adhered with dimensionals.

The same inks were used to stamp the flowers which were cut with the coordinating punch.

Lastly, some leaves were punched from vellum. These were slotted behind the flowers and secured with Multipurpose glue.

I hope you enjoyed this project. The supplies used are listed and linked to the online store below.

I would love to be your demonstrator.

Thanks for stopping by today and happy Stampin’!

Verity xx

Product List

Nine Blooms #GDP182

Hello Everyone,

This week is a sketch challenge!

See what the Design Team have created with the sketch here

And this is my interpretation of the sketch. I love how it turned out.

The card base was made with Powder Pink card stock. The front was embossed with the Petal Burst embossing folder.

Stitched Rectangle Framelits were used to build the topper. Powder Pink ribbon was tied around the first two layers.

The third later was adhered with dimensionals. Nine Bitty Blooms were punched and added to the card. A rhinestone was placed in each of the centres.

A final rectangle was used to cut a sentiment that was stamped with Berry Burst ink.

I hope you enjoyed this project. The supplies used are listed below.

Thanks for stopping by today and happy Stampin’!

Verity xx

Product List

InspireINK Blog Hop – Easter.

Good Morning Everybody,

Welcome to this month’s InspireINK blog hop.

Please be sure to click through all the projects in the hop by clicking on the blue button below.

I don’t usually do 3D projects, so this was quite a challenge.

I made life easier by using this Window Box Die with it’s great hexagonal shape.

I decorated the sides with Botanical Butterfly Designer Series Paper.

Little flowers were punched from Whisper White card stock and vellum. A silver pearl was added to each of the centres. These were adhered with glue dots.

Click here for the other projects in the hop!

You are invited to the Inlinkz link party!

Click here to enter

I hope you enjoyed this project. The supplies used are listed below.

Thanks for stopping by today and happy Stampin’!

Verity xx

Product List

Glue Dots

[103683]

£5.00

Pretty in Pink

Hello,

Well today is my birthday! And I have the pleasure of sharing it with my friend, and this is the card I gave her.

I had to chose Flirty Flamingo as the base colour…. She loves flamingoes!

I added the beatiful Edgelit along the bottom.

The greeting was taken from the Lemon Zest stamp set and stamped with Melon Mambo ink. This fitted perfectly in to a Stitched Rectangle die.

Three little butterflies were punched out and added to the top, wings slightly lifted for extra movement.

I hope you enjoyed this project. The supplies used are listed and linked to the online store below.

I would love to be your demonstrator.

Don’t forget to check out Sale-a-bration and the free products available when you spend multiples of £45.

If your shopping wish list gets to £99, there’s no better time to join my team. You can choose £170 worth of products to be included in your personal starter kit; add a little extra and receive an exclusive Stampin’ Up! Craft & Carry tote.

Thanks for stopping by today and happy Stampin’!

Verity xx

Product List

Those Who Inspire Us

Good Morning Folks,

Today I am combining a Sale-a-bration freebie with one of my annual catalogue favourites.

If you do not know what Sale-a-bration is all about click below to see more about the offers available.

I built this project by starting with this great sentiment. This comes from “Part of my Story” Sale-a-bration stamp set.

This was stamped with Lovely Lipstick ink and Die cut with a Stitched Shapes Framelit. A Scalloped Layering Oval Die made the card stock layer.

The card base was made with Lovely Lipstick card stock. Ribbon was wrapped around the white layer before adhering to the base. The prepared sentiment was added usind dimensionals.

The Pop of Petals stamp set was used to add some greenery to the background. Three flowers were stamped & punched. These were secured in position with glue dots.

Finally, some leaves were punched from Lemon Lime Twist card stock. Glitter Enamel dots completed the card.

I hope you enjoyed this project. The supplies used are listed and linked to the online store below.

I would love to be your demonstrator.

Don’t forget to see more about Sale-a-bration and the free products available when you spend multiples of £45.

If your shopping wish list gets to £99, there’s no better time to join my team. You can choose £170 worth of products to be included in your personal starter kit; add a little extra and receive an exclusive Stampin’ Up! Craft & Carry tote.

Thanks for stopping by today and happy Stampin’!

Verity xx

Product List

Leaf Punch

[144667]

£15.00

Glue Dots

[103683]

£5.00