Pigment Sprinkled Yuletide Cheer

Hello Everyone,

Do you like “messy” crafting? This is the technique for you!

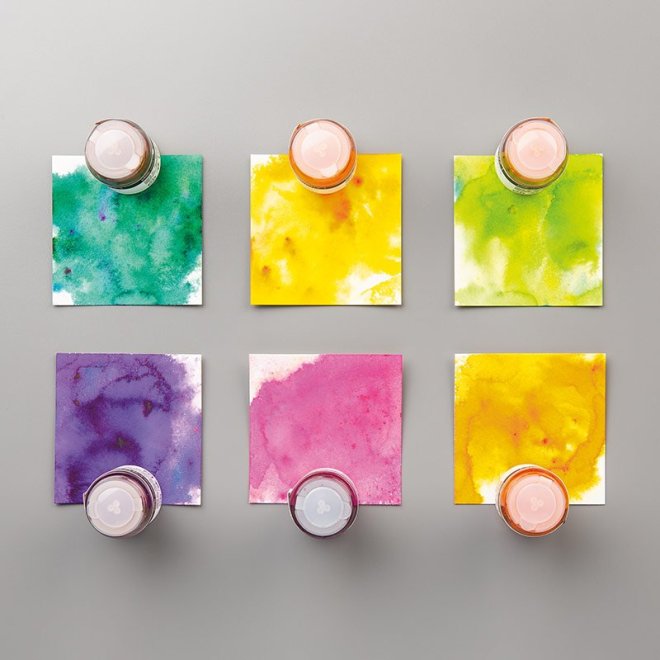
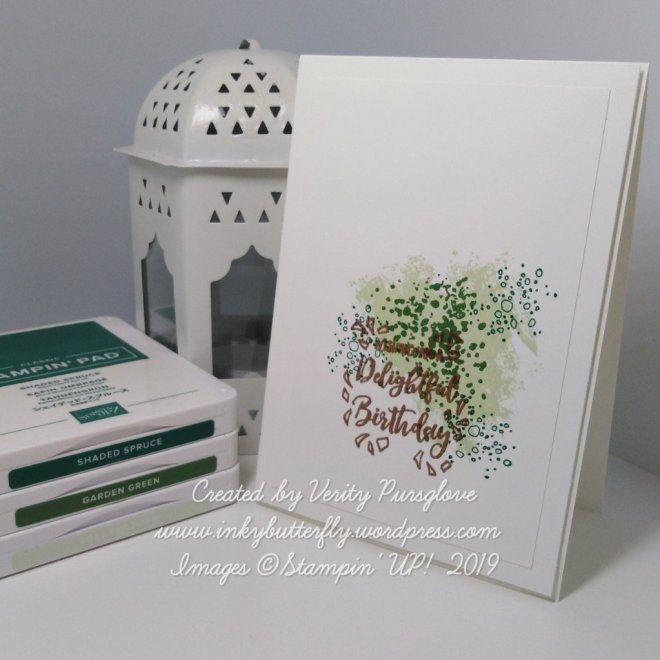
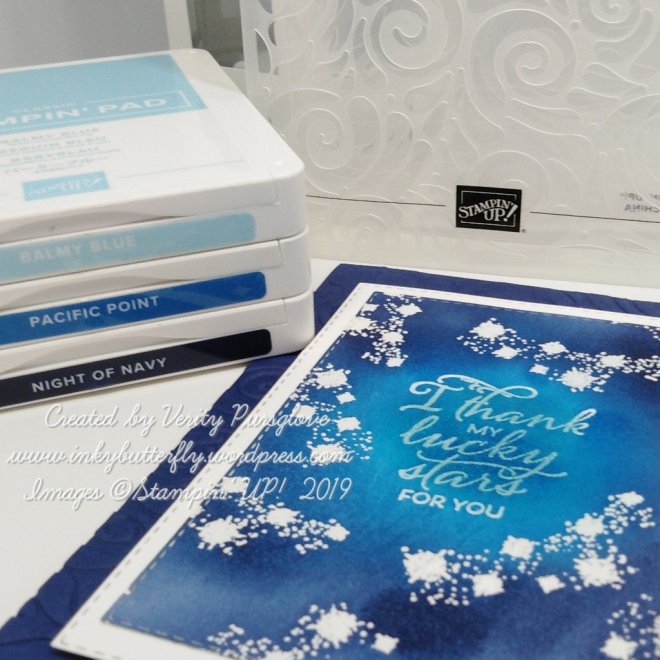
Pigment Sprinkles are water reactive crystals packed with colour so a little goes a long way! They come in a pack of 6, Bermuda Bay, Daffodil Delight, Granny Apple Green, Gorgeous Grape, Melon Mambo and Mango Melody.

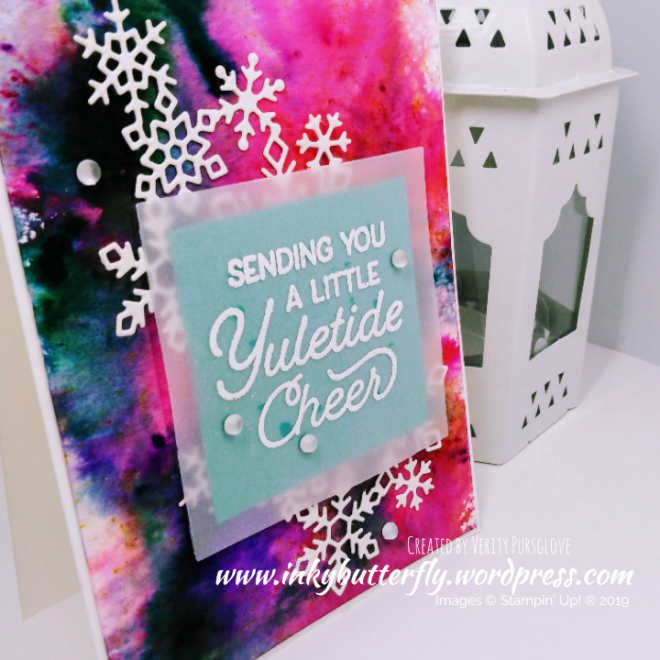
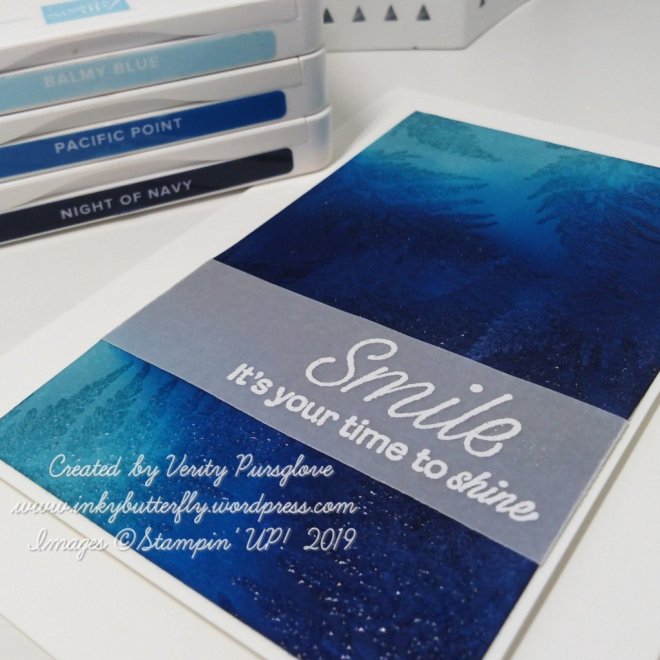
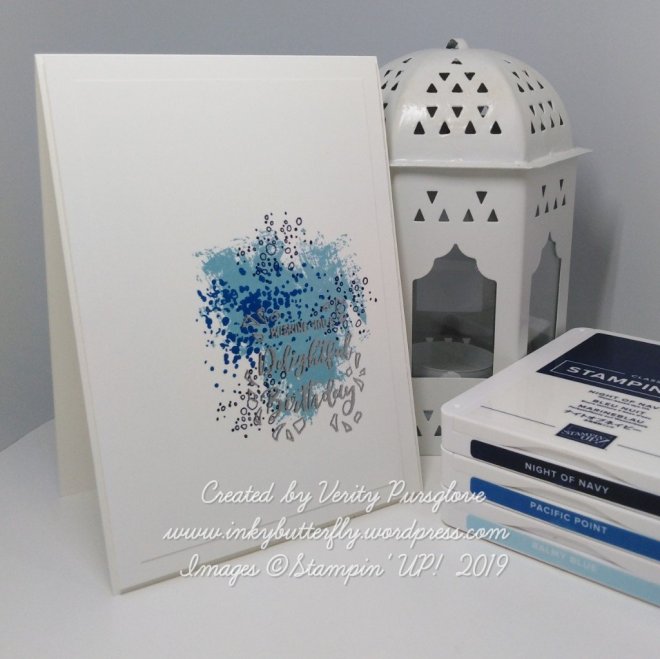
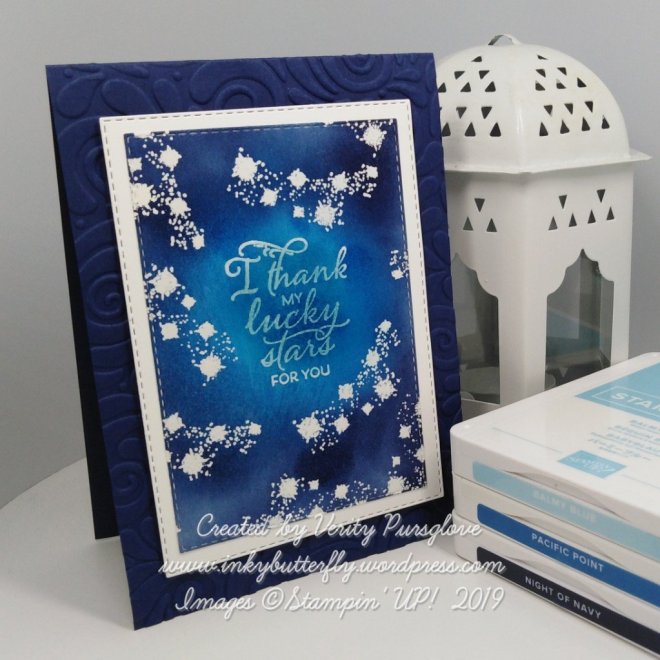
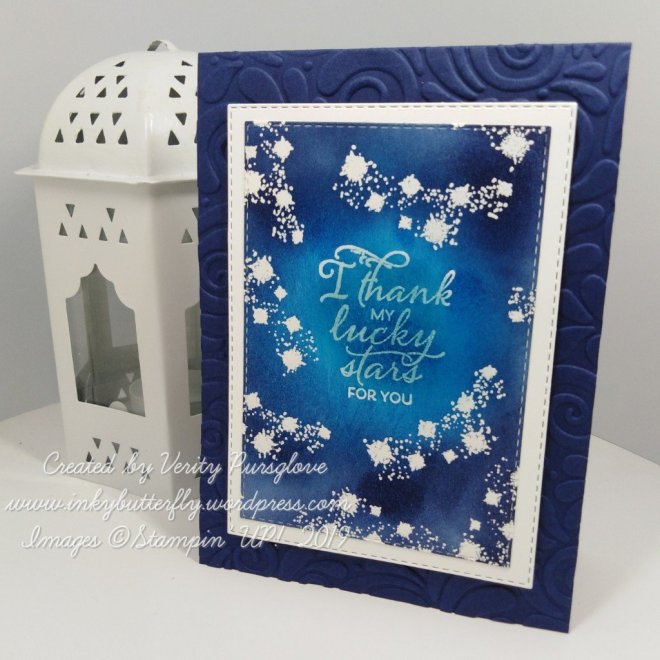
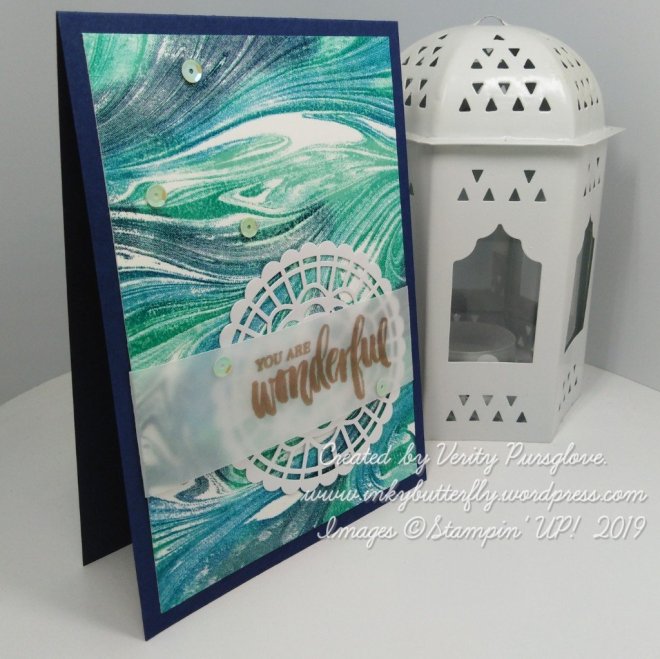
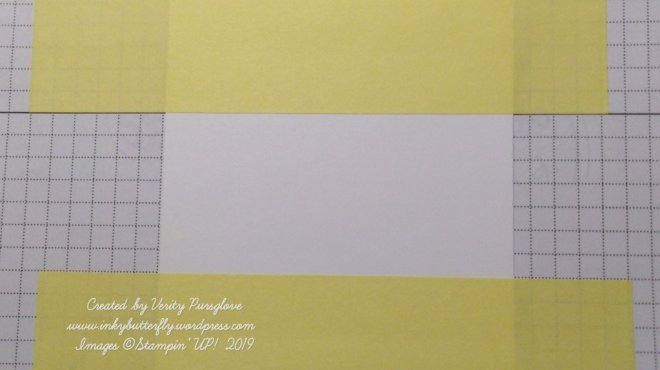
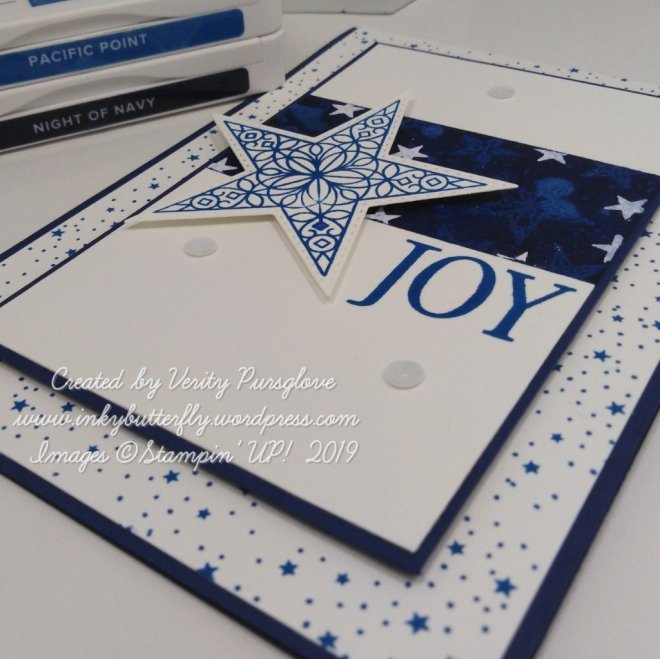
To create a background, I misted some watercolour paper with clean water. Pigment was sprinkled over the top.

The piece was dried thoroughly with a heat gun. The paper will curl but is easily flattened under a heavy book.

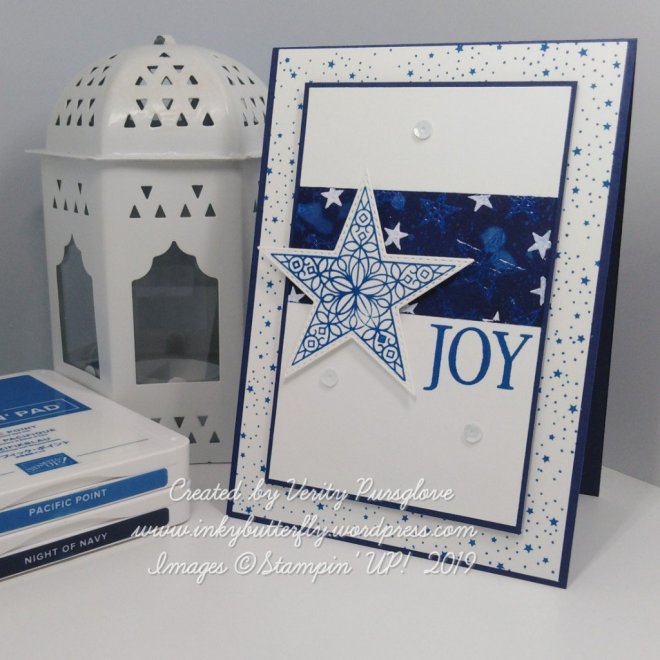
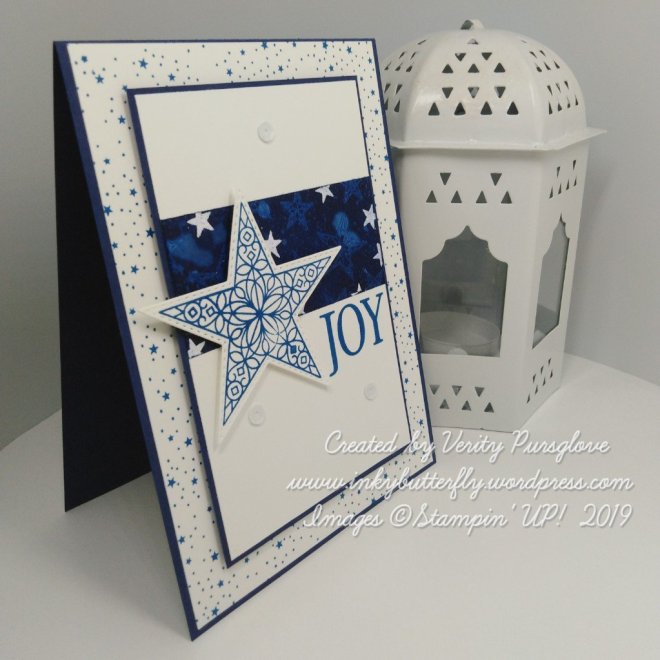
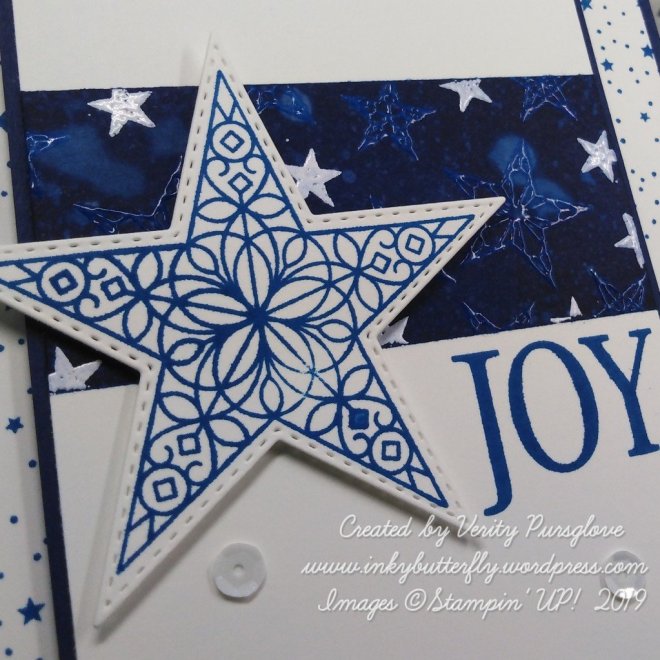
Snowflakes were die cut from Shimmery White card stock.

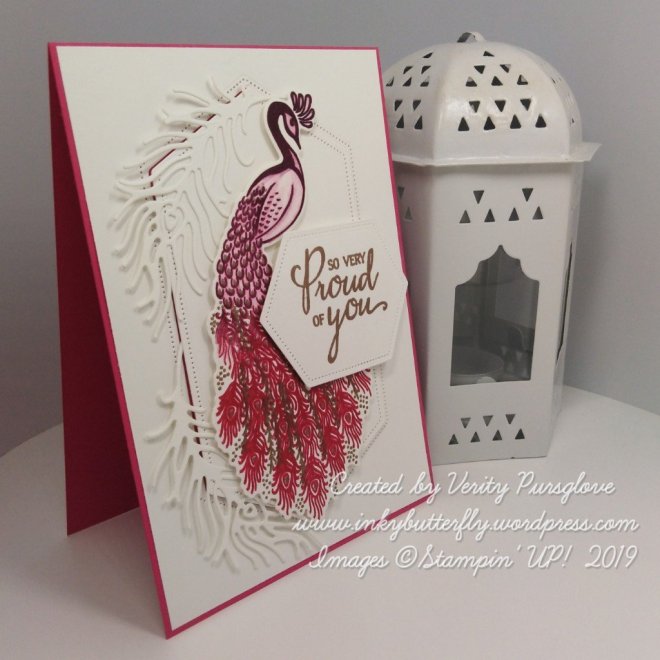
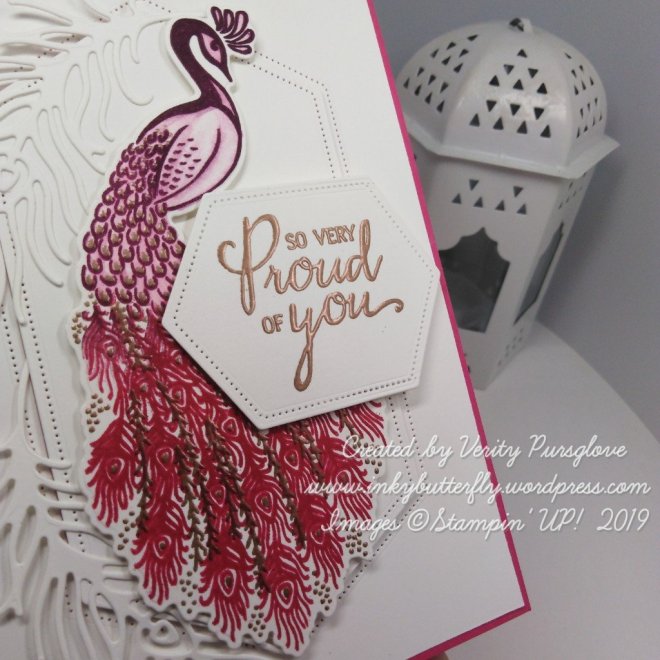
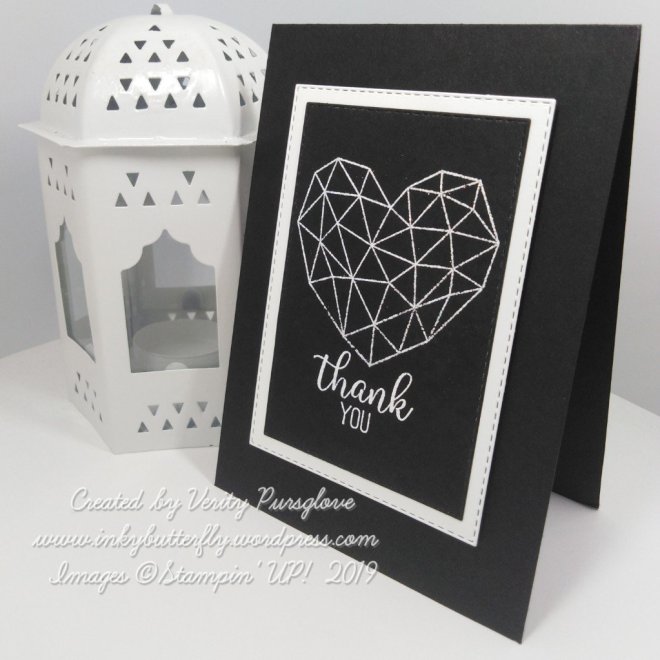
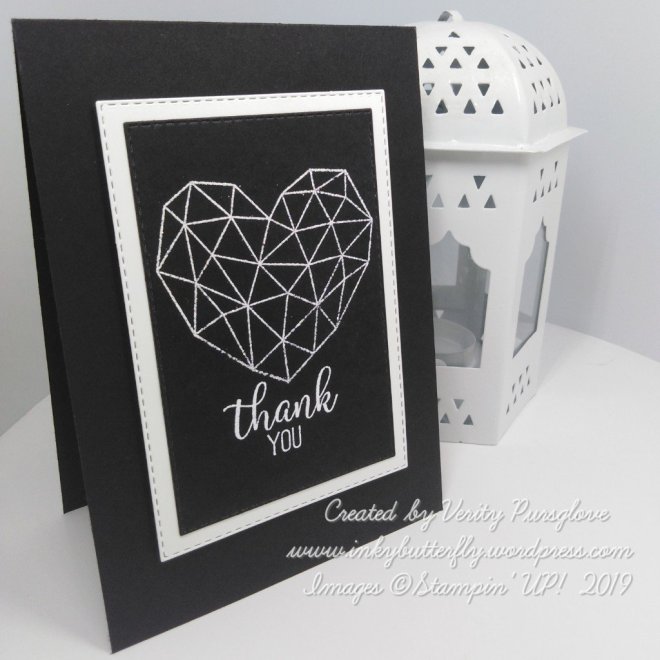
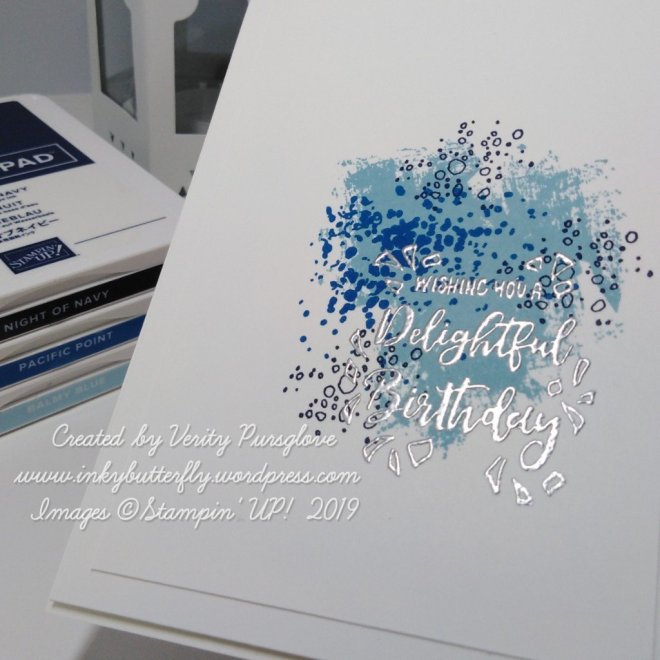
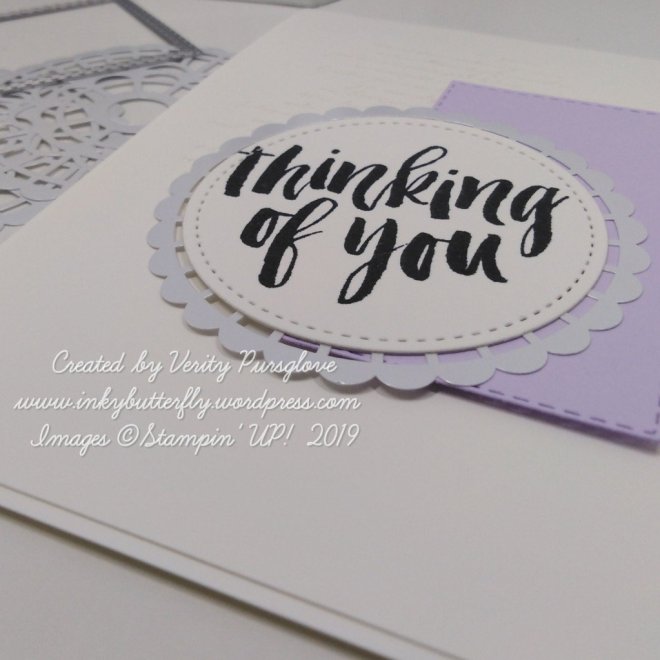
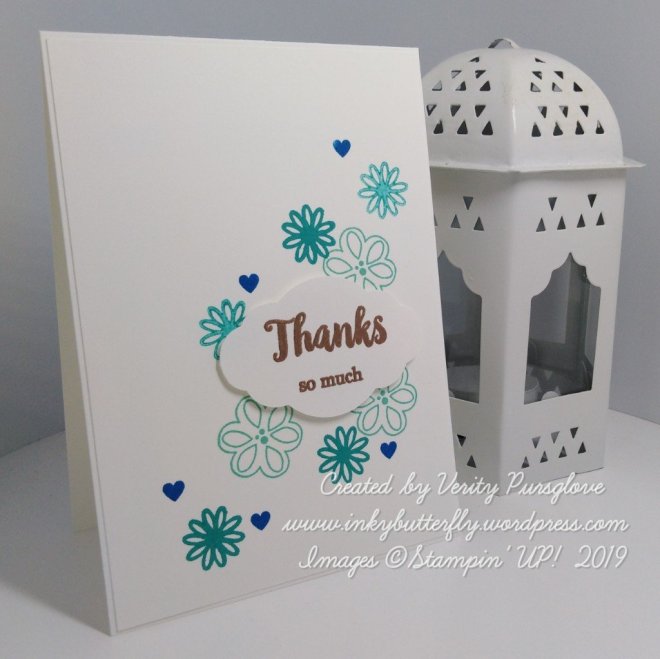
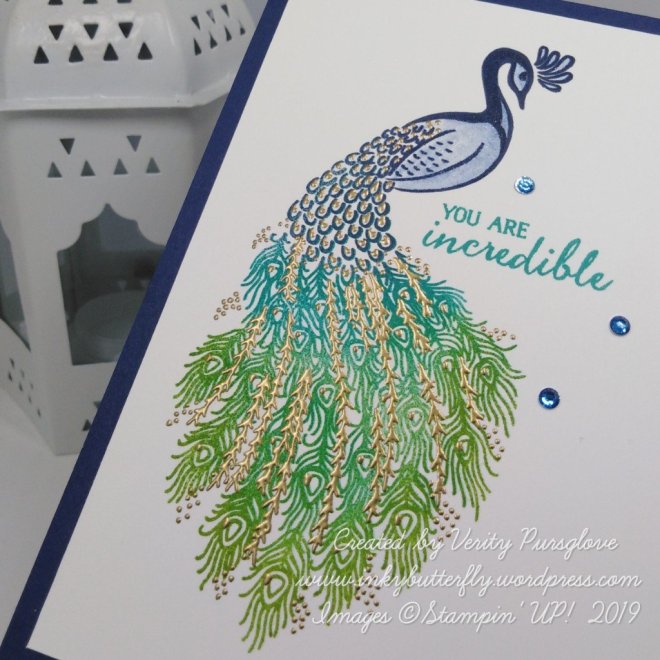
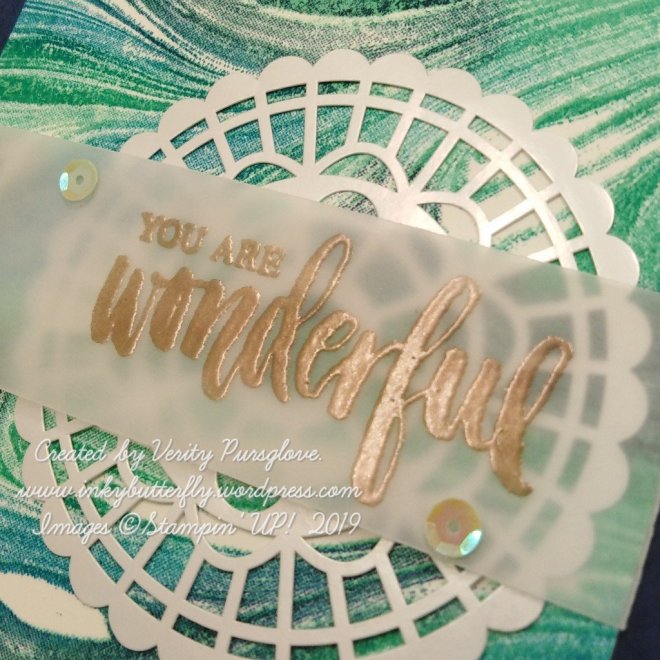
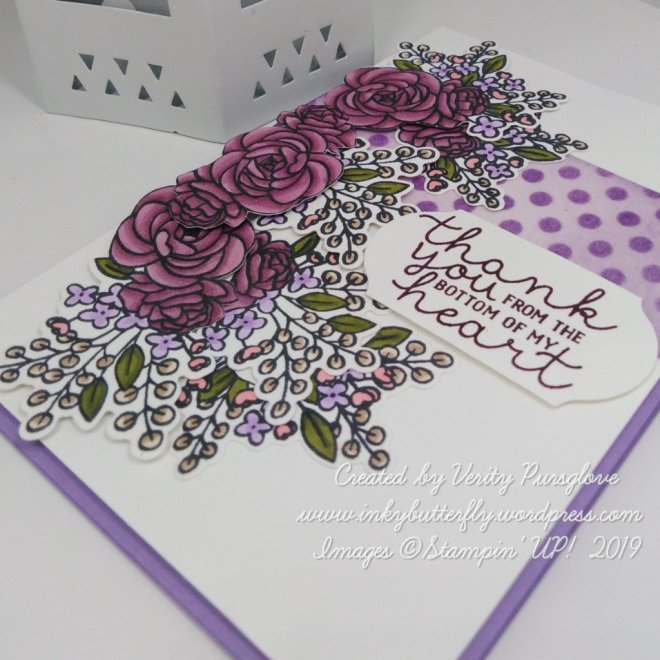
The sentiment was stamped with versamark and heat embossed with white powder on Vellum.

A piece of Bermuda Bay card stock was adhered behind the sentiment to make it stand out.

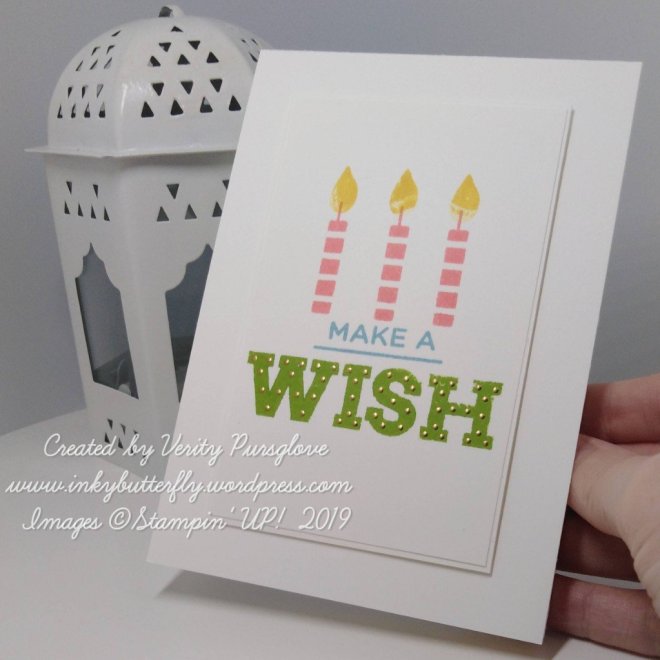
Some frosted epoxy dots finished the card.

I hope you enjoyed this project. The supplies used are listed and linked to the online store below.

I would love to be your demonstrator.

Thanks for stopping by today and happy Stampin’!

Verity xx

Product List

A Wonderful Couple

Hello Everyone,

Wedding season is in full swing and this card has been made with a special couple in mind.

The background layer was stamped with Verdant Garden and heat embossed with silver powder.

A vellum layer softened the background a little before adding a final layer of Whisper White. This had been stamped with the sentiment using Smoky Slate ink.

The large Magnolia was stamped and coloured with watercolour pencils. After die cutting the image, I applied versamark ink over the top and heat embossed it with clear powder to give a glazed effect.

I hope you enjoyed this project. The supplies used are listed and linked to the online store below.

I would love to be your demonstrator.

Thanks for stopping by today and happy Stampin’!

Verity xx

Product List

Blender Pens

[102845]

£11.25

Watercoloured Bricks and Mortar

Hello Everyone,

I had a bit of fun with a new 3D embossing folder for today’s project.

I used Stampin’ Sponges to apply ink to the inside of the Bricks & Mortar embossing folder and spritzed it lightly with water.

The folder was used as intended to emboss some watercolour paper. Once dry, I trimmed it down and added it to a black card base.

Because the card is about the backround I added a simple white embossed sentiment from the Perennial Birthday set.

A few frosted epoxy dots completed the card

I hope you enjoyed this project. The supplies used are listed and linked to the online store below.

I would love to be your demonstrator.

Thanks for stopping by today and happy Stampin’!

Verity xx

Product List

Home

Hello Everyone,

I was so pleased to be asked to make this piece as a house warming gift.

The gorgeous Noble Peacock foiled DSP was used as the background.

The white panel was die cut with a Stitched Nested Die and added to a Bermuda Bay mat and adhered in centre.

I used my Stamparatus to create the peacock with Night Of Navy, Bermuda Bay and Granny Apple Green inks. The details were added with versamark and heat emboss in gold.

This was adhered to the Die cut Nested shape with dimensionals and then on to project.

Letters were die cut from Bermuda Bay card stock and positioned below the peacock. Feathers were cut from Pretty Peacock, Bermuda Bay and Granny Apple Green card stocks and added with liquid glue.

I hope you enjoyed this project. The supplies used are listed and linked to the online store below.

I would love to be your demonstrator.

Thanks for stopping by today and happy Stampin’!

Verity xx

Product List

Stamparatus

[148187]

£46.00

From the Bottom of my Heart

Hello Everyone,

Lots of colouring of one sort or another going on in today’s card.

I began by preparing the background panel.

I used my grid paper to line up some post it note masks so I could add ink to this portion. I did this with a sponge and Highland Heather ink.

Leaving the post it notes in place, I secured a pattern mask over the top and added more Highland Heather ink. I then added versamark to the inked section, peeled away the post it notes and embossed with clear powder.

The florals are from the Bloom and Grow set. These were stamped three times with Memento ink and coloured with Stampin’ Blends Markers.

The coloured images were die cut and then manually cut apart to create the large spray of flowers. I used a mix of dimensionals and liquid glue to add texture.

Finally, the sentiment was stamped with Blackberry Bliss ink and cut with the Timeless Label punch and Wink of Stella Glitter was added to the larger flowers.

I hope you enjoyed this project. The supplies used are listed and linked to the online store below.

I would love to be your demonstrator.

Thanks for stopping by today and happy Stampin’!

Verity xx

Product List

Grid Paper

[130148]

£11.75

Inspire.Create #050

Hello Everyone,

Welcome to my blog. Every other Monday I share my project that I have used as my entry for the Inspire.Create challenge.

This time it’s a sketch challenge. The design team have made some wonderful samples as inspiration. You can see them here.

And this is what I created!

As you can see, I opted to change the circle to a star….. I have been itching to use the new So Many Stars Bundle!

I prepared a Night of Navy card base and added to this a white layer stamped with the tiny stars in the set using Pacific Point Ink.

A smaller panel was masked off with post it notes and inked with Pacific Point. Stars were stamped over the top with versamark and embossed with clear powder.

The section was inked again, this time with Night Of Navy. Additional stars were embossed with white powder.

The sentiment was added with Pacific Point Ink. The panel was matted with Night Of Navy card stock and adhered to the base with dimensionals.

A large star was stamped and die cut and adhered to the card with dimensionals. A few adhesive sequins completed the card.

I hope you enjoyed this project. The supplies used are listed and linked to the online store below.

I would love to be your demonstrator.

Thanks for stopping by today and happy Stampin’!

Verity xx

Product List

Pretty Pink Peacock

Hello Everyone,

I thought I would do something different with the Royal Peacock.

I switched up the colours and used Blackberry Bliss, Rich Razzleberry and Melon Mambo to stamp the peacock.

The details were added with versamark and embossed with copper powder.

I cut a Nested Label from a white card layer and added to a Melon Mambo card base.

The peacock was adhered to the Label with dimensionals. This in turn was repositioned on the card also with dimensionals.

A heat embossed sentiment and some Die cut Feathers completed the card.

I hope you enjoyed this project. The supplies used are listed and linked to the online store below.

I would love to be your demonstrator.

Thanks for stopping by today and happy Stampin’!

Verity xx

Product List

Embossed Modern Heart

Hello Everyone.

Those of you who follow me, will know I usually use white card bases, so today I am switching it up…. with black!

I fancied trying to emboss this lovely heart image with white powder. I really liked the look but thought it needed some layers to carry it off.

I added the sentiment first also heat embossed in white, the die cut with a Stitched Rectangle.

This was layered on to a white rectangle cut from white card stock before adhering to the card base.

I hope you enjoyed this project. The supplies used are listed and linked to the online store below.

I would love to be your demonstrator.

Thanks for stopping by today and happy Stampin’!

Verity xx

Product List

Magnolia Thanks

Hello Everyone,

There’s lots going on with this card, it was so much fun to make.

The Magnolia was stamped with Stazon Ink and coloured with watercolour pencils and die cut.

I wanted to use one of the laser cut note cards. I inked a piece kf Whisper White card stock with Melon Mambo ink and adhered this behind the front panel.

I added the Magnolia with dimensionals. The sentiment was heat embossed on black card stock.

I hope you enjoyed this project. The supplies used are listed and linked to the online store below.

I would love to be your demonstrator.

Thanks for stopping by today and happy Stampin’!

Verity xx

Product List

Watercoloured Shimmer Petals

Hello Everyone,

The Shimmer White Embossing powder was a new addition to the 2019 catalogue… I can’t believe I have waited so long to use it.

These watercoloured flowers look amazing….

The flowers were stamped with versamark ink on to watercolour paper and embossed with Shimmer White powder.

I used a selection of inks to paint the Petals. Once dry, they were cut out with the coordinating punch.

I prepped a card base with the speckles from the Waterfront stamp set using Grey Granite ink.

The flowers were arranged in a circle to form a rainbow.

The sentiment, also from the Waterfront set, was stamped on to a 2 inch circle and added to the centre of the card with dimensionals.

I hope you enjoyed this project. The supplies used are listed and linked to the online store below.

I would love to be your demonstrator.

Thanks for stopping by today and happy Stampin’!

Verity xx

Product List

Aqua Painters

[103954]

£16.00

So Much to Love

Hello Everyone,

Today I am using die cuts to create a faux embossed look.

The die I have used for the background is from the Wild Rose set. It was cut 4 times and adhered to the card evenly spaced. The overhanging pieces were then trimmed away.

I picked out a sentiment from the Abstract Impressions stamp set. This was heat embossed with silver powder and cut with a Stitched Rectangle Die.

I didn’t like the sentiment on the card as it was, so I added a layer of vellum behind it which looked much better.

I hope you enjoyed this project. The supplies used are listed and linked to the online store below.

I would love to be your demonstrator.

Thanks for stopping by today and happy Stampin’!

Verity xx

Product List

Time to Shine

Hello Everyone,

Today’s card uses ink blending to create a background.

Sponge daubers were used to apply three shades of ink to a card layer. This was allowed to dry completely.

The leaf from the Daisy Lane stamp set was stamped with versamark ink and embossed using clear powder.

The sentiment was stamped on to vellum and embossed with white powder and wrapped around the blended panel.

This was then matted on to white card stock and adhered to a white card base with dimensionals.

I hope you enjoyed this project. The supplies used are listed and linked to the online store below.

I would love to be your demonstrator.

Thanks for stopping by today and happy Stampin’!

Verity xx

Product List

Embossed Delightful Birthday

Hello Everyone,

I thought I would get my embossing powders out today to create these simple stamping cards.

For the background stamping I used the Artisan Textures stamp set with a trio of ink colours, working from light to dark.

An embossing buddy ensured the ink was completely dry before adding the sentiment with versamark ink.

Embossing powder was sprinkled over the stamped sentiment and heated until melted.

The toppers were adhered to white card bases with dimensionals.

I hope you enjoyed this project. The supplies used are listed and linked to the online store below.

I would love to be your demonstrator.

Thanks for stopping by today and happy Stampin’!

Verity xx

Product List

Make a Wish

Hello Everyone,

Today’s card features the Broadway Birthday stamp set.

I love the little dot detail stamps that can be used to add some showbiz bling to the bold lettering. I decided to heat emboss these with gold powder.

I hope you enjoyed this project. The supplies used are listed and linked to the online store below.

I would love to be your demonstrator.

Thanks for stopping by today and happy Stampin’!

Verity xx

Product List

Inspire.Create #046

Hello Everyone,

Welcome to my blog. Every other Monday I share my project that I have used as my entry for the Inspire.Create challenge.

This time it’s a colour challenge. The design team have made some wonderful samples as inspiration. You can see them here.

And this is what I created!

If I’m honest I wasn’t sure what I wanted to create to begin with, I don’t have all the ink colours. But I have the card stock! I already had these Stitched Rectangles left over from another project.

For some added interest, though it is not clear on the photos, I stamped the script image from the Very Versaille stamp set with versamark and heat embossed with clear powder.

The coloured rectangle was added towards the right hand side of the card with dimensionals.

I wanted a bold sentiment, I picked this one from Rooted in Nature.

This was stamped with Memento ink and die cut with a Stitched Circle. Each circle was mounted on to a Pearlized Doily.

I hope you enjoyed this project. The supplies used are listed and linked to the online store below.

I would love to be your demonstrator.

Thanks for stopping by today and happy Stampin’!

Verity xx

Product List

Very Versaille Thank You

Hello Everyone,

I just love the mixture of images in the Very Versaille stamp set!

This background was really simple to create.

I wanted a more vintage feel, so I used some Very Vanilla card stock to stamp on for a change.

I positioned the text first, stamping this with Crumb Cake ink.

The foliage was stamped next with Mossy Meadow ink. This was done twice so the leaves ran along the left hand edge of the card.

I decided to heat emboss the ornate frame image with gold embossing powder.

I did try to add the sentiment directly to the card but it got lost on the background. To get round this, I stamped it again on to some scrap card and cut it with a 1″ punch.

The card front was layered onto Mossy Meadow card stock and added to a Crumb Cake card base.

I hope you enjoyed this project. The supplies used are listed and linked to the online store below.

I would love to be your demonstrator.

Why not join my team and enjoy discounted prices on your favourite Stampin’ supplies!

Thanks for stopping by today and happy Stampin’!

Verity xx

Product List

Thanks So Much

Hello Everyone,

You know when you remember you need a card the night before the event? This is the kind of design that still looks elegant but really fast to do.

I chose blue tones with copper…. What combination would you use?

I used images from the A Big Thank You stamp set working from largest to smallest, lightest to darkest.

The sentiment was heat embossed with copper powder and cut with the Pretty Label Punch.

I hope you enjoyed this project. The supplies used are listed and linked to the online store below.

I would love to be your demonstrator.

Thanks for stopping by today and happy Stampin’!

Verity xx

Product List

Inspire.Create #045

Hello Everyone,

Welcome to my blog. Every other Monday I share my project that I have used as my entry for the Inspire.Create challenge.

This time it’s a theme challenge.

The design team have made some wonderful samples as inspiration. You can see them here.

I have used the emboss resist technique for my project;

I picked out the Stargazing stamp set…. I thought the stars would be perfect for this technique.

First, I applied Balmy Blue ink to some white card stock where the sentiment would be. I then used versamark ink to stamp the images. These were embossed with clear powder.

I then added Pacific Point and Night of Navy ink over the top. A damp cloth rubbed away the excess ink.

The panel was die cut with a Stitched Rectangle and layered on to Whisper White card stock.

A Night of Navy card base was embossed with the Swirls & Curls embossing folder before adding the topper with dimensionals.

I hope you enjoyed this project. The supplies used are listed and linked to the online store below.

I would love to be your demonstrator.

Thanks for stopping by today and happy Stampin’!

Verity xx

Product List

Royal Peacock

Hello Everyone,

When I first saw the new catalogue back in April, this suite was top of my wish list. I couldn’t wait for it to arrive and start playing with it!

I wanted to showcase the stamp set alone with this card, there are many more stunning items in the suite which I shall use in future projects… Watch this space!

I used the Stamparatus to stamp the main image so I could use several colours and repeat stamp. Sponge daubers allowed me to apply the ink where I wanted it to achieve a gradient.

The complimentary stamp was positioned on to the main image and stamped with versamark ink so that these details could be heat embossed with gold powder.

A touch of Wink of Stella pulled ink in to colour the bird’s body. The sentiment was added with Bermuda Bay ink and embellished with blue rhinestones.

I hope you enjoyed this project. The supplies used are listed and linked to the online store below.

I would love to be your demonstrator.

Thanks for stopping by today and happy Stampin’!

Verity xx

Product List

Blue Marble

Hello Everyone,

Today’s project uses one of the gorgeously detailed background stamp. This stamp retires at the end of May.

I used the Stamparatus to stamp the background image. Sponge dauber were used to apply the different coloured inks, working from light to dark and cleaning the stamp each time.

The sentiment from the Rooted in Nature stamp set was stamped onto vellum and heat embossed with copper powder.

The vellum was wrapped around the background and adhered to a Night of Navy card base.

A pearlized Doily was added behind the vellum. A scattering of sequins finished the card.

I hope you enjoyed this project. The supplies used are listed and linked to the online store below.

I would love to be your demonstrator.

Don’t miss out on these last chance items…. When they’re gone, they’re gone!

Thanks for stopping by today and happy Stampin’!

Verity xx

Product List