In Colour Medley

Hello Everyone,

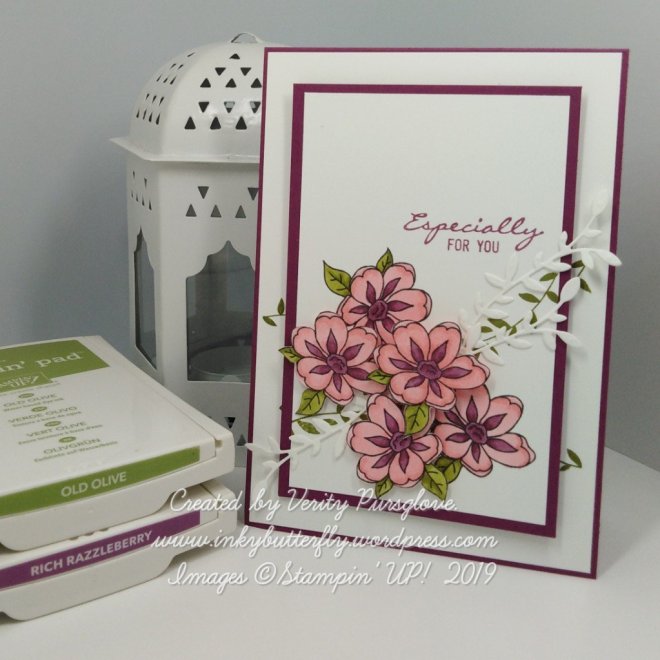
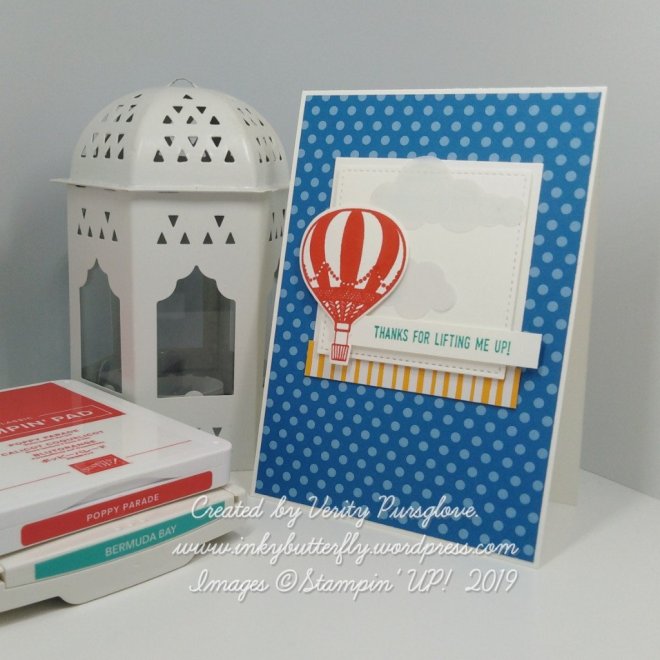
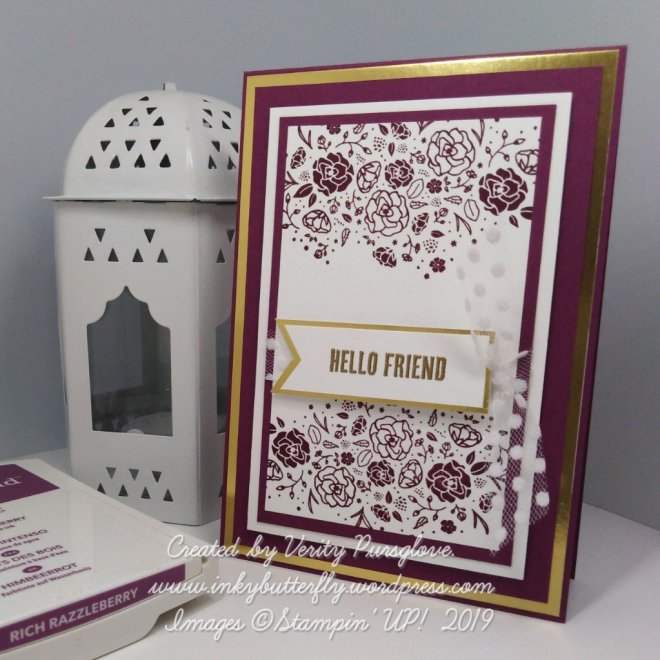
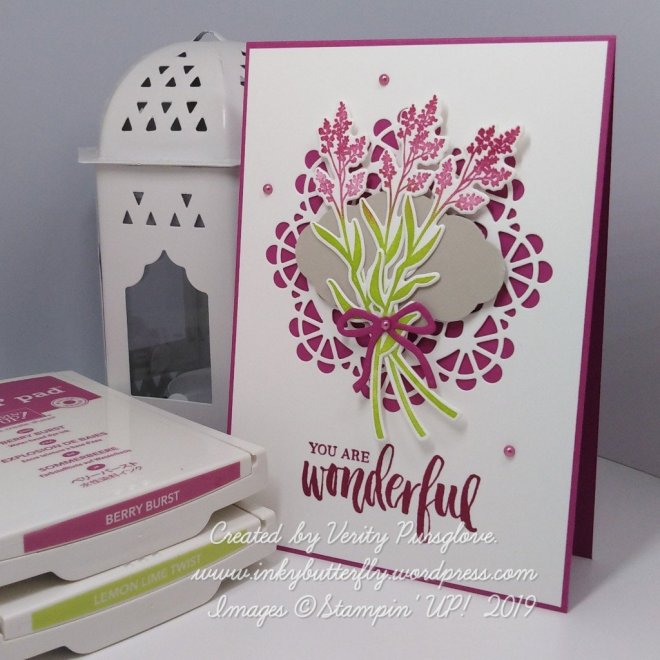
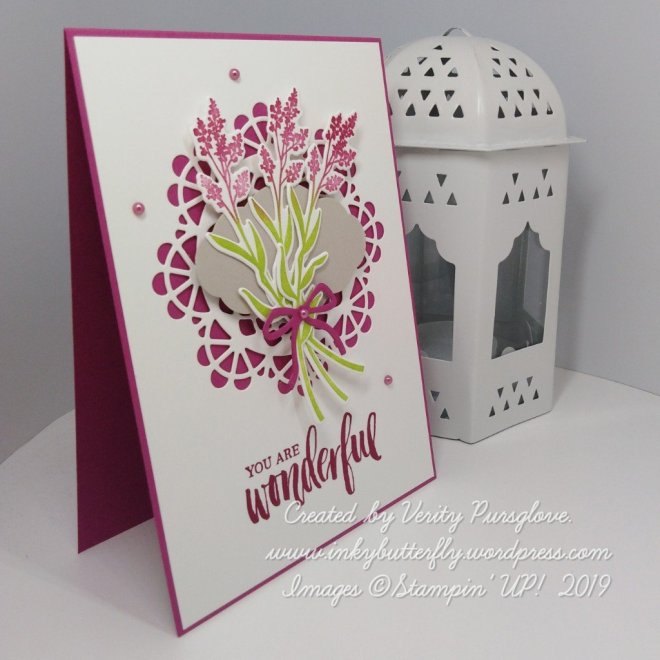
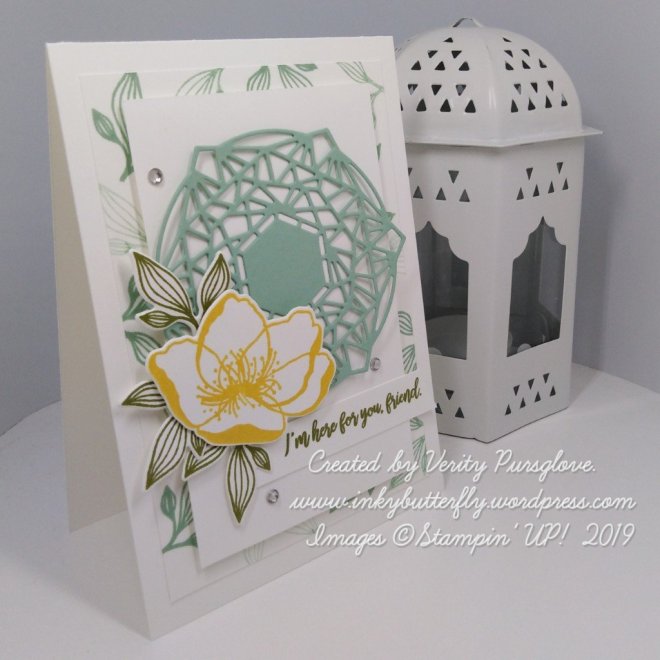
It will soon be time to say a fond farewell to some of the current In Colours. So today, I have used three of them to make this card.

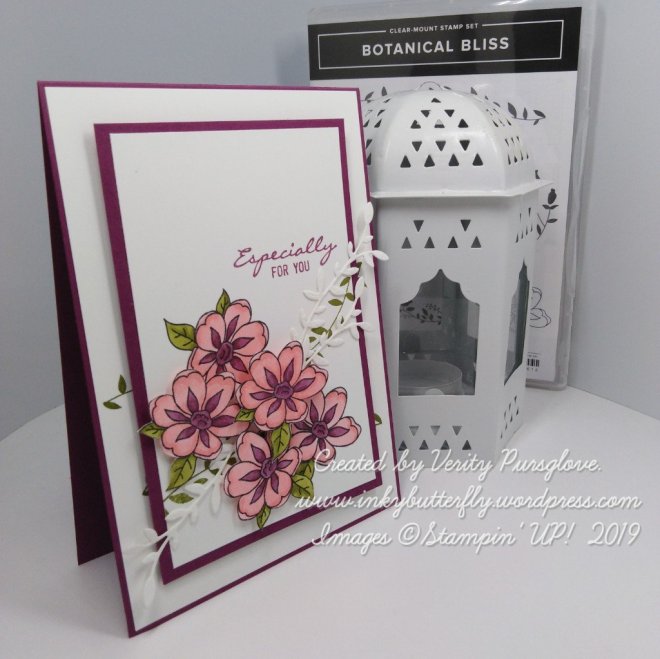
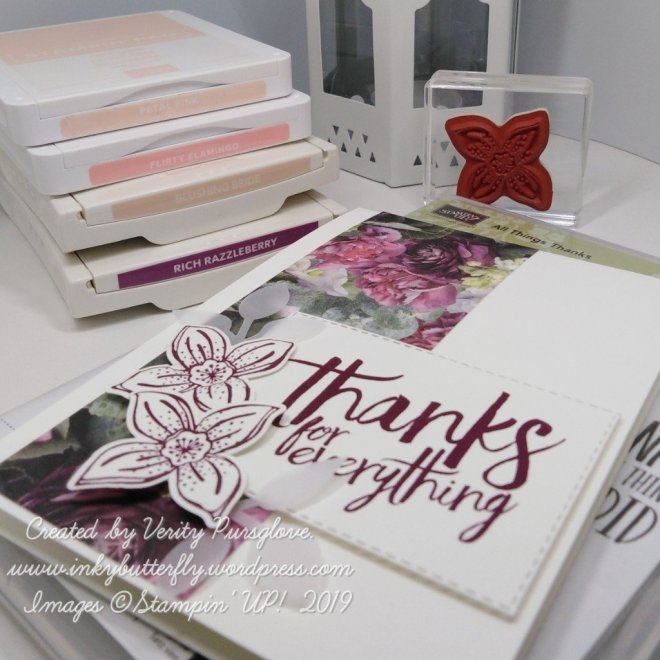
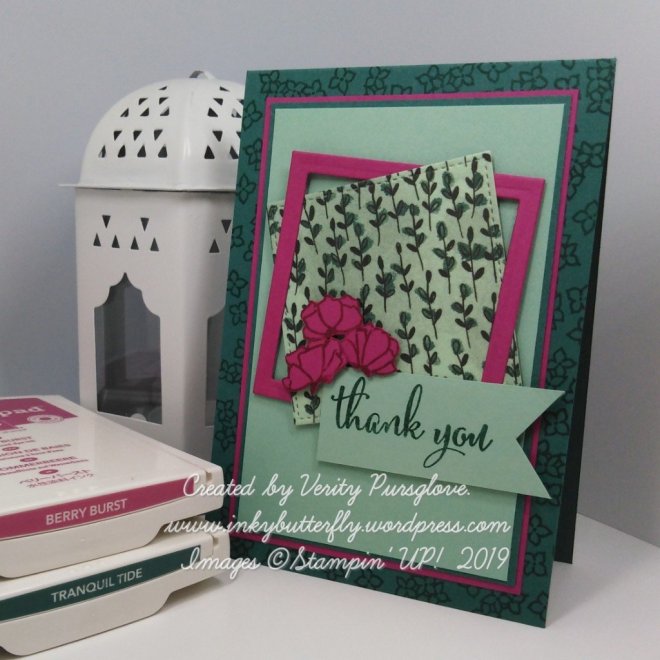
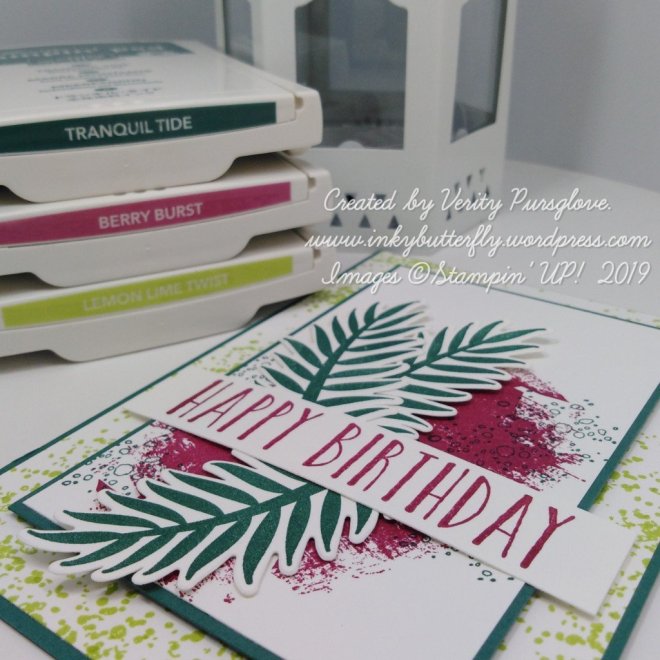
I love using grungy stamps to make backgrounds. I used Artisan Textures for this project.

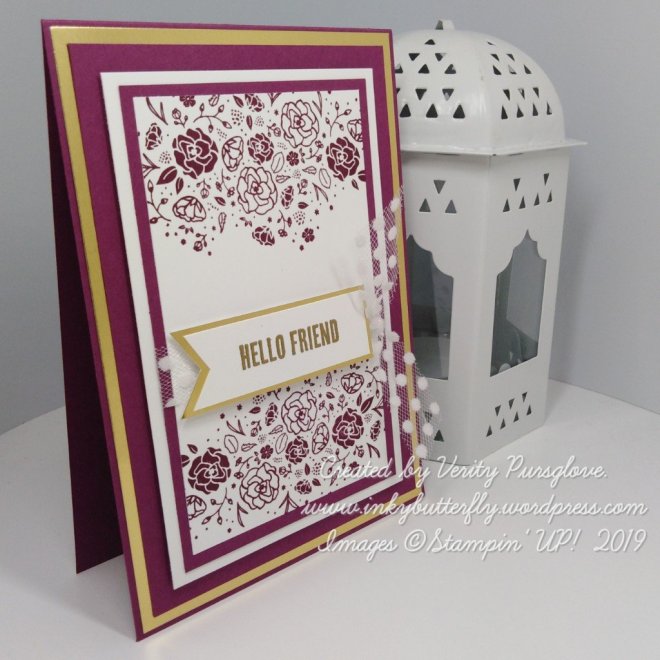
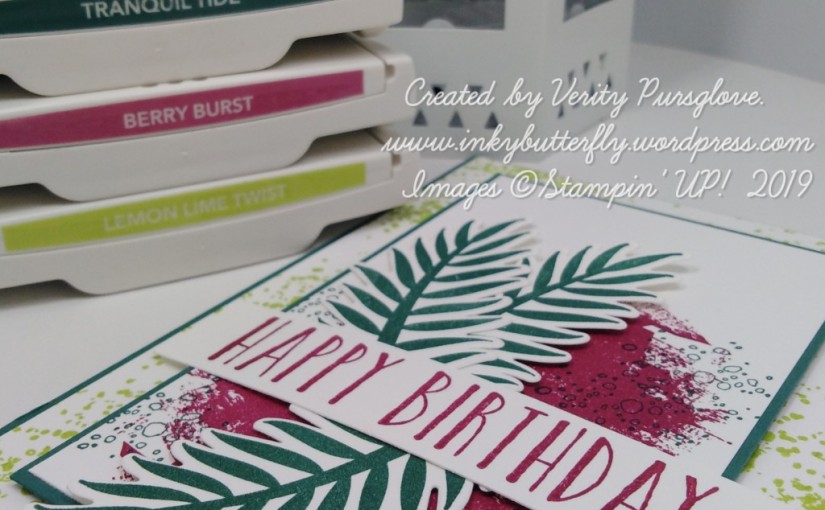
Lemon Lime Twist ink was used for the base layer. This was adhered to a Tranquil Tide card base.

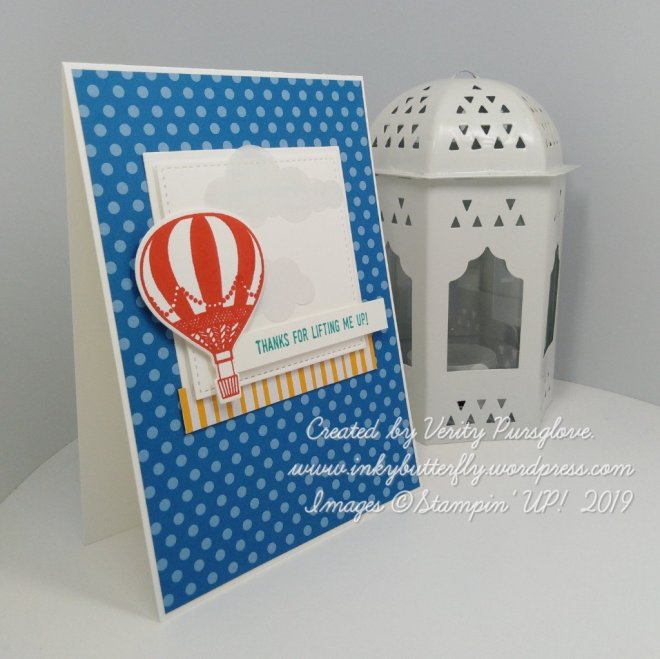
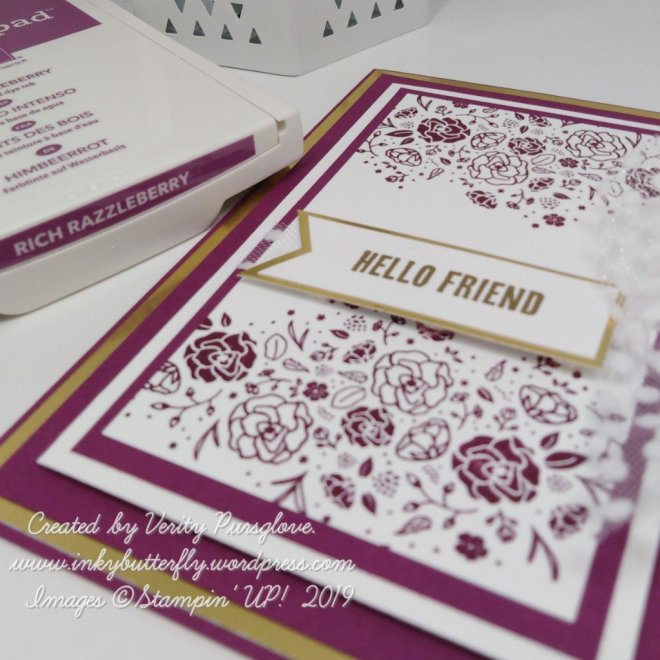
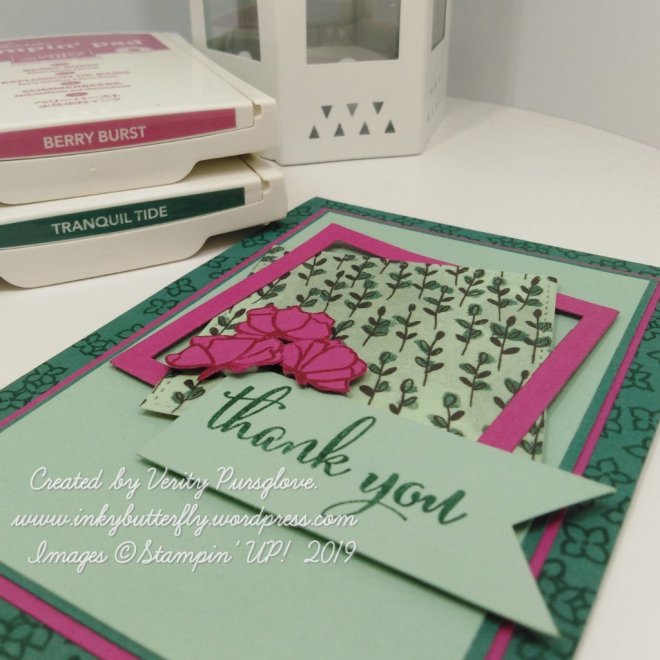
On the topper, Berry Burst ink ink was used for the large image. A smaller image was chosen and stamped with Tranquil Tide ink. This was layered on to Tranquil Tide card stock and added to the card with dimensionals.

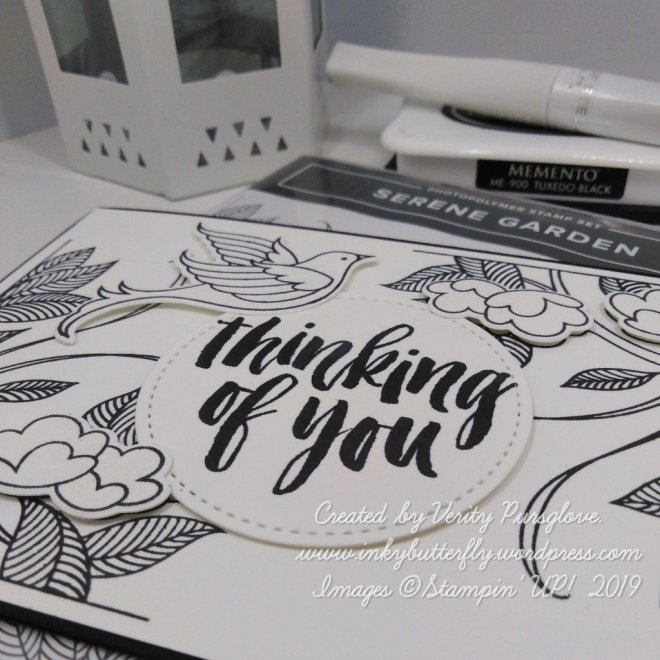
The sentiment from Perennial Birthday was stamped with Berry Burst ink and added across the topper.

Leaves from Tropical Chic were stamped with Tranquil Tide ink and die cut. These were tucked behind the sentiment strip.

I hope you enjoyed this project. The supplies used are listed and linked to the online store below.I would love to be your demonstrator.Don’t miss out on these last chance items…. When they’re gone, they’re gone!

Thanks for stopping by today and happy Stampin’!

Verity xx

Product List

Project Share Project

Hello Everyone,

Welcome to this week’s Project Share. As always my friends have created some lovely work. Please use the links to visit their blogs and read more about their projects.

Jill has been inspired by a fellow demonstrator to create this bouquet with the Bitty Blooms Punch pack.

Visit Jill’s blog here

Heather is letting this beautiful All My Love Designer Series Paper do the work for this card.

Visit Heather’s blog here

Gez made these clever little gift boxes that don’t need any glue! It looks great in the Tranquil Textures Designer Series Paper.

Visit Gez’s blog here

Helzie has shared her favourite technique – masking. Just look at the effect that can be achieved.

Visit Helzie’s blog here

I hope you enjoyed these projects. The supplies used are listed and linked to the online store below.

I would love to be your demonstrator.

Thanks for stopping by today and happy Stampin’!

Verity xx

Product List

Simply Scored

[122334]

£28.00

Especially for You

Hello Everyone,

Today I wanted to use my Stampin’ Blends for some relaxing colour therapy.

I picked this Bloom from the Botanical Bliss stamp set to work with.

Three flowers were stamped on to some Whisper White card stock with Memento Ink. Two others were added directly to a 3 by 4-3/4 inch card layer.

Each was coloured with Stampin’ Blends Markers. Three of the images were fussy cut to add to the card later.

Old Olive ink was used to stamp the leaf sprigs on to the card layer which was matted on to some Rich Razzleberry card stock.

The sentiment was added next with Rich Razzleberry ink.

The Blooms were adhered with dimensionals and die cut sprigs were added in between for some texture.

The panel was finally adhered to Rich Razzleberry card base layered with Whisper White card stock with dimensionals.

I hope you enjoyed this project. The supplies used are listed and linked to the online store below.

I would love to be your demonstrator.

Don’t miss out on these last chance items…. When they’re gone, they’re gone!

Thanks for stopping by today and happy Stampin’!

Verity xx

Product List

Big Shot

[143263]

£102.00

Inspire.Create #042

Hello Everyone,

Welcome to my blog. Every other Monday I share my project that I have used as my entry for the Inspire.Create challenge.

This time it’s a theme challenge. The design team have made some wonderful samples as inspiration. You can see them here.

I have used the adorable Little Elephant bundle to make today’s project.

I opted for a gender neutral colour featuring the retiring Gingham Gala designer series paper.

The background panel was embossed with the Seaside folder.

The elephants were stamped with Gray Granite ink. These were cut with the coordinating punch. The ears were cut separately in matching gingham DSP.

The sentiment was stamped on to a strip of card stock and cut with the Everyday Label Punch.

I hope you enjoyed this project. The supplies used are listed and linked to the online store below.

I would love to be your demonstrator.

Thanks for stopping by today and happy Stampin’!

Verity xx

Product List

Project Share Project

Hello Everyone,

Welcome to this week’s Project Share. As always my friends have created some lovely work. Please use the links to visit their blogs and read more about their projects.

Jill had taken inspiration from another demonstrator in our team to make the card using the paper piecing technique.

Visit Jill’s blog here to see more about the technique and the original card.

Heather has used this superb colour combination for this card. The layout is really simple but can be adapted to suit any occasion.

Visit Heather’s blog here to see more on making this project.

Gez has a thing for purple… But she couldn’t leave the others out! This is a great way to use Designer Series Paper!

Visit Gez’s blog here to see how these bags are made.

Helzie is taking advantage of the Stamparatus to create this multicoloured card.

Visit Helzie’s blog here to see how to achieve this look.

I hope you enjoyed these projects. The supplies used are listed and linked to the online store below.

I would love to be your demonstrator.

Thanks for stopping by today and happy Stampin’!

Verity xx

Product List

Stamparatus

[148187]

£46.00

Happiness

Hello Everyone,

Here’s another project using a retiring favourite. Anyone who knows me knows I love tea! So this set really appeals to me.

I started by stamping foliage around the edge of a Whisper White card layer using Gray Granite ink. This was layered on to Mango Melody card stock. This was adhered to a Night of Navy card base.

The tea cups, additional foliage and the greeting were stamped with Night of Navy ink and die cut. Dimensionals were used to adhere the elements to the card.

A trio of flowers were stamped with Mango Melody ink and added to the corner.

Some Wink of Stella Glitter finished the card.

I hope you enjoyed this project. The supplies used are listed and linked to the online store below.

I would love to be your demonstrator.

Don’t miss out on these last chance items…. When they’re gone, they’re gone!

Thanks for stopping by today and happy Stampin’!

Verity xx

Product List

Big Shot

[143263]

£102.00

Courage

Hello Everyone,

Today I am featuring the Ribbon of Courage stamp set.

These ribbons are used to promote awareness for many different causes. I made this one for every person going through something right now… We all need a little courage from time to time.

I covered a Rich Razzleberry card base with a piece of All My Love DSP.

The ribbon was stamped with Memento ink to allow colouring with Stampin’ Blends.

Te panel was trimmed down and layered on to Rich Razzleberry card stock. This was added to the card with dimensionals.

I hope you enjoyed this project. The supplies used are listed and linked to the online store below.

I would love to be your demonstrator.

Don’t miss out on these last chance items…. When they’re gone, they’re gone!

Thanks for stopping by today and happy Stampin’!

Verity xx

Product List

Lifting Me Up #GDP186

Hello Everyone,

This week is a sketch challenge!

See what the Design Team have created here

I have used a bright colour palette for my project featuring the Lift Me Up stamp set.

Pacific Point Designer Series Paper was added to a Whisper White card base.

Two squares of Whisper White card stock were die cut. The first was adhered flat. A small strip of Mango Melody DSP was added to the bottom edge. The second square was added with dimensionals.

A balloon was stamped with Poppy Parade ink and die cut.

A sentiment was added with Bermuda Bay ink.

Finally, some vellum clouds were added to the background.

I hope you enjoyed this project. The supplies used are listed below.

Thanks for stopping by today and happy Stampin’!

Verity xx

Product List

Wild Congratulations

Hello Everyone,

Here’s something a bit different from me today. Isn’t it cute!

This stamp set is called A Little Wild and will be retiring at the end of May.

The lions were stamped in Memento ink and coloured with Stampin’ Blends.

A rectangular frame was die cut and added to the card with dimensionals.

The lions were arranged in and around the frame.

A simple sentiment was added to the bottom.

I hope you enjoyed this project. The supplies used are listed and linked to the online store below.

I would love to be your demonstrator.

Don’t miss out on these last chance items…. When they’re gone, they’re gone!

Thanks for stopping by today and happy Stampin’!

Verity xx

Product List

Hello Friend

Hello Everyone,

Today’s project features the Wood Words stamp set which is due to retire at the end of May.

I chose to use Rich Razzleberry and gold to make my card.

I used lots of layers to make up the card.

The uppermost layer was stamped top and bottom with the large image from the set.

Some polka dot tulle was tied around this panel and then adhered with dimensionals.

The greeting was heat embossed with gold powder. I cut this to a banner and layer this on to gold foil.

I hope you enjoyed this project. The supplies used are listed and linked to the online store below.

I would love to be your demonstrator.

Don’t miss out on these last chance items…. When they’re gone, they’re gone!

Thanks for stopping by today and happy Stampin’!

Verity xx

Product List

Project Share Project

Hello Everyone,

Welcome to this week’s Project Share!

How do you like the new header? We were all finally together in one place so couldn’t pass up the opportunity for a picture of us all…

From the left….

Jill, Me, Gez, Heather & Helzie!

We all had an amazing time at on stage on Saturday and at our team day on Sunday!

Now…. Back to the projects. Please use the links to visit their blogs to read more.

Jill is #simplestamping with one of my favourite colours, Bermuda Bay! The monochrome look is so effective.

Visit Jill’s blog here

Heather is a Scots, so Highland Heather was just made for her! Teamed with Gorgeous Grape and Soft Sea Foam this card is beautiful.

Visit Heather’s blog here

Gez had made these cute rainbow pen pouches. Our Up line is quite the fan of rainbows so I am sure she loved seeing these.

Visit Gez’s blog here

Helzie is completing her series of projects with the Artfully Aware stamp set with this simple heartfelt greeting.

Visit Helzie’s blog here

I hope you enjoyed these projects. The supplies used are listed and linked to the online store below.

I would love to be your demonstrator.

Thanks for stopping by today and happy Stampin’!

Verity xx

Product List

Simply Scored

[122334]

£28.00

Dream #GDP185

Hello Everyone,

This week is a colour challenge with a twist…..

See what the Design Team have created here

I have opted to use one of the exiting in colours for my design. The lovely Berry Burst.

I have used a standard card base matted with Whisper White card stock.

Additional layers were added over the top with dimensionals.

The design elements were taken from the Chase Your Dreams die set.

The feathers and the word “dream” were coloured using a sponge dauber.

I hope you enjoyed this project. The supplies used are listed below.

Thanks for stopping by today and happy Stampin’!

Verity xx

Product List

To See Far

Hello Everyone,

This stamp set was on my Product Purchase Premiere last year! New products before anyone else is just one perk of being a Stampin’ Up! demonstrator that attends an On Stage event.

Find out about becoming a demonstrator here

I used some different colours for this one, plumping for Highland Heather for the watery background.

The sentiment was added next using Lovely Lipstick ink. I used the same colour card stock to layer on to. This was adhered to a Gray Granite card base.

The heron and water lilies were stamped with Gray Granite ink and coloured with Stampin’ Blends. I used the coordinating dies to cut the images and added them to the card front with dimensionals.

I hope you enjoyed this project. The supplies used are listed and linked to the online store below.

I would love to be your demonstrator.

Thanks for stopping by today and happy Stampin’!

Verity xx

Product List

Big Shot

[143263]

£102.00

Lots of Happy Birthday

Hello Everyone,

Have you seen the Stamparatus tool? I couldn’t have made this card front without it!

I started at the bottom of the card stock, stamping first with Night Of Navy ink.

Keeping the card in place, the stamp plate was moved up on the hinge. I stamped the next row with Pacific Point twice.

The plate was moved up again, and stamped with Pacific Point once.

The next two levels were stamped without reinking the stamp.

The rest of the card was made by matting and layering with glimmer paper and Twinkle Twinkle Designer Series Paper.

I hope you enjoyed this project. The supplies used are listed and linked to the online store below.

I would love to be your demonstrator.

Thanks for stopping by today and happy Stampin’!

Verity xx

Product List

Stamparatus

[148187]

£46.00

Petal Thanks

Hello Everyone,

Today’s project is about using up scraps. I had a bunch of Designer Series Paper strips left over from something else, (which you will see on Tuesday)!

The strips were trimmed slightly to 5-3/4 inches in length and adhered to a white card base.

A coordinating ink colour was used to stamp the bold sentiment from All Things Thanks. This was die cut with a Stitched Rectangle die and adhered with dimensionals.

The same inks were used to stamp the flowers which were cut with the coordinating punch.

Lastly, some leaves were punched from vellum. These were slotted behind the flowers and secured with Multipurpose glue.

I hope you enjoyed this project. The supplies used are listed and linked to the online store below.

I would love to be your demonstrator.

Thanks for stopping by today and happy Stampin’!

Verity xx

Product List

Wonderful Doily #GDP184

Hello Everyone,

This week is a Case the Designer challenge!

See what the Design Team have created with the sketch here

This is what I made…. I used the idea of layering a Doily, a label and another focal element and added a bold sentiment to the bottom.

I die cut the large doily from a white card layer and adhered this to a Berry Burst card base. The sentiment was stamped at the bottom of the card with Berry Burst ink.

A Pretty Label was punched from Sahara Sand card stock and added with dimensionals.

The blooms from the Dear Doily set were stamped using the Stamparatus tool with Lemon Lime Twist and Berry Burst inks. I secured these to the card with Multipurpose glue.

A die cut bow was added along with some pearls to complete the card.

I hope you enjoyed this project. The supplies used are listed below.

Thanks for stopping by today and happy Stampin’!

Verity xx

Product List

Stamparatus

[148187]

£46.00

Best Thing

Hello Everyone,

The Wonderful Romance bundle was instantly a favourite of mine when I first saw it in the catalogue back in November.

I haven’t used many of the dies, so this card is all about die cutting!

I used a piece of this fabulous Designer Series Paper as a backdrop for the white die cuts.

The decorative strip was adhered first by using mini dimensionals under each of the leaves.

The sentiment was stamped with Mossy Meadow ink. I love this oval Die, which was also adhered with dimensionals.

The leaves are so delicate and have great embossed details. These were slotted in behind the oval with multipurpose glue.

I hope you enjoyed this project. The supplies used are listed and linked to the online store below.

I would love to be your demonstrator.

Thanks for stopping by today and happy Stampin’!

Verity xx

Product List

Big Shot

[143263]

£102.00

Inspire.Create #040

Hello Everyone,

Welcome to my blog. Every other Monday I share my project that I have used as my entry for the Inspire.Create challenge.

This time it’s a colour challenge. The design team have made some wonderful samples as inspiration. You can see them here.

I have used Serene Garden for my card with a sentiment from Rooted in Nature.

The large stamp was added to opposite corners of a Whisper White card layer using the Stamparatus tool. This was adhered to a Basic Black card base.

The dove and flowers were stamped separately and die cut. The flowers were added to the card.

The sentiment was cut with a Stitched Shapes Framelit. This was positioned on the card with dimensionals. The dove was then adhered next to it.

Wink of Stella Glitter was added to the dove and the flowers to complete the card.

I hope you enjoyed this project. The supplies used are listed and linked to the online store below.

I would love to be your demonstrator.

Thanks for stopping by today and happy Stampin’!

Verity xx

Product List

Stamparatus

[148187]

£46.00

Tranquil Thank You

Hello Everyone,

Today’s project is made with the Love What You Do stamp set and some of the coordinating Share What You Love Specialty Designer Series Paper.

I started with a Tranquil Tide card base. Matching ink was used stamp the tiny flowers around the edge.

Layers of Berry Burst, Tranquil Tide and Mint Macaron card stocks were added to the front.

Square Framelits were used to cut the patterned paper. A frame was cut from Berry Burst card stock and wrapped around the paper and secured with adhesive.

This was added to the card with dimensionals.

The sentiment wS stamped on to Mint Macaron card and cut to a banner.

I added some flowers which I fussy cut from Berry Burst card stock.

I hope you enjoyed this project. The supplies used are listed and linked to the online store below.

I would love to be your demonstrator.

Thanks for stopping by today and happy Stampin’!

Verity xx

Product List

Big Shot

[143263]

£102.00

Here for You

Hello Everyone,

I am playing along with a Facebook colour challenge today!

I have used the Beautiful Promenade bundle to make my project. Isn’t the doily die cut stunning?

A white card layer was stamped randomly with leaves using first and second generation Mint Macaron ink. This was adhered to a white card base.

A smaller white layer was added with dimensionals. The doily was die cut from Mint Macaron card stock and adhered to the card.

Three sets of leaves and the flower were stamped on to a separate piece of card in Old Olive and Daffodil Delight inks. These were die cut and arranged on the card.

The sentiment was stamped with Old Olive ink and slotted in under the flower. A few rhinestones finished the project.

I hope you enjoyed this project. The supplies used are listed and linked to the online store below.

I would love to be your demonstrator.

*****AVAILABLE NOW*****

Brand new storage solutions for your favourite Stampin’ Up! products now available. Order what you need to create a bespoke solution, add more as your collection grows!

Thanks for stopping by today and happy Stampin’!

Verity xx

Product List