Hello Everyone,
I hope you are enjoying seeing the new Stampin’ Up! products….. All of which you can purchase in my online store, links are at the bottom of this post!
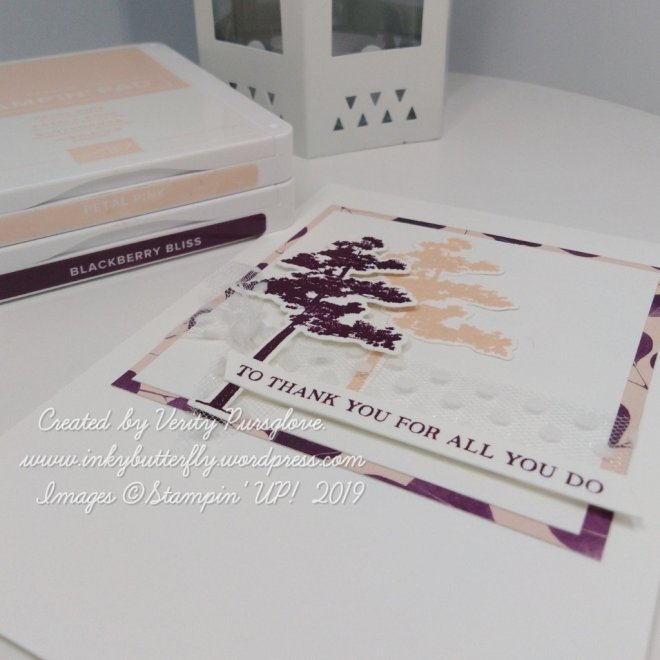
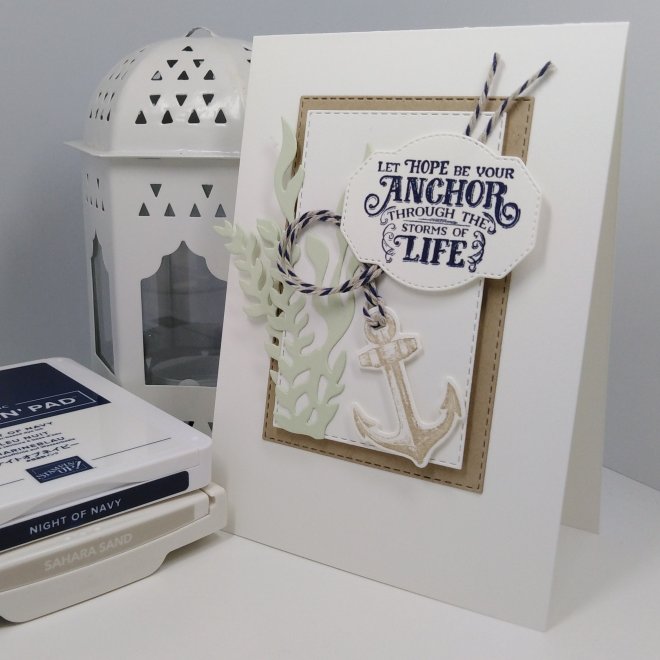
Today’s featured set is Sailing Home and coordinating dies.
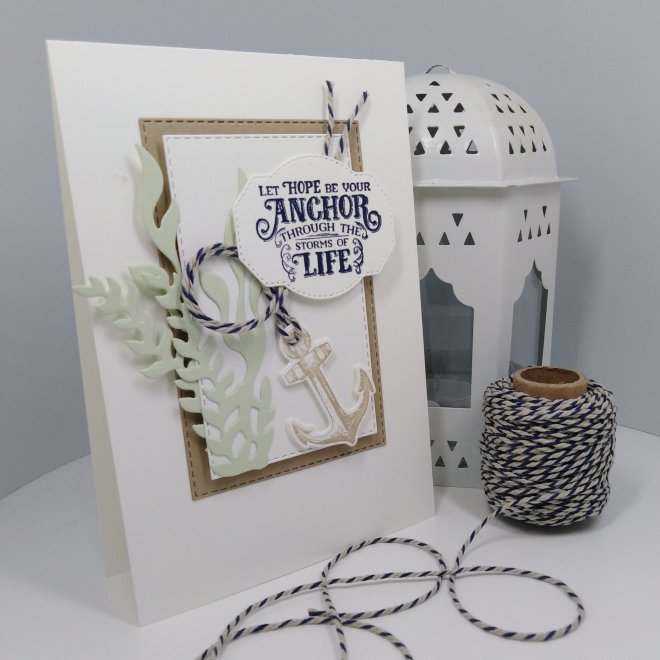
To make the topper, two of the seaweed die cuts were adhered to a Stitched Rectangle. This was layered with a larger rectangle cut from Crumb Cake card stock with dimensionals.
The anchor was stamped with Sahara Sand ink. This was die cut and some baker’s twine attached. The anchor was secured to the card. The twine was left loose.
The sentiment was stamped with Night of Navy ink and die cut. The trailing twine was then held in place with this die cut.

I hope you enjoyed this project. The supplies used are listed and linked to the online store below.
I would love to be your demonstrator.
Thanks for stopping by today and happy Stampin’!
Verity xx
Product List
|
|
|
|
|
|
|
|