Project Share Project

Hi Everyone,

Just look at what my crafty friends have been upto… Please click the links to see more details of each of the projects.

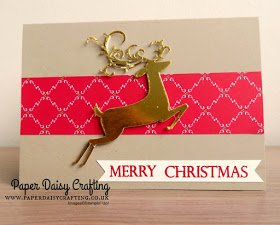
Jill has featured the wonderful new Dashing Deer in this beautifully simple card.

See how Jill made the card here

Heidi has been creating even more ways to gift some tea lights with this unusual closure.

See more on her blog here

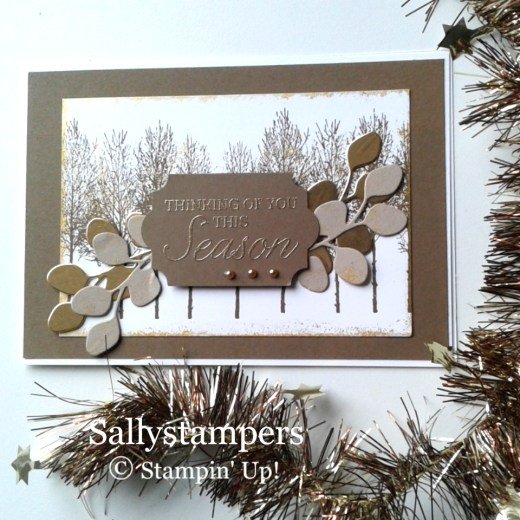
Sally has made this stunning card. Neutral colours make this suitable for the guys too!

See more about this project here

I hope you enjoyed these projects.

Thanks for stopping by today and happy Stampin’!

Verity xx

Product List

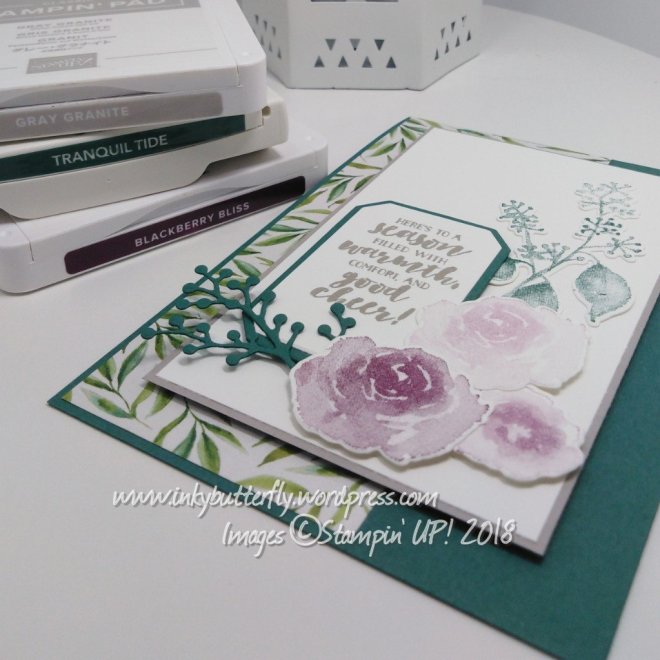
Frosted Florals

Hello Everyone,

The Frosted Floral suite is one of the stand out items in the upcoming Stampin’! Up! Autumn Winter catalogue.

If you would like to receive a Free catalogue please contact me here.

All the papers have a shimmer finish on both sides and they are all absolutely stunning.

I have used a Tranquil Tide card base. A 2-1/2 inch, strip of Designer Series Paper was added along the left hand side.

A 5 by 3-1/4 inch piece of white card stock was Layered on to some Gray Granite card stock and added to the card base with dimensionals.

On a separate sheet, the flowers and foliage wee stamped with Blackberry Bliss and Tranquil Tide inks. The sentiment was stamped with Gray Granite ink.

All the elements were Die cut with the coordinating Framelits. An extra sprig was cut from Tranquil Tide card stock.

Dimensionals were used to adhere the pieces to the card base.

I hope you enjoyed this project. The supplies used are listed and linked to the online store below.

I would love to be your demonstrator.

Thanks for stopping by today and happy Stampin’!

Verity xx

Product List

Grateful Heart

Hello Folks,

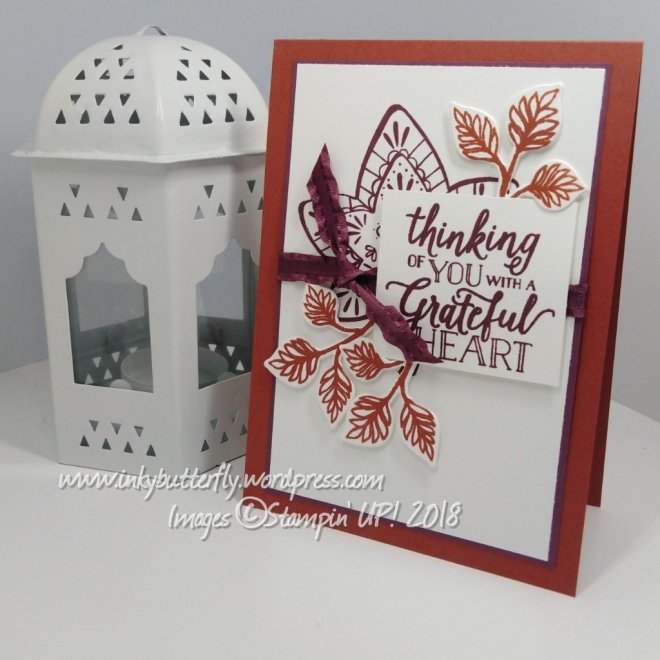
It’s not long now until the Stampin’ Up! Autumn Winter catalogue 2018 goes live, so here is a look at a new set called Falling for Leaves…. I just had to have this one, leaves are so versatile.

If you would like a free catalogue from me, please contact me here!

The card base is made with Cajun Craze card stock.

A panel was made with Whisper White card stock cut to 5-1/4 by 3-1/2 inches, (13.4 by 9 cm). This was adhered to a piece of Fresh Fig card stock 1/8 inch or 3mm larger.

The large leaf was stamped with Fresh Fig ink. Some mini Ruffled Ribbon was tied around the panel before adhering to the base.

The sentiment was stamped on to a separate piece of white card and trimmed to size. This was secured with dimensionals.

Three sets of smaller leaves were stamped with Cajun Craze ink and Die cut. Mini dimensionals were the perfect size to stick these down.

I hope you enjoyed this project. The supplies used are listed and linked to the online store below.

I would love to be your demonstrator.

Thanks for stopping by today and happy Stampin’!

Verity xx

Product List

Sorry…

Good Morning Everybody,

Today’s make is a clean and Simple card.

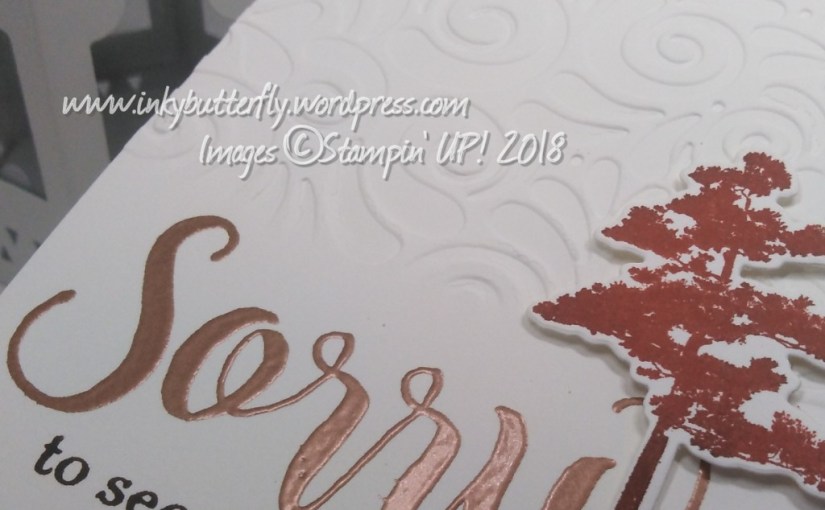
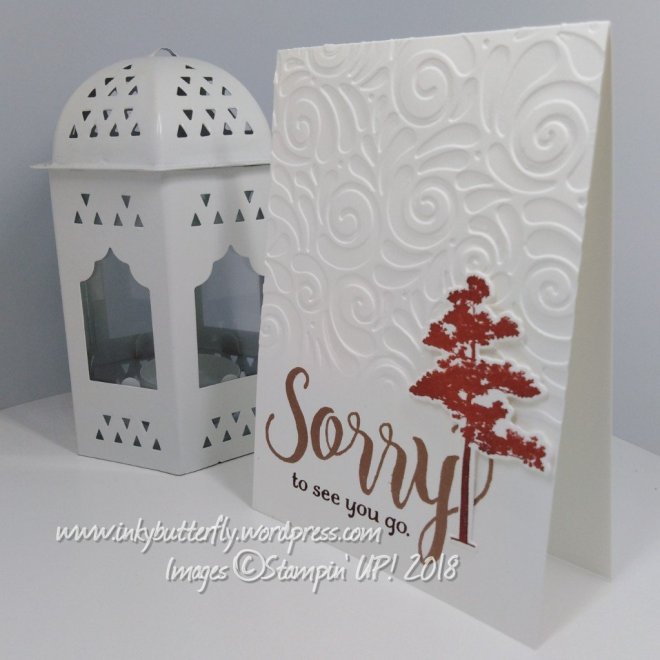
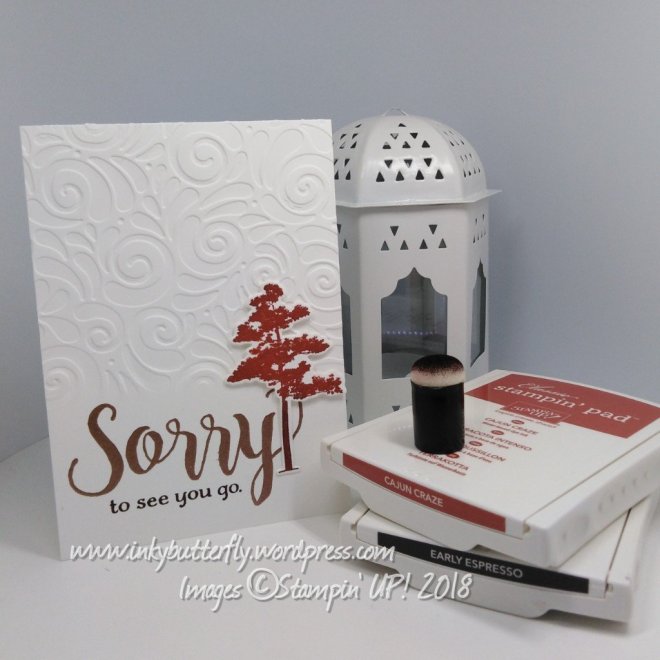
I began by embossing a white card base with the brand new Swirls and Curls embossing folder. The folder was not rolled through all the way, resulting in the bottom of the card remaining flat.

The word “sorry” was stamped with versamark ink and embossed with copper powder.

The partner sentiment was added with Early Espresso ink.

The tree was inked with Cajun Craze, a sponge was used to add some Early Espresso to the trunk. The image was die cut and adhered using mini dimensionals.

I hope you enjoyed this project. The supplies used are listed and linked to the online store below.

Look out for more Autumn Winter catalogue sneek peeks ahead of next week’s launch.

Thanks for stopping by today and happy Stampin’!

Verity xx

Product List

Versamark Pad

[102283]

£7.75

Sponge Daubers

[133773]

£4.75

Filled with Peace #FMS352

Hi Everyone and Happy Friday!

Today I am playing along with the Freshly Made Sketches challenge from Jen.

As usual there are some great samples from the Design Team. You can see them all here!

And this is my card featuring brand new products coming soon.

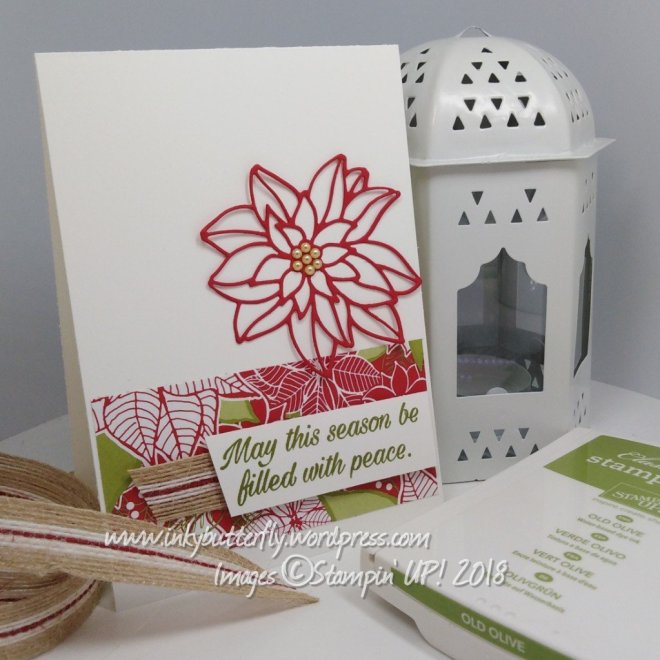
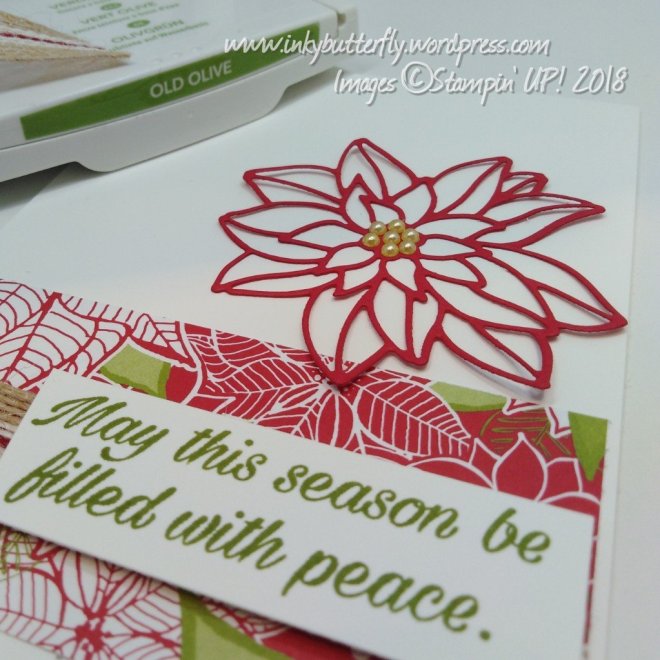
A 2 inch strip of Under the Mistletoe Designer Series Paper was adhered toward the bottom of a white card base.

Some striped Burlap ribbon was added with tear and tape. The sentiment was then added over the top using mini dimensionals.

The poinsettia was cut from Real Read card stock. Multipurpose glue was used to secure the Die cut in place. Some artisan pearls were added to the centre.

I hope you enjoyed this project. The supplies used are listed below.

Thanks for stopping by today and happy Stampin’!

Verity xx

Product List

Project Share Project

Hi there,

It’s Thursday, which means another Project Share.

My crafty friends have been busy creating so many lovely things. Please click the links to see the full project.

First up this week is Heidi of Flutterby Heidi. This Darling little box is the perfect new home gift package, such a brilliant idea.

See more here

Helzie has used this adorable stamp set to make this bright and happy card…. That little fella looks so excited.

See more here

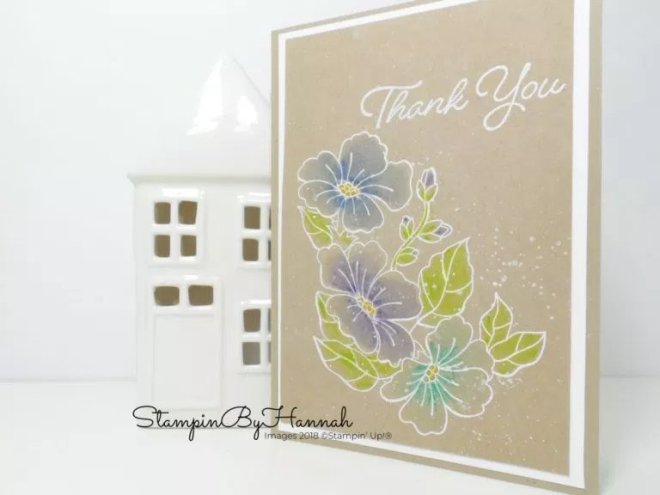
And Hannah has demonstrated how to achieve a watercolour effect on coloured card stock for a completely different look.

See more here.

I hope the ladies have inspired you as much as they have me.

Thanks for stopping by today and happy Stampin’!

Verity xx

Product List

Simply Scored

[122334]

£27.00

Happy Birthday Friend #GDP153

Hi Everyone,

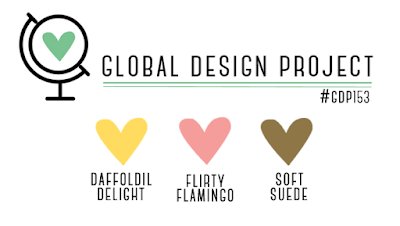
It’s time for a Global Design Project colour challenge! Wish me luck, the winner will get the opportunity to be a guest designer… That would be amazing!

See what the design team have made here.!

So these colours are quite a challenge. Not a combination I would have chosen, though it does remind me of neopolitan ice cream!

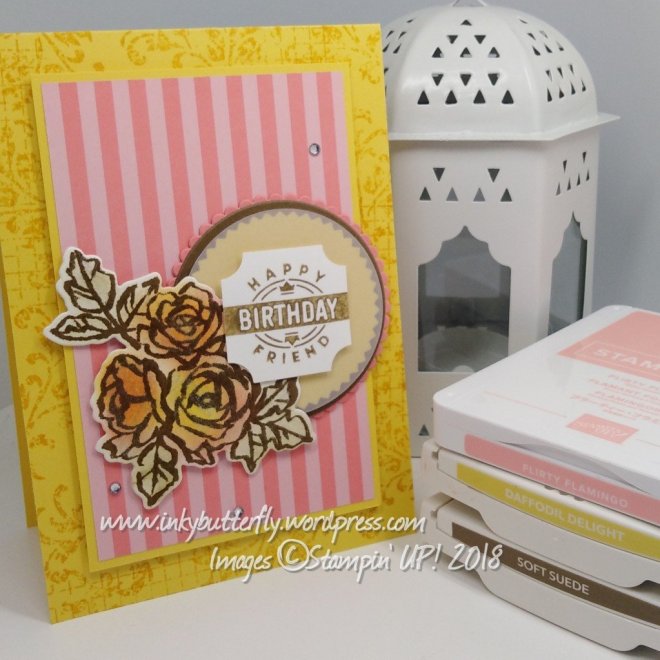
This is what I created.

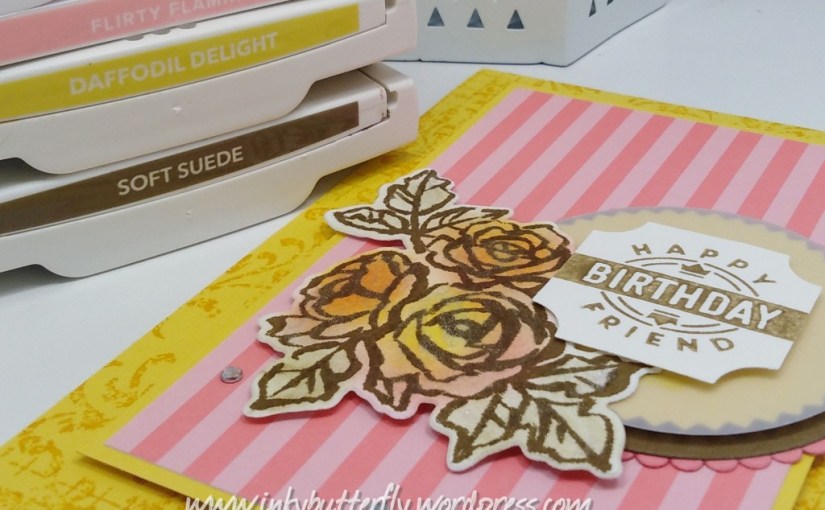
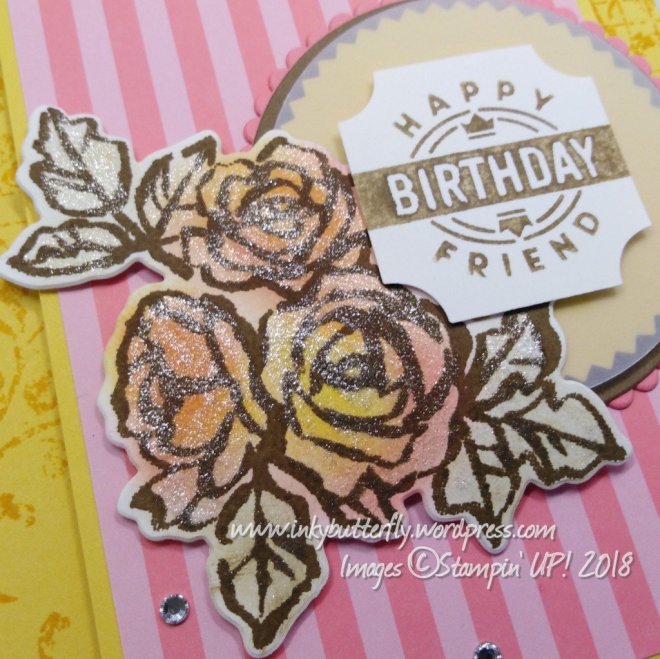
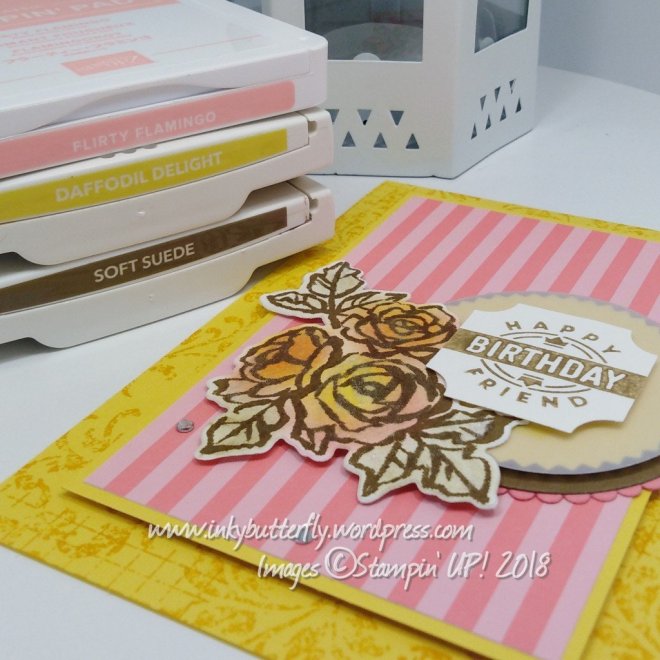
The Timeless Textures stamp set was used to make a tone on tone distressed background on the Daffodil Delight card base.

A panel was made by adding Flirty Flamingo DSP to another piece of Daffodil Delight card stock. This was adhered with dimensionals.

The circle topper was made using combinations of layering dies and punches. The sentiment was stamped with 2nd generation Soft Suede ink and cut with the matching Darling Label punch.

Soft Suede ink was used to stamp the flowers. Sponge daubers were used to apply the ink colours of the challenge to the image.

This was die cut and added to the card with dimensionals. A few rhinestones and Wink of Stella completed the card.

I hope you enjoyed this project. The supplies used are listed below.

Thanks for stopping by today and happy Stampin’!

Verity xx

Product List

Starburst Punch

[143717]

£17.00

Sponge Daubers

[133773]

£4.75

Just Add Ink #423

Hi Everyone,

I hope those of you in the UK are enjoying the Bank Holiday.

Today I am playing along with the Just Add Ink challenge.

This is an interesting combination, see what the design team have made here!

And this is what I have created featuring the Follow Your Dreams stamp set and dies.

I built the background first using the Artisan Textures stamp set. To soften this a little, a Vellum overlay was placed over the top. The panel was added to a Basic Grey card base.

There are lots of layers on the dream catcher.

First, the largest image was stamped in Basic Grey and Die cut.

The additional layers were cut from Bermuda Bay and Soft Suede card stock. These were secured together with a silver brad.

The large feathers were cut from white card stock and Soft Suede ink was added to the ends with a sponge dauber. The smaller feathers were stamped with Bermuda Bay ink on to matching card before Die Cutting and adding to the dream catcher.

The Friendly Expressions stamp set was used for the sentiment which was heat embossed with silver powder.

This was cut with the Pretty Label Punch and adhered with dimensionals. A few silver pearls completed the card.

I hope you enjoyed this project. The supplies used are listed below.

Thanks for stopping by today and happy Stampin’!

Verity xx

Product List
Versamark Pad

[102283]

£7.75

Metallic Brads

[146929]

£4.25

Metallic Pearls

[146282]

£6.50

Oh Darling! #GDP152

Good Afternoon,

I am playing along with the Global Design Project today.

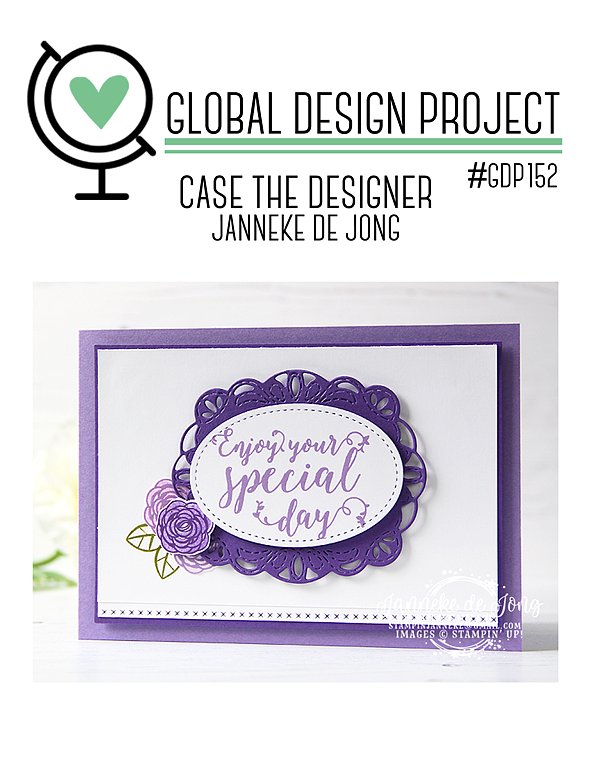
The challenge this time is to case the Designer. Janneke has created this beautiful card as inspiration.

The design team have made some fantastic interpretations of the card. You can see them here!

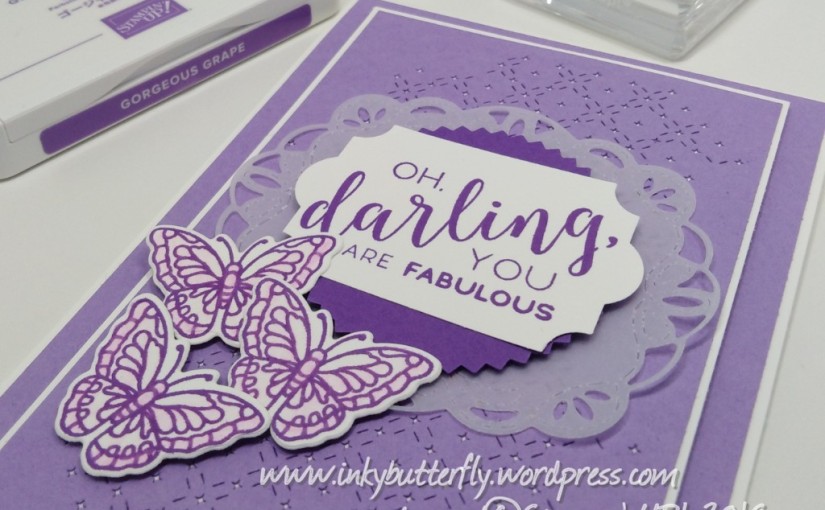
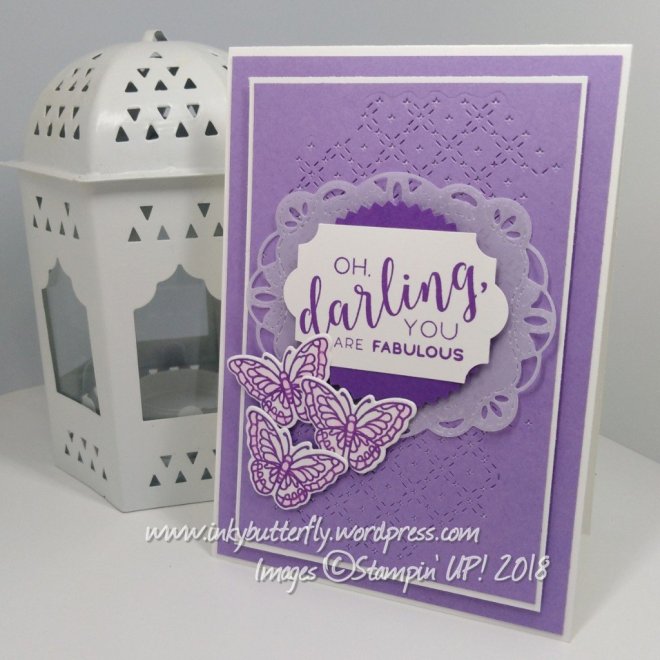
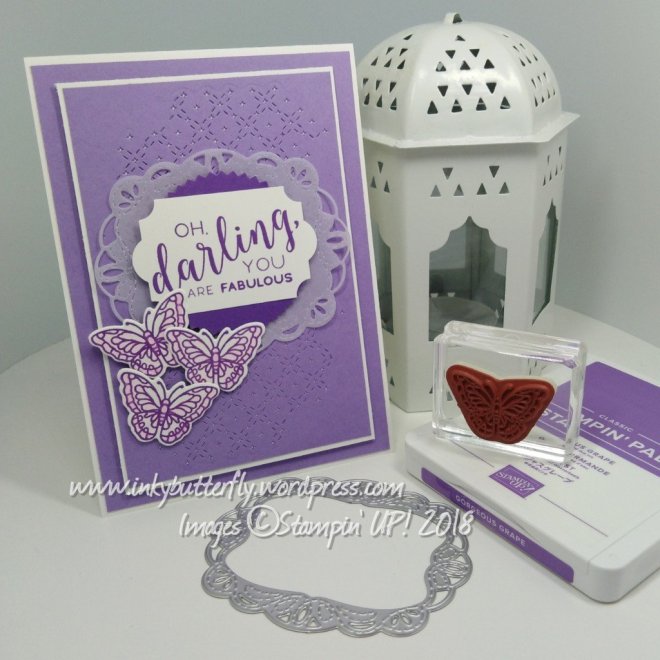
The inspiration card uses the Stitched All Around stem set, which I carried through to my design. I also kept the purple colour theme.

The card base was made by adding Highland Heather card stock.

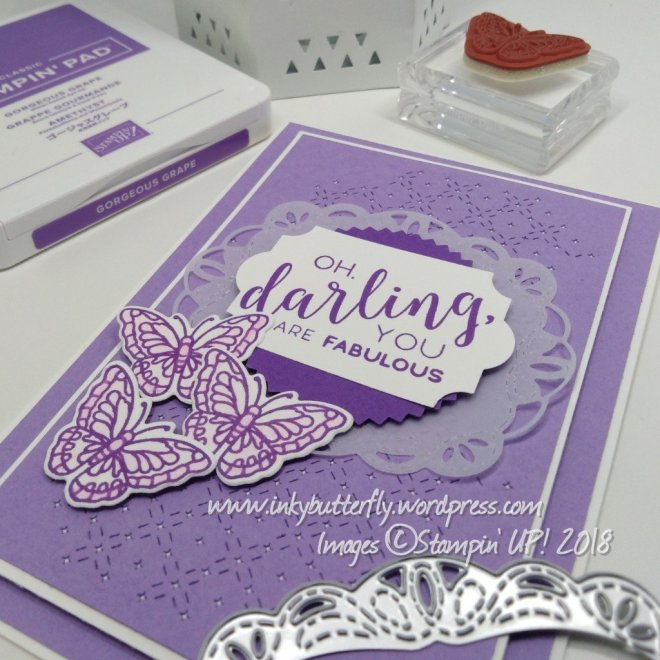
A smaller layer was embossed with the stitching Die from the set. The layer was mounted on to Whisper White card stock and adhered to the base with dimensionals.

The Stitched label was cut from Vellum.

The sentiment was stamped with Gorgeous Grape ink and cut with the Everyday Label Punch. This was added to a a starburst punch shape and then on to the card with dimensionals.

Rather than flowers, I added butterflies from the Painted Glass stamp set. The outline was Blended slightly and Wink of Stella Glitter brush added some bling.

I hope you enjoyed this project. The supplies used are listed below.

Thanks for stopping by today and happy Stampin’!

Verity xx

Product List

Blender Pens

[102845]

£10.75

Project Share Project

Hi Everybody,

Welcome to another project share. As always please click the images to see more about how each project was made.

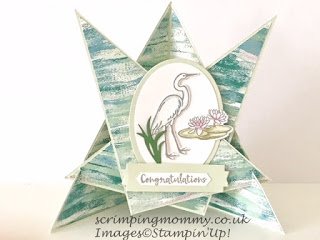
Amanda has made this superb fancy fold card. This will really stand out on the mantelpiece!

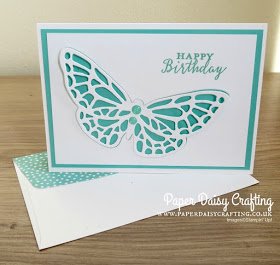
Jill has used this beautiful butterfly as the centrepiece of this card. Absolutely stunning.

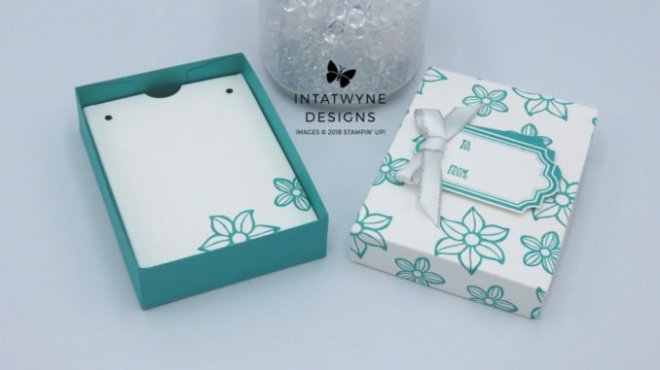
Angelina has made this lovely presentation gift box. Handmade box for a handmade gift, perfect!

I hope you enjoyed these project ideas

Thanks for stopping by today and happy Stampin’!

Verity xx

Product List

Simply Scored

[122334]

£27.00

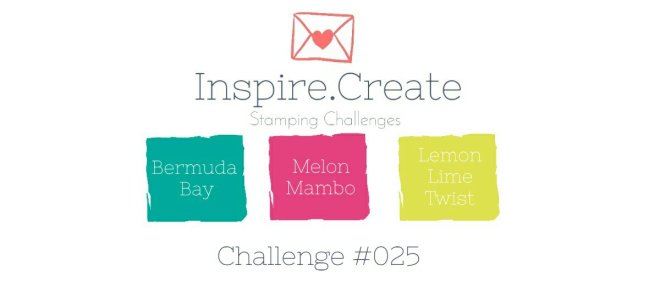
Inspire.Create. #025 Guest Designer

Hello Everybody,

Today is a very special day for me… Today I have the enormous pleasure to be a guest designer for this Inspire.Create.Challenge.

This week is a colour challenge, and wouldn’t you know they are three of my favourites!

So this what I have designed.

I have kept the card simple to allow the beautiful colours to shine through.

I used the Chase Your Dreams Framelits to cut five feathers from Whisper White card stock. The word “dream” was cut three times.

The inks were applied to the die cuts using a sponge dauber.

The die cut words were stacked and adhered to the card with Multipurpose glue.

Mini dimensionals were used to adhere the feathers to the card.

A touch of Wink of Stella was added over the top of the die cuts for a little extra sparkle.

I hope have enjoyed this project as much as I did making it!

The supplies used to make this card are listed below.

Thanks for taking the time to read my blog post today, please call back again soon.

Happy Stampin’!

Verity xx

Product List

Big Shot

[143263]

£102.00

Friend Like You

Good Morning!

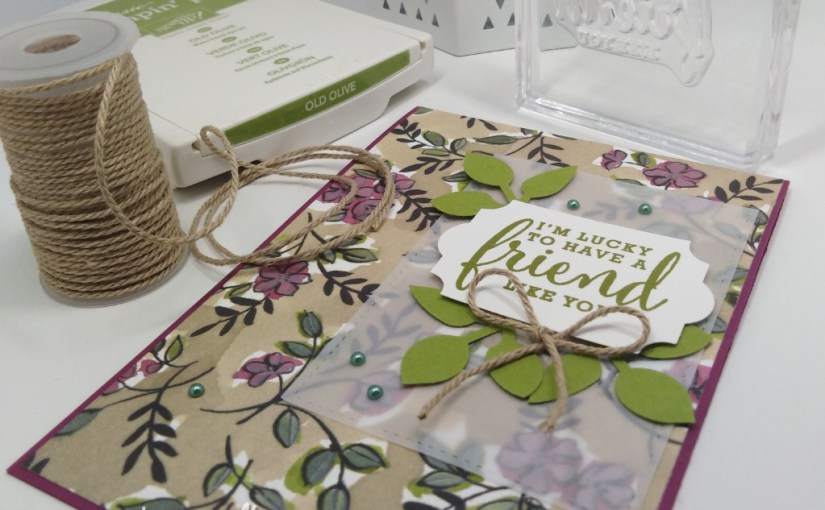
Today I fancied using the Share What You Love suite to make this lovely card.

Some speciality Designer Series Paper was adhered to a Rich Razzleberry card base.

The partial die Cutting technique was used to cut a rectangular piece of Vellum with the largest Stitched Square Framelit.

Old Olive ink was used to stamp the sentiment. This was cut with the Everyday Label Punch.

To decorate, three sets of leaves were punched from Old Olive card stock. Crumb Cake Nature’s Twine was tied in a bow. Some Artisan pearls added some bling!

I hope you enjoyed this project. The supplies used are listed and linked to the online store below.

Thanks for stopping by today and happy Stampin’!

Verity xx

Product List

Leaf Punch

[144667]

£15.00

Embossed Thinking of You card

Hello and Happy Monday!

This week’s Just Add Ink challenge is all about embossing!

The design team have made some wonderful samples. You can see them here!

Quick Measurements:

Gray Granite card base, A4 cut lengthways at 4-1/8 inches (10.5cm) and scored at 5-7/8 inches (14.2cm).

Whisper White card layer for embossing, 5-3/4 inches (13.7cm) by 4 inches (10cm).

Watch the video:

This version uses Merry Merlot card stock for the base.

Both cards could be sent to male or female recipient just to let them know they are in your thoughts.

I hope you enjoyed this project. The supplies used are listed below.

Thanks for stopping by today and happy Stampin’!

Verity xx

Product List

Versamark Pad

[102283]

£7.75

Sending Love

Hey Everyone,

I have gone to town with the layers on this project.

A piece of Tropical Escape Designer Series Paper was adhered to a white card base.

The Floral Frames dies were used to cut the pieces to build the topper.

Whisper White, Crumb Card and Lemon Lime Twist card stock was used.

The sentiment was stamped with Lemon Lime Twist ink. The frame was added with Blushing Bride ink and die cut.

The Crumb Cake and Lemon Lime Twist leaves were adhered in between the layers.

Flowers were stamped with Crumb Cake ink and added to the topper with Multipurpose glue.

I hope you enjoyed this project. The supplies used are listed and linked to the online store below.

Thanks for stopping by today and happy Stampin’!

Verity xx

Product List

Be You

Good Afternoon,

I thought I would pop an extra post up today using my beloved Rooted in Nature stamp set and matching Designer Series Paper.

A 3 inch strip of paper was adhered to a white card base.

The colours, Petal Pink, Mint Macaron and Cajun Craze were selected to match the paper.

The tree rings were fussy cut and positioned to the left hand side popped up on dimensionals.

Mint Macaron ink was used to stamp the tree. This was die cut and layered over the top. Double dimensionals were used to support the right hand side.

Finally, the sentiment was stamped with Cajun Craze Ink and fussy cut. Multipurpose glue was used to add this to the tree rings.

I hope you enjoyed this project. The supplies used are listed and linked to the online store below.

I would love to be your demonstrator.

Thanks for stopping by today and happy Stampin’!

Verity xx

Product List

Wonderful Adventure #GDP151

Hello Everyone,

Today I am taking part in the Global Design Project theme challenge this week.

You can see what the design team have here!

I have used the Sea of Textures bundle to create my card, building lots of layers.

The Seaside Embossing folder was used to Emboss some Pool Party card stock which was added to a Whisper White card base.

The netting was die cut from Crumb Cake card stock.

Calypso Coral ink was used to stamp the octopus and the sentiment. He was added to the card using dimensionals.

Some of the little fishes were cut from Berry Burst card stock and adhered to the background.

The weeds were cut from Tranquil Tide card stock and secured to the card with Multipurpose glue.

I hope you enjoyed this project. The supplies used are listed below.

Thanks for stopping by today and happy Stampin’!

Verity xx

Product List

Big Shot

[143263]

£102.00

Stitched Thank You

Good Morning,

Today’s project is a complete contrast to yesterday, using lots of white space.

I started by using the Big Shot Embossing mats with the Stitched All Around dies to add texture to a white card base.

The thank you motif was stamped with Soft Suede ink. This was die cut along with a Crumb Cake circle and a white label from the same Die set.

The elements were layered together using dimensionals and snail adhesive. Some linen thread added some texture.

I hope you enjoyed this project. The supplies used are listed and linked to the online store below.

Thanks for stopping by today and happy Stampin’!

Verity xx

Product List
Big Shot

[143263]

£102.00

Linen Thread

[104199]

£4.25

For All You Do

Good Morning Everybody,

I have revisited one of my favourite bundles in the Stampin’ Up! Annual catalogue today… The stunning Rooted in Nature and Nature’s Poem Designer Series Paper.

The card base was prepared using Tranquil Tide card stock. I picked out a coordinating patterned paper from the Nature’s Poem collection and adhered that to the front.

I love the combination of Tranquil Tide and Blackberry Bliss, so I added a 2 inch strip across the card towards the bottom.

Coordinating inks were used to stamp the trees and these were Die cut. These were then arranged on the card and secured with snail and dimensionals.

The sentiment was stamped with Blackberry Bliss ink and added to the bottom of the card.

I hope you enjoyed this project. The supplies used are listed and linked to the online store below.

Thanks for stopping by today and happy Stampin’!

Verity xx

Product List

Falling Leaves

Hello again Everyone,

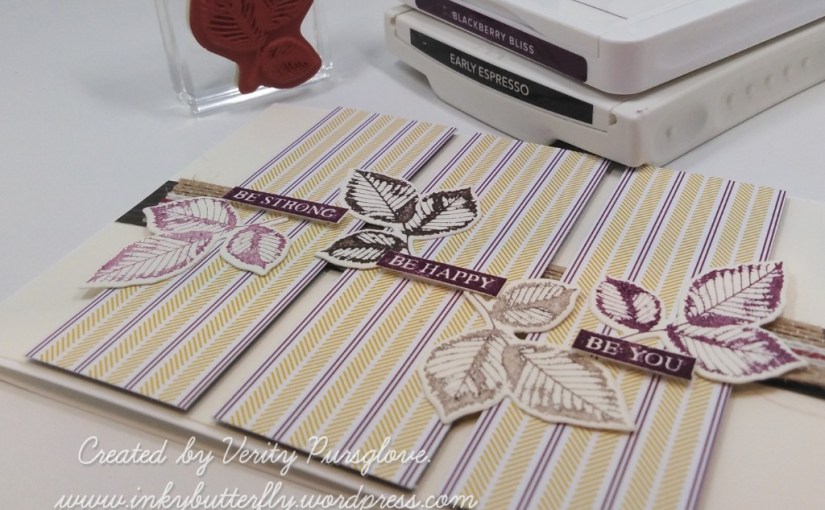
I am just loving the Blended Seasons bundle… Make sure you order quickly, it is only available during August and while stocks last!

I started by Die cutting two of the Stitched shapes from the Framelits to make a frame.

The centre portion was stamped with a sentiment and leaves from the stamp set.

The card base was also stamped with leaves before adding the Die cuts. The outer frame was popped up using mini dimensionals.

Additional leaves were Die cut from Lemon Lime Twist and Tranquil Tide card stock.
I hope you enjoyed this project. The supplies used are listed and linked to the online store below.

I would love to be your demonstrator.

Don’t forget the any purchases over £45 will qualify for a voucher to spend in September… Just in time for the seasonal catalogue launch!
If you can’t wait to see the new seasonal catalogue why not become a demonstrator? There’s no pressure to sell, get a discount on future purchases and enjoy bei g part of a larger crafting community.
Find out more about joining my team here!

Thanks for stopping by today and happy Stampin’!

Verity xx

Project Share Project

Hello Everyone,

Welcome to this week’s Project Share. This week the ladies have designed some lovely monochromatic cards.

It just goes to show what can be achieved with minimal supplies. I have enjoyed using this technique too.

Amanda has used shades of blue with the Very Vintage stamp set for this beautifully simply and elegant card.

See more about how the card was made on Amanda’s blog here

Angelina has treated her customers to this wonderful card design. This demonstrates the exquisite coordination of Stampin’ Up! Designer Series Papers and ink pads.

See more cards using a number of other colour combinations here

Heidi has used one of my favourite sets of Stampin’ Up! 2018 Annual Catalogue. The combination of greens makes the dream catcher really pop from the background.

See more from Heidi here

I hope you have enjoyed all these projects.

Thanks for stopping by today and happy Stampin’!

Verity xx

Product List