Three Boats #GDP158

Hi there Everyone,

It’s Wednesday, so it’s time for a Global Design Project challenge.

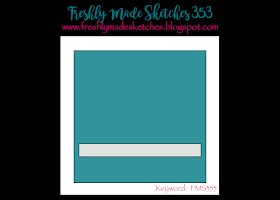
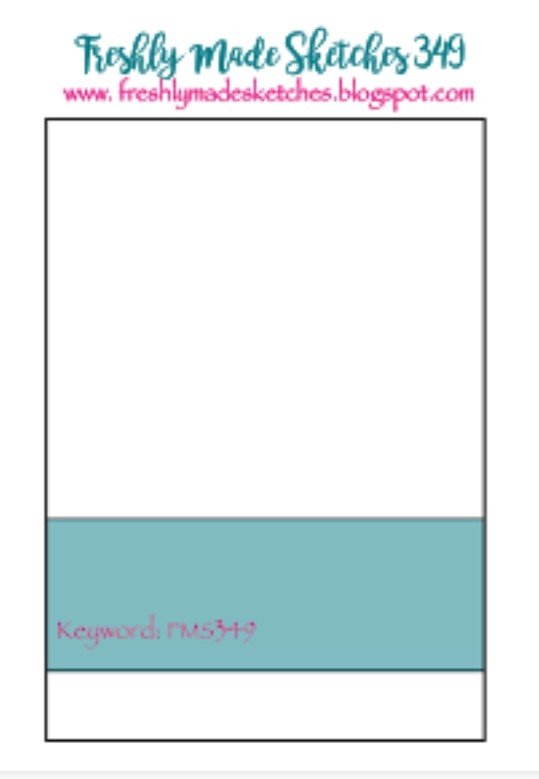
This week is a sketch challenge and as usual the design team have made some wonderful projects to inspire us. See them all here!

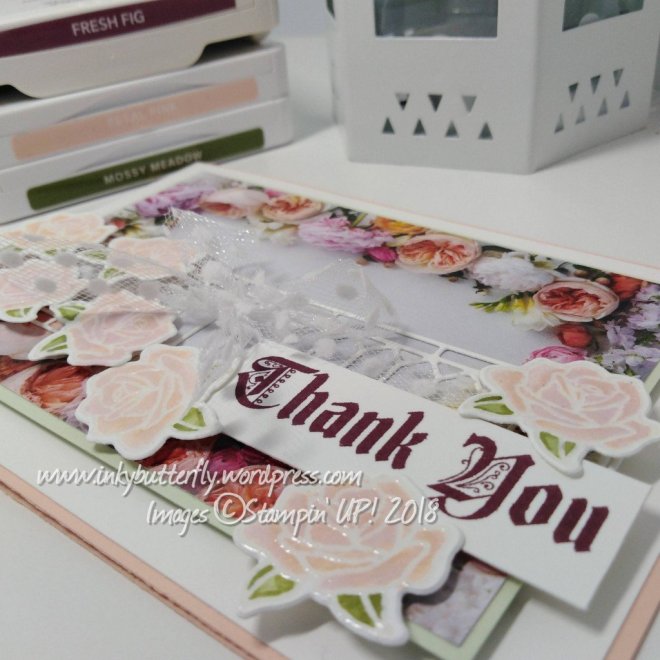
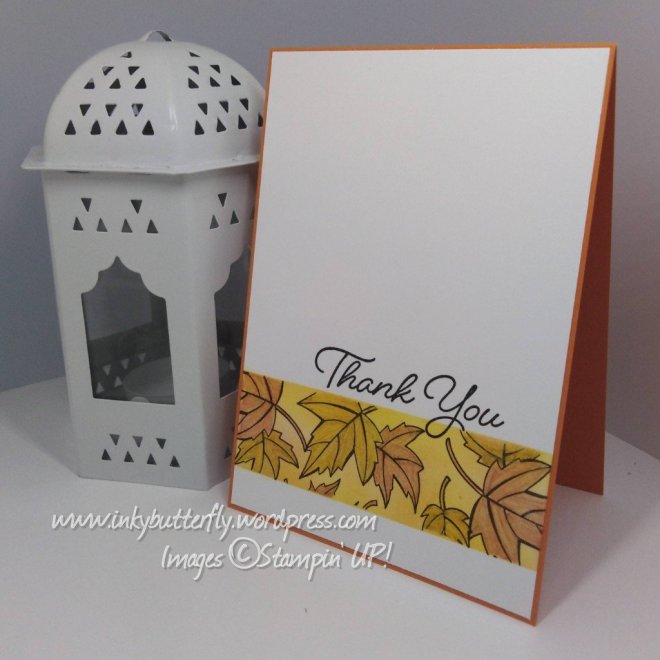
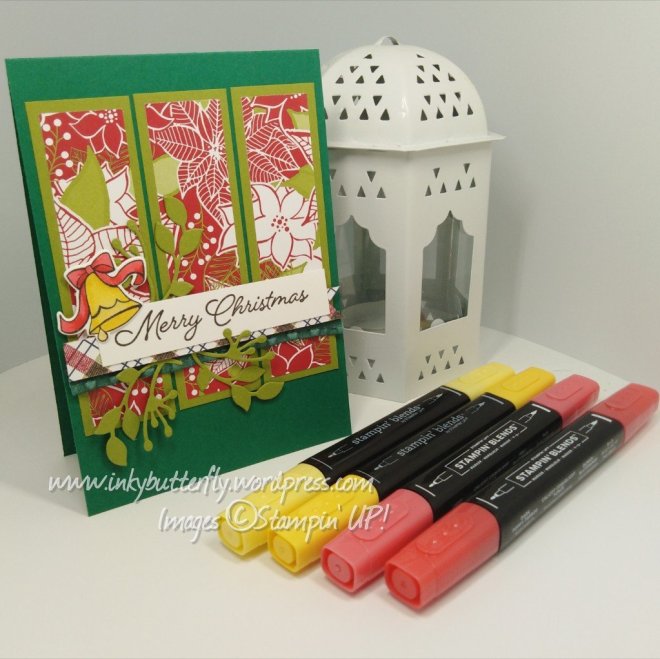
I have pulled out the Lilypad Lake bundle. I liked the idea of having three little boats across the card.

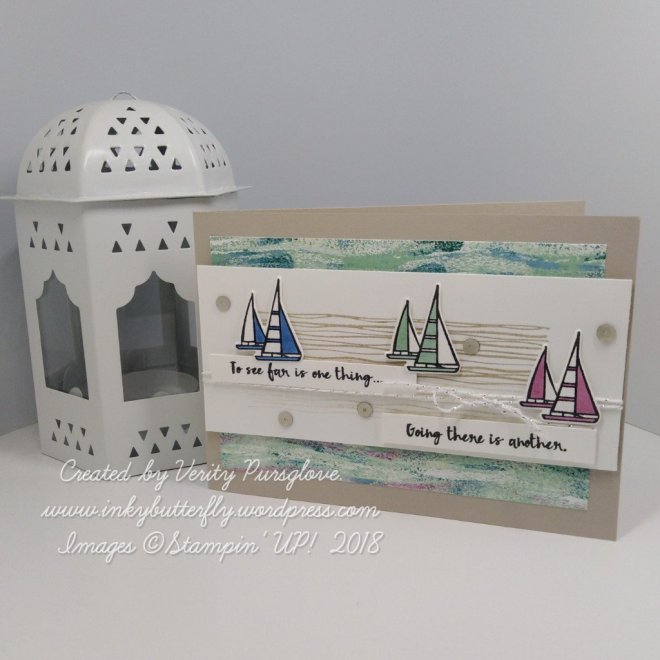
I chose a neutral card base of Sahara Sand. A piece of Tranquil Textures Designer Series Paper was adhered to the base with SNAIL adhesive.

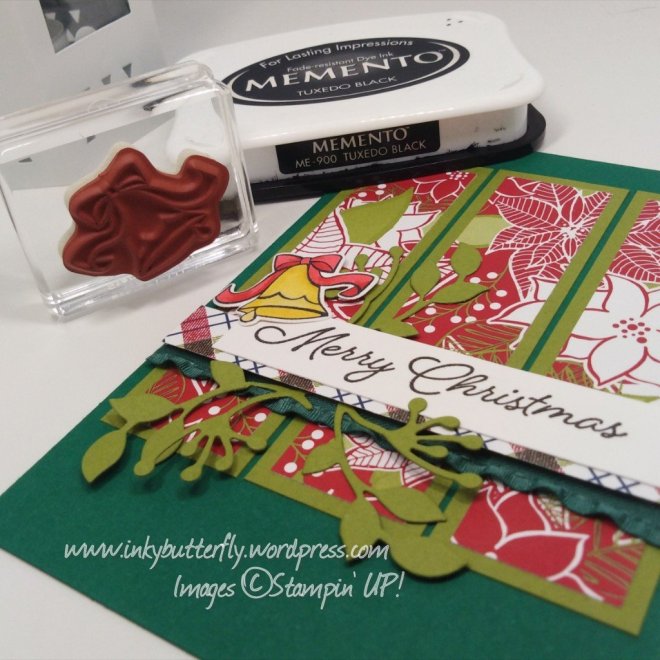
Sahara Sand ink was used to stamp the water on to a strip of Whisper White card stock. Some silver baker’s twine was tied around the piece before adding to the card with dimensionals.

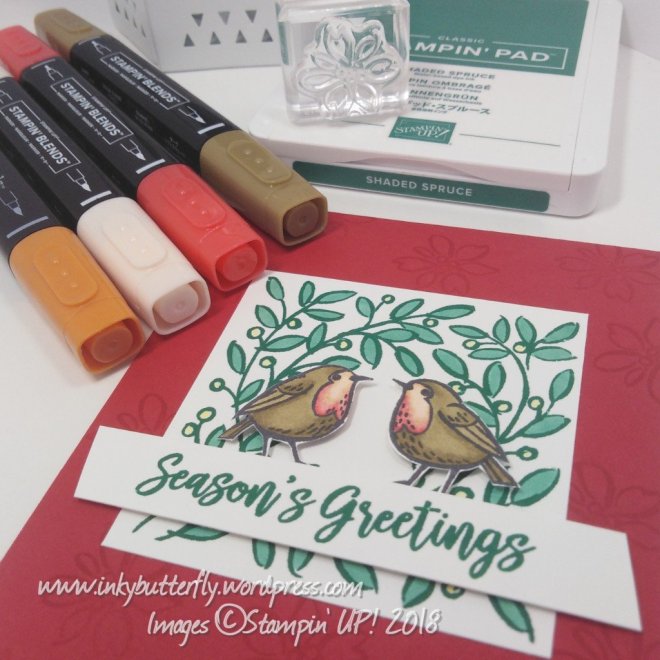
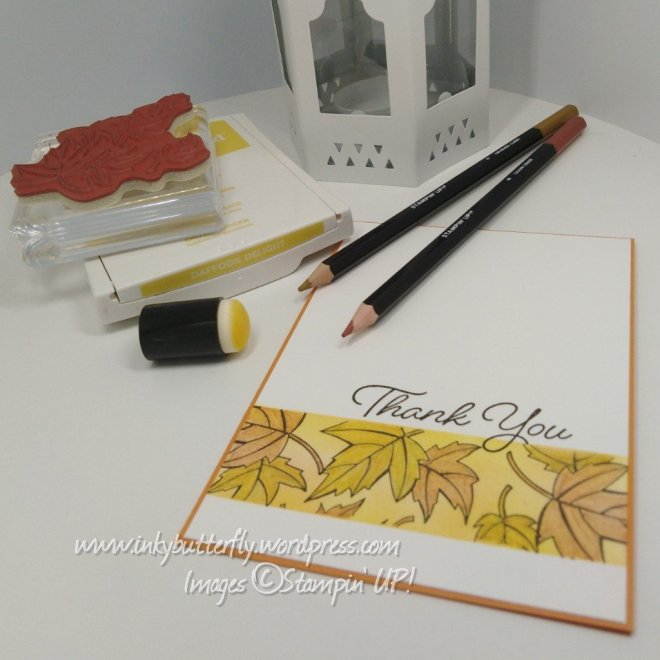
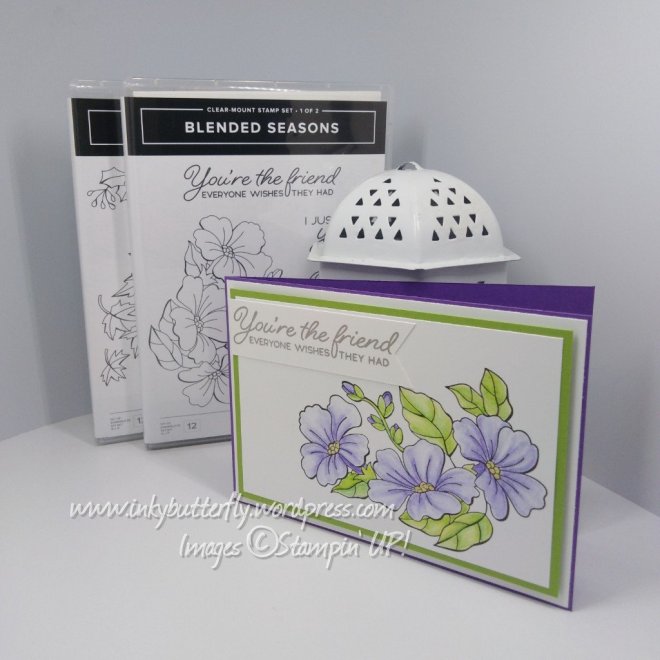
The boats were stamped with Memento Ink and coloured with Stampin’ Blends markers to complement the paper in the background.

The sentiment was also stamped with Memento Ink and cut in to strips.

Some adhesive backed sequins were added to the background.

I hope you enjoyed this project. The supplies used are listed below.

Thanks for stopping by today and happy Stampin’!

Verity xx

Product List

Stencilled Snowflakes

Good Morning,

With the chilly morning we have been having, I thought I would use the Beautiful Blizzard bundle today.

The card is inspired by a project that we made at our recent team retreat curtesy of the lovely Heidi.

The main panel has made use of the “waste” from the cutting die as, a stencil.

I gently stippled ink over the portions I wanted using a sponge dauber. It didn’t matter to me that the edges weren’t perfect, it all added to the effect.

Once I was happy with the result, I adhered this to a Pool Party card which already has a white layer attached.

The sentiment was added simply at the bottom of the card and a few sequins completed the design.

I hope you enjoyed this project. The supplies used are listed and linked to the online store below.

I would love to be your demonstrator.

Thanks for stopping by today and happy Stampin’!

Verity xx

Product List

Big Shot

[143263]

£102.00

Merry Christmas To You

Good Morning Everybody,

Today’s card is a C. A. S. E of a card from The Creative Watermelon. You can see her original design here.

I really liked the watercoloured circle of Kaylee’s card. For my version, I used the Emboss resist technique.

The light bulbs from the Making Christmas Bright stamp set was stamped with clear versamark ink and heat embossed with clear powder.

Ink was pressed on to an acrylic block and added over the top of the embossing.

A white card layer Die cut with a layering circle die. The watercoloured piece was adhered behind the aperture and added to a Real Red card base.

Black card stock was die cut with an adhesive sheet on the back. The word could then be adhered straight on to the card.

The rest of the sentiment was heat embossed in white and then adhered with dimensionals.

I hope you enjoyed this project. The supplies used are listed and linked to the online store below.

I would love to be your demonstrator.

Thanks for stopping by today and happy Stampin’!

Verity xx

Product List

Project Share Project

Hi Everyone,

It’s been another wonderfully creative week… I am being a bit cheeky and showing four projects today.

I spent last weekend with all these lovely ladies at our team retreat so I wanted to give them all a shout out!

First up is this sponged card from Heidi. This technique allows for more control when creating backgrounds.

See more on Heidi’s blog here.

Helzie was kind enough to be my chauffeur. Here is a card showing how to use stamps in different ways.

See more at Helzie’s blog here

The lovely Jill has used the embossing mats with a Die to add texture to the card.

See more on Jill’s blog here

And then Angelina has used lovely purples to make her card with Designer Series Paper.

See more on Angelina’s blog here

I hope you enjoyed these projects.

Thanks for stopping by today and happy Stampin’!

Verity xx

Product List

Back to School – #GDP155

Hi Everyone,

The Global Design Project have set a theme challenge this week.

See what the design team have made here

I have kept my card very simple.

I used Stazon Ink to stamp the images. These were then coloured with watercolour pencils.

The letters were taken from the Pick a Pennant stamp set. I used Call Me Clover Ink.

I then cut this with the Christmas Traditions Punch. This was Layered on to a Tailored Tag.

I hope you enjoyed this project. The supplies used are listed below.

Thanks for stopping by today and happy Stampin’!

Verity xx

Product List

Blender Pens

[102845]

£10.75

Autumn Winter Team card Swap

Hello Everyone,

With each catalogue launch, the team send out cards to each other to share creativity with new products.

I featured the Peaceful Poinsettia bundle.

The centrepiece was coloured with Stampin’ Blends;

  • Light & Dark Shaded Spruce
  • Light Poppy Parade
  • Light & Dark Cherry Cobbler

The coloured image was die cut ready to add to the card.

The same Poinsettia image was stamped on to a Cherry Cobbler card base. A strip of Shaded Spruce paper was adhered across the middle.

The sentiment was cut with the Everyday Label Punch and mounted on to some Merry Merlot glimmer paper.

I hope you enjoyed this project. The supplies used are listed and linked to the online store below.

I would love to be your demonstrator.

Thanks for stopping by today and happy Stampin’!

Verity xx

Product List

Pretty Floral Thank You – Just Add Ink #425

Hello Again,

Here is my entry for this week’s Just Add Ink challenge from Kelly.

The design team have made some great inspirational projects. You can see them here!

I immediately turned to the gorgeous Petal Promenade Designer Series Paper.

One of the sheets has these sweet frames that cropped out and layered on to Soft Sea Foam card stock.

The Painted Glass stamp set and coordinating dies were used to embellish the topper. Starting with the decorative strip to emulate the picket fence in the inspiration image.

Some white Polka Dot Tulle was tied to a bow around the topper which was then adhered to the card with dimensionals.

The roses were stamped and heat embossed with clear powder. Mossy Meadow, Petal Pink and a touch of Fresh Fig were used to watercolour the images. They were die cut with the matching framelits.

Fresh Fig ink was used to stamp the sentiment.

I hope you enjoyed this project. The supplies used are listed below.

Thanks for stopping by today and happy Stampin’!

Verity xx

Product List

Season’s Greetings #FMS353

Hi there,

It time for another Freshly Made Sketch challenge entry.

The design team have made some great samples. You can see them all here!

I have used the new Feathers & Frost stamp set… Love those little Robins!

I prepared a Real Red card base by stamping the poinsettia with versamark ink.

On some Whisper White, the leafy frame was stamped with Shaded Spruce ink and coloured with Stampin’ Blends. As Classic ink is waterbased, it won’t bleed with the Blends markers!

The little robins were coloured with Stampin’ Blends. Real Red, Pumpkin Pie and Petal Pink gave a great result for the red breast!

Finally, I added the greeting.

I hope you enjoyed this project. The supplies used are listed below.

Thanks for stopping by today and happy Stampin’!

Verity xx

Product List

Project Share Project

Hi there,

It’s Thursday, which means another Project Share.

My crafty friends have been busy creating so many lovely things. Please click the links to see the full project.

First up this week is Heidi of Flutterby Heidi. This Darling little box is the perfect new home gift package, such a brilliant idea.

See more here

Helzie has used this adorable stamp set to make this bright and happy card…. That little fella looks so excited.

See more here

And Hannah has demonstrated how to achieve a watercolour effect on coloured card stock for a completely different look.

See more here.

I hope the ladies have inspired you as much as they have me.

Thanks for stopping by today and happy Stampin’!

Verity xx

Product List

Simply Scored

[122334]

£27.00

Happy Birthday Friend #GDP153

Hi Everyone,

It’s time for a Global Design Project colour challenge! Wish me luck, the winner will get the opportunity to be a guest designer… That would be amazing!

See what the design team have made here.!

So these colours are quite a challenge. Not a combination I would have chosen, though it does remind me of neopolitan ice cream!

This is what I created.

The Timeless Textures stamp set was used to make a tone on tone distressed background on the Daffodil Delight card base.

A panel was made by adding Flirty Flamingo DSP to another piece of Daffodil Delight card stock. This was adhered with dimensionals.

The circle topper was made using combinations of layering dies and punches. The sentiment was stamped with 2nd generation Soft Suede ink and cut with the matching Darling Label punch.

Soft Suede ink was used to stamp the flowers. Sponge daubers were used to apply the ink colours of the challenge to the image.

This was die cut and added to the card with dimensionals. A few rhinestones and Wink of Stella completed the card.

I hope you enjoyed this project. The supplies used are listed below.

Thanks for stopping by today and happy Stampin’!

Verity xx

Product List

Oh Darling! #GDP152

Good Afternoon,

I am playing along with the Global Design Project today.

The challenge this time is to case the Designer. Janneke has created this beautiful card as inspiration.

The design team have made some fantastic interpretations of the card. You can see them here!

The inspiration card uses the Stitched All Around stem set, which I carried through to my design. I also kept the purple colour theme.

The card base was made by adding Highland Heather card stock.

A smaller layer was embossed with the stitching Die from the set. The layer was mounted on to Whisper White card stock and adhered to the base with dimensionals.

The Stitched label was cut from Vellum.

The sentiment was stamped with Gorgeous Grape ink and cut with the Everyday Label Punch. This was added to a a starburst punch shape and then on to the card with dimensionals.

Rather than flowers, I added butterflies from the Painted Glass stamp set. The outline was Blended slightly and Wink of Stella Glitter brush added some bling.

I hope you enjoyed this project. The supplies used are listed below.

Thanks for stopping by today and happy Stampin’!

Verity xx

Product List

Blender Pens

[102845]

£10.75

More Autumnal Leaves

Good Morning,

My lovely friend Tina wanted to see more autumn leaves, so here it is…. Especially for her!

The leaves from the Blended Seasons stamp set were stamped with black Stazon Ink on to some Whisper White card stock.

So Saffron ink was sponged over the edges of the card.

Cajun Craze, Pumpkin Pie, Crushed Curry and Early Espresso watercolour Pencils were used to colour the leaves. A blender pen smoothed out the lines.

The panel was layered on to Pumpkin Pie card stock and then on to a Cajun Craze card base.

I hope you enjoyed this project. The supplies used are listed and linked to the online store below.

Thanks for stopping by today and happy Stampin’!

Verity xx

Product List

Blender Pens

[102845]

£10.75

Just Add Ink #421

Hi Everyone,

Welcome to another Just Add Ink challenge entry…. This week the team has provided this sketch as inspiration. All their projects can be seen here!

I thought I would try Colouring on Vellum for this project. I picked out a geometric pattern and pale coloured Stampin’ Blend markers.

  1. Highland Heather
  2. Mint Macaron
  3. Petal Pink
  4. Flirty Flamingo
  5. Soft Sea Foam

The piece was adhered to a white card base.

The same markers were used to colour the decorative circle image from the Painted Glass stamp set.

This was adhered to a Soft Sea Foam starburst and a Pearlized Doily.

The sentiment was stamped simply with black ink.

The Delicate Trio punch was used to round the corners.

I hope you enjoyed this project. The supplies used are listed below.

Thanks for stopping by today and happy Stampin’!

Verity xx

Product List

Autumnal Thank You #FMS349

Hi Everyone,

Welcome back to my usual Friday post when I create a project using a sketch from the Freshly Made Sketches challenge.

This one leaves plenty of room for creativity…. The design team have made some great inspirational projects. You can them all on the FMS blog here!

I couldn’t resist getting out the Blended Seasons stamp set once again for this challenge.

I started by using post it notes to section off the portion at the bottom. The section was coloured with Daffodil Delight ink and a sponge dauber. The leaves from the stamp set were then added using Stazon black ink.

I then coloured the leaves with Crushed Curry and Cajun Craze watercolour Pencils. A blender pen was used to smooth out the lines.

Stazon black ink was then used to add the sentiment across the top.

The panel was adhered to a Pumpkin Pie card base.

I hope you enjoyed this project. The supplies used are listed below.

Thanks for stopping by today and happy Stampin’!

Verity xx

Product List

Blender Pens

[102845]

£10.75

Sssh! Merry Christmas #GDP150

Hi Everyone,

I missed out on taking part in last week’s colour challenge as I was away on holiday…. I did have craft withdrawal though!

So I am pleased to be bringing you another Global Design Project entry.

The team have a sketch challenge for us this time. You can see all of their wonderful ideas here!

So I gone (ssshh!) Christmas, and featured the fabulous Blended Seasons stamp set and Under the Mistletoe Designer Series Paper.

I prepared a card base using Shaded Spruce card stock. This is nota colour featured in the paper but thought it provided some extra colour tones.

Three strips of paper were cut to 4 inches by 1 inch and layered on to Old Olive card stock. Starting with the outer most pieces these were secured with snail adhesive.

Tranquil Tide mini Ruffled Ribbon was added over the top of the panels. An additional 1/2 inch strip of paper, (the reverse design), was added with dimensionals.

The Merry Christmas sentiment was stamped in black ink and also added with dimensionals.

The little Christmas bell was stamped and then coloured with Daffodil Delight and Poppy Parade Stampin’ Blends markers. This was die cut with the coordinating Framelits.

Additional sprigs were cut from Old Olive card stock and added with Multipurpose glue.

I hope you enjoyed this project. The supplies used are listed below.

Thanks for stopping by today and happy Stampin’!

Verity xx

Product List

Gorgeous Blended Seasons

Good Morning Everybody,

Today’s project is a simple presentation of the Blended Seasons stamp set. I have also used the new collection of watercolour Pencils.

These beautiful products are only available during August.

Even better, purchasing this bundle will also qualify for a Bonus Day voucher to spend during September.

To make the card, the floral image was stamped with Stazon Ink and allowed to dry.

Gorgeous Grape, Granny Apple Green and Garden Green watercolour Pencils were used to shade the image. A blender pen was used to smooth out the Colouring.

The panel was adhered to a Granny Apple Green layer, which in turn was added to a Gorgeous Grape card base with dimensionals.

Gray Granite ink was used to stamp the lovely sentiment.

I hope you enjoyed this project.

The supplies used are listed and linked to the online store below…. I would love to be your demonstrator.

Thanks for stopping by today and happy Stampin’!

Verity xx

Product List

Just Add Ink #420

Good Morning Everybody,

How about this for inspiration this week? Such a bright palette of colour.

The design team have made some great inspirational projects. You can see them here

For me the colours that show the most are pink-red, green and yellow. The botanical aspect is carried over in to my design with the use of leaves.

I opted for an Emboss resist watercolour card.

The leaves from the Blended Season stamp set were stamped with versamark ink on to watercolour paper. Clear embossing powder was added and this was heat set.

Lovely Lipstick, Pineapple Punch and Call Me Clover ink was pressed on to a silicon sheet and an aqua painter was used to colour over the card stock.

Once this was completely dry, extra ink was applied to the leaves. This brought out the detail of the stamped images.

The piece was adhered to some Night of Navy card stock and mounted on to a white card base.

A sentiment from Stitched All Around was stamped with Night of Navy ink and die cut with Blended Season coordinating Framelits. This was layered onto a larger Die cut from vellum and then adhered to the card base with dimensionals.

I hope you enjoyed this project. The supplies used are listed below.

Thanks for stopping by today and happy Stampin’!

Verity xx

Product List

Aqua Painters

[103954]

£15.50

For George

Hello Everyone,

Last week we said goodbye to one of our colleagues who was moving on to pursue her dream career.

As she loves butterflies, I knew exactly which set to use.

The large butterfly from the Beautiful Day was stamped with Stazon ink and allowed to dry completely.

In the meantime, the base was prepared by layering Whisper White card stock on to Gray Granite card stock. Some Bermuda Bay ink was used to add some texture to the background.

The sentiment was stamped with Melon Mambo ink and layered on to Smoky Slate card stock. The corners were rounded with the Detailed Trio punch.

The butterfly was coloured using watercolour pencils and blender pens. A bone folder was used to add shape the wings which were secured with dimensionals.

I hope you enjoyed this project.

The supplies used are listed and linked to the online store below.

Today is also the last day to enjoy the Designer Series Paper sale and take advantage of the amazing joining offer.

Thanks for stopping by today and happy Stampin’!

Verity xx

Product List

Project Share Project

Hello Everyone,

Welcome to another Project Share. This is where I have the great pleasure of showcasing the creativity of my crafting friends!

Please click the links provided in the text to see their beautiful cards in full.

This week I have chosen cards of a botanical theme….

First up is Amanda.

This card is a real triumph. This set is so pretty Amanda couldn’t wait to try it out. It is one of my favourites too. I love the texture that has been added for extra interest.

See more on how this card was made here!

Next we have Sally.

There are so many ways to use this stamp set with or without the matching dies. Sally has lots of ideas on her blog… She just can’t put it down!

See more of Sally’s ideas here!

And finally this week is Jill.

Jill has a distinctive simple yet effective style. This card uses beautiful colours and really shows what can be done with these products.

See more from Jill here!

I hope you have enjoyed these projects.

Thanks for stopping by today and happy Stampin’!

Verity x

Product List

Project Share Project

Hello Everyone,

Welcome to the Project Share Project.

This is where my crafting friends and I share each others work. There is so much inspiration to be had!

This week I am starting with Heidi. It amazes me how many different ways this lady comes up with to package little treats!

See more here!

Helzie is using this card to show off her colouring skills with Stampin’ Blend markers. Isn’t the shading amazing giving the flower a real 3D look; so pretty!

See more here!

Angelina has celebrated her birthday this year with some wonderful gift packaging ideas. Love the colour combos with these two boxes and that black ribbon is lush!

See more here!

I hope you gave enjoyed seeing these projects.

Thanks for stopping by today and happy Stampin’!

Verity x