Hello Everyone,
If you need a stamp set to cover all kinds of celebrations this could be the one for you!
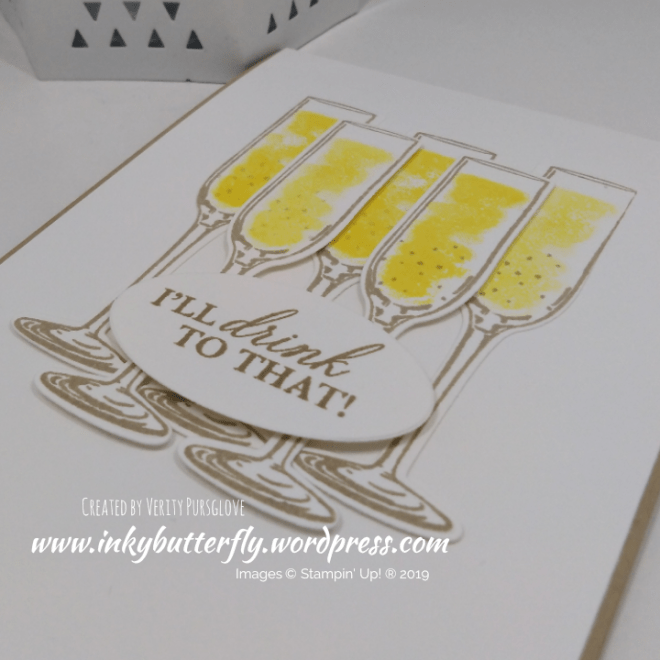
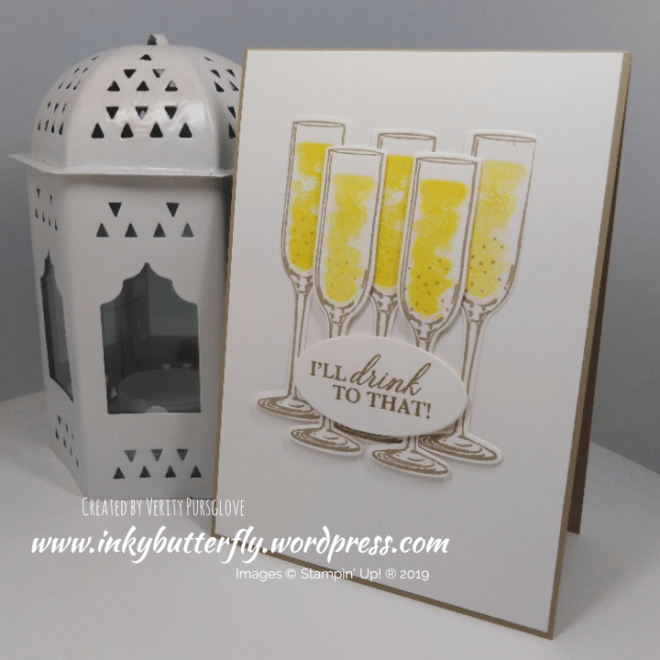
This card was simple to put together.
The flutes were stamped first, I used Crumb Cake, but could easily be Smoky Slate or even Balmy Blue.
The liquid, (champagne in this case) was stamped with Daffodil Delight Ink. Some bubbles were added with 2nd generation Crumb Cake Ink. Some Wink of Stella Glitter also helped add some fizz.
All the glasses were die cut. Three glasses were adhered first flat to the card. The remaining two were added with dimensionals.
Finally, the sentiment was stamped and die cut. A double layer of dimensionals lifted this from the rest of the elements.

I hope you enjoyed this project. The supplies used are listed and linked to the online store below.
I would love to be your demonstrator.
Thanks for stopping by today and happy Stampin’!
Verity xx
Product List
")
|
||

|

|

|

|

|


")
")


")


")


")