Hello Everyone,
Isn’t this a fun stamp set! This cute little house can be whatever colour you like, up in the tree or down on the ground.
My little cabin is hidden away in the woods!
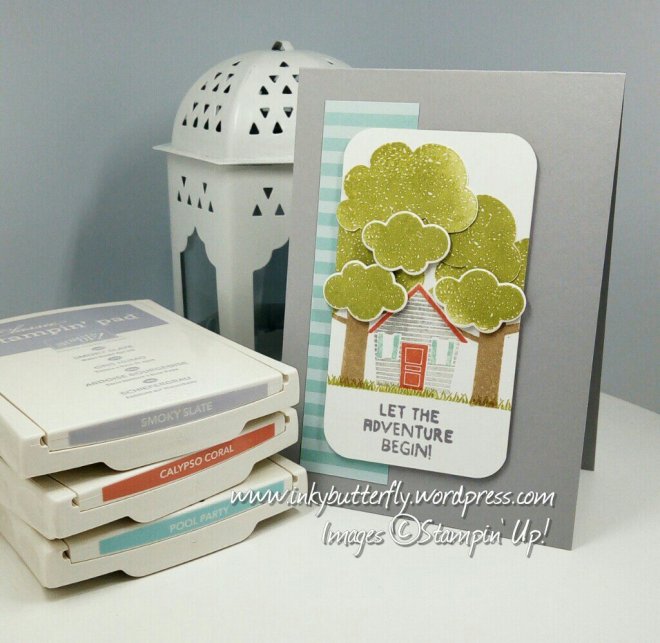
The images have been stamped on to a 2-1/2 inch strip of Whisper White card stock.
The house was stamped with Miky Slate, Calypso Coral and Pool Party inks.
Additional tree canopies were stamped and cut out separately to add extra dimension.
The sentiment was added with Smoky Slate ink. The corners of the panel were rounded with the Detailed Trio punch.
A strip of Pool Party DSP was adhered to the left hand side of a Smoky Slate card base. The stamped panel was then positioned over the top using dimensionals.

I hope you enjoyed this project. The supplies used are listed and linked to the online store below.
Please use the host code 4QCQ4HPT when placing your order.
Thanks for stopping by today and happy Stampin’!
Verity x
Product List

|

|
|

|
||

|

|