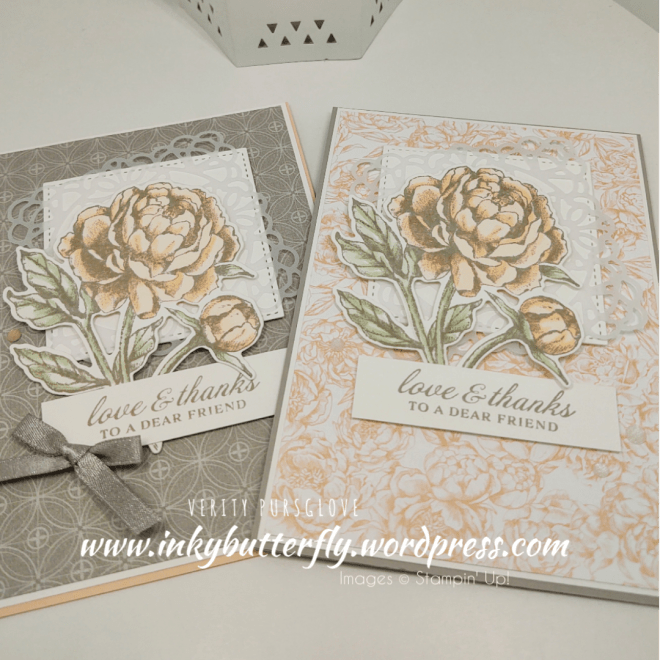
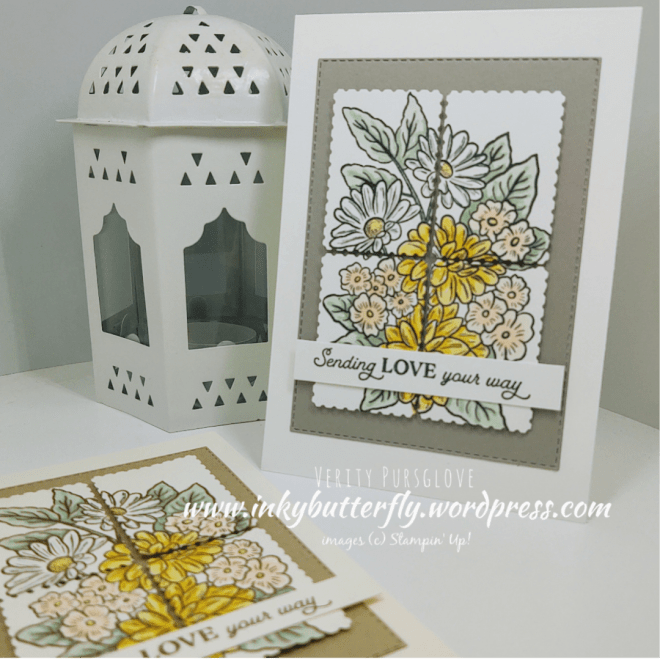
I can’t believe I have resisted using this product suite before now!
I used almost everything in the collection apart from the embossing folder!
See how I made this card in my video tutorial;
If this suite is on your wish list, then why not invest the extra £9 in joining Stampin’ Up! You can then choose additional free products, (up to a total of £130), free shipping and a minimum 20% discount on future purchases!
I hope you enjoyed this project.
The supplies used are listed and linked to the online store below.
If your order is less than £150, use the Hostess Code BREHFN2Q when placing your order to get an extra gift from me!
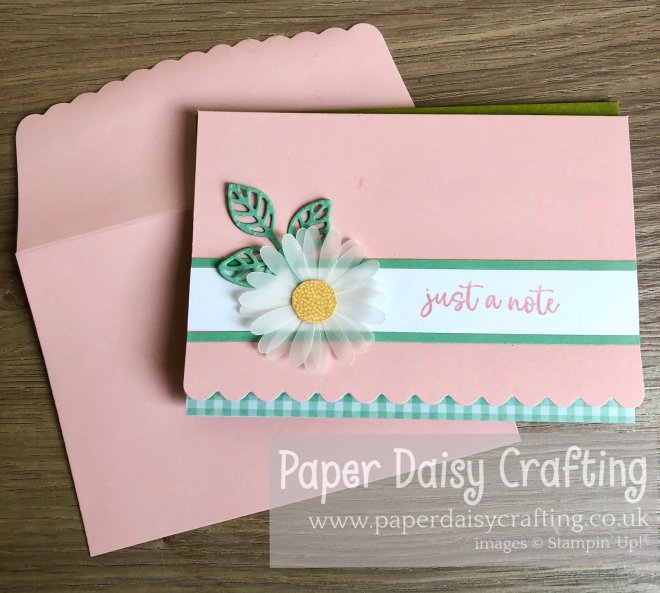
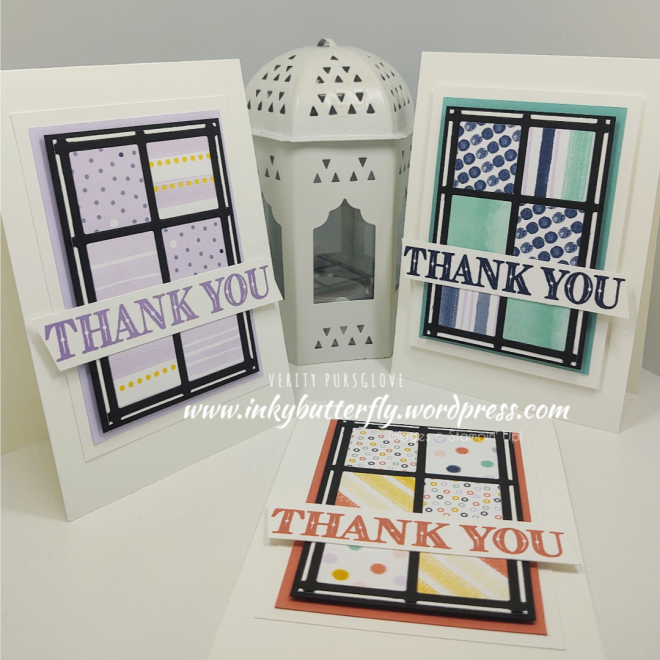
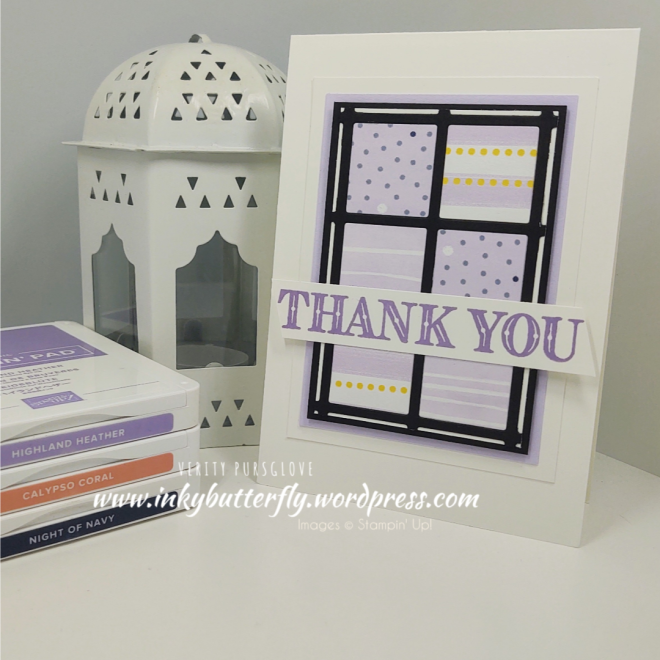
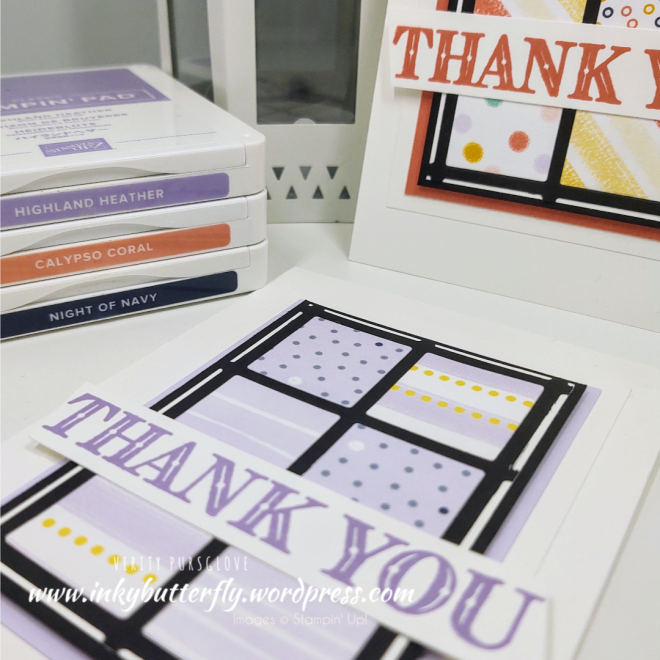
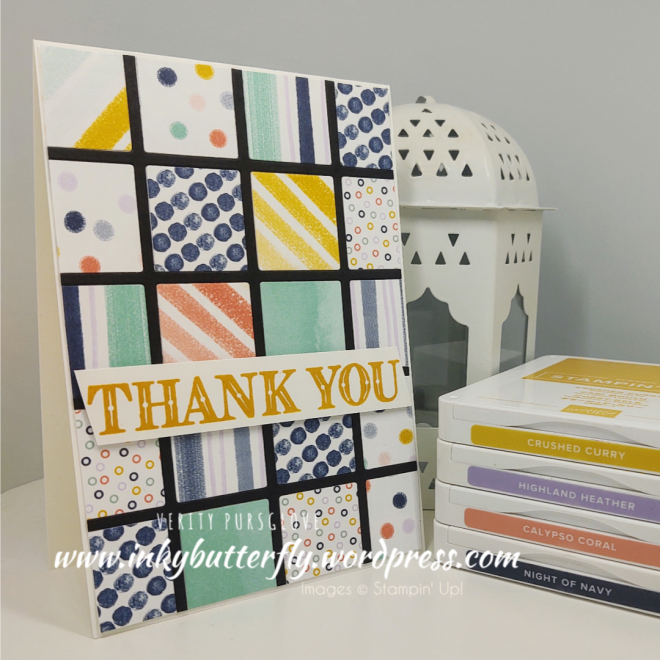
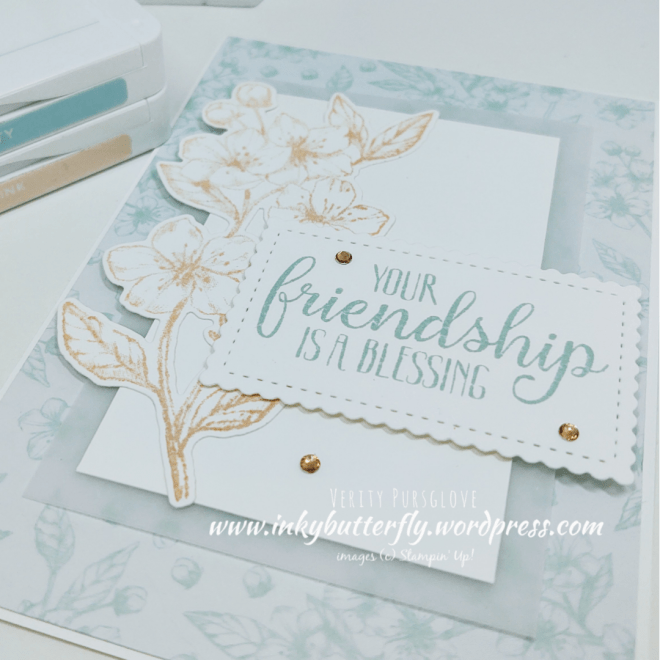
After yesterday’s video hop challenge to use Designer Series Paper, I have pulled out some more to work with today!
This is the Flowers for Every Season collection. This can be purchased alone or as part of a product suite. Even better, all the designs coordinate with the 2020 in colours!
See how I made this card in my video tutorial;
The vellum flowers really finish off the card.
And the rhinestones hide those glue dots!
I hope you enjoyed this project. The supplies used are listed and linked to the online store below.
There are some fantastic new products that I can’t wait to order!
There are some great promotion offers too.
Pick a Free bundle…. This makes the Starter Kit even better value for money. Totally customisable and delivered for free too.
There’s good news for hosts too with an extra £20 of rewards if the order reaches £200.
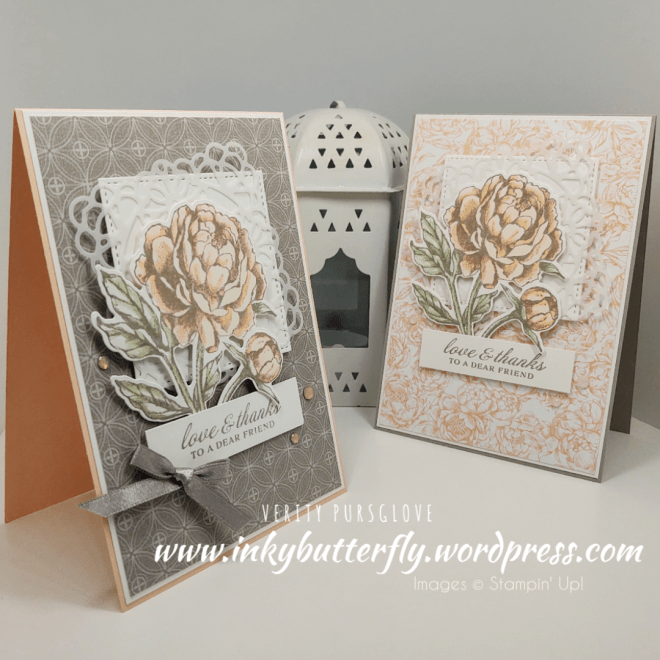
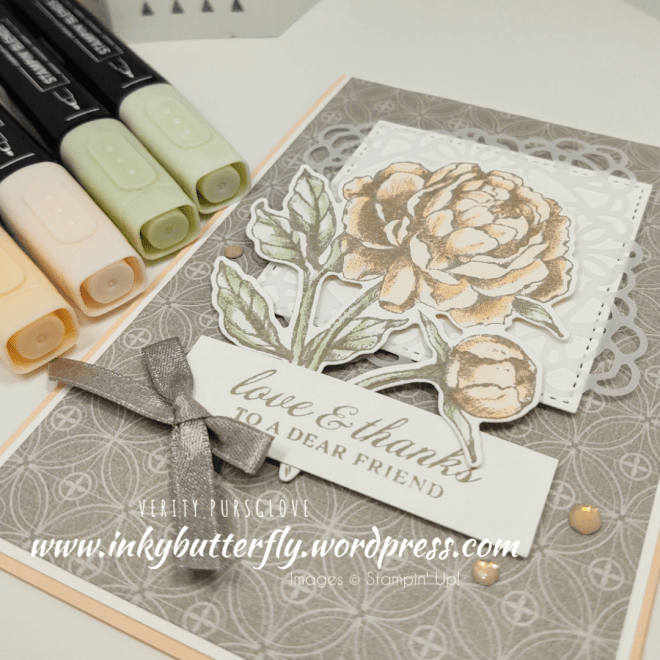
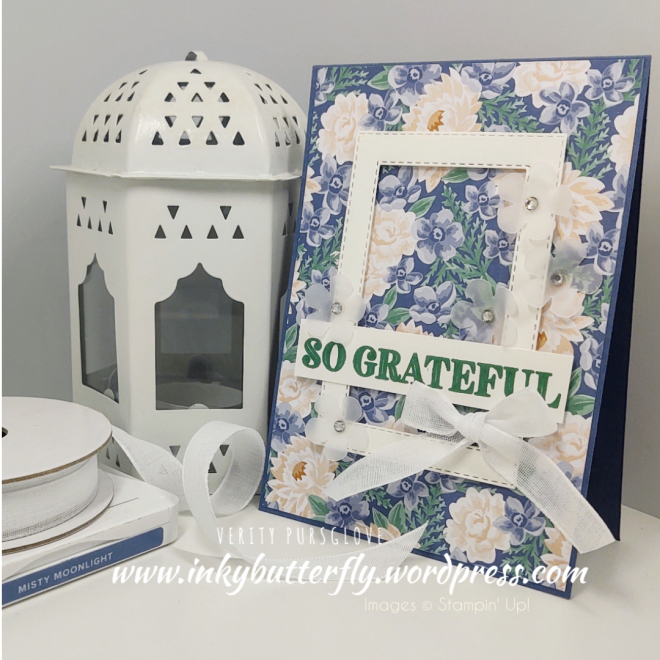
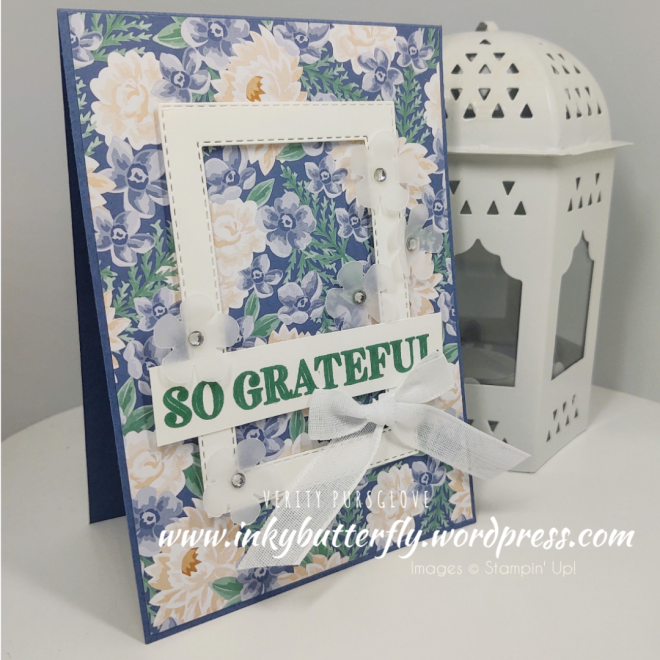
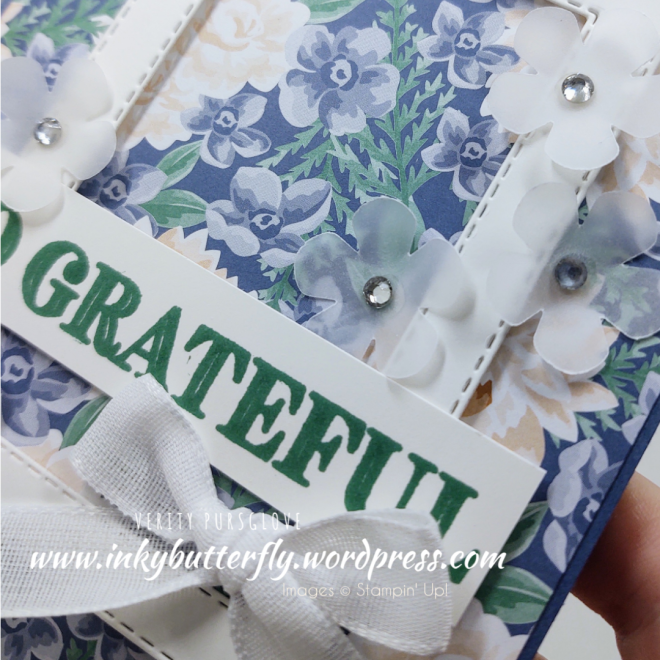
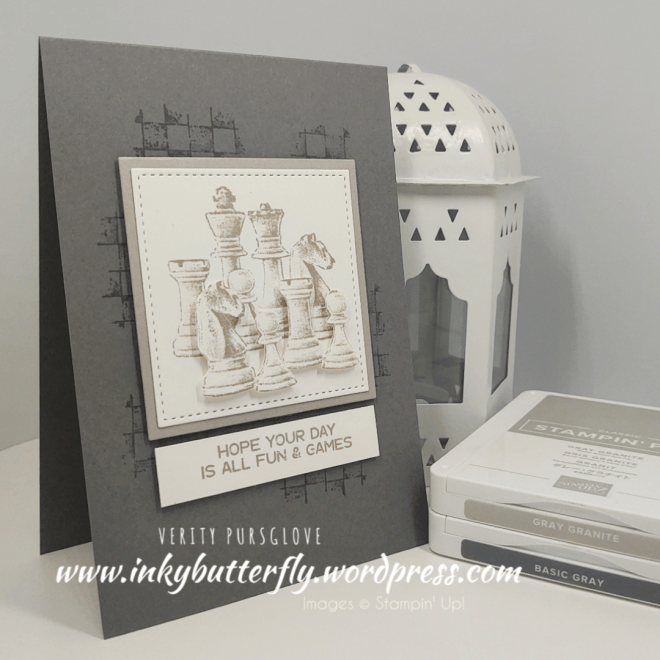
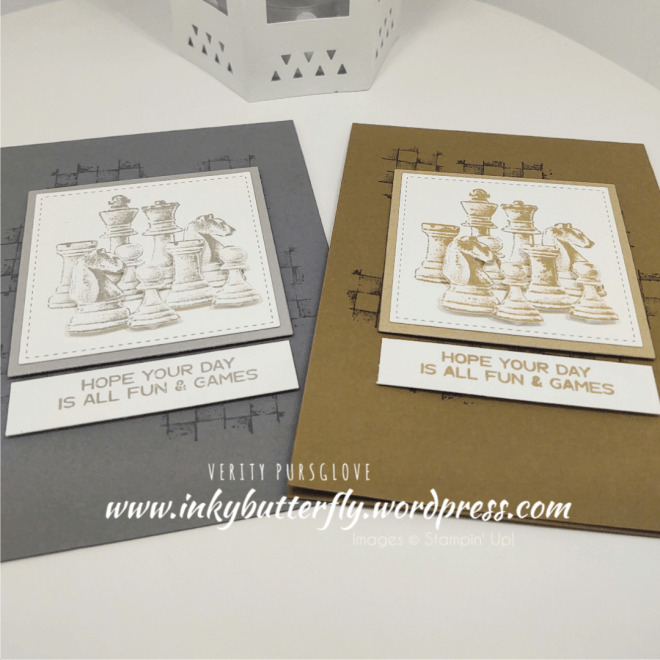
Now for today’s project, I am test driving the Tasteful Touches stamp set, the coordinating Tasteful Labels dies and In Good Taste Designer Series Paper.
I also pulled out the Early Espresso Faux Suede ribbon too.
See how I made this card in my video!
I hope you enjoyed this project. The supplies used are listed and linked to the online store below.
If your order is less than £150, use the Hostess Code VKY3SPC7 when placing your order to get an extra gift from me!
I made this card ages ago and completely forgot to share it!
I have to different ink blending methods to create this project.
I also used the amazing Tropic Chic stamp set which is sadly retiring. To achieve the gradient colour on the leaves, I used the Stamparatus tool, inking and stamping each image twice.
Here is video showing how to create a blended background!
I hope you enjoyed this project. The supplies used are listed and linked to the online store below.
Welcome to this week’s Project Share. As always my friends have created some lovely work. Please use the links to visit their blogs and read more about their projects.
Jill is sharing another layout using her one sheet wonder, combining dies and punches
Today is the final day of my doubling up week, I hope you have liked what I have sharing with you.
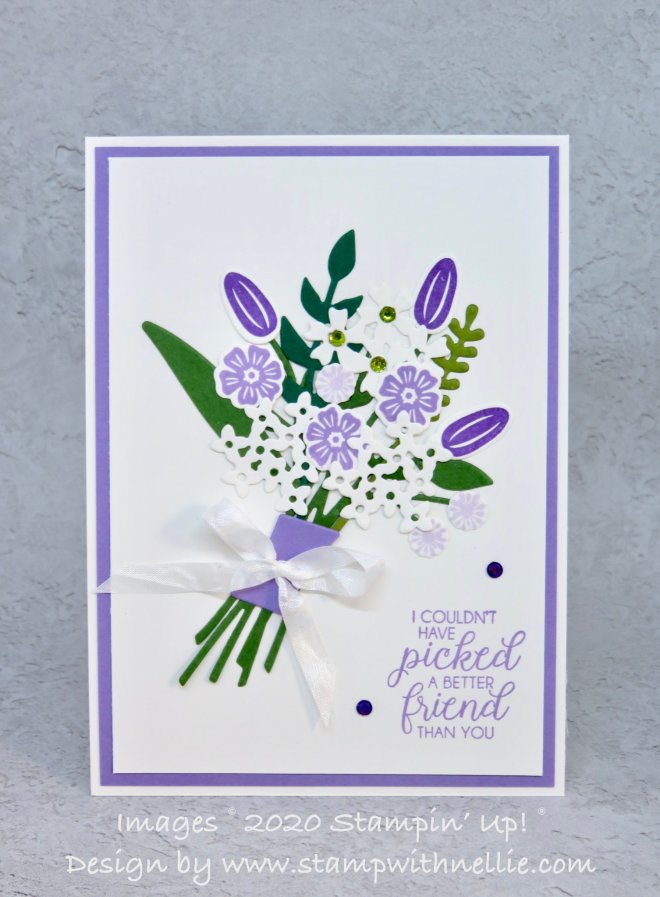
For this post I am using the same colour combo with two different stamp sets!
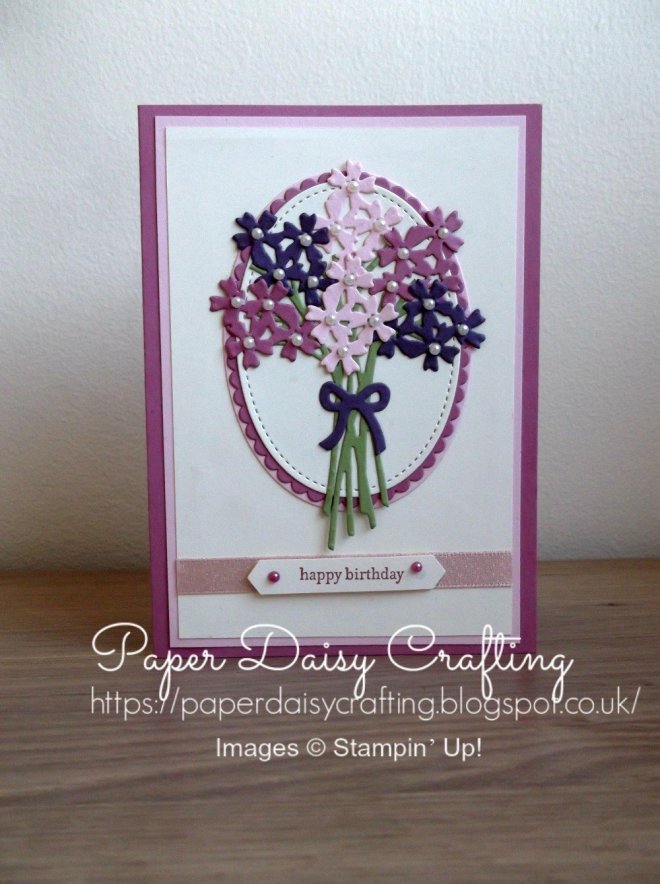
The first uses Beautiful Bouquet and the coordinating dies.
I started with a Grapefruit Grove card base and added layers of Pear Pizzazz and Whisper White card stock.
Flowers and leaves were stamped and die cut ready to add to the card. The sentiment was stamped with Soft Suede ink and die cut using the Stitched So Sweetly die set.
The elements were adhered to the card with dimensionals and a small bow was added.
My second card uses the same colours, but uses the Colourful Seasons stamp set instead. I do use the coordinating dies too but these are no longer available.
See how I created this card as it happened in the video below:
I hope you enjoyed this project. The supplies used are listed and linked to the online store below.
This week I’m doubling up! Two cards each day with the same or similar products!
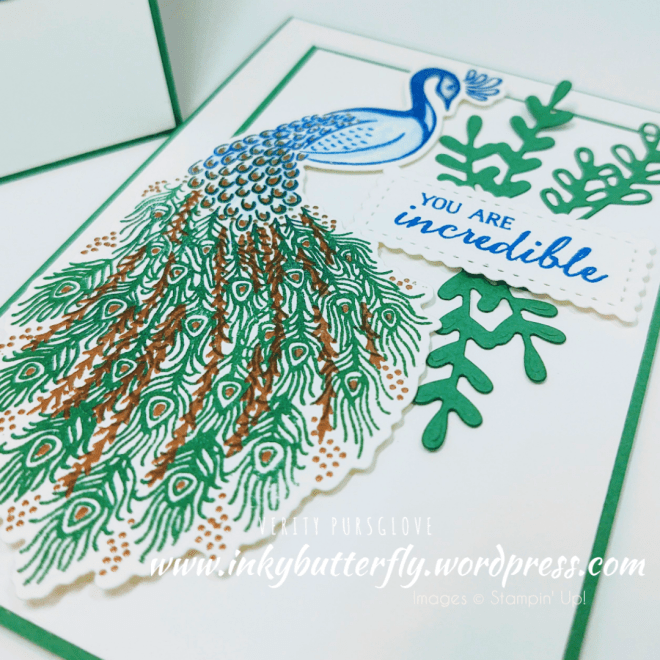
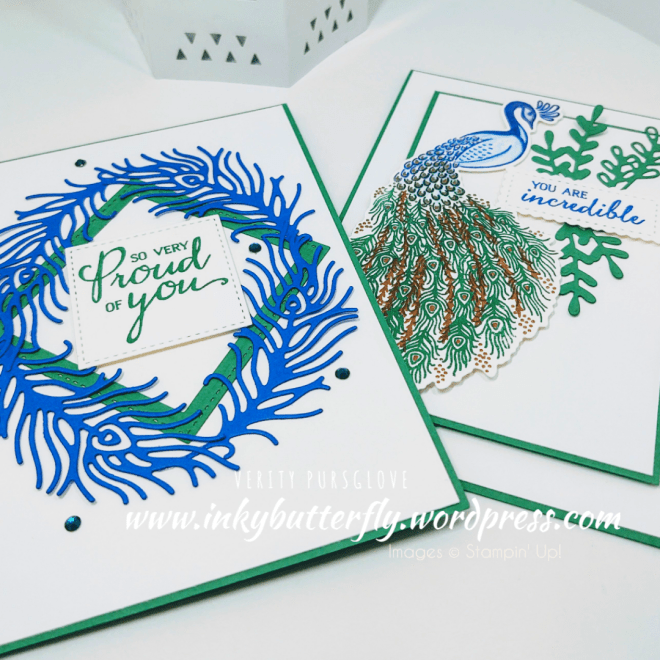
Today, it’s the Royal Peacock stamp set and matching dies with Call Me Clover and Blueberry Bushel retiring In Colours.
For the first card, the peacock was stamped with the assistance of the Stamparatus, first with Blueberry Bushel for the head and body and Call Me Clover for the tail.
The details were heat embossed with copper powder, (also retiring), and then die cut.
Some additional feathers were die cut to embellish the sentiment. This was stamped with Blueberry Bushel ink and cut with the Stitched So Sweetly dies.
The second card is completely different!
Four large feathers were die cut from Blueberry Bushel card stock and adhered together to form an oval-ish shape.
Stitched Square dies were used to cut the green frame and the stamped sentiment.
A few rhinestones added some extra interest to the background.
I hope you enjoyed this project. The supplies used are listed and linked to the online store below.
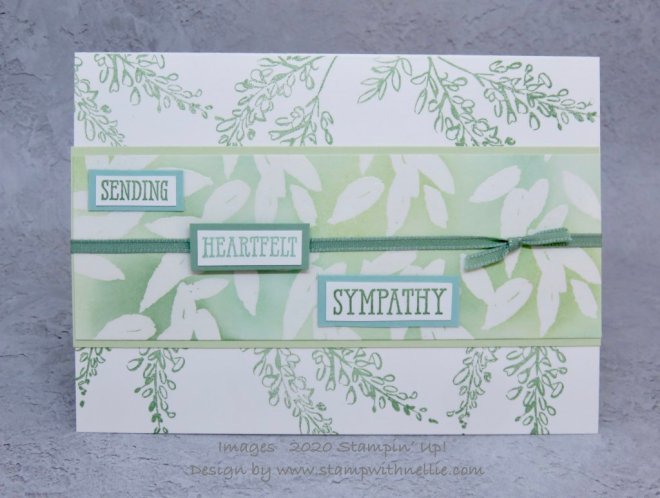
It is a sad reality that not all the cards we make and send are for happy events. There is comfort however, that even at these sad times, a beautiful handmade card can be created.
I used a simple layout, starting by stamping a Whisper White card panel with an image from the Verdant Garden stamp set and Smoky Slate ink.
The panel was layered with Basic Grey card stock and some Polka Dot Tulle was wrapped around the middle. This was adhered to a white card base with dimensionals.
The sentiment is from the Peaceful Moments set and was stamped with Smoky Slate ink. This was then die cut and also added to the card with dimensionals.
I hope you enjoyed this project. The supplies used are listed and linked to the online store below.
Welcome to this week’s Project Share. As always my friends have created some lovely work. Please use the links to visit their blogs and read more about their projects.
This week the list of retiring products was released, so all the projects I am sharing feature some of those items. They are only around til the end of May or while stocks last!
Jill’s clean and simple card really shows off these stunning dies. What colours would you use?
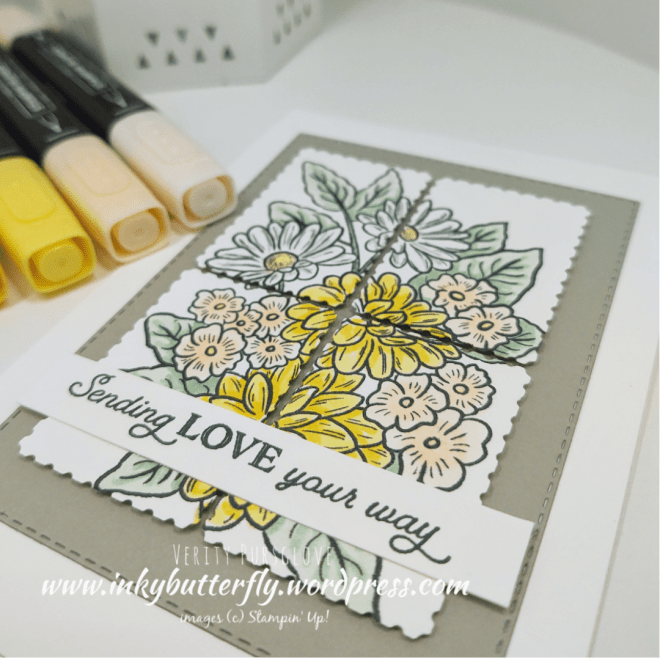
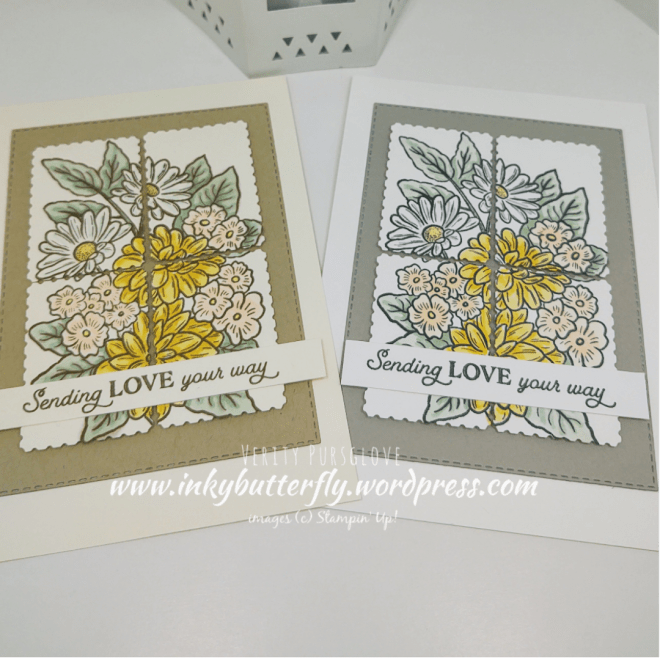
Photopolymer stamp sets are so easy to use, especially when lining up images like this.
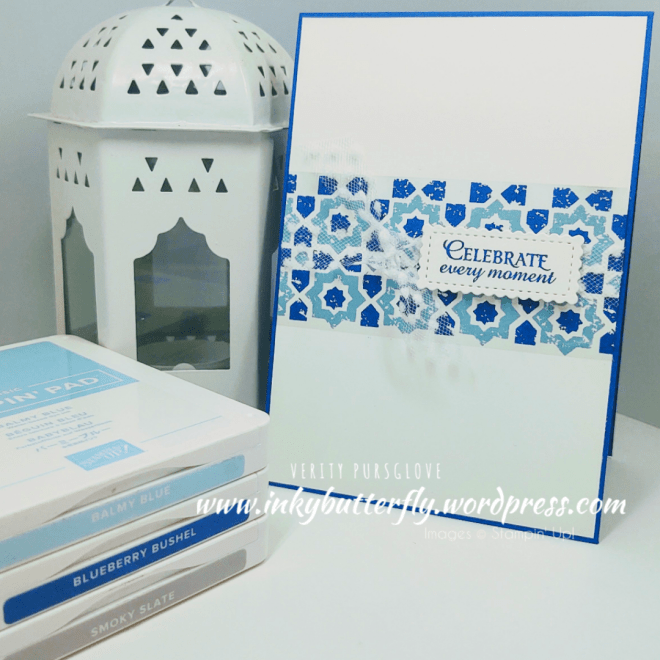
Here I have used the Verdant Garden stamp set to create this tile effect.
Again, j am using up some remaining Blueberry Bushel card stock for the card base.
Balmy Blue ink was used first, stamping the image across a white layer. Blueberry Bushel ink was used fill in the gaps with the compliment image from the set.
Polka Dot Tulle, (not retiring!), was added around the layer before adhering it to the card base.
The sentiment was taken from the Honey Bee stamp set and cut with the smallest Stitched So Sweetly die, (also staying!).
I hope you enjoyed this project.
The supplies used are listed and linked to the online store below.
Have you checked out the Last Chance products yet?
The new annual catalogue launches next month which means making room in the warehouse and retiring some products.
There are a few things to consider when looking at the list;
1. Bundles will retire, but may still be available as individual items in the new catalogue.
2. 2018 In Colours and anything with those colours included, (DSP, ribbon, embellishments etc.) will retire…. But don’t worry new colours are on the way!
3. Individual Stampin’ Blends markers will no longer be available.
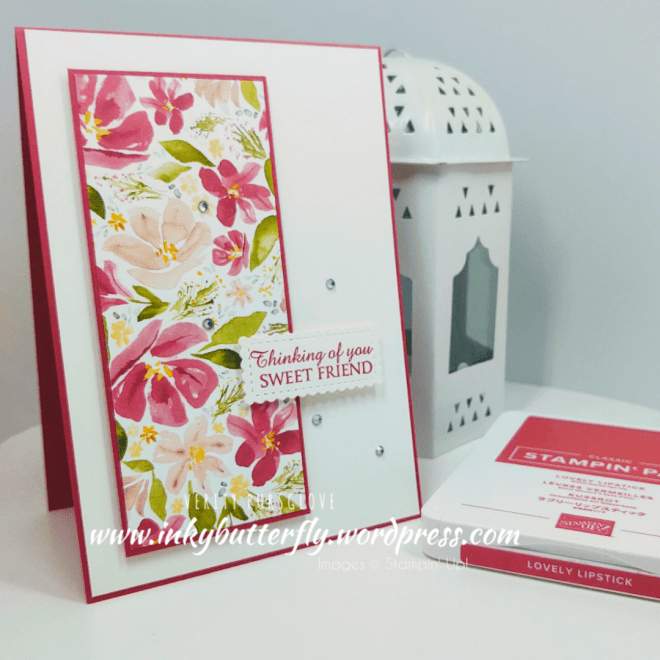
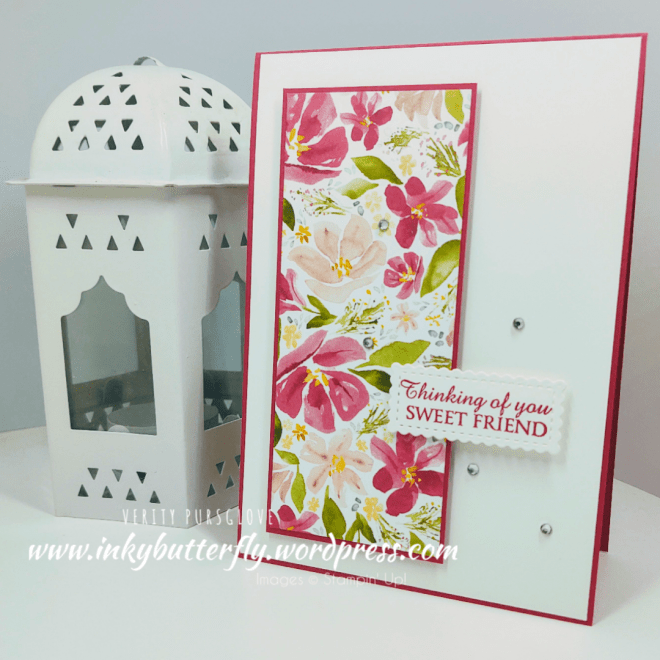
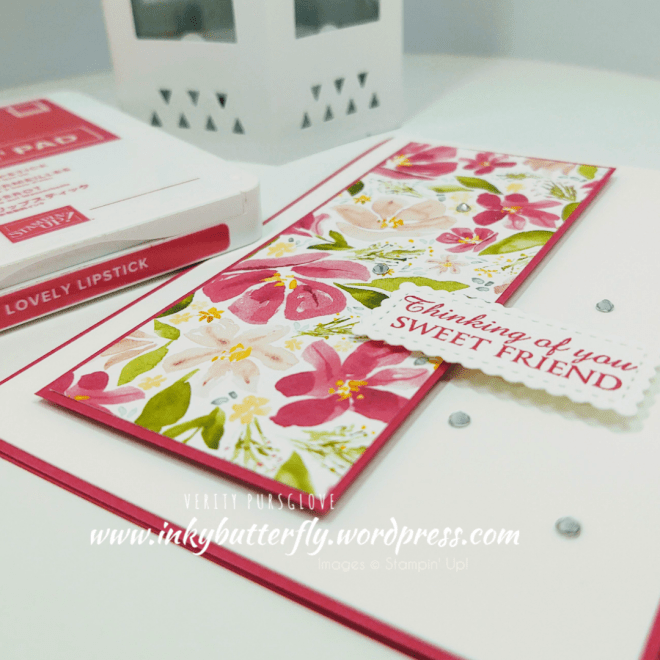
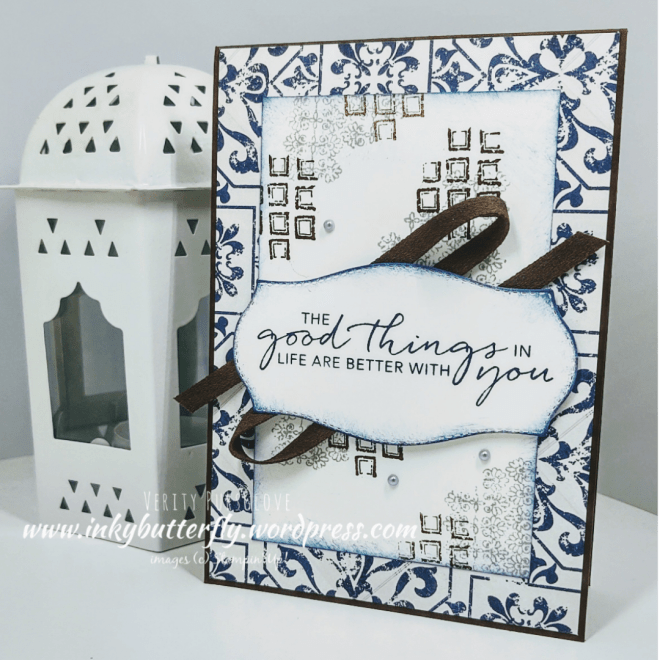
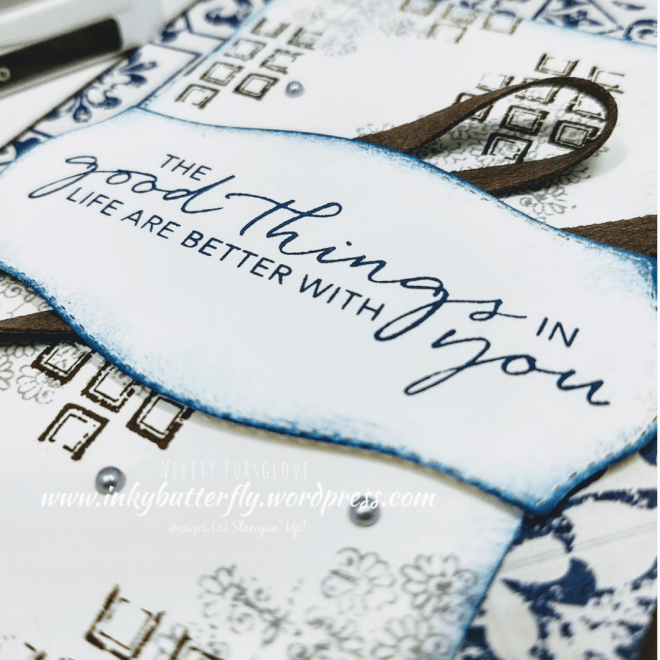
So this card uses retiring items, Lovely Lipstick ink and card stock, Best Dressed DSP and the Honey Bee stamp set.
The DSP panel measures 2 by 5 inches and was adhered to Lovely Lipstick card stock cut 1/8 inch larger on both sides.
I adhered this panel to a preprepared card base with dimensionals.
The sentiment from the Honey Bee stamp set was stamped with Lovely Lipstick ink and cut with the Stitched So Sweetly dies…. Thankfully these dies are staying, I use them so much!
A scattering of clear rhinestone jewels finished off the card.
I hope you enjoyed this project. The supplies used are listed and linked to the online store below.

")
")


")


")


")


")


")
")


")


")


")