Big Time

Good Morning Everybody,

I fancied doing some colouring so I pulled out this Animal Outing stamp set.

As I was using Stampin’ Blends to colour, I stamped the images with Memento ink on to a 3-1/2 square of Whisper White card stock.

The rhino was coloured with Smoky Slate and Ivory;

The frog is Rich Razzleberry;

The bird is Pool Party and Bermuda Bay;

Old Olive and Bronze were used for the branch.

The card base was made from Call Me Clover card stock which was cut to 8 by 4 inches, scored at 4 inches.

A 2 inch strip of In Colour DSP was added to the right hand side of the card, then embossed with the Layered Leaves Dynamic Textures embossing folder.

Layering Squares framelits were used to make a small frame of card stock which was adhered at an angle with mini dimensionals. Some Wink of Stella glitter pen added some sparkle.

The stamped panel adhered over the top of this.

The cute sentiment was stamped with Call Me Clover ink and cut with a 1-1/4 inch circle punch. This was added to a 1-3/8 scallop circle cut from the same DSP.

I hope you enjoyed this project. The supplies used are listed below. Click the picture to be directed to the online store.

The hostess code for orders less than £150 is 4QCQ4HPT. I would love to be your demonstrator.

If you wish to place an order of more than £99, consider joining Stampin’ Up! This means you can choose £130 worth of product to build your custom starter kit. There is no obligation to sell. Find out more here!

If you want a free copy of the catalogue please contact me, otherwise a PDF copy is available to view in the menu.

Thanks for stopping by today and Happy Stampin’!

Verity x

Product List

Textures of the Sea #FMS339

Hello Everyone,

This week’s sketch challenge has been set by Jen Brum.

The design team have made some great projects as inspiration; you can see them all on the Freshly Made Sketches blog, here!

This is my entry for the challenge;

I really wanted to use Sea of Textures on this card. I thought the shape could be a coral reef on the sea bed.

I picked out some paper from the coordinating designer series paper collection. The paper was cut diagonally, one piece was flipped over to create the “V” shape.

Before adhering to the card, I stamped the tall sea weed across the background with Tranquil Tide ink.

The papers were added to the card, leaving space for other pieces to be positioned behind them.

Other seaweed and coral elements were die cut from Old Olive, Lemon Lime Twist and Fresh Fig. These were tucked in place.

Finally, the octopus was stamped with Night of Navy ink, die cut and adhered with dimensionals.

I hope you enjoyed this project. The supplies used are listed below.

Thanks for stopping by today and Happy Stampin’!

Verity x

Product List

Getting There

Hello Everyone,

The project for today uses the new Lilypad Lake bundle.

I like to use the “small stamps” to make cards as they can get overlooked.

This card features the little sail boats, I thought the sentiment was just right.

I have used Whisper White card stock to stamp on measuring 3-3/4 by 5-1/4 inches.

A combination of Coastal Cabana and Balmy Blue ink was used to stamp the water. First, second and third generation stamping added depth and texture.

The sentiment was stamped so the first half lay on the horizon, with the second part off set to the right.

The boats were stamped with Poppy Parade and Gorgeous Grape inks. A blender pen was used to move the ink slightly to add a hint of colour to the sails.

These were die cut and adhered to the card, using a combination of snail and dimensionals.

The panel was added to Tranquil Tide card stock and then on to a Very Vanilla card base.

I hope you enjoyed this project. The supplies used are listed below. They will be available to purchase from 1st June.

If you don’t have a copy of the new catalogue, please contact me and I will send one out to you free of charge!

Thanks for stopping by today and Happy Stampin’!

Verity x

Product List

Blender Pens

[102845]

£10.75

Thinking of You #GDP140

Good Morning Everyone!

This week the Global Design Project team are casing this wonderful card from Brian King.

You can see all their cards here!

This is my interpretation using the new Rooted in Nature bundle.

A piece of Whisper White card stock was cut to 3 by 4-3/4 inches.

The bottom portion was stamped with leaves using second generation Soft Sea Foam and Mint Macaron inks.

The sentiment was added over top with black ink.

The Rooted in Nature dies include some elements that will emboss rather the cut. The coordinating stamped leaves were embossed with the Big Shot.

The panel was adhered to some Soft Suede card stock. This was then added to a Tranquil Tide card base using dimensionals.

The beautiful tree as stamped twice with Blackberry Bliss ink and die cut. The lighter image was adhered flat, the other was raised using mini dimensionals.

As a final touch, some Grapefruit Grove twine was added to the tree trunk.

I hope you enjoyed this project. The supplies used are listed below, and available from 1st June.

Thanks for stopping by today and Happy Stampin’!

Verity x

Product List

Big Shot

[143263]

£99.00

Mini Tag Album

Hi Everyone,

This cute little project I have cased from the lovely Liz Yuille at Old Stables Crafts. You can see Liz’s version of this project here!

Start with a 12 by 12 sheet of designer series paper. I chose a sheet from the Eastern Palace collection.

I used my Stampin’ Trimmer to cut and score the paper, but you could equally use the Simply Scored and some scissors.

Score the paper at 3, 6 and 9 inches.

Turn the paper and score at 2 and 10 inches.

Keeping the paper in this orientation, score at the 6 inch mark down to the first score line, (3 inches). Without moving the paper, cut up to the same score line, (9inches).

To form the book shape, fold in the 2 inch portions. Secure the ends with a little wet glue.

Fold along the short centre score line so that the 2 inch section is visible. Concertina fold along the remaining score lines.

There will be some “loose pages” that can be secured with some double sided tape.

To make the cover, I cut some Dapper Denim card stock to 4-1/8 by 6-1/2 inches. The long side was scored at 3-1/8 inches from both ends to create the “spine”.

Some grosgrain ribbon was adhered to the inside of the cover before securing the pages.

The front was decorated with more patterned paper and Eastern Medallion die cuts.

The tags were made by cutting 2 inch strips of card stock with the Tag Topper punch. These were threaded with Lemon Lime Twist mini striped ribbon.

I hope you enjoyed this project. The supplies used are listed below.

Thanks for stopping by today and Happy Stampin’!

Verity x

Product List

Bone Folder

[102300]

£6.25

Enjoy!

Hi Everyone,

Today’s card was made with minimal supplies.

The card base was made with Perfect Plum card stock.

A Very Vanilla layer was stamped with the splatter image from the Swirly Bird stamp set using Perfect Plum ink before adhering to the card base.

The smaller layers were cut one inch smaller the the base layers.

A selection of swirl images were stamped on to the Very Vanilla card stock. First, second and third generation ink were used to create texture.

A Perfect Plum die cut swirl was secured to the upper right portion, with the sentiment banner added over the top.

I hope you enjoyed this project. The supplies used are listed and linked to the online store below.

Thanks for stopping by today and Happy Stampin’!

Verity x

Product List

Inspire.Create #018

Hi there Everyone,

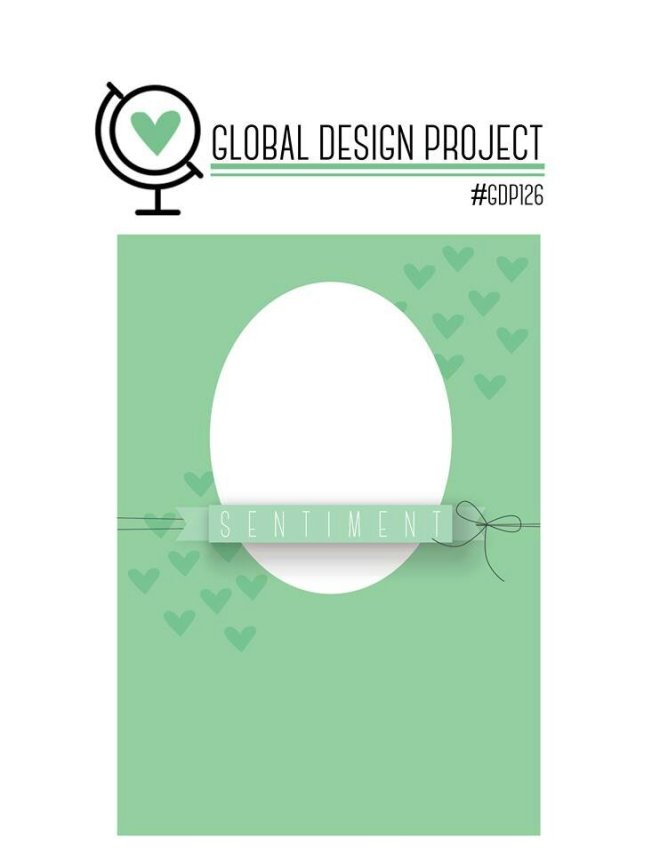
Today I am sharing my entry for the Inspire.Create.Challenge.

You can see what the design team have created here!

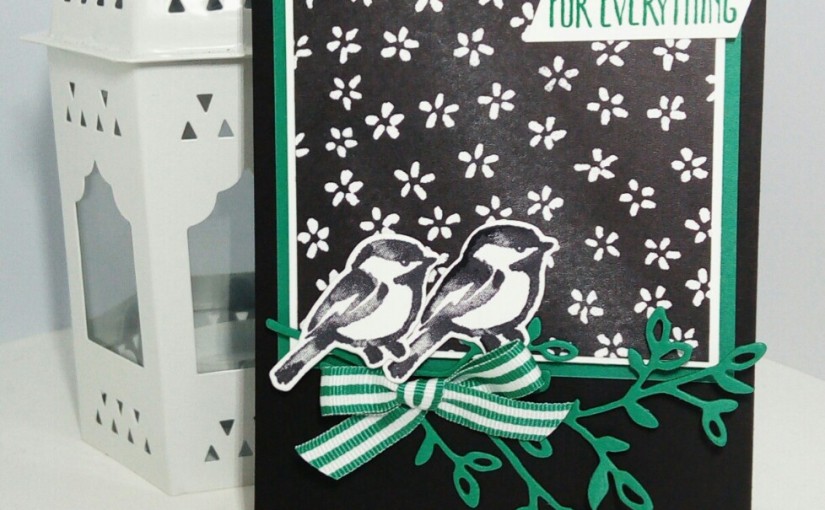
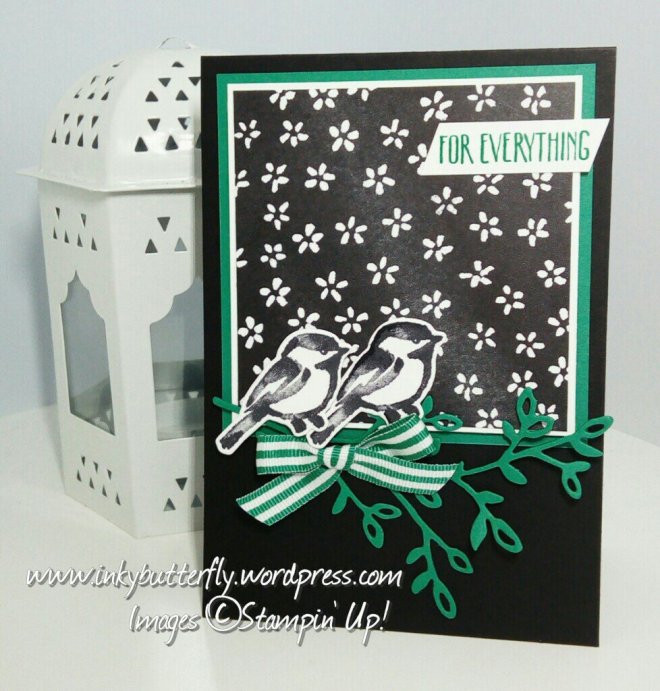
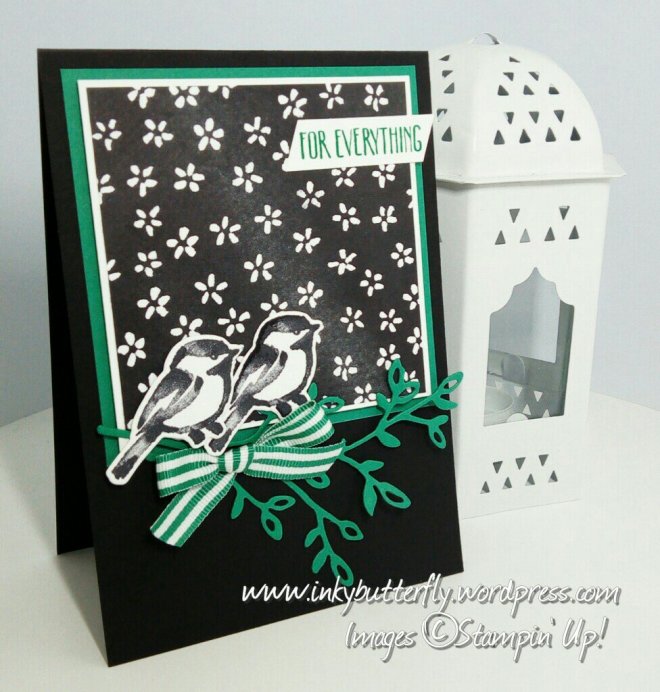
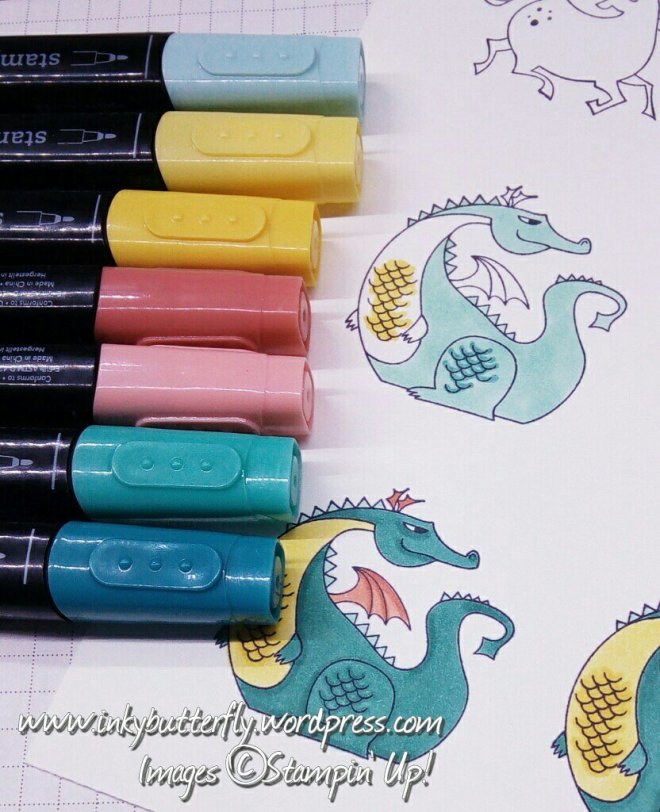
I decided to use one of the retiring stamp sets, Cool Treats and coordinating dies and mixed them with a retiring colour palette.

I started by constructing the cad base, first of all with Tempting Turquoise and adding Peekaboo Peach and Wild Wasabi. Finally, a white layer was stamped with the sprinkles image with Tempting Turquoise ink.

The central topper was made by adding a 3 inch square of Whisper White to Wild Wasabi and Peekaboo Peach layers.

The ice cream cones were cut from Crumb Cake card stock. First and second generation Sweet Sugarplum ink was used to stamp the ice cream.

These were adhered to the topper with dimensionals.

Finally, the word “sunshine” was die cut from Tempting Turquoise card stock.

I hope you enjoyed this project. The supplies used are listed below.

Thanks for stopping by today and Happy Stampin’!

Verity x

Product List

Thanks for the Smile

Hi there Everyone,

I thought I would break out the Dragonfly Dreams stamp set. This set will be carrying over in to the new annual catalogue!

If you would like a complementary catalogue then please contact me!

For today’s project, I have used Marina Mist to make the card base. Versamark ink was used to stamp along the edges.

A 3 inch strip of Whisper White card stock was stamped using the dragonfly image and Soft Sky ink. This was adhered to Soft Sky card stock before adding to the card.

A dragonfly was die cut from Soft Sky card stock, the wings were shaped before adhering to the card.

The sentiment was stamped with Marina Mist ink and adhered with dimensionals.

I hope you enjoyed this project. The supplies used are listed and linked to the online store below.

Thanks for stopping by today and Happy Stampin’!

Verity x

Product List

Sending Hugs & Kisses

Hi there Everyone,

I have made this cute card today using two of my favourite retiring colours and the Lovely Inside and Out bundle.

The card base is made with Dapper Denim card stock which I have layered with Soft Sky and White.

In a separate piece of white card stock, I stamped the sunburst sort of image using Soft Sky Dapper Denim inks. I adhered this to more Dapper Denim card stock and then to the card base with dimensionals.

I used the coordinating “hugs” die with layering circles to created the topper which was added to the card using dimensionals.

I stamped the additional parts of the sentiment with Dapper Denim ink and cut them with the Classic Label punch, (also retiring).

I hope you enjoyed this project. The supplies I have used are available while stocks last. The links are below.

Thanks for stopping by and Happy Stampin’!

Verity x

Product List

Lift Your Spirits

Good Morning!

This is one of favourite stamp sets and I am so glad it will be staying with us.

Today I am pairing it with the retiring In Colour, Dapper Denim.

The card base was made in the usual way by cutting an A4 sheet lengthways at 4-1/8 inches and scoring at 5-7/8 inches. A white card layer was added to this 1/4 inch shorter and narrower.

Subsequent layers of Dapper Denim and Whisper White card stock were cut 1/4 inch smaller.

These layers were adhered together. Some striped grosgrain ribbon was wrapped around these layers before adding to the card base with dimensionals.

The sentiment was stamped with Dapper Denim ink and cut to size and adhered to some Dapper Denim card stock. This was added to the card where the ribbon crossed using dimensionals.

Three balloons were stamped and die cut. Two were adhered using dimensionals and the third flat to create an illusion of distance.

I hope you enjoyed this project. The supplies used are listed and linked to the online store below.

Also check out the exclusive customer pre-order Share What You Love bundles, the Retiring Products list and the bargains on the Clearance Rack!

Thanks for stopping by today and Happy Stampin’!

Verity x

Product List

My World is Brighter

Hello Everyone,

I am using the Paisleys and Posies stamps and coordinating dies for today’s project.

I have chosen a neutral colour combination of Sahara Sand, Soft Sky and Crumb Cake.

The card base was built using Sahara Sand card stock and adding layers of Soft Sky and Crumb Cake card stock.

The Crumb Cake was stamped with the large dotted outline first.

The make the topper, I stamped and die cut three of the shapes from the stamp set.

The sentiment was stamped with Early Espresso ink on to Very Vanilla card stock. The sentiment and Paisley shapes were arranged on to some Soft Sky card stock.

Some extra details were added to break up the empty space using Soft Sky ink and rhinestones.

I hope you enjoyed this project. The supplies used are listed and linked below. I would love to be your demonstrator!

Thanks for stopping by and Happy Stampin’!

Verity x

Product List

Inspire.Create #016

Good Morning!

This week the Inspire.Create design team are celebrating the 2016-2018 In Colours that will be retiring in June.

You can see their beautiful designs here!

And here are my projects;

I have used the You Move Me stamp and die bundle – also retiring – and really love how they turned out.

The card bases were cut to 4 inches and scored at 5-7/8 inches. Whisper White card stock was adhered to the front.

Five Stitched squares were die cut from white card. These were then cut again with the decorative butterfly die and adhered to a scalloped square cut from each of the In Colour card stocks.

Five additional butterflies were cut from white card stock. The wings were shaped with a bone folder and adhered to the scalloped square topper.

The sentiment was stamped in coordinating ink at the bottom of each card. I used my grid paper to line up each one.

The topper was adhered to the card with dimensionals.

Finally, three rhinestone gems were added to each of the butterfly bodies.

I hope you enjoyed this project. The supplies used are listed below.

Thanks for stopping by and Happy Stampin’!

Verity x

Product List

Tweet Thank You Card

Happy Sunday Everyone,

I love the little birds in this stamp set. Today I have used the sweet Cockatoo.

The card base is made from Whisper White card stock. Some Tutti-Frutti DSP and and an additional layer of Whisper White card were adhered to this.

The sentiment was stamped with Peekaboo Peach ink. This was layered with Striped grosgrain ribbon and Peekaboo Peach card stock.

The bird was stamped in black Memento ink and lightly coloured with a Pumpkin Pie Stampin’ Blends marker. The image was due cut with a Stitched Circle framelit and adhered over the top of the sentiment.

I hope you enjoyed this project. The supplies used are listed and linked to the online store below.

Thanks for stopping by and Happy Stampin’!

Verity x

Product List

Don’t forget to check out the retiring product list.

Bargains to be had from the clearance rack too!

Love Stampin’ Up! products? Why not join. Find out more here.

Smooshed Heart

Good Morning,

I am trying something new today… Ink smooshing!

I prepared a card blank using Rose Red card stock.

On some watercolour paper, I stamped the striped heart from the Heart Happiness stamp set using clear Versamark ink. This was heat embossed with clear powder.

Once cool, I smooshed Rose Red ink over the top. To do this, ink was applied to a piece of plastic which was then swiped and dabbed over the project.

While this dried, I die cut hearts from black card stock and vellum. A Tailored Tag was cut from Rose Red card stock.

Some black metallic thread was adhered to the card first. The other elements were then added over the top.

The greeting is from the Window Shopping set. This was stamped with Rose Red ink and adhered with dimensionals.

I hope you enjoyed this project. The supplies used are listed and linked to the online store below.

Thanks for stopping by and Happy Stampin’!

Verity x

Product List

Shelter from the Storm

Good Morning Everybody,

Today’s project is clean and simple, leaving lots of white space.

The card base is made with Perfect Plum card stock.

Card layers of Elegant Eggplant and Whisper White were added to the front.

The umbrella elements from the Weather Together were stamped on to Whisper White card stock with Perfect Plum and Wisteria Wonder inks.

The images were die cut with the coordinating framelits and adhered with dimensionals.

The sentiment was stamped on to a banner. This was shaped and adhered using a dimensional in the centre.

I hope you enjoyed this project. The supplies used are listed and linked to the store below.

Don’t forget to check the retiring list.

The clearance rack has also been updated. There are some wonderful items available at reduced to clear prices! Grab yourself a bargain!

Thanks for stopping by today.

Happy Stampin’!

Verity x

Product List

Magical Day Shaker – Just Add Ink #404

Hi Everyone,

I am taking part in this week’s Just Add Ink Challenge.

This time the task is to create a Shaker card…. Not something I make a lot!

Pop over to the Just Add Ink blog to see what the design team have made.

Here is what I created.

I just love the Magical Day stamp bundle … It is such a shame it will be retiring at the end of May.

The card base is made with Pink Pirouette card stock. Some Daffodil Delight striped paper from the Tutti-Frutti collection was adhered to the front.

I chose to make a heart shaped aperture from Pink Pirouette card stock. Some Window Sheet adhered to the back with Fast Fuse.

Adhesive foam strips were applied around the aperture and the edge of the card stock.

Gold glitter flakes and some sequins were placed in the centre of the card. The aperture was then adhered over the top.

The sentiment from the stamp set was stamped with Pink Pirouette ink and cut with the Everyday Label punch. This was adhered with dimensionals withe some Silver metallic thread looped behind.

Three unicorns were coloured with Stampin’ Blend markers.

I hope that you enjoyed this project. The supplies used are listed below.

Thanks for stopping by and Happy Stampin’!

Verity x

Product List

For Dad

Good Morning,

The retiring product list for 2018 has been released! Stock is already flying out the door. See the list here!

Today’s card uses Marina Mist card stock, really gonna miss this colour.

A piece of Whisper White card stock was stamped using Timeless Textures. I chose Soft Sky, Marina Mist and Dapper Denim.

This was adhered to Dapper Denim card stock. Some striped grosgrain ribbon was wrapped around the card stock before adhering to the card base with dimensionals.

The Large Letter dies were used to cut the word Dad. This was adhered using multipurpose glue.

The ‘Happy Birthday’ was taken from the Thoughtful Banners stamp set and stamped using Dapper Denim ink.

I hope you enjoyed this project. The supplies used are listed and linked to the online store below – just click on the image.

Thanks for stopping by and Happy Stampin’!

Verity x

Product List

Without a Little Rain

Hi there Everyone,

With all the rain we have had recently, I thought this was just the card for today.

This is very simply made by die cutting the rainbow bands from coloured card stock.

I used Real Red, Pumpkin Pie, Daffodil Delight, Garden Green, Tempting Turquoise, Rose Red and Elegant Eggplant.

Three clouds were die cut from Whisper White card stock.

I decided to use one of these to stage the sentiment.

Using Smoky Slate card stock as the base really made the colours in the rainbow pop.

A few raindrops stamped at the top completed the design.

I hope you enjoyed this project. The supplies used are listed and linked to the online store below. If you live in the UK, France, Germany, Austria or The Netherlands, I would love to have your business.

Thanks for stopping by and Happy Stampin’!

Verity x

Product List

Razzleberry Unicorn

Happy Easter!

I hope you are all having a lovely break.

Today my card features the Magical Day bundle and matching DSP.

A 4 by 5-3/4 piece of DSP was wrapped twice with Rich Razzleberry stitched edge ribbon before adhering to a white card base.

The sentiment was stamped with Rich Razzleberry ink and cut with the coordinating banner die. This was added across the ribbon with mini dimensionals. A bow was also attached to the left hand side.

Dazzling Diamond Glimmer paper was cut with a 2-1/4 inch circle punch. This was adhered flat to the card.

The magical unicorn was stamped with memento ink and coloured with Stampin’ Blends. She was adhered to the card with dimensionals.

I hope you enjoyed this project. The supplies used are listed and linked to the online store below.

Thanks for stopping by and Happy Stampin’!

Verity x

Product List

Emerald Passion

Good Morning Everybody,

For today’s card, I am using the Petal Passion Suite.

To make the square topper I used;

3-3/4 inch Emerald Envy card stock,

3-1/2 inch Whisper White card stock,

3-3/8 inch Petal Passion DSP.

These layers were adhered together. I added dimensionals between the white and green layers, the others were adhered flat using Snail.

The leaf sprig was die cut from Emerald Envy card stock. I also stamped two of the little birds and die cut these too.

These were positioned along the bottom edge of the square topper.

A small bow was tied from Emerald Envy Striped Grosgrain ribbon.

The sentiment was stamped with Emerald Envy ink and positioned at the top of the card the balance the embellishments.

I hope you enjoyed this project. The supplies used are listed and linked to the online store at the bottom of this post.

Today is the last day of Sale-a-bration. Don’t miss out on great free products with a qualifying order of £45. Find out more here but be quick!

Now is a great time to join Stampin’ Up! Pick your own starter kit products to start your new hobby or business today! Find out more about joining here!

If you live in the UK, France, Germany, Austria or The Netherlands, I would love to have you onboard as part of my team!

Product List