Royal Peacock

Hello Everyone,

When I first saw the new catalogue back in April, this suite was top of my wish list. I couldn’t wait for it to arrive and start playing with it!

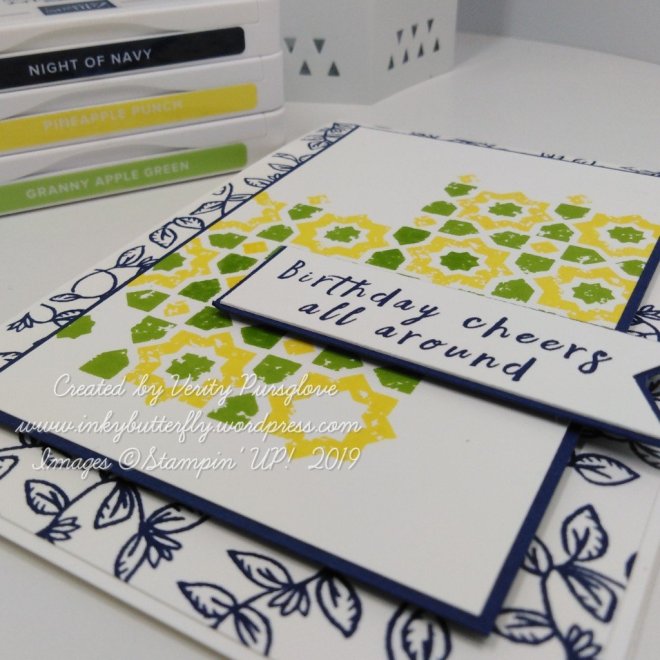
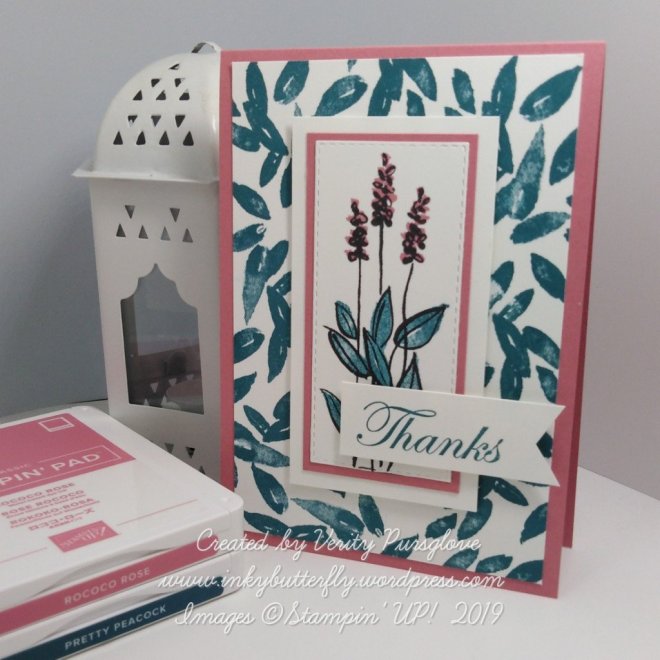
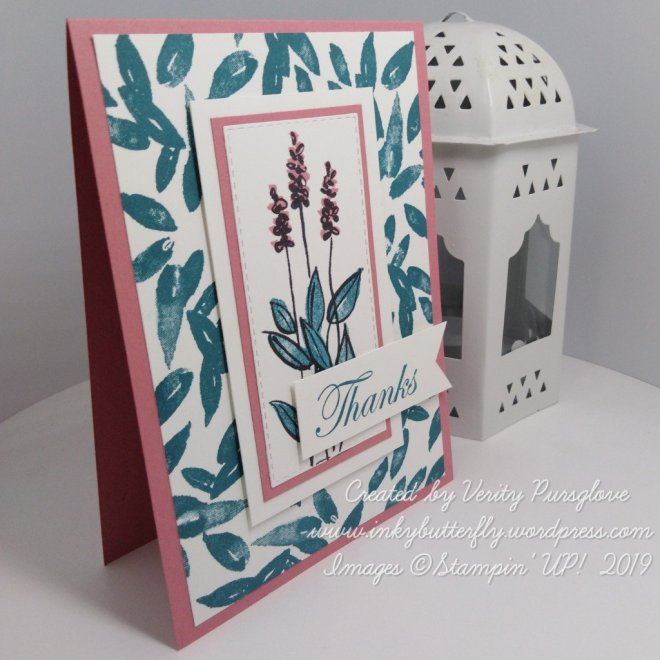
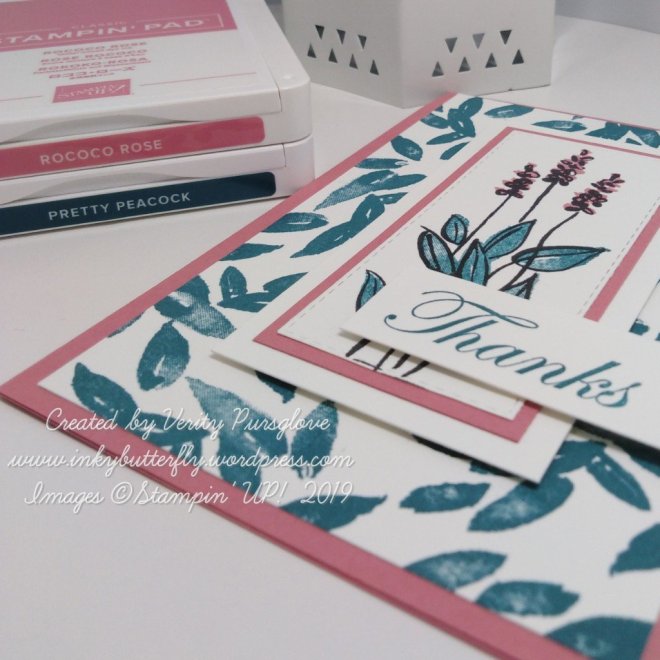
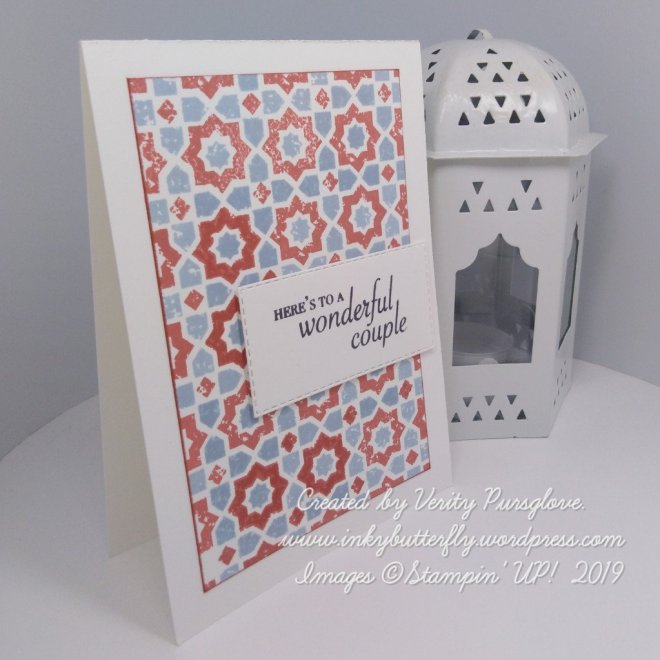
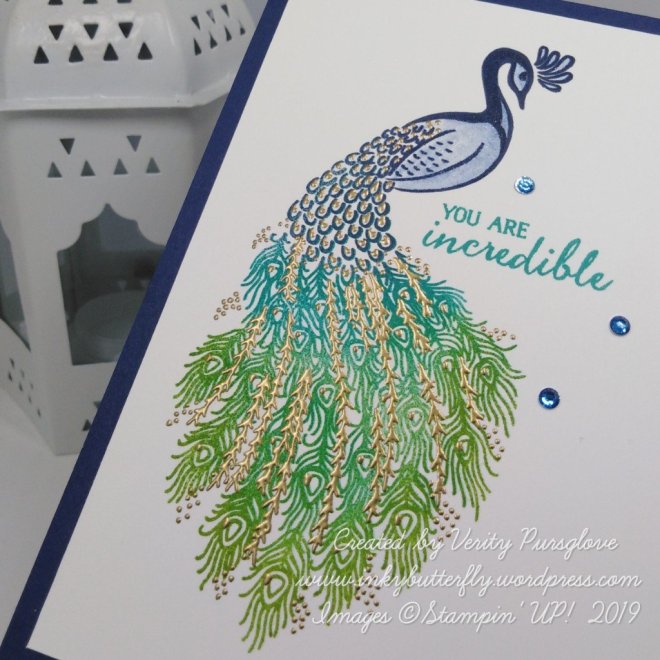
I wanted to showcase the stamp set alone with this card, there are many more stunning items in the suite which I shall use in future projects… Watch this space!

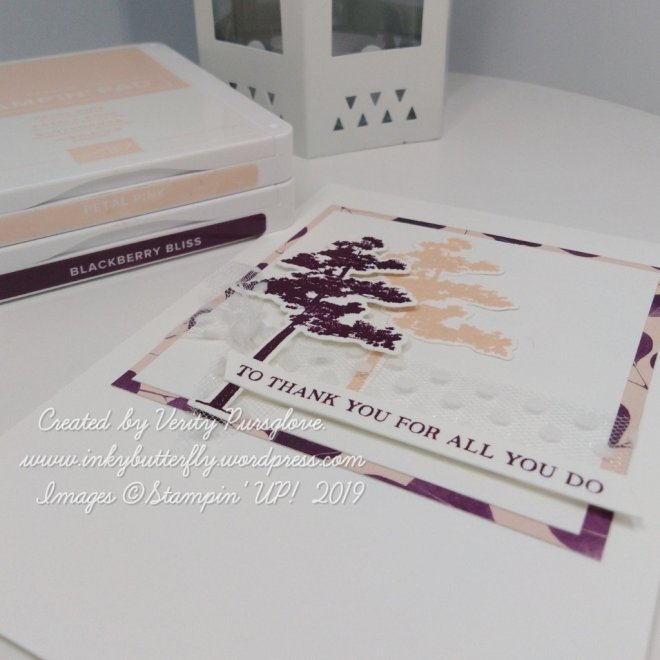
I used the Stamparatus to stamp the main image so I could use several colours and repeat stamp. Sponge daubers allowed me to apply the ink where I wanted it to achieve a gradient.

The complimentary stamp was positioned on to the main image and stamped with versamark ink so that these details could be heat embossed with gold powder.

A touch of Wink of Stella pulled ink in to colour the bird’s body. The sentiment was added with Bermuda Bay ink and embellished with blue rhinestones.

I hope you enjoyed this project. The supplies used are listed and linked to the online store below.

I would love to be your demonstrator.

Thanks for stopping by today and happy Stampin’!

Verity xx

Product List

Project Share Project

Hello Everyone,

Welcome to this week’s Project Share. As always my friends have created some lovely work. Please use the links to visit their blogs and read more about their projects.

Jill has combined bright colours with white embossing, made all the more striking by using a black background!

Visit Jill’s blog here

Heather has made this lovely card using her Stampin.’ Blends to colour the focal image. The Stitched Rectangle dies frame it perfectly.

Visit Heather’s blog here

Gez has used tone on tone layering to make this great Father’s Day card. Mixing and matching several sets of dies really extends their use.

Visit Gez’s blog here

I hope you enjoyed these projects. The supplies used are listed and linked to the online store below.

I would love to be your demonstrator.

Thanks for stopping by today and happy Stampin’!

Verity xx

Product List

Birthday Cheers #GDP193

Hello Everyone,

This week is a colour challenge at the Global Design Project!


See what the Design Team have created here.

……. And this is my project…..

I have used the Verdant Garden stamp set to create the backgrounds on each of the Whisper White panels.

The smaller panel was layered on to Night Of Navy card stock and adhered to the card with dimensionals.

The sentiment was taken from the Perennial Birthday stamp set and stamped with Night Of Navy ink.


I hope you enjoyed this project. The supplies used are listed below.

Thanks for stopping by today and happy Stampin’!

Verity xx

Product List

Your Anchor

Hello Everyone,

I hope you are enjoying seeing the new Stampin’ Up! products….. All of which you can purchase in my online store, links are at the bottom of this post!

Today’s featured set is Sailing Home and coordinating dies.

To make the topper, two of the seaweed die cuts were adhered to a Stitched Rectangle. This was layered with a larger rectangle cut from Crumb Cake card stock with dimensionals.

The anchor was stamped with Sahara Sand ink. This was die cut and some baker’s twine attached. The anchor was secured to the card. The twine was left loose.

The sentiment was stamped with Night of Navy ink and die cut. The trailing twine was then held in place with this die cut.

I hope you enjoyed this project. The supplies used are listed and linked to the online store below.

I would love to be your demonstrator.

Thanks for stopping by today and happy Stampin’!

Verity xx

Product List

Great Places

Hello Everyone,

I was very fond of the Lift Me Up stamp set and was really sad to see it retire….. But just look what’s new…. Above the Clouds! And it has a wonderful coordinating punch too.

If you haven’t seen the new catalogue and would like a free copy please let me know.

The small balloons were stamped first on to a Whisper White card stock panel. This was layered on to Purple Posy card stock and added to a card base.

Two large balloons were stamped and punched as the focal image with a sentiment added to one side.

I hope you enjoyed this project. The supplies used are listed and linked to the online store below.

I would love to be your demonstrator.

Thanks for stopping by today and happy Stampin’!

Verity xx

Product List

Soft Spring

Hello Everyone,

A new annual catalogue means lots of brand new products and long shopping list.

The stamp set I have used today is a hostess set which can be purchased with orders over £150.

Club together with your friends or host a party. Find out more here

My card today used the Soft Spring host stamp set with two new In Colours. This is a two-step stamp set allowing images to be layered together.

I started by stamping a background with Pretty Peacock ink and adhering this to Rococo Rose card base.

The flowers were stamped in Memento Ink and “coloured” with the coordinating stamps from the set.

This was cut with a Stitched Rectangle die and layered with Rococo Rose and Whisper White card stock and adhered with dimensionals.

The sentiment was added with Pretty Peacock ink.

I hope you enjoyed this project. The supplies used are listed and linked to the online store below.

I would love to be your demonstrator.

If you would like a Free copy of the new Stampin’ Up! catalogue please contact me.

Thanks for stopping by today and happy Stampin’!

Verity xx

Product List

Watercoloured Magnolia

Hello Everyone,

Allow me to introduce the Magnolia Lane Suite. This is an astoundingly beautiful stamp set with coordinating dies. The Designer Series Paper is equally stunning.

Other products in the suite include a ribbon combo pack and cute embellishments.

Product List

Today’s project is focused on the huge Magnolia image. This was stamped with Stazon Ink using the Stamparatus to guarantee a clear image.

The image was coloured with watercolour pencils and blender pens, then die cut.

Dimensionals were used to adhere the coloured Magnolia to a card base which was covered with Designer Series Paper.

Finally, a small strip of paper was used to mount the sentiment which was stamped on to some white card stock.

I hope you enjoyed this project. The supplies used are listed and linked to the online store below.

I would love to be your demonstrator.

If you would like a Free copy of the new Stampin’ Up! catalogue please let me know.

Thanks for stopping by today and happy Stampin’!

Verity xx

Product List

Stamparatus

[148187]

£46.00

Blender Pens

[102845]

£11.25

Project Share Project

Hello Everyone,

Welcome to this week’s Project Share. As always my friends have created some lovely work. Please Jill\’suse the links to visit their blogs and read more about their projects.

This week the cards are made with sadly retired…. But never fear there are some lovely alternatives available in the new catalogue!

Jill is making this large sentiment die do the hard working. Using this with colour coordinated patterned paper and ribbon makes a simple but effective card.

Visit Jill’s blog here

Gez is all about the gingham. This paper was extremely popular and there are so many ways it can be used. Once again, the coordinated accessories work together beautifully.

Visit Gez’s blog here

Heather has gone floral using the fabulous Happiness Blooms paper. So bright and summery!

Visit Heather’s blog here

I hope you enjoyed these projects. The supplies used are listed and linked to the online store below.

I would love to be your demonstrator.

Thanks for stopping by today and happy Stampin’!

Verity xx

Product List

2019 In Colour Wild Roses

img_20190603_210518_wm

Hello Everyone,

It’s new annual catalogue launch day!

If you would like a Free copy of the new Stampin’ Up! catalogue please contact me.

The focus for today are the new In Colours.

Rococo Rose, Seaside Spray, Pretty Peacock and Terracotta Tile. Purple Posy will follow later. 

I have used the gorgeous NEW To a Wild Rose stamp set.

img_20190603_210413_wm

For each card the line image was used to make the background.

A coordinating card stock frame was die cut and adhered with mini dimensionals.

img_20190603_210458_wm

Two additional flowers were stamped in each colour. The images were “coloured” with the complementary stamps in the set.

The sentiment was cut with a Stitched Rectangle Die.

img_20190603_210329_wm

I hope you enjoyed this project. The supplies used are listed and linked to the online store below.

I would love to be your demonstrator.

Thanks for stopping by today and happy Stampin’!

Verity xx

Product List

Inspire.Create #044

Hello Everyone,

Welcome to my blog. Every other Monday I share my project that I have used as my entry for the Inspire.Create challenge.

This time it’s a sketch challenge.

1559488882468802565166279813112031451102889279655.jpg

The design team have made some wonderful samples as inspiration. You can see them here.

This is my project. I have chosen a new stamp set to work with called Floral Essence. This will be available from 4th June as a bundle with a cute coordinating punch.

The card base was layered with this beautiful new designer series paper.

img_20190602_113500_wm

A frame was created using Petal Pink card stock which was interlocked with a white Stitched Square.

Flowers and leaves were stamped and cut with the coordinating punches.

The sentiment was stamped with Old Olive ink. This fitted perfectly inside the Darling Label punch.

img_20190602_113414_wm

I hope you enjoyed this project. The supplies used are listed and linked to the online store below.

I would love to be your demonstrator.

Thanks for stopping by today and happy Stampin’!

Verity xx

Product List

Leaf Punch

£15.00

Sepia Butterflies

Hello Everyone,

When I sat down to make this card, I had no idea what I was going to create… Super pleased with the result.

I began by stamping butterflies from the Painted Glass stamp set over a white card layer using Sahara Sand ink.

This was layered with Soft Suede and adhered to a Whisper White card base.

I cut the delicate square frame using the coordinating dies and adhered this in a diamond orientation.

The sentiment was stamped and cut with a new punch called Timeless Label. This was added with dimensionals.

Three butterflies were stamped with Soft Suede ink and coloured with Stampin’ Write Markers.

I hope you enjoyed this project. The supplies used are listed and linked to the online store below.

I would love to be your demonstrator.

Don’t miss out on these last chance items…. When they’re gone, they’re gone!

Thanks for stopping by today and happy Stampin’!

Verity xx

Product List

Project Share Project

Hello Everyone,

Welcome to this week’s Project Share. As always my friends have created some lovely work. Please use the links to visit their blogs and read more about their projects.

Jill has given us a sneak Peek at something new. This stamp set and coordinating Designer Series Paper will be released in June!

Visit Jill’s blog Here

155916331635615949486644539896994839233813025357975.jpg

Heather is using her retiring Designer Series Paper to make this statement birthday card.

Visit Heather’s blog Here

155916382829562677599539814344178766583788390746289.jpg

Gez made these cards a while back to showcase the 2018 in colours. These inks stay for another year! 

Visit Gez’s blog Here

1559164481777358969967080004163307382277519827478.jpg

Helzie has used a hostess stamp set for this project. This is a great set to colour to match the occasion

Visit Helzie’s blog Here

155916490573950345692718145112147331322650199180016.jpg

I hope you enjoyed these projects. The supplies used are listed and linked to the online store below.

I would love to be your demonstrator.

Thanks for stopping by today and happy Stampin’!

Verity xx

Product List

Butterflies for You #GDP191

Hello Everyone,

This week is a theme challenge at the Global Design Project!

15589646178897663178627400263625130874875737045901.jpg

See what the Design Team have created here.

……. And this is my project…..

img_20190528_223802_wm-1

I have used the Beauty Abounds bundle to create my project.

The bokeh dots in the set were stamped onto the background in Petal Pink and Flirty Flamingo inks.

The largest Layering Squares dies were used to make the topper base. This was adhered flat to the card base.

img_20190528_223706_wm

Four of the smallest Stitched Squares were cut and added to the topper using dimensionals. 

A sponge dauber was used to apply ink to some Whisper White card stock. The butterflies were stamped over top and die cut. These were adhered to each of the squares.

The simple sentiment was stamped below the topper in black ink.

img_20190528_223731_wm-1

I hope you enjoyed this project. The supplies used are listed below.

Thanks for stopping by today and happy Stampin’!

Verity xx

Product List


Delightful Bouquet

Hello Everyone,

With summer around the corner, I wanted to make a bright bunch of flowers for today’s card.

A white card layer was stamped with Daffodil Delight ink and adhered to a So Saffron card base.

Stitched Rectangles cut from vellum and white card stock were added to the card.

The bouquet was made using three yellow inks to stamp the tulips. These were assembled with Multipurpose glue.

These were in turn adhered to stems cut from Pear Pizzazz card stock.

The sentiment was stamped with Pear Pizzazz ink and cut with a small Stitched Rectangle die. This was added with dimensionals.

I hope you enjoyed this project. The supplies used are listed and linked to the online store below.

I would love to be your demonstrator.

Don’t miss out on these last chance items…. When they’re gone, they’re gone!

Thanks for stopping by today and happy Stampin’!

Verity xx

Product List

Blue Green Butterflies

Hello Everyone,

Spring time brings flowers and they bring butterflies. This inspired today’s card.

I prepared a white card base. A white card layer was stamped with Granny Apple Green ink using a leaf image from the Rooted in Nature stamp set.

Butterflies from the Butterfly Gala stamp set were stamped with black ink. Granny Apple Green and Bermuda Bay inks were used to colour the images before cutting with coordinating punch.

These were shaped with a stylus before adhering to a smaller card layer.

A sentiment was cut with a Stitched Rectangle die.

I hope you enjoyed this project. The supplies used are listed and linked to the online store below.

I would love to be your demonstrator.

Don’t miss out on these last chance items…. When they’re gone, they’re gone!

Thanks for stopping by today and happy Stampin’!

Verity xx

Product List

Verdant Garden

Hello Everyone,

It’s not long until we will be welcoming a new Stampin’ Up Annual Catalogue. This year it is better than ever!

Do you want one? Leave me a message and I will send one out free of charge.

So today I have a sneak peek at a new set called Verdant Garden and maybe a couple of new In Colours too!

This set can be used to make backgrounds with the 2 step Stamping technique.

I chose Seaside Spray and Terracotta Tile. They go together so well!

The Photopolymer material allows the images to be lined up by looking through the acrylic block.

I added a simple sentiment from the same set using Memento Ink. I cut this with a Stitched Rectangle die which I added with dimensionals.

I hope you enjoyed this project. The supplies used are listed and linked to the online store below.

I would love to be your demonstrator.

Don’t miss out on these last chance items…. When they’re gone, they’re gone!

Thanks for stopping by today and happy Stampin’!

Verity xx

Project Share Project

Hello Everyone,

Welcome to this week’s Project Share. As always my friends have created some lovely work. Please use the links to visit their blogs and read more about their projects.

Jill has made this card for a fancy fold challenge. These projects are a great way to use Designer Series Paper.

Visit Jill’s blog here

Heather is using her Designer Series Paper in a different way, this time to make a custom gift bag.

Visit Heather’s blog here

Gez has revisited the eclipse technique with her own hand stamped background paper.

Visit Gez’s blog here

Helzie has completed her Bee Happy series with this card.

Visit Helzie’s blog here

I hope you enjoyed these projects. The supplies used are listed and linked to the online store below.

I would love to be your demonstrator.

Thanks for stopping by today and happy Stampin’!

Verity xx

Product List

To Thank You #GDP190

Hello Everyone,

This week is a sketch challenge at the Global Design Project!

See what the Design Team have created here.

……. And this is my project…..

To make the topper Whisper White card stock was adhered to some Nature’s Poem Designer Series Paper. Polka Dot Tulle ribbon was wrapped around before adhering to a white card base.

Trees were stamped with Blackberry Bliss and Petal Pink inks and die cut.

The sentiment was added across the bottom of the topper with dimensionals.

I hope you enjoyed this project. The supplies used are listed below.

Thanks for stopping by today and happy Stampin’!

Verity xx

Product List

Just for You

Hello Everyone,

There are some exciting limited time only products available until the end of May, while stocks last!

Paper Pumpkin is popular in other USA market as a subscription box. This month the UK also has the chance to order this kit as a one off payment. The contents are a surprise!

Everything is Rosy product medley contains fully coordinating products to create beautiful projects.

My project for today uses the Meant to Be bundle. The stamp set and dies are currently available as a bundle with a 10% saving.

For the card base, white card stock was adhered to a Soft Suede card base. A Powder Pink layer was embossed with the largest stitched heart die.

Two smaller dies were used to cut the white hearts which were adhered to the centre.

The sentiment was stamped with Soft Suede ink and die cut with a Stitched Rectangle.

I hope you enjoyed this project. The supplies used are listed and linked to the online store below.

I would love to be your demonstrator.

Don’t miss out on these last chance items…. When they’re gone, they’re gone!

Thanks for stopping by today and happy Stampin’!

Verity xx

Product List

Inspire.Create #043

Hello Everyone,

Welcome to my blog. Every other Monday I share my project that I have used as my entry for the Inspire.Create challenge.

This time it’s a colour challenge.

The design team have made some wonderful samples as inspiration. You can see them here.

I have used the Abstract Impressions bundle to create my project.

I began by Die Cutting the butterfly and sponged over this with Poppy Parade and Pumpkin Pie ink.

While this dried, I stamped some grass on a Whisper White card panel with Granny Apple Green ink. This was layered on to some Poppy Parade card stock and adhered to a white card base.

The sentiment was stamped with Pumpkin Pie ink and trimmed to size. After layering with Poppy Parade card stock, this was adhered to the card with dimensionals.

The butterfly was shaped and adhered to the card. I used Pumpkin Pie Stampin Blends to colour some rhinestones to complete the card.

I hope you enjoyed this project. The supplies used are listed and linked to the online store below.

I would love to be your demonstrator.

Thanks for stopping by today and happy Stampin’!

Verity xx

Product List