Project Share Project

Hi Everyone,

Just look at what my crafty friends have been upto… Please click the links to see more details of each of the projects.

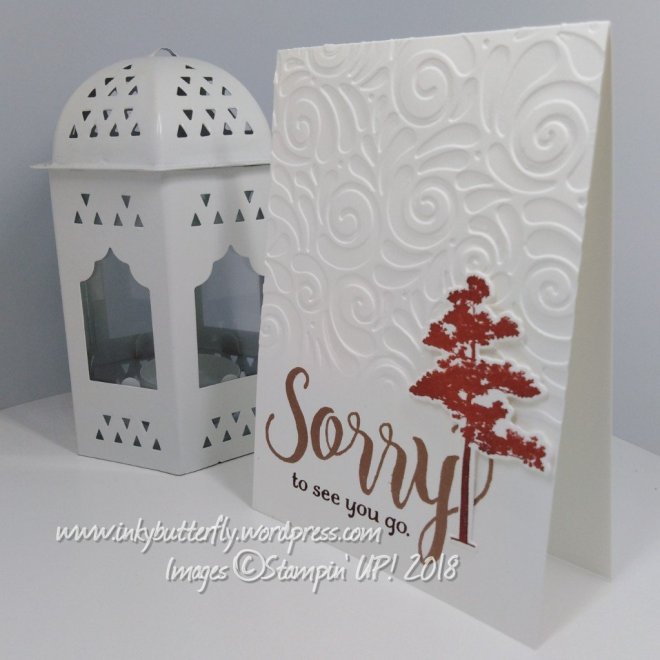
Jill has featured the wonderful new Dashing Deer in this beautifully simple card.

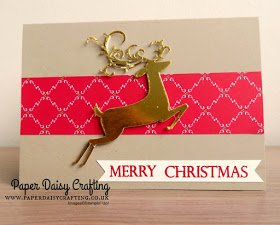
See how Jill made the card here

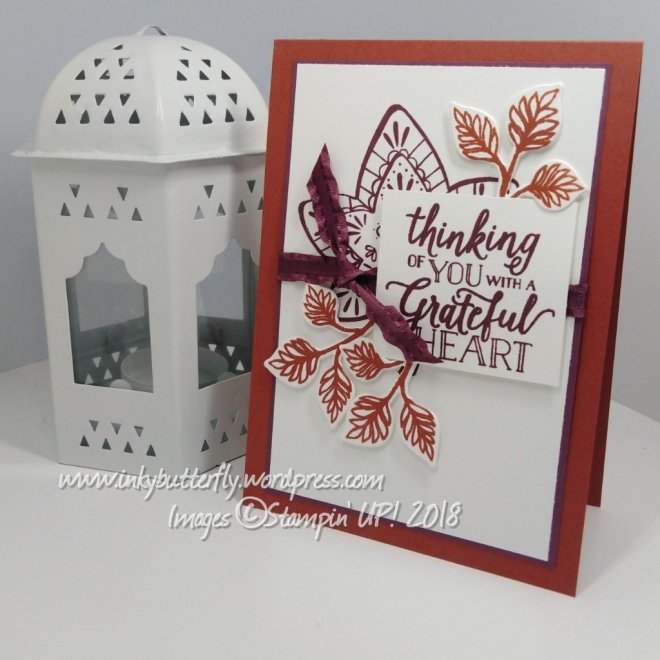
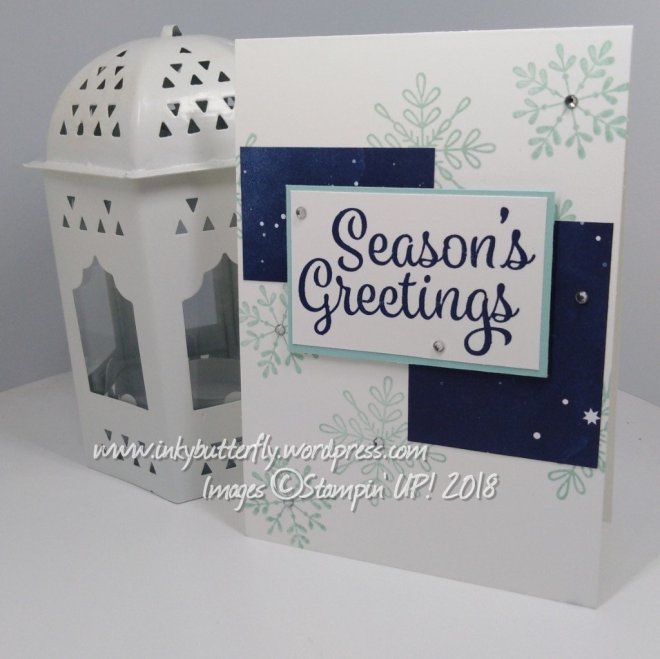
Heidi has been creating even more ways to gift some tea lights with this unusual closure.

See more on her blog here

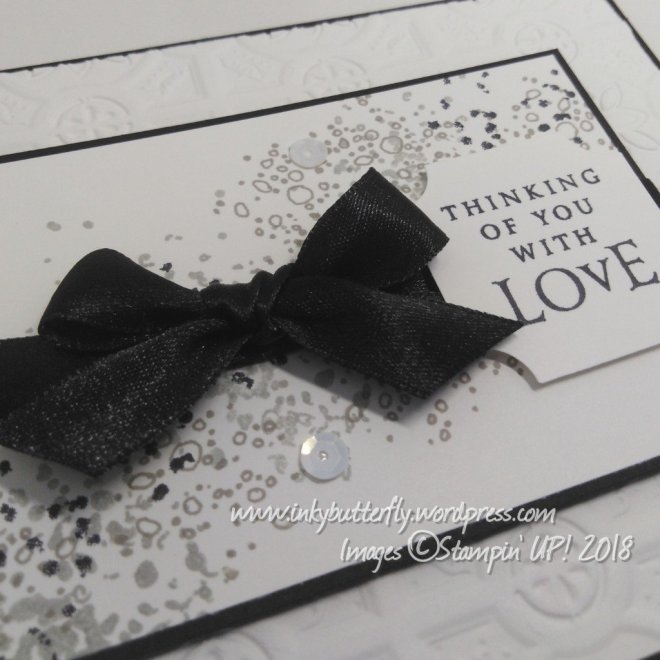
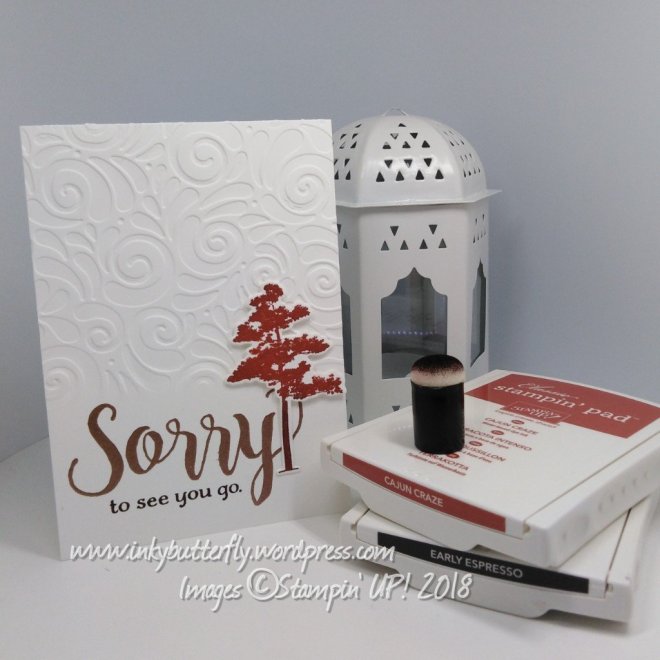
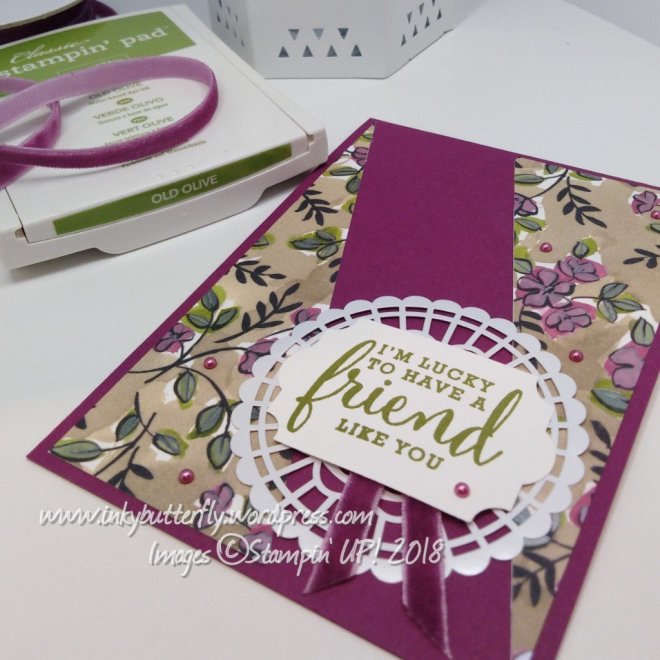
Sally has made this stunning card. Neutral colours make this suitable for the guys too!

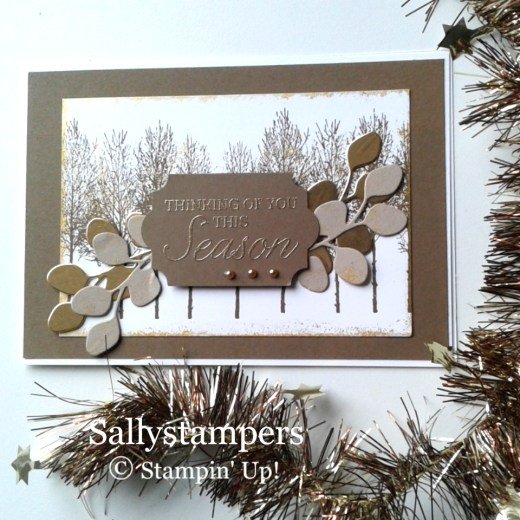
See more about this project here

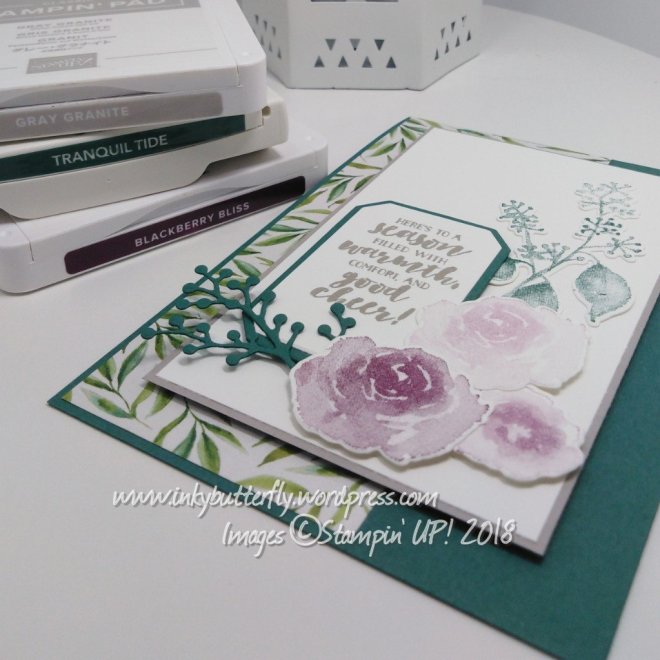
I hope you enjoyed these projects.

Thanks for stopping by today and happy Stampin’!

Verity xx

Product List

Beauty of the Season #GDP154

Good Morning,

Today I am playing along with the Global Design Project sketch challenge.

I like these challenges as they make me think differently about the cards I am making.

The design team have made some wonderful samples. You can see them here!

This is my project using newly released products.

I chose to use shimmery white card stock for the card base.

I picked out this gorgeous Designer Series Paper. This was cut to 3 by 4 inches and Layered with some Vellum.

The large sentiment was stamped with versamark ink and heat embossed with gold powder.

A piece of champagne foil was embossed with the Swirls & Curls embossing folder. The ends were cut with the Everyday Label Punch. Silver baker’s twine was wrapped around this before adding to the card base.

The DSP panel was adhered with dimensionals. Some gold pearls finished the project.

I hope you enjoyed this project. The supplies used are listed below.

Thanks for stopping by today and happy Stampin’!

Verity xx

Product List

With Love – Just Add Ink #424

Hello Everyone.,

Welcome to another challenge entry… I usually do these on Mondays, but this week has been a bit crazy getting ready for a new school term.

This week the challenge is…

You can see what the design team have made here.

My design features a new embossing folder called Tin Tile, it’s so pretty! I just used white card stock which I mounted on to a black card base.

The inner panel is 1-1/2 inches smaller so the the embossing is still visible.

A combination of Artisan Textures and Beautiful Blizzard was used to add the texture to this panel. Smoky Slate, Gray Granite and Black Memento Ink were used.

The sentiment also comes from Beautiful Blizzard… Just goes to show that there are uses beyond Christmas…. This was cut with the Darling Label punch.

Some black satin ribbon was added across the middle, with a small bow attached.

For a final bit of bling and extra texture a few pearl sequins were also used.

I hope you enjoyed this project. The supplies used are listed below.

Thanks for stopping by today and happy Stampin’!

Verity xx

Product List

Frosted Florals

Hello Everyone,

The Frosted Floral suite is one of the stand out items in the upcoming Stampin’! Up! Autumn Winter catalogue.

If you would like to receive a Free catalogue please contact me here.

All the papers have a shimmer finish on both sides and they are all absolutely stunning.

I have used a Tranquil Tide card base. A 2-1/2 inch, strip of Designer Series Paper was added along the left hand side.

A 5 by 3-1/4 inch piece of white card stock was Layered on to some Gray Granite card stock and added to the card base with dimensionals.

On a separate sheet, the flowers and foliage wee stamped with Blackberry Bliss and Tranquil Tide inks. The sentiment was stamped with Gray Granite ink.

All the elements were Die cut with the coordinating Framelits. An extra sprig was cut from Tranquil Tide card stock.

Dimensionals were used to adhere the pieces to the card base.

I hope you enjoyed this project. The supplies used are listed and linked to the online store below.

I would love to be your demonstrator.

Thanks for stopping by today and happy Stampin’!

Verity xx

Product List

Grateful Heart

Hello Folks,

It’s not long now until the Stampin’ Up! Autumn Winter catalogue 2018 goes live, so here is a look at a new set called Falling for Leaves…. I just had to have this one, leaves are so versatile.

If you would like a free catalogue from me, please contact me here!

The card base is made with Cajun Craze card stock.

A panel was made with Whisper White card stock cut to 5-1/4 by 3-1/2 inches, (13.4 by 9 cm). This was adhered to a piece of Fresh Fig card stock 1/8 inch or 3mm larger.

The large leaf was stamped with Fresh Fig ink. Some mini Ruffled Ribbon was tied around the panel before adhering to the base.

The sentiment was stamped on to a separate piece of white card and trimmed to size. This was secured with dimensionals.

Three sets of smaller leaves were stamped with Cajun Craze ink and Die cut. Mini dimensionals were the perfect size to stick these down.

I hope you enjoyed this project. The supplies used are listed and linked to the online store below.

I would love to be your demonstrator.

Thanks for stopping by today and happy Stampin’!

Verity xx

Product List

Sorry…

Good Morning Everybody,

Today’s make is a clean and Simple card.

I began by embossing a white card base with the brand new Swirls and Curls embossing folder. The folder was not rolled through all the way, resulting in the bottom of the card remaining flat.

The word “sorry” was stamped with versamark ink and embossed with copper powder.

The partner sentiment was added with Early Espresso ink.

The tree was inked with Cajun Craze, a sponge was used to add some Early Espresso to the trunk. The image was die cut and adhered using mini dimensionals.

I hope you enjoyed this project. The supplies used are listed and linked to the online store below.

Look out for more Autumn Winter catalogue sneek peeks ahead of next week’s launch.

Thanks for stopping by today and happy Stampin’!

Verity xx

Product List

Filled with Peace #FMS352

Hi Everyone and Happy Friday!

Today I am playing along with the Freshly Made Sketches challenge from Jen.

As usual there are some great samples from the Design Team. You can see them all here!

And this is my card featuring brand new products coming soon.

A 2 inch strip of Under the Mistletoe Designer Series Paper was adhered toward the bottom of a white card base.

Some striped Burlap ribbon was added with tear and tape. The sentiment was then added over the top using mini dimensionals.

The poinsettia was cut from Real Read card stock. Multipurpose glue was used to secure the Die cut in place. Some artisan pearls were added to the centre.

I hope you enjoyed this project. The supplies used are listed below.

Thanks for stopping by today and happy Stampin’!

Verity xx

Product List

Project Share Project

Hi there,

It’s Thursday, which means another Project Share.

My crafty friends have been busy creating so many lovely things. Please click the links to see the full project.

First up this week is Heidi of Flutterby Heidi. This Darling little box is the perfect new home gift package, such a brilliant idea.

See more here

Helzie has used this adorable stamp set to make this bright and happy card…. That little fella looks so excited.

See more here

And Hannah has demonstrated how to achieve a watercolour effect on coloured card stock for a completely different look.

See more here.

I hope the ladies have inspired you as much as they have me.

Thanks for stopping by today and happy Stampin’!

Verity xx

Product List

Simply Scored

[122334]

£27.00

Happy Birthday Friend #GDP153

Hi Everyone,

It’s time for a Global Design Project colour challenge! Wish me luck, the winner will get the opportunity to be a guest designer… That would be amazing!

See what the design team have made here.!

So these colours are quite a challenge. Not a combination I would have chosen, though it does remind me of neopolitan ice cream!

This is what I created.

The Timeless Textures stamp set was used to make a tone on tone distressed background on the Daffodil Delight card base.

A panel was made by adding Flirty Flamingo DSP to another piece of Daffodil Delight card stock. This was adhered with dimensionals.

The circle topper was made using combinations of layering dies and punches. The sentiment was stamped with 2nd generation Soft Suede ink and cut with the matching Darling Label punch.

Soft Suede ink was used to stamp the flowers. Sponge daubers were used to apply the ink colours of the challenge to the image.

This was die cut and added to the card with dimensionals. A few rhinestones and Wink of Stella completed the card.

I hope you enjoyed this project. The supplies used are listed below.

Thanks for stopping by today and happy Stampin’!

Verity xx

Product List

Cascading Squares

Hi Everyone,

I thought I would try out a completely different layout for today’s project.

Rich Razzleberry card stock, Share What You Love paper and vellum were cut in to 2 inch squares.

These were adhered to a Crumb Cake card base starting with the Rich Razzleberry at the top and bottom. I then added the DSP. The Vellum square was added in the centre.

Old Olive ink was used to stamp the sentiment which was cut with the Everyday Label Punch.

Rich Razzleberry card stock was used to cut some leaves which were tuck in under the label. A few pearls were added to finish the card.

I hope you enjoyed this project. The supplies used are listed and linked to the online store below.

I would love to be your demonstrator.

Thanks for stopping by today and happy Stampin’!

Verity xx

Product List

Leaf Punch

[144667]

£15.00

Oh Darling! #GDP152

Good Afternoon,

I am playing along with the Global Design Project today.

The challenge this time is to case the Designer. Janneke has created this beautiful card as inspiration.

The design team have made some fantastic interpretations of the card. You can see them here!

The inspiration card uses the Stitched All Around stem set, which I carried through to my design. I also kept the purple colour theme.

The card base was made by adding Highland Heather card stock.

A smaller layer was embossed with the stitching Die from the set. The layer was mounted on to Whisper White card stock and adhered to the base with dimensionals.

The Stitched label was cut from Vellum.

The sentiment was stamped with Gorgeous Grape ink and cut with the Everyday Label Punch. This was added to a a starburst punch shape and then on to the card with dimensionals.

Rather than flowers, I added butterflies from the Painted Glass stamp set. The outline was Blended slightly and Wink of Stella Glitter brush added some bling.

I hope you enjoyed this project. The supplies used are listed below.

Thanks for stopping by today and happy Stampin’!

Verity xx

Product List

Blender Pens

[102845]

£10.75

Lisa’s Colour Challenge

Hi Everyone,

Welcome this month’s InspireINK blog hop.

Lisa has chosen a colour challenge. I had to think a long time about this one!

In the end I opted for a grungy style card.

I used the Artisan Textures stamp set, starting with Merry Merlot. This is a strong colour, so I used only a little bit. This later became the backdrop for the sentiment.

Other images from Artisan Textures were used to build up the background. Bermuda Bay first, then Daffodil Delight. The panel was mounted on to a Merry Merlot card base.

Bermuda Bay ink was used to stamp the sentiment on to a strip of white card stock. The Everyday Label Punch was used the shape the ends.

A few rhinestones finished the card.

I hope you enjoyed this project.

Next up is beautiful Hannah, just clickthe next button below!

Happy Stampin’!

Verity xx

Product List

Trio of Vases #FMS351

Hi Everyone,

Today I am taking part in the Freshly Made Sketches challenge. The idea for this week’s sketch was based on the rule of thirds.

So I have created a trio of beautiful Vases, each filled with a trio of flowers!

I started by Stamping and punching all the Vases, flowers and leaves. The outlines were stamped with Memento and then the solid images were used to fill them in. I chose Soft Sea Foam, Petal Pink and Balmy Blue. Granny Apple Green was used for the leaves.

The flowers were left white and vanilla.

On a Whisper White layer, I stamped the “shelf” with Sahara Sand ink.

I lay out the Vases without adhesive to judge where to add some green stalks. The Vases were then secured with dimensionals.

Leaves were added with Multipurpose glue and the flowers with mini dimensionals.

Wink of Stella clear glitter pen add sparkle to the flowers and Vases.

Gray Granite ink was used to add the sentiment. The panel was mounted on to a Tranquil Tide card base.

I hope you enjoyed this project. The supplies used are listed below.

Thanks for stopping by today and happy Stampin’!

Verity xx

Product List

More Share What You Love

Hi folks,

Here is another really quick and easy card using the Share What You Love suite.

A 2 inch strip of patterned paper was cut diagonally and adhered to a Rich Razzleberry card base.

Old Olive ink was used to stamp the sentiment which was cut with the Everyday Punch.

The sentiment was adhered to the card over a pearlized doily and some velvet ribbon using dimensionals.

I hope you enjoyed this project. The supplies used are listed and linked to the online store below.

Thanks for stopping by today and happy Stampin’!

Verity xx

Product List

Inspire.Create. #025 Guest Designer

Hello Everybody,

Today is a very special day for me… Today I have the enormous pleasure to be a guest designer for this Inspire.Create.Challenge.

This week is a colour challenge, and wouldn’t you know they are three of my favourites!

So this what I have designed.

I have kept the card simple to allow the beautiful colours to shine through.

I used the Chase Your Dreams Framelits to cut five feathers from Whisper White card stock. The word “dream” was cut three times.

The inks were applied to the die cuts using a sponge dauber.

The die cut words were stacked and adhered to the card with Multipurpose glue.

Mini dimensionals were used to adhere the feathers to the card.

A touch of Wink of Stella was added over the top of the die cuts for a little extra sparkle.

I hope have enjoyed this project as much as I did making it!

The supplies used to make this card are listed below.

Thanks for taking the time to read my blog post today, please call back again soon.

Happy Stampin’!

Verity xx

Product List

Big Shot

[143263]

£102.00

Friend Like You

Good Morning!

Today I fancied using the Share What You Love suite to make this lovely card.

Some speciality Designer Series Paper was adhered to a Rich Razzleberry card base.

The partial die Cutting technique was used to cut a rectangular piece of Vellum with the largest Stitched Square Framelit.

Old Olive ink was used to stamp the sentiment. This was cut with the Everyday Label Punch.

To decorate, three sets of leaves were punched from Old Olive card stock. Crumb Cake Nature’s Twine was tied in a bow. Some Artisan pearls added some bling!

I hope you enjoyed this project. The supplies used are listed and linked to the online store below.

Thanks for stopping by today and happy Stampin’!

Verity xx

Product List

Leaf Punch

[144667]

£15.00

Seasons Greetings #CTS285

Hello again,

I thought I would play along with the Case This Sketch challenge this week.

See more about the challenge here!

Pool Party Ink was used to stamp snowflakes over a white card base.

Two pieces of Twinkle Twinkle Designer Series Paper was adhered with snail.

The greeting was stamped with Night of Navy ink and layered on to Pool Party card stock. This added to the card with dimensionals.

A few rhinestones finished the card.

I hope you enjoyed this project. The supplies used are listed below.

Thanks for stopping by today and happy Stampin’!

Verity xx

Product List

More Autumnal Leaves

Good Morning,

My lovely friend Tina wanted to see more autumn leaves, so here it is…. Especially for her!

The leaves from the Blended Seasons stamp set were stamped with black Stazon Ink on to some Whisper White card stock.

So Saffron ink was sponged over the edges of the card.

Cajun Craze, Pumpkin Pie, Crushed Curry and Early Espresso watercolour Pencils were used to colour the leaves. A blender pen smoothed out the lines.

The panel was layered on to Pumpkin Pie card stock and then on to a Cajun Craze card base.

I hope you enjoyed this project. The supplies used are listed and linked to the online store below.

Thanks for stopping by today and happy Stampin’!

Verity xx

Product List

Blender Pens

[102845]

£10.75

Sending Love

Hey Everyone,

I have gone to town with the layers on this project.

A piece of Tropical Escape Designer Series Paper was adhered to a white card base.

The Floral Frames dies were used to cut the pieces to build the topper.

Whisper White, Crumb Card and Lemon Lime Twist card stock was used.

The sentiment was stamped with Lemon Lime Twist ink. The frame was added with Blushing Bride ink and die cut.

The Crumb Cake and Lemon Lime Twist leaves were adhered in between the layers.

Flowers were stamped with Crumb Cake ink and added to the topper with Multipurpose glue.

I hope you enjoyed this project. The supplies used are listed and linked to the online store below.

Thanks for stopping by today and happy Stampin’!

Verity xx

Product List

Be You

Good Afternoon,

I thought I would pop an extra post up today using my beloved Rooted in Nature stamp set and matching Designer Series Paper.

A 3 inch strip of paper was adhered to a white card base.

The colours, Petal Pink, Mint Macaron and Cajun Craze were selected to match the paper.

The tree rings were fussy cut and positioned to the left hand side popped up on dimensionals.

Mint Macaron ink was used to stamp the tree. This was die cut and layered over the top. Double dimensionals were used to support the right hand side.

Finally, the sentiment was stamped with Cajun Craze Ink and fussy cut. Multipurpose glue was used to add this to the tree rings.

I hope you enjoyed this project. The supplies used are listed and linked to the online store below.

I would love to be your demonstrator.

Thanks for stopping by today and happy Stampin’!

Verity xx

Product List