Happiest Wishes

Good Morning Everybody,

I hope you are having a good weekend!

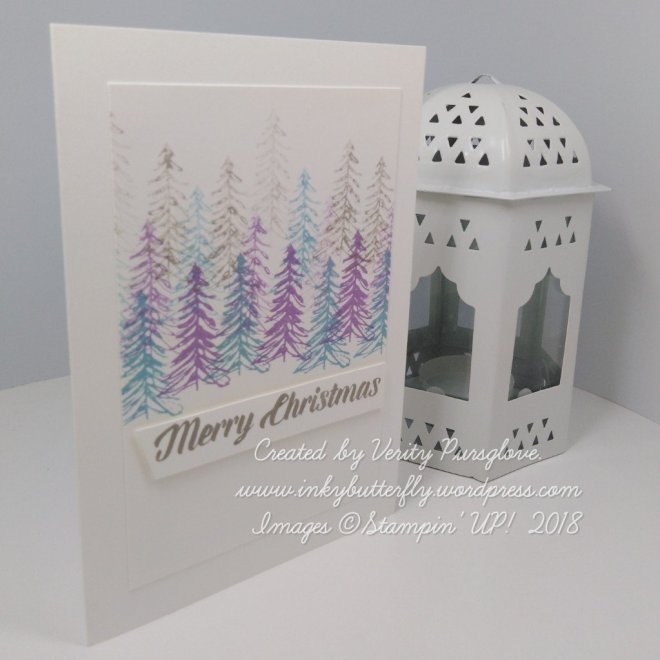
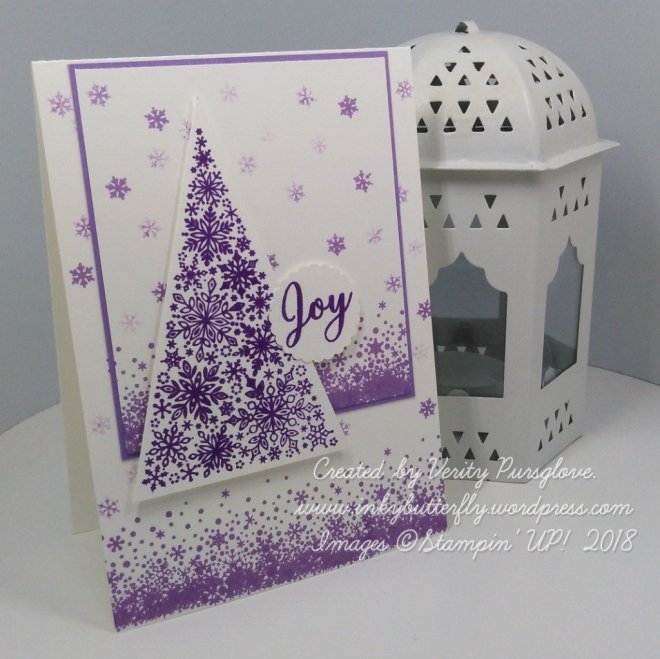
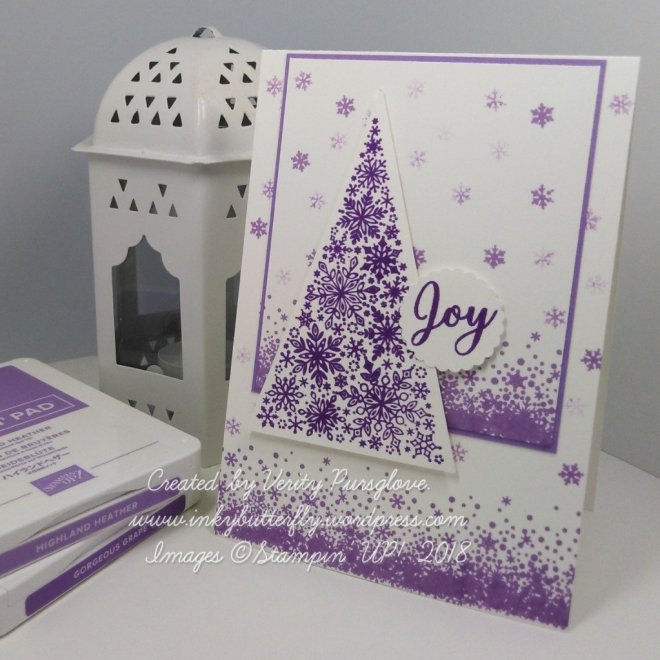
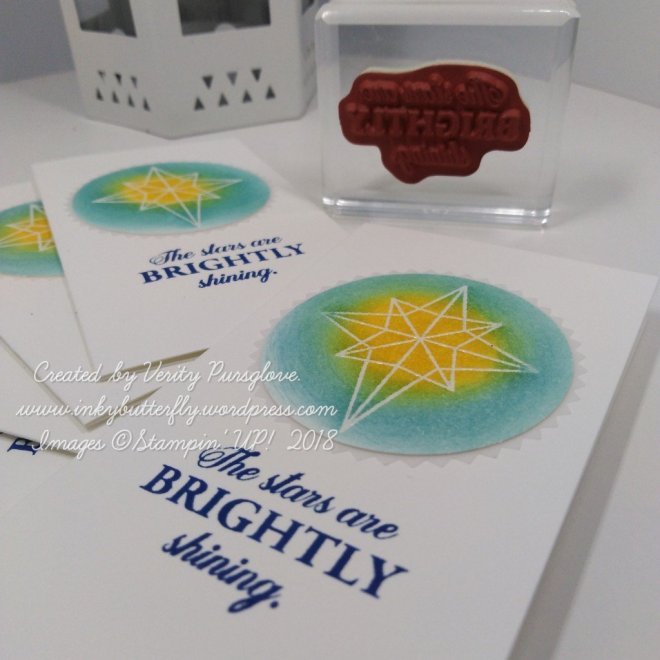
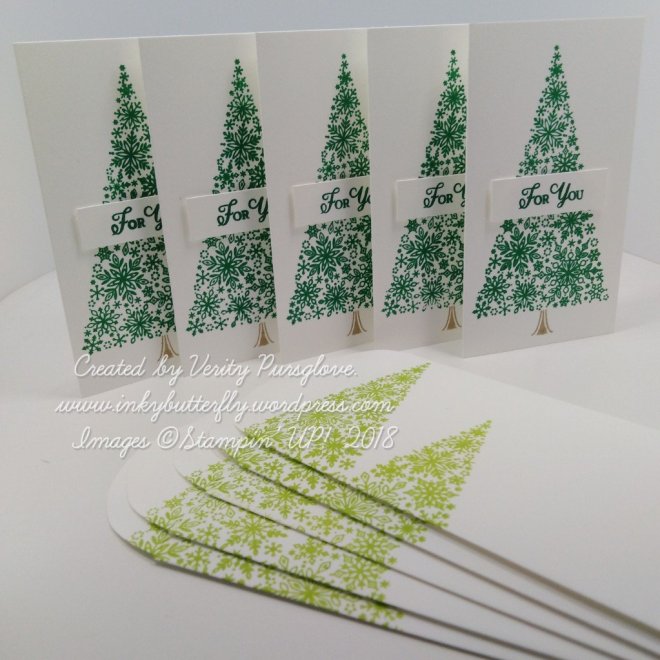
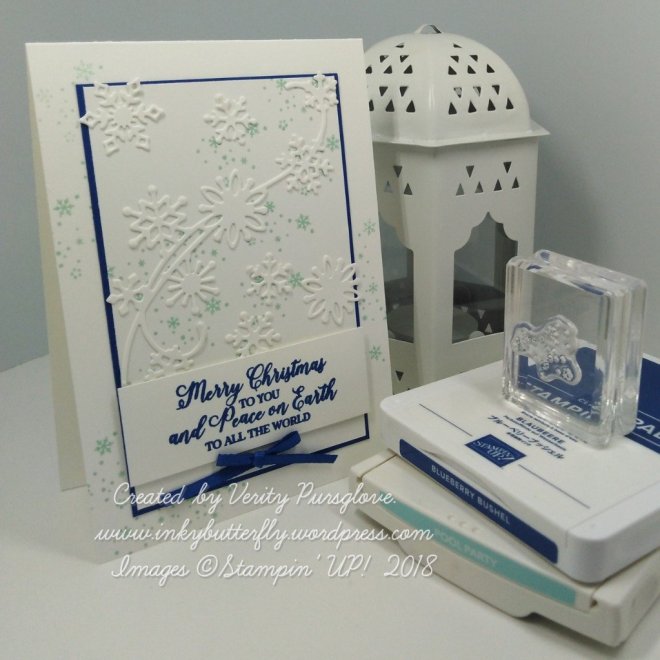
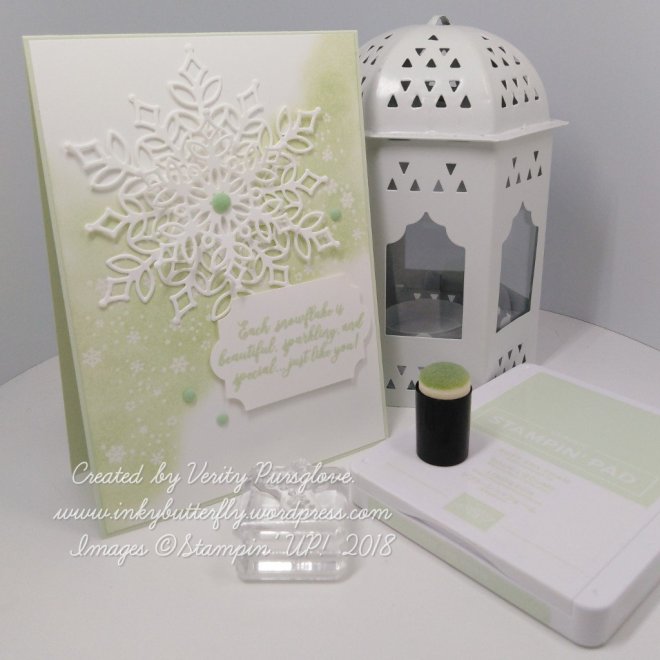
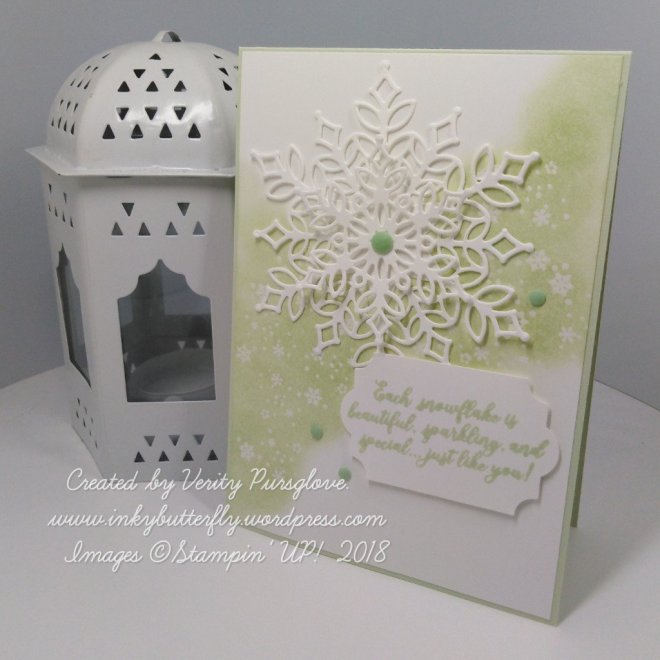
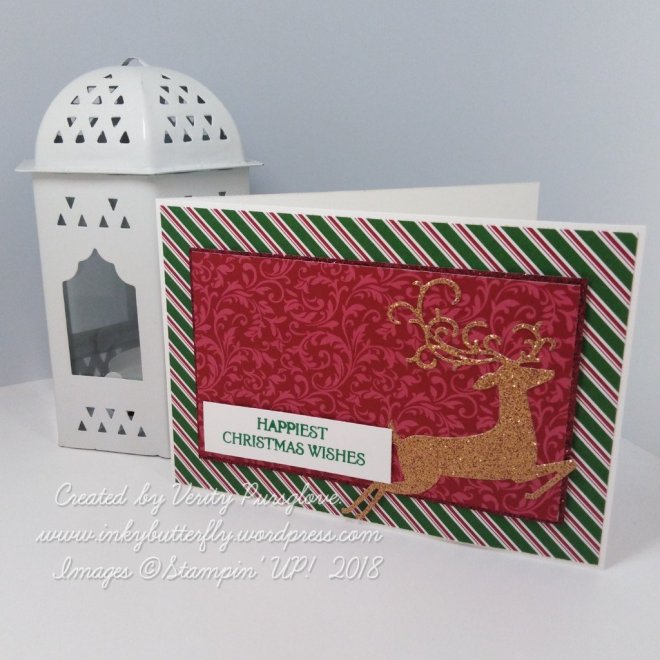
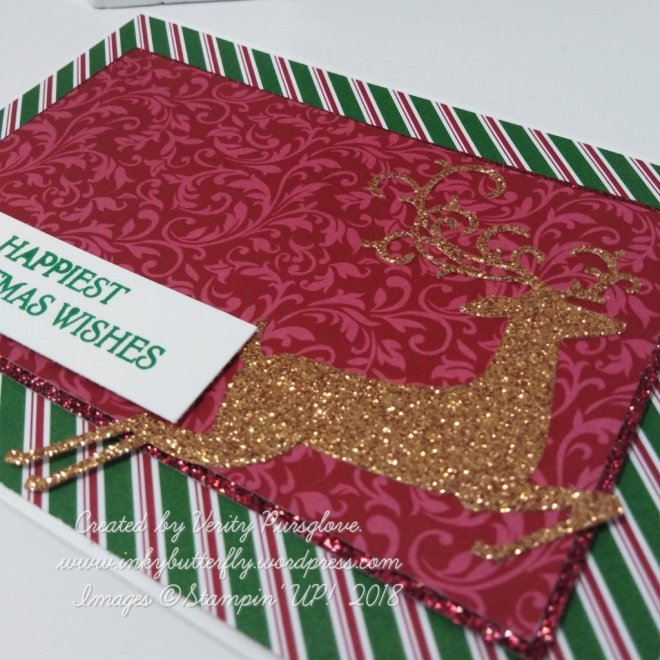
Today I am sharing cards made using the Dashing Along Designer Series Paper.

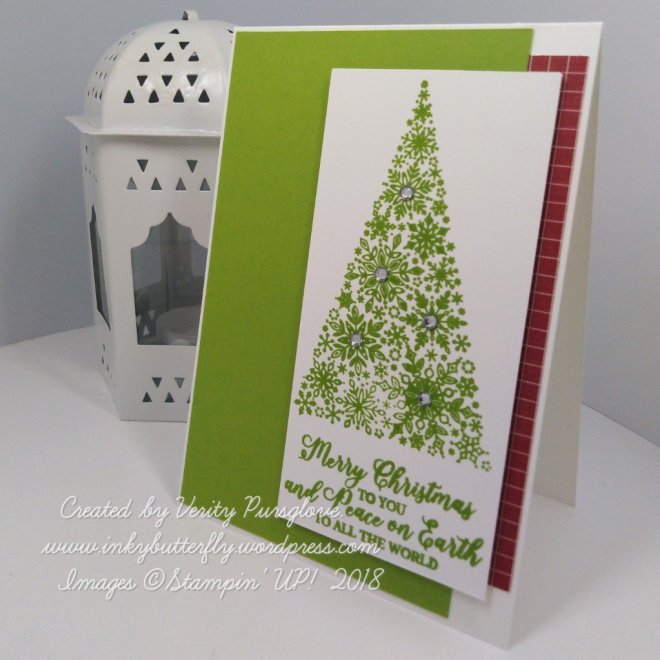
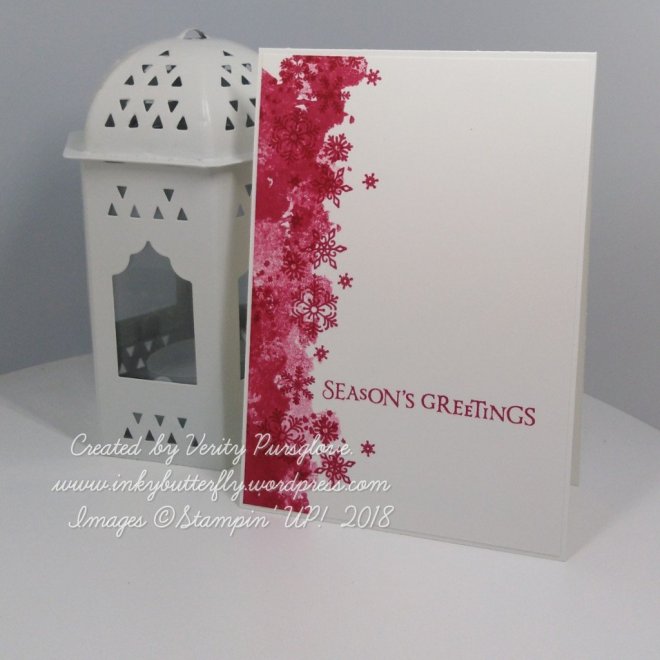
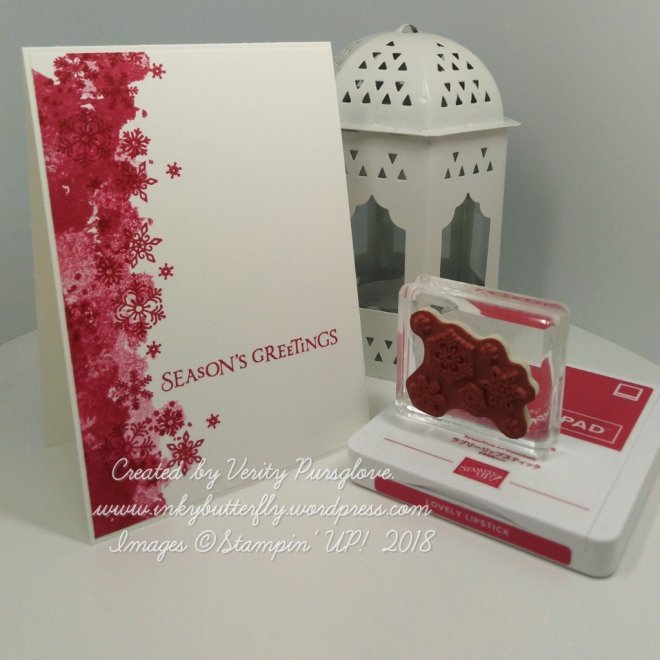
Paper was cut the 4 by 5-3/4 inches for the background layer.

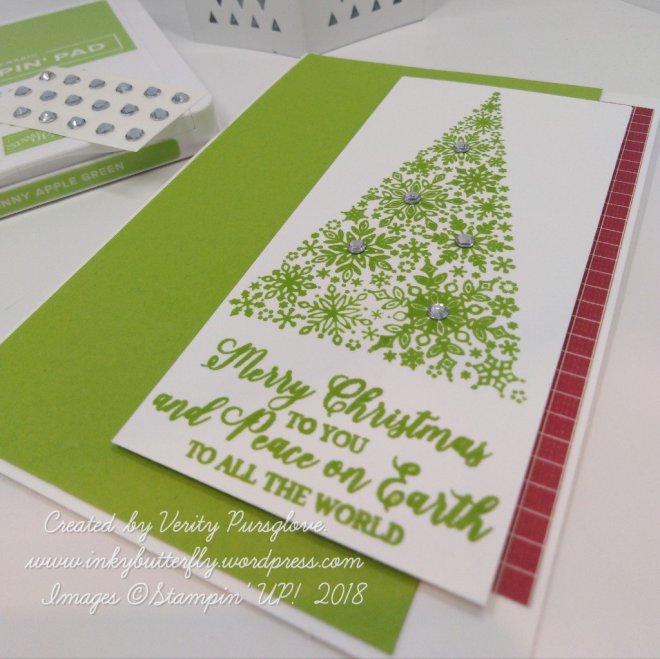
Another complimentary piece was cut 1 inch shorter and narrower and adhered to some red glimmer paper. This was added to the card with dimensionals.

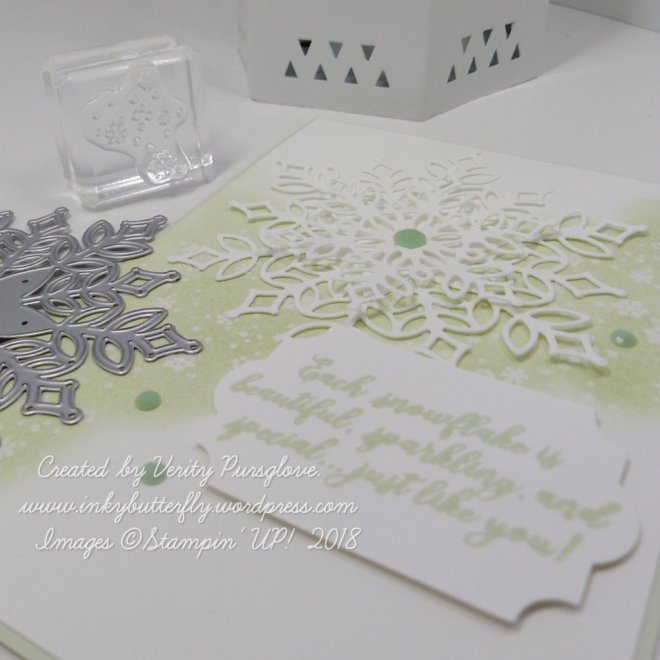
The deer was die cut and adhered with Multipurpose glue.

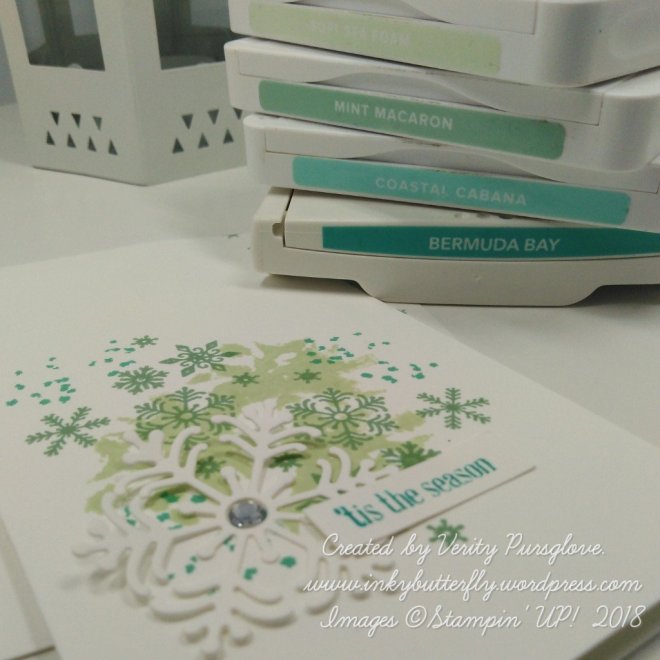
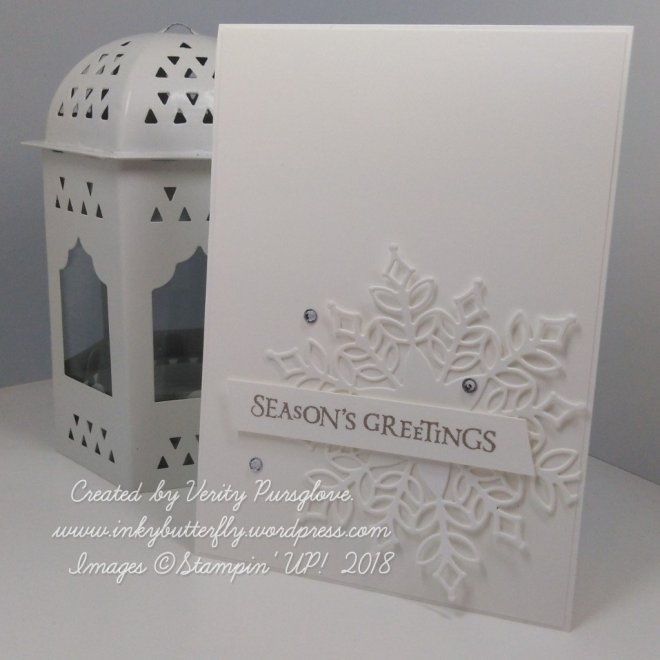
Garden Green ink was used to stamp the sentiment.

I hope you enjoyed this project.

The supplies used are listed and linked to the online store below.

I would love to be your demonstrator.

Thanks for stopping by today and happy Stampin’!

Verity xx

Product List

Project Share Project

Good Morning Everybody,

This week the ladies have all made cute little Christmas gift ideas.

I just had to include these adorable candy cane reindeer from Heather.

See how they are made at Heather’s blog here

Speaking of cute… Look at this guy! Gez has really pulled out the stops on this project.

See her tutorial on her blog here

Jill has opted for a traditional cracker design. Beautifully made and the red ribbon finishes them off perfectly.

See how they were made here

I hope you enjoyed these projects.

The supplies used are listed below.

Thanks for stopping by today and happy Stampin’!

Verity xx

Product List

Simply Scored

[122334]

£28.00

Simple Cardmaking with Designer Series Paper

Hi Everyone,

Here’s another way to make simple cards…..using stunning Stampin’ Up! Designer Series Paper.

I have used the Dashing Along collection and layered this with fabulous glimmer paper.

A simple sentiment was added at the bottom with dimensionals.

I hope you enjoyed this project. The supplies used are listed and linked to the online store below.

I would love to be your demonstrator.

Thanks for stopping by today and happy Stampin’!

Product List

Just Add Ink #435

Hi there,

Today’s project is my entry for this week’s Just Add Ink challenge.

The inspiration image is just beautiful. See what the design team have made here

My winter forest was made with the Timeless Tidings stamp set.

Highland Heather, Balmy Blue and Gray Granite inks were used.

This was adhered to a large Memories & More card.

The sentiment was added with dimensionals.

I hope you enjoyed this project.

The supplies used are listed below.

Thanks for stopping by today and happy Stampin’!

Verity xx

Product List

Joy to the World

Hello Everyone,

I just love these little robins in the Feathers and Frost stamp set.

The card base was made with Garden Green card stock. Matching ink was used to stamp the Holly frame on to the background.

A 3 by 3 inch square of Whisper White card was stamped to make the topper, starting with the sentiment.

The robins were added using Memento black ink. These were coloured with Soft Suede and Poppy Parade Stampin’ Blends.

The piece was then layered on to red glimmer paper and adhered to the card with dimensionals.

I hope you enjoyed this project.

The supplies used are listed and linked to the online store below. Just click on the images!

There’s a sale on at the moment on selected items. See what’s on offer here

I would love to be your demonstrator.

Thanks for stopping by today and happy Stampin’!

Verity xx

Product List

Merry Thanks #GDP165

Hello Everyone,,

Here’s a festive colour challenge from the Global Design Project team!

Check out the design team projects here

I have used the Dashing Deer stamp set for my project.

I prepared the card base using Crumb Cake card stock. The matching ink was used to add the small flower motif.

The topper was made by stamping the deer and sentiment with Merry Merlot ink. This was trimmed to size and layered on to Tranquil Tide card stock.

I hope you enjoyed this project. The supplies used are listed below.

Thanks for stopping by today and happy Stampin’!

Verity xx

Product List

Peace on Earth #FMS363

Hello!

It’s Friday! and time for another sketch challenge.

As always the design team have created some amazing projects. See them here

154230884661372797415276396028806386217856573444034.jpg

Sticking with the Christmas theme, I have used the Snow is Glistening stamp set… I love it so much, I just can’t put it down.

The base card was made simply with Whisper White card stock. Some Cherry Cobbler patterned paper was added to the right hand side with Granny Apple Green card stock added over the top.

The focal image was stamped on to a separate piece of card with Granny Apple Green ink, then trimmed to size.

This was adhered with dimensionals and decorated with rhinestones.

I hope you enjoyed this project. The supplies used are listed below.

Thanks for stopping by today and happy Stampin’!

Verity xx

Product List

Joy #GDP164

Hello Everyone,

Welcome to a Global Design Project entry.

This week the challenge is to Case the Designer…… Louise Sharp. You can see what the design team have made here

And this is my design.

The layout is similar to the inspiration design, though I thought a layer of coloured card stock lifted the top panel away from the background.

I started by Stamping the bottom edge of the card base and the topper panel. Extra snowflakes were added to each background

The top layer was mounted on to Highland Heather card stock and secured with snail adhesive.

The tree was stamped with Gorgeous Grape ink, cut out and adhered across the bottom edge of the panel with dimensionals.

The sentiment was punched out with a 1-3/8 inch scallop punch.

I hope you enjoyed this project. The supplies used are listed below.

Thanks for stopping by today and happy Stampin’!

Verity xx

Product List

More Mini Cards

Hello Everyone,

Today I have made these cute little cards with the Beautiful Blizzard stamp bundle.

The base is a small Memories & More card.

The front was stamped with Soft Sea Foam, Mint Macaron and Coastal Cabana inks.

A die cut snowflake was adhered with Multipurpose glue and rhinestone added to the centre.

Bermuda Bay Ink was used to stamp the sentiment.

The matching envelopes were also stamped to complete the set.

I made 5 cards in no time at all, a great quick project.

I hope you enjoyed this project.

The supplies used are listed and linked to the online store below.

I would love to be your demonstrator.

Thanks for stopping by today and happy Stampin’!

Verity xx

Product List

Simple Snowflake

Hello Folks,

Today’s card makes use of simple white on white layering.

A Die cut show flake was adhered toward the bottom right corner of a card layer. The over hanging pieces were trimmed away.

Gray Granite ink was used to stamp the sentiment and added with dimensionals.

A few rhinestone jewels add some sparkle.

I hope you enjoyed this project.

The supplies used are listed and linked to the online store below.

I would love to be your demonstrator.

Thanks for stopping by today and happy Stampin’!

Verity xx

Product List

Project Share Project

Hello Everyone,

My friends have been making some wonderful things this week. Please click the links to see more about each project.

Helzie has taken a break from Christmas to make this gorgeous wedding card. See more here.

Jill is loving non traditional colours for her Christmas projects this year. See more here.

Heather has made this set of thank you cards. Perfect for after the big day! See more here.

I hope you enjoyed these projects.

Thanks for stopping by today and happy Stampin’!

Verity xx

Product List

Big Shot

[143263]

£102.00

More Quick Cards

Hello there,

Today’s cards are made with the Illuminated Christmas stamp set.

I made the toppers by heat embossing the stars on a separate piece of white card stock.

Sponge dauber were used to add the colour before punching them out. I chose Daffodil Delight and Balmy Blue. As a little extra I also add a vellum starburst behind it before adhering to the card.

The sentiment was added with Blueberry Bushel ink.

I hope you enjoyed this project. The supplies used are listed and linked to the online store below.

I would love to be your demonstrator.

Thanks for stopping by today and happy Stampin’!

Verity xx

Product List

Snowy Tree

Good Morning,

Tomorrow sees the launch of limited edition products, available during November only.

Today I have used this lovely snowflake tree to make little cards with matching envelopes.

The cards themselves are the cute narrow note cards. The tree fitted perfectly.

To make sure the images were the same on each card, I used my Stamparatus tool.

First, I positioned the trunk, and used Crumb Cake ink. On the other plate, I positioned the tree, which I stamped with Call Me Clover ink. Using the tool meant I could make up all the cards very quickly, perfect for batch making.

Shaded Spruce ink was used for the sentiment.

The envelopes were stamped with Lemon Lime Twist ink.

I hope you enjoyed this project. The supplies used are listed and linked to the online store below.

I would love to be your demonstrator.

Thanks for stopping by today and happy Stampin’!

Verity xx

Product List

Stamparatus

[148187]

£46.00

Snowfall

Hello Everybody,

Here is another look at the upcoming limited edition products available from 1st November 2018.

There are so many dies in the collection, making it so easy to create a beautiful snowy scene.

Pool Party ink was used to stamp the tiny snowflakes on a Whisper White card base and card layer.

The layer was then matted with some Blueberry Bushel card stock and adhered to the card base.

The sentiment was stamped with Blueberry Bushel ink and trimmed to size. The width matched that of the card layer. This was adhered to the card with dimensionals.

A number of snowflakes were die cut and adhered with Multipurpose glue.

Finally, a small bow was added to the bottom of the card.

I hope you enjoyed this project. The supplies used are listed and linked to the online store below.

I would love to be your demonstrator.

Thanks for stopping by today and happy Stampin’!

Verity xx

Product List

Coming Soon…..

Hi Everyone,

I have exciting news. 1st November sees the release of limited edition stamps and dies.

As a demonstrator, I have been able to purchase this early, and as you know, I adore snowflakes for Christmas card making.

This is the idea I am sharing today using a non traditional colour scheme.

First, I stamped the small snowflake cluster across the card using versamark ink and heat embossed with clear powder.

Soft Sea Foam ink was applied over the top with a sponge dauber.

The sentiment was also stamped with Soft Sea Foam ink and cut with the Everyday Label Punch.

The large snowflake was die cut from Whisper White card stock. I then embellished with faceted dots.

I hope you enjoyed this project. The supplies used are listed below.

Thanks for stopping by today and happy Stampin’!

Verity xx

Product List

Faceted Dots

[146910]

£5.50

Heart & Home #FMS360

Good Morning,

As it is Friday, today’s project is my entry for the Freshly Made Sketches challenge.

You can see what the design team have made here

I discovered my pack of Festive Farmhouse patterned paper when I was deciding what to make. It is so lovely.

The green paper was adhered to a white card base. The opposite side was cut 1 inch smaller, Layered on to Very Vanilla card stock and added with dimensionals.

Cherry Cobbler ink was used to stamp the sentiment which was die cut.

The holly was stamped with Memento Ink and coloured with Stampin’ Blends. These were fussy cut.

Ribbon was laid down first. The oval was added next with dimensionals. The holly was added using multipurpose glue.

I hope you enjoyed this project. The supplies used are listed below.

Thanks for stopping by today and happy Stampin’!

Verity xx

Product List

Inspire.Create #029

Hi Everyone,

This week there is a sketch challenge going on over at the Inspire.Create.Challenge’s blog.

The design team have made some wonderful samples as inspiration. Check them out here

And this is my festive project…

Shaded Spruce card stock has been used for the base.

Designer Series Paper panels were cut to 5 by 3-1/4 inches and layered on to Real Red mats 1/8 inches larger.

The panel was adhered with dimensionals.

The word “holidays” was die cut from glimmer paper… I forgot to add sticky sheet to mine, so used Multipurpose glue to add this to the card.

“happy” was heat embossed with gold powder on Real Red card stock.

I hope you enjoyed this project.

The supplies used are listed below.

Thanks for stopping by today and happy Stampin’!

Verity xx

Product List

Simple Monochrome Snowflakes

Hello Again,

I know….. More snowflakes!

I just love them, at least on cards anyway, not so keen on the real thing.

This was so easy to make too.

Lovely Lipstick Ink was used throughout, firstly to stamp the grungy edge. I stamped off once, so the snowflakes would still be visible over the top.

I then just added the sentiment towards the bottom of the card and added this to a white card base.

No extra layers or embellishments today.

I hope you enjoyed this project. The supplies used are listed and linked to the online store below.

I would love to be your demonstrator.

Thanks for stopping by today and happy Stampin’!

Verity xx

Product List

Three Wise Men

Hello & Happy Sunday,

Today I am using the Illuminated Christmas stamp set and doing some ink blending.

I started by heat embossing the star in the top corner.

Sponge daubers were used to blend in the background, beginning with So Saffron for the star and working through Pool Party, Balmy Blue and Night of Navy inks. A chalk marker was used to add some other tiny “stars” in the sky.

The three Kings were stamped and coloured with Stampin’ Blends. A stitched circle was used to die cut the image.

The final step was to add the sentiment. This was done simply by stamping in black ink, trimming to size and adhering with dimensionals.

I hope you enjoyed this project. The supplies used are listed and linked to the online store below.

I would love to be your demonstrator.

Thanks for stopping by today and happy Stampin’!

Verity xx

Product List

Snowflake Hugs

Good Morning,

The Beautiful Blizzard bundle was one of the first things I bought from the Autumn Winter catalogue… I knew I would able to make simple but effective cards.

I built the background with Pool Party ink. Stamped snowflakes were added with Pool Party and 2nd and 3rd generation Blueberry Bushel inks.

The sentiment was stamped with Blueberry Bushel Ink and adhered with dimensionals.

Some Die cut snowflakes were added with glue dots and a small bow of mini Grosgrain ribbon.

Finally, a few iridescent sequins finished the card.

I hope you enjoyed this project. The supplies used are listed and linked to the online store below.

I would love to be your demonstrator.

Thanks for stopping by today and happy Stampin’!

Verity xx

Product List

Glue Dots

[103683]

£4.75