Today is new catalogue day and the start of Sale-a-bration, so social media will be all about the new products and freebies, but I thought I would give one last hurrah to some Last Chance favourites… All available while stocks last!
Links to the new catalogues are available at the bottom of this post!
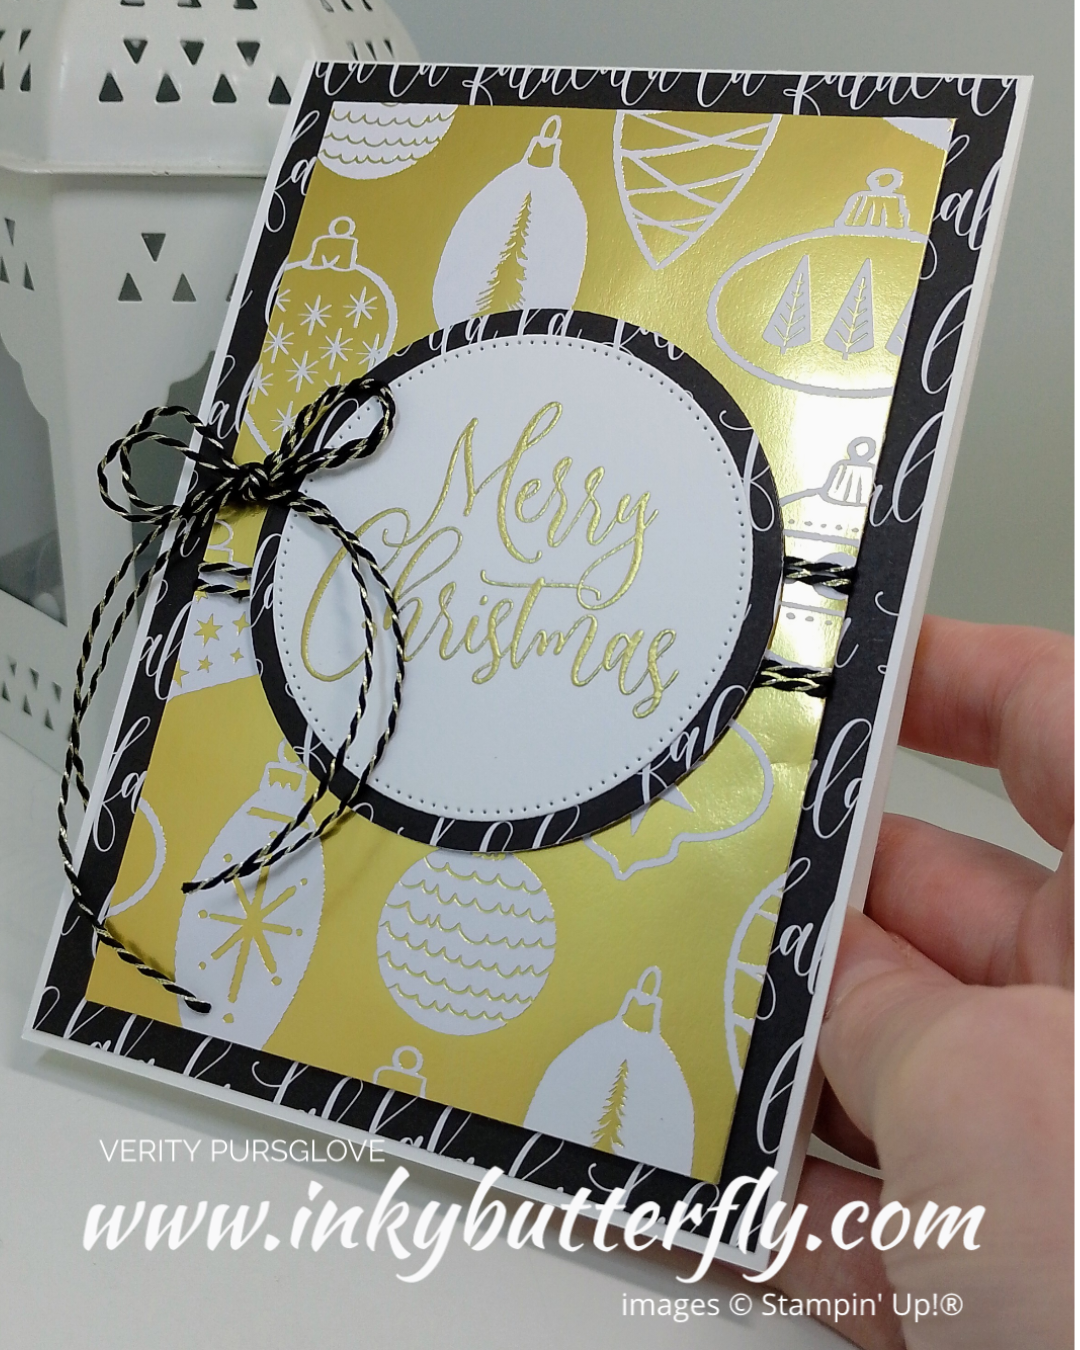
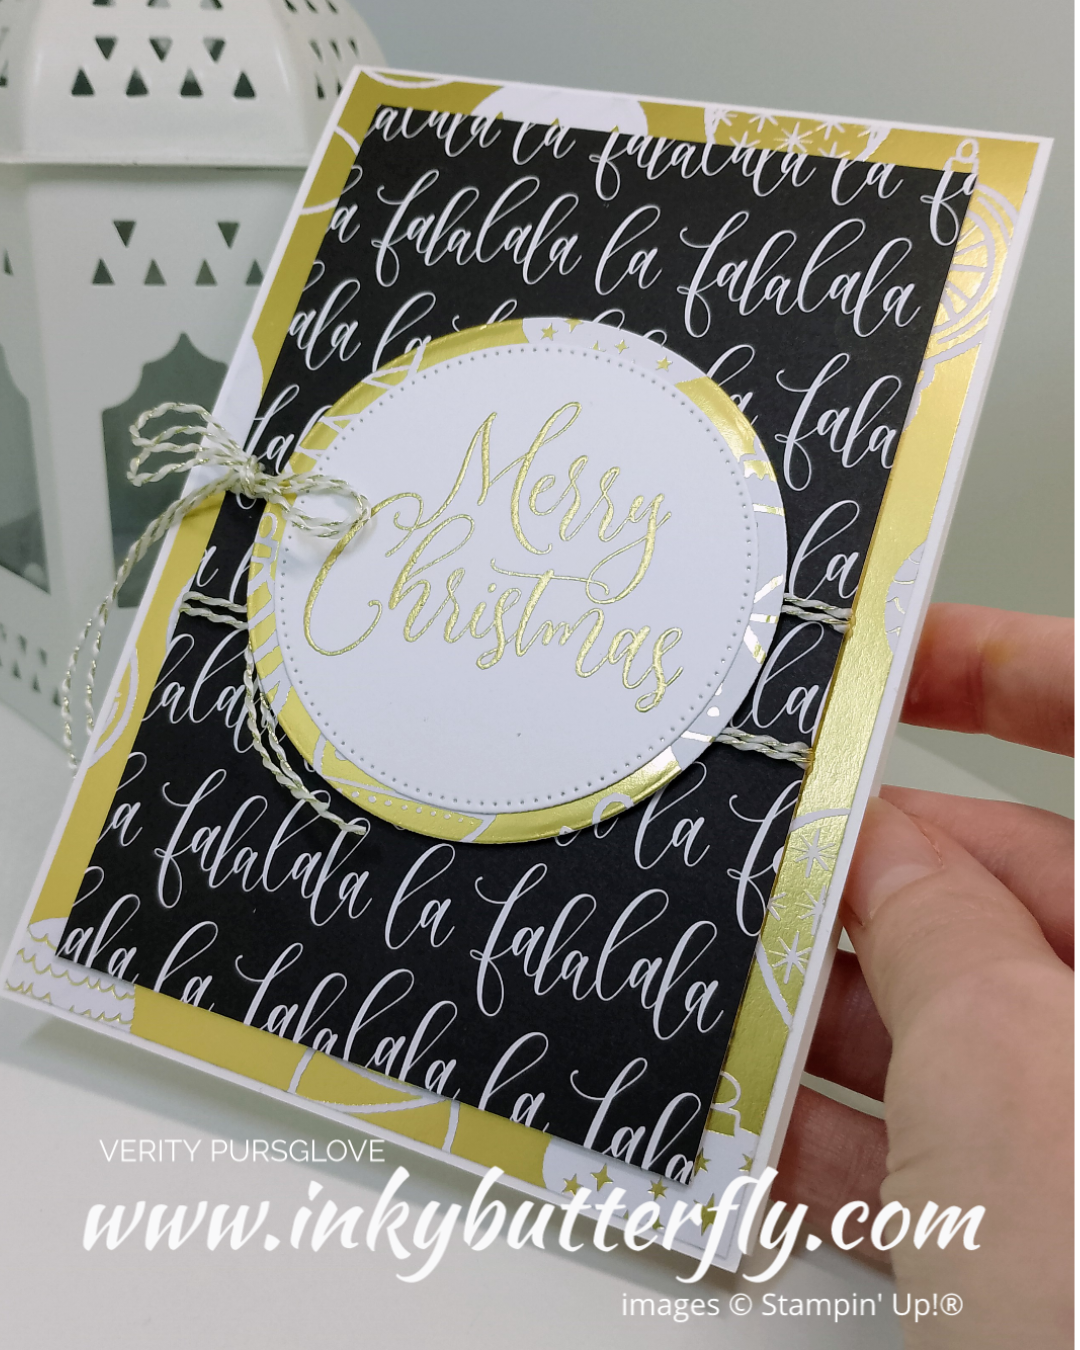
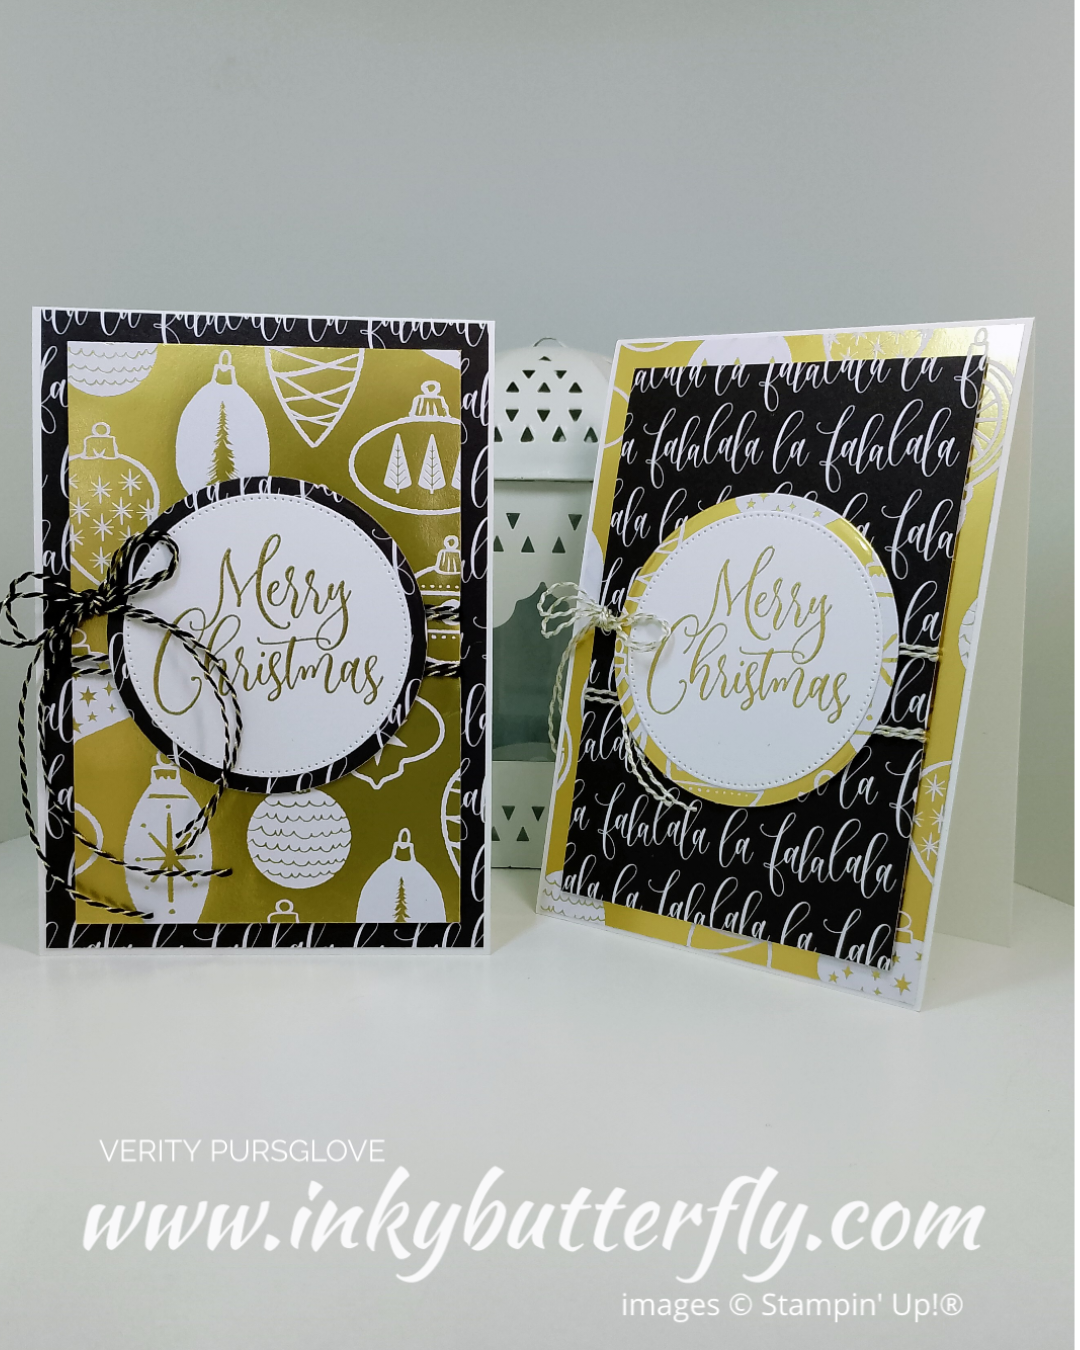
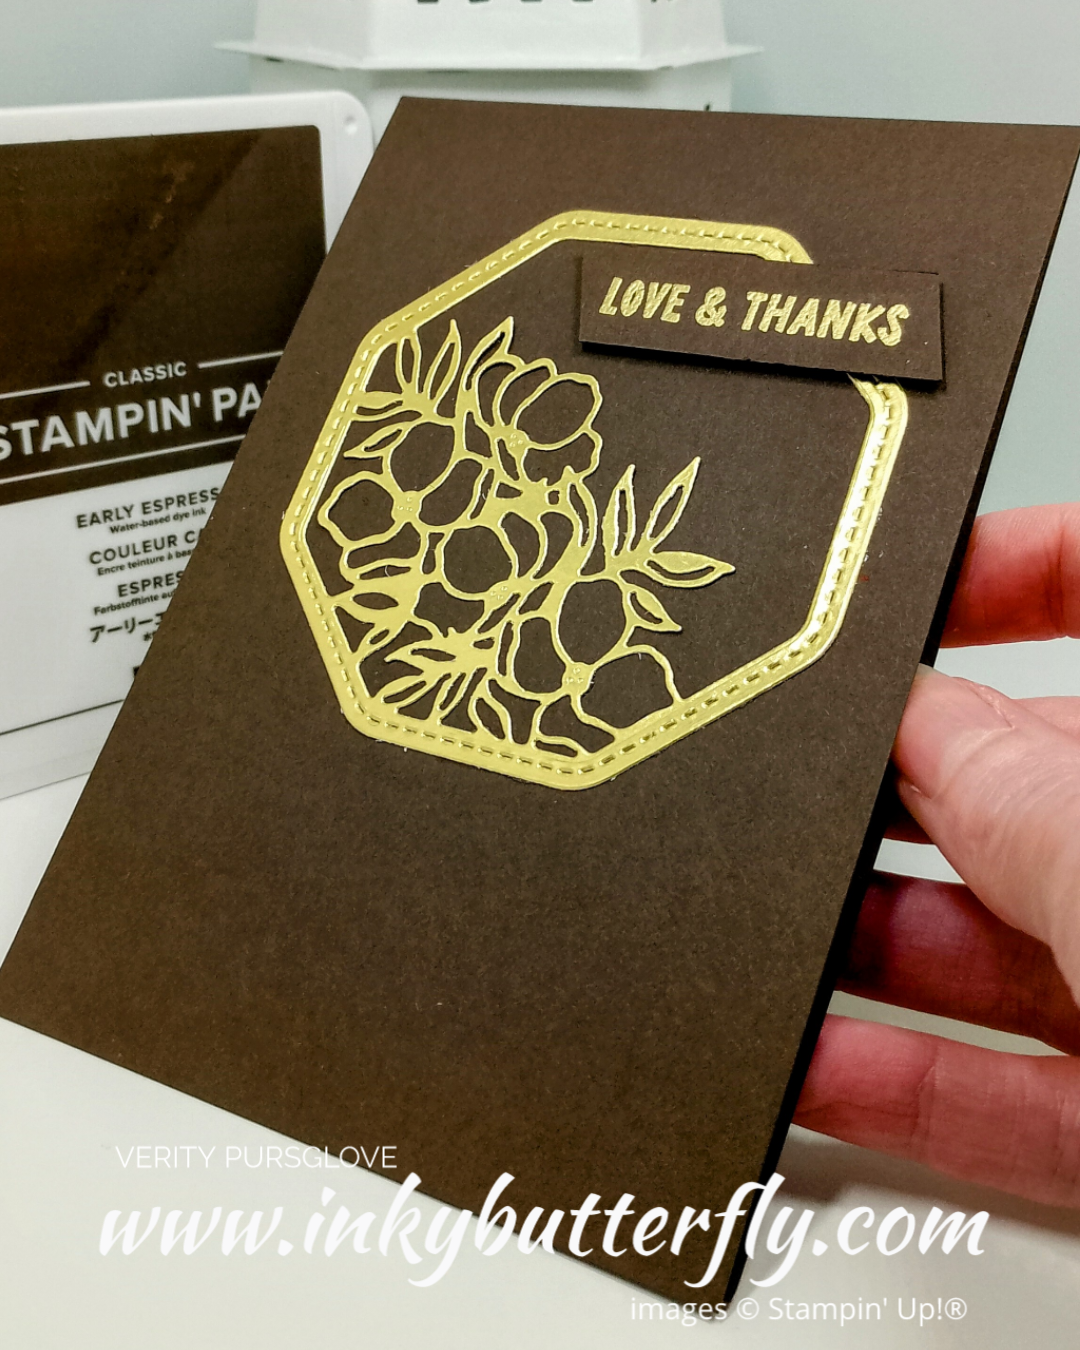
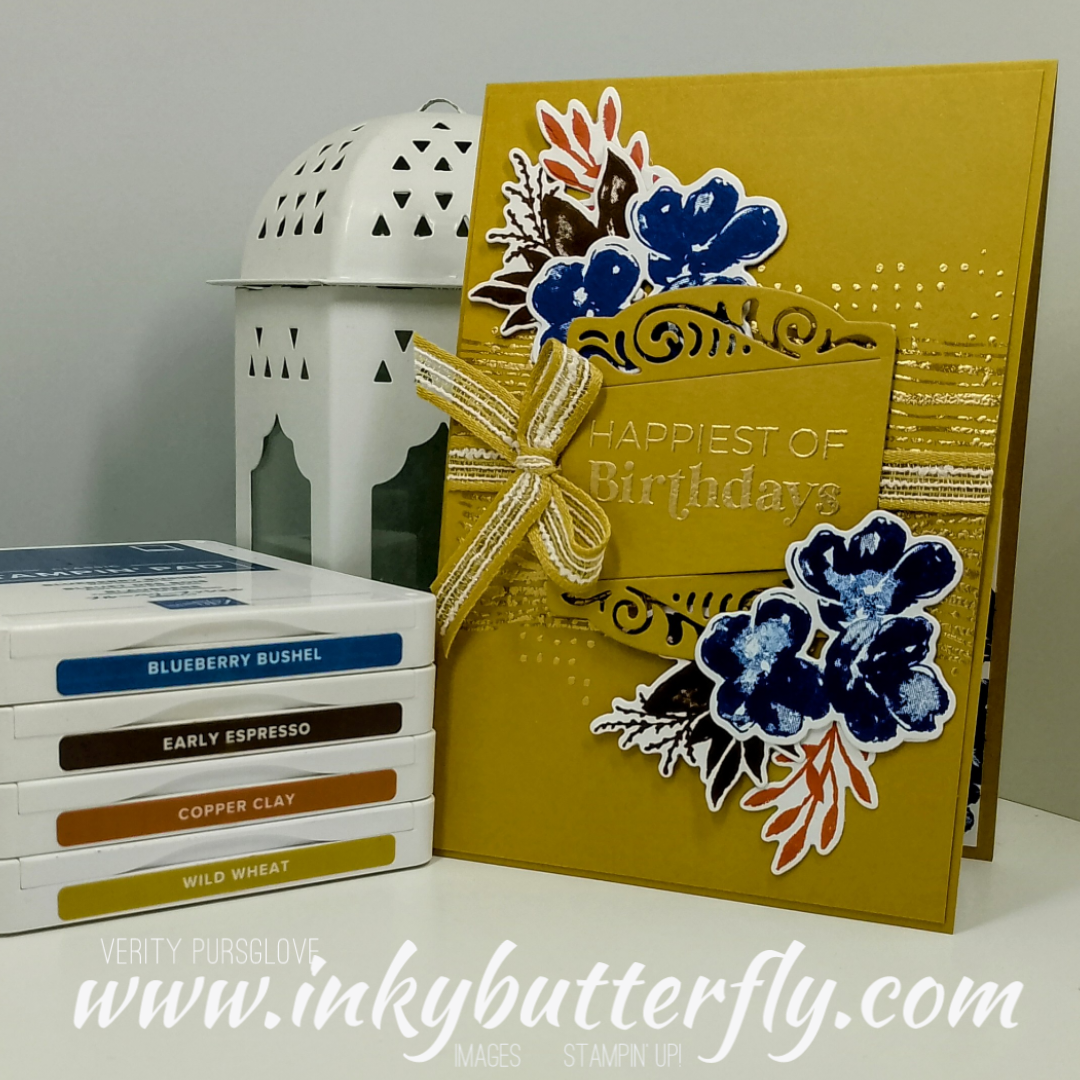
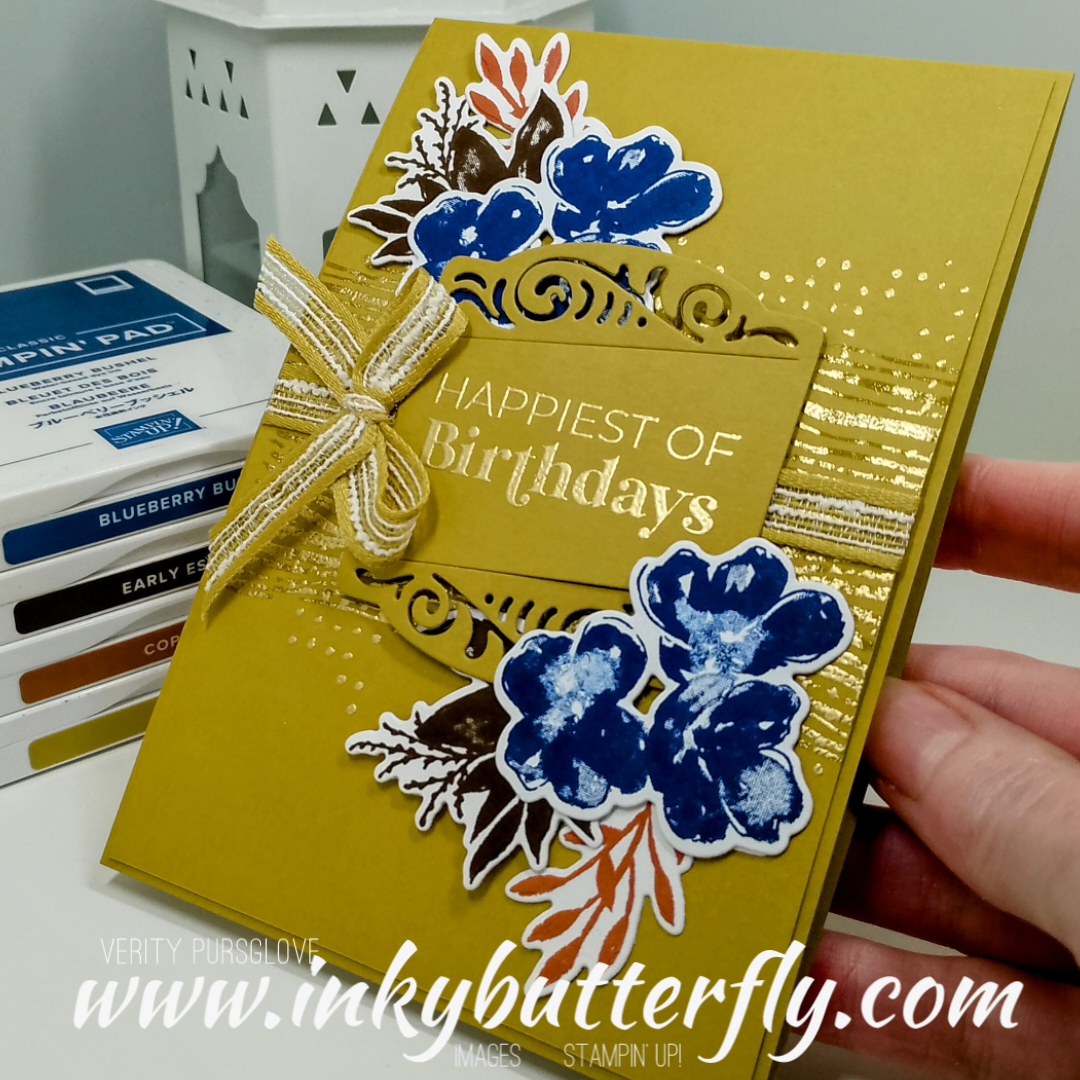
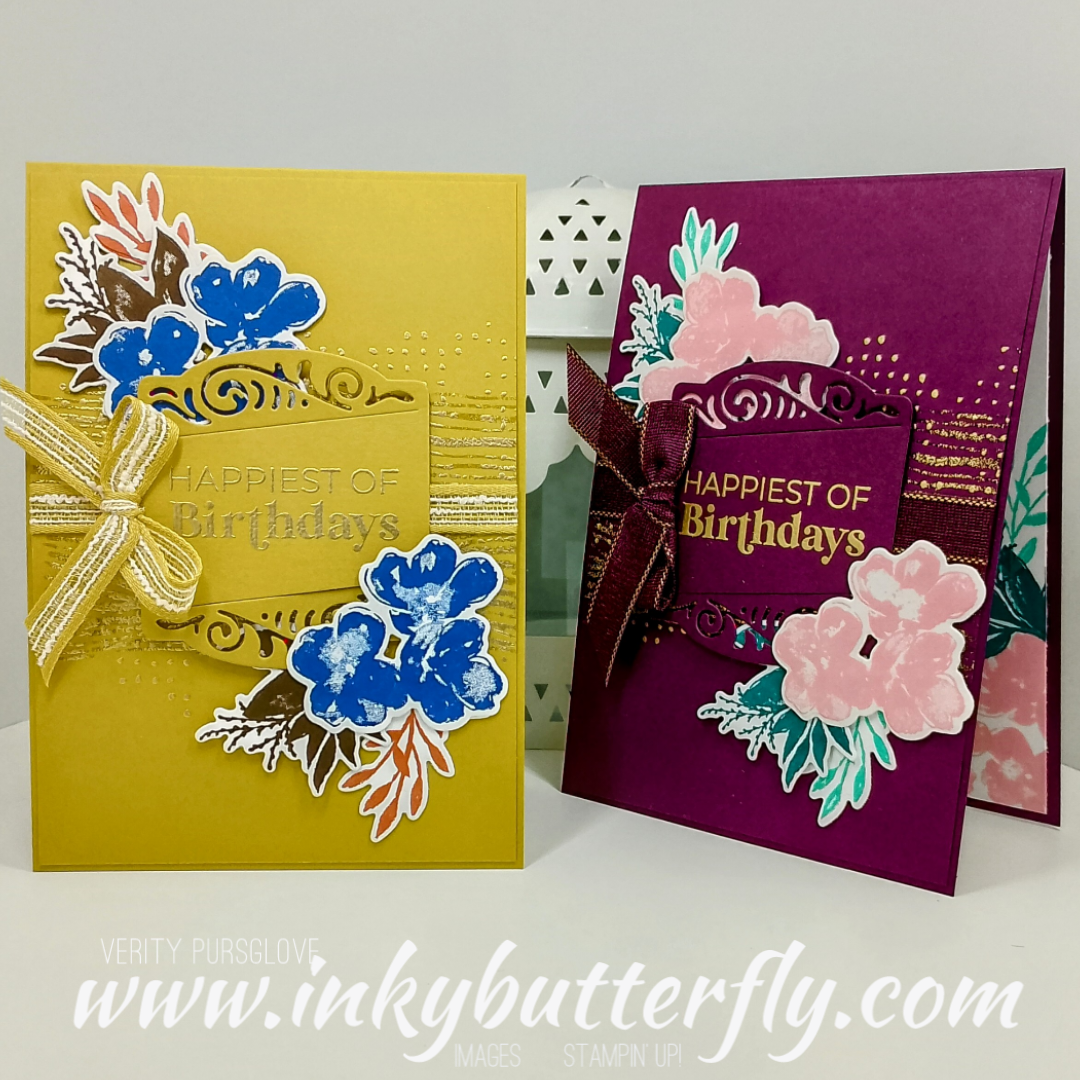
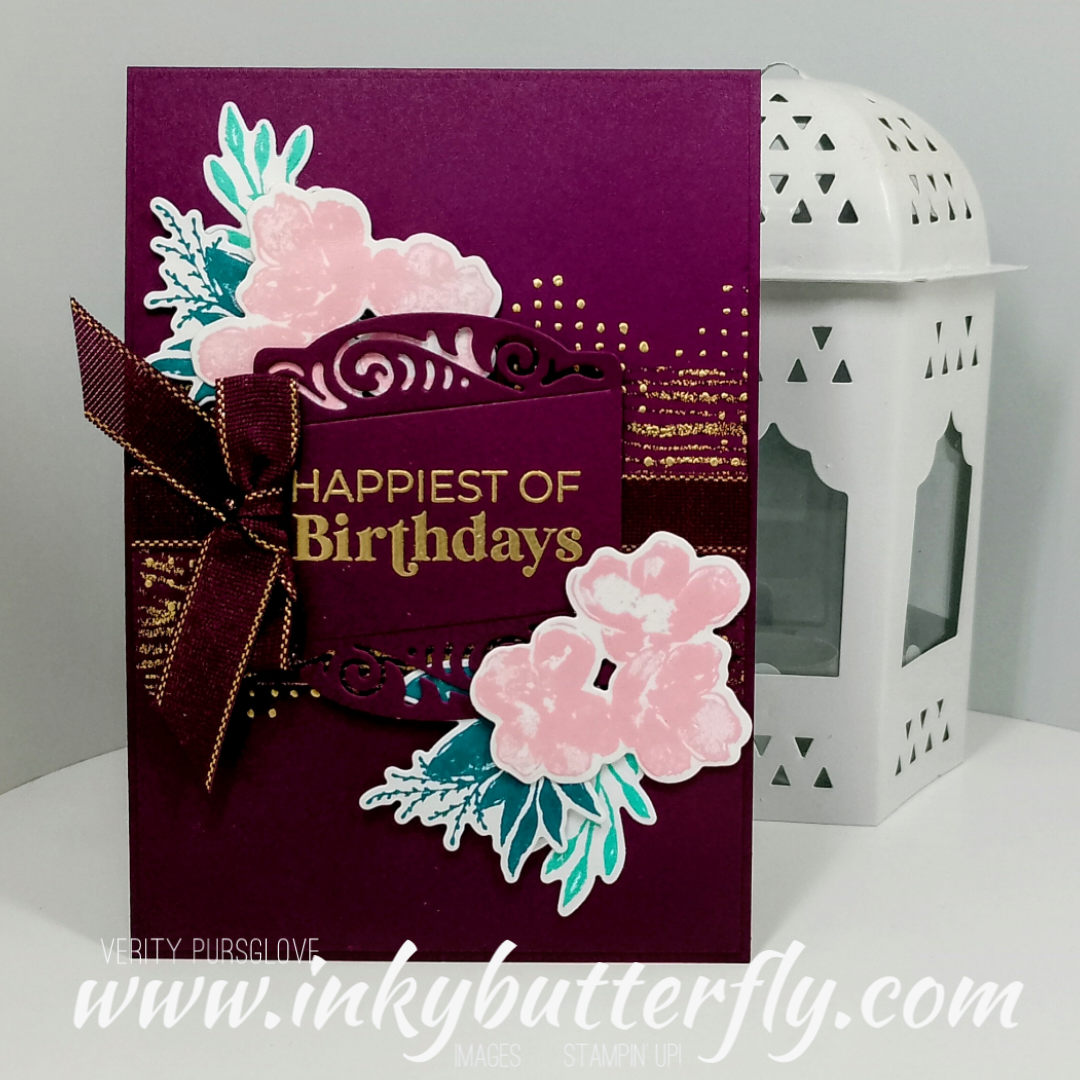
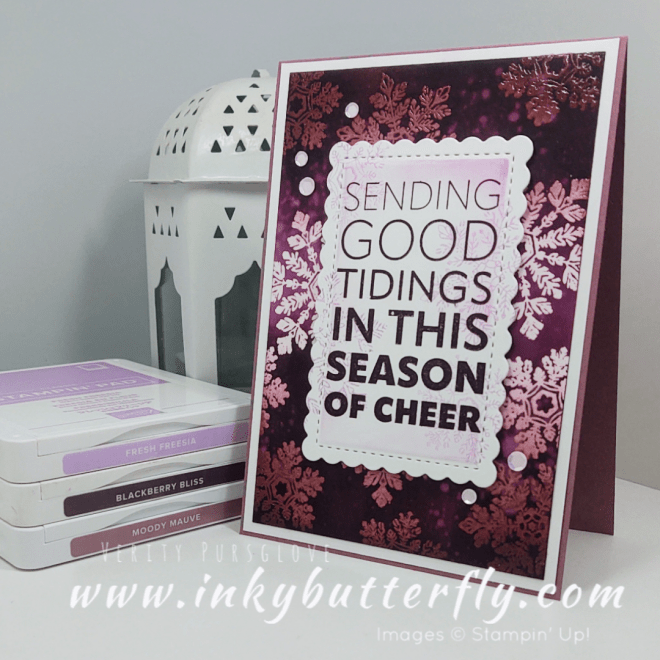
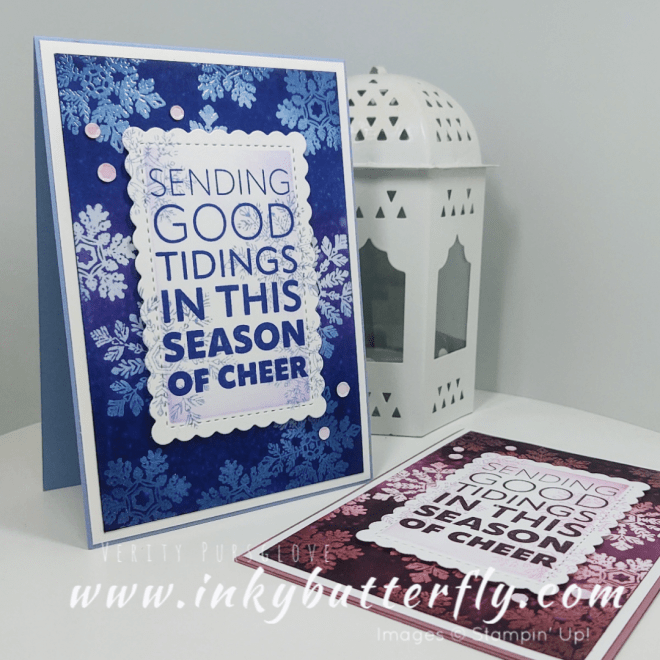
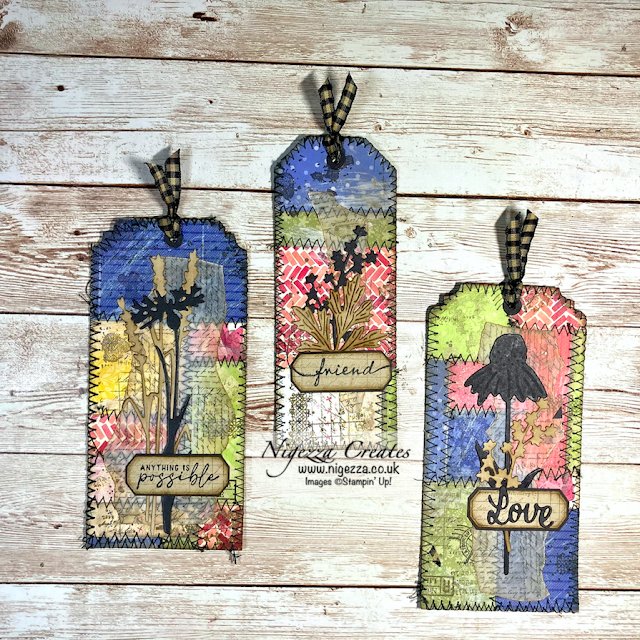
I created a distressed look background with Textured Timber stamp set, gold embossing powder and Wild Wheat Rustic ribbon.
You can see how I made this card in my video tutorial….
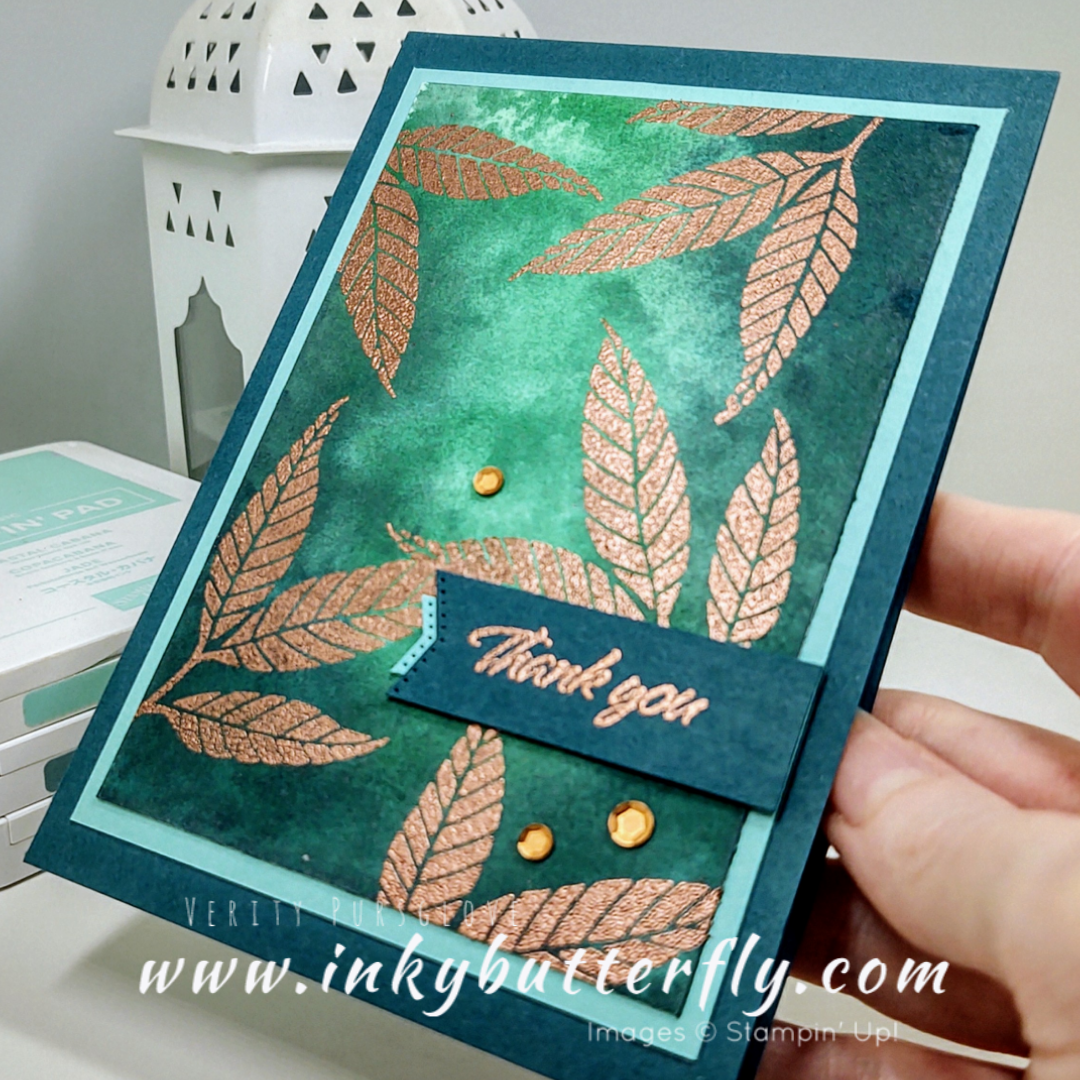
The sentiment was also heat embossed in gold and die cut with this lovely Christmas Labels die.
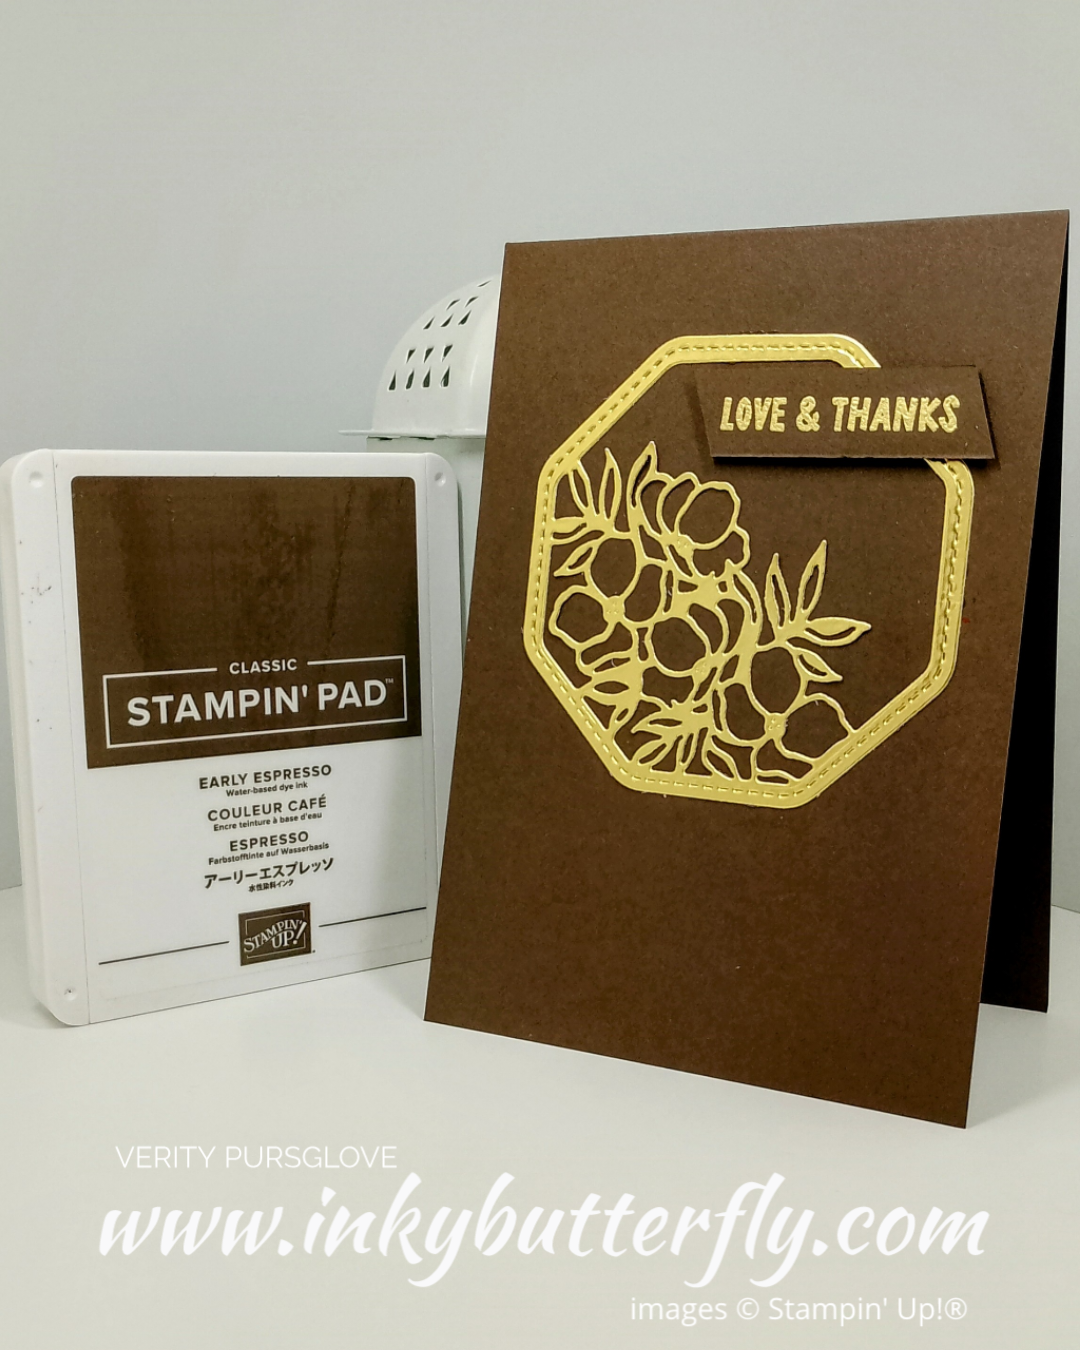
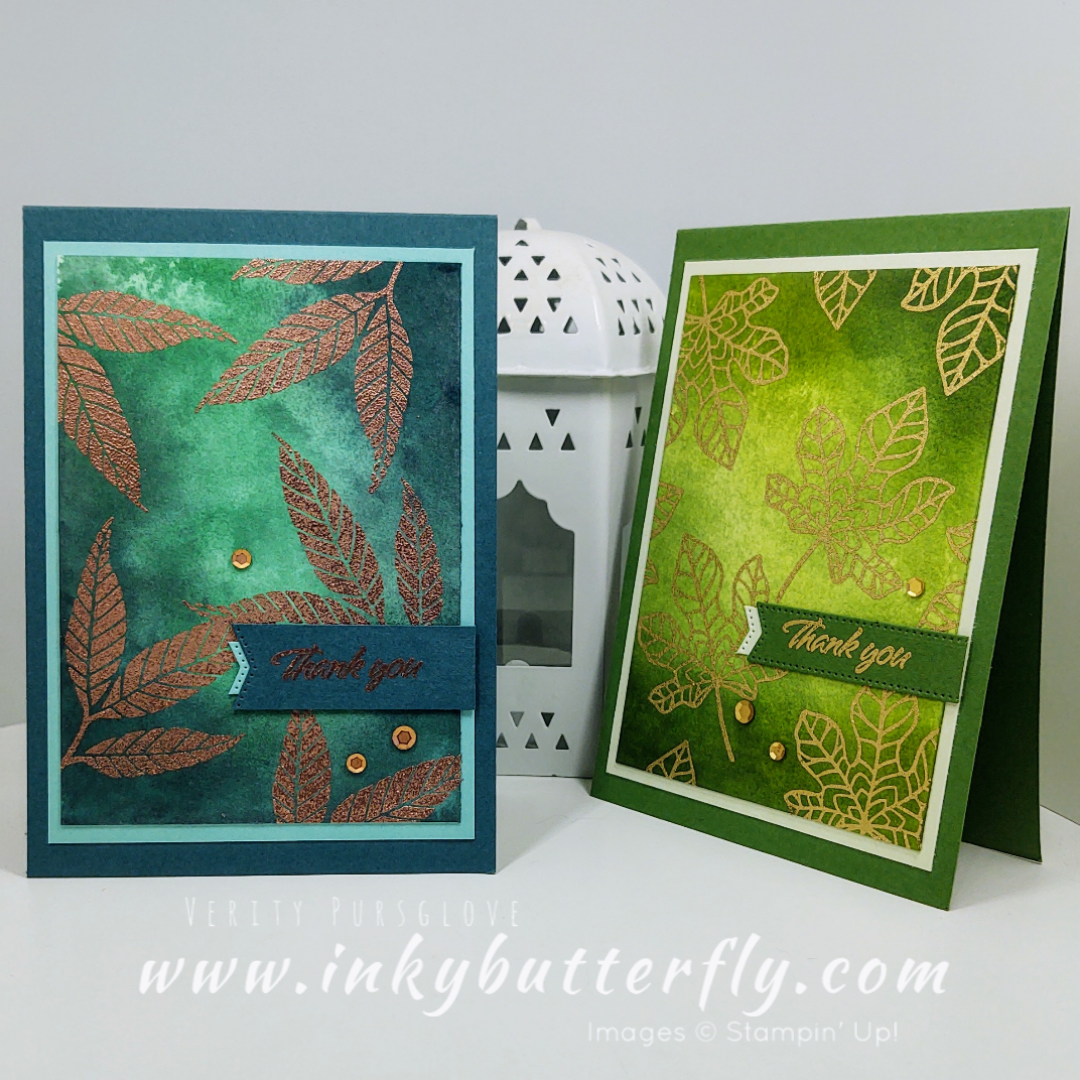
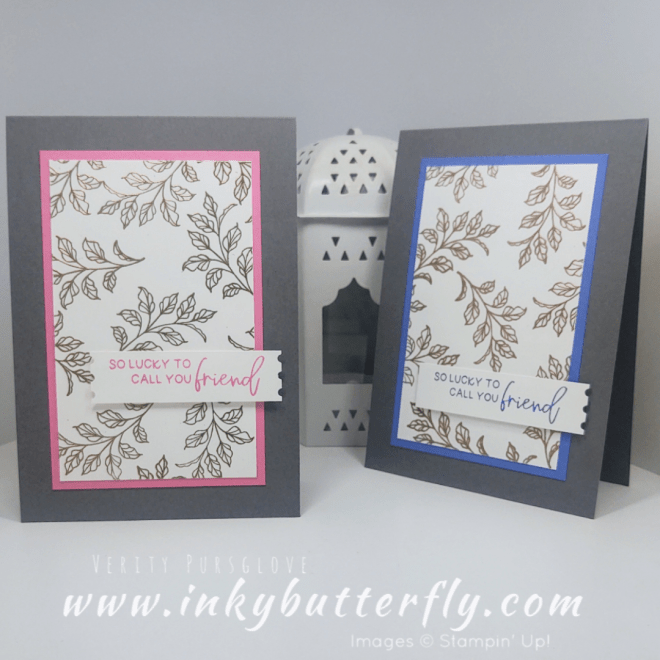
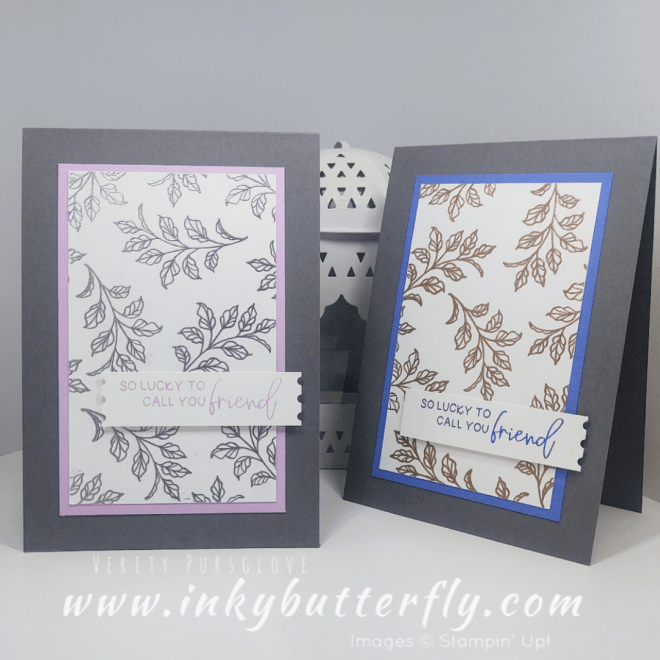
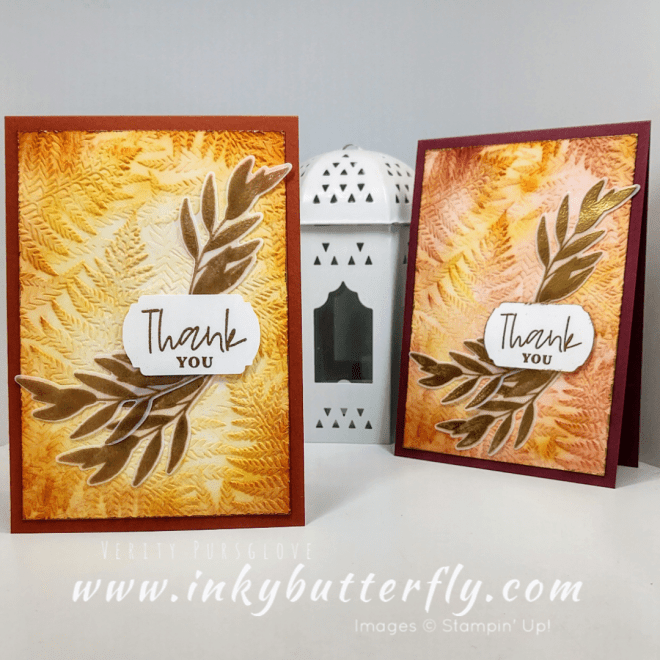
Blueberry Bushel, Early Espresso and Copper Clay inks were used to stamp the florals and foliage.
This version uses Blackberry Bliss, Pretty in Pink, Pretty Peacock and Summer Splash.
The supplies used are listed and linked to the online store below.
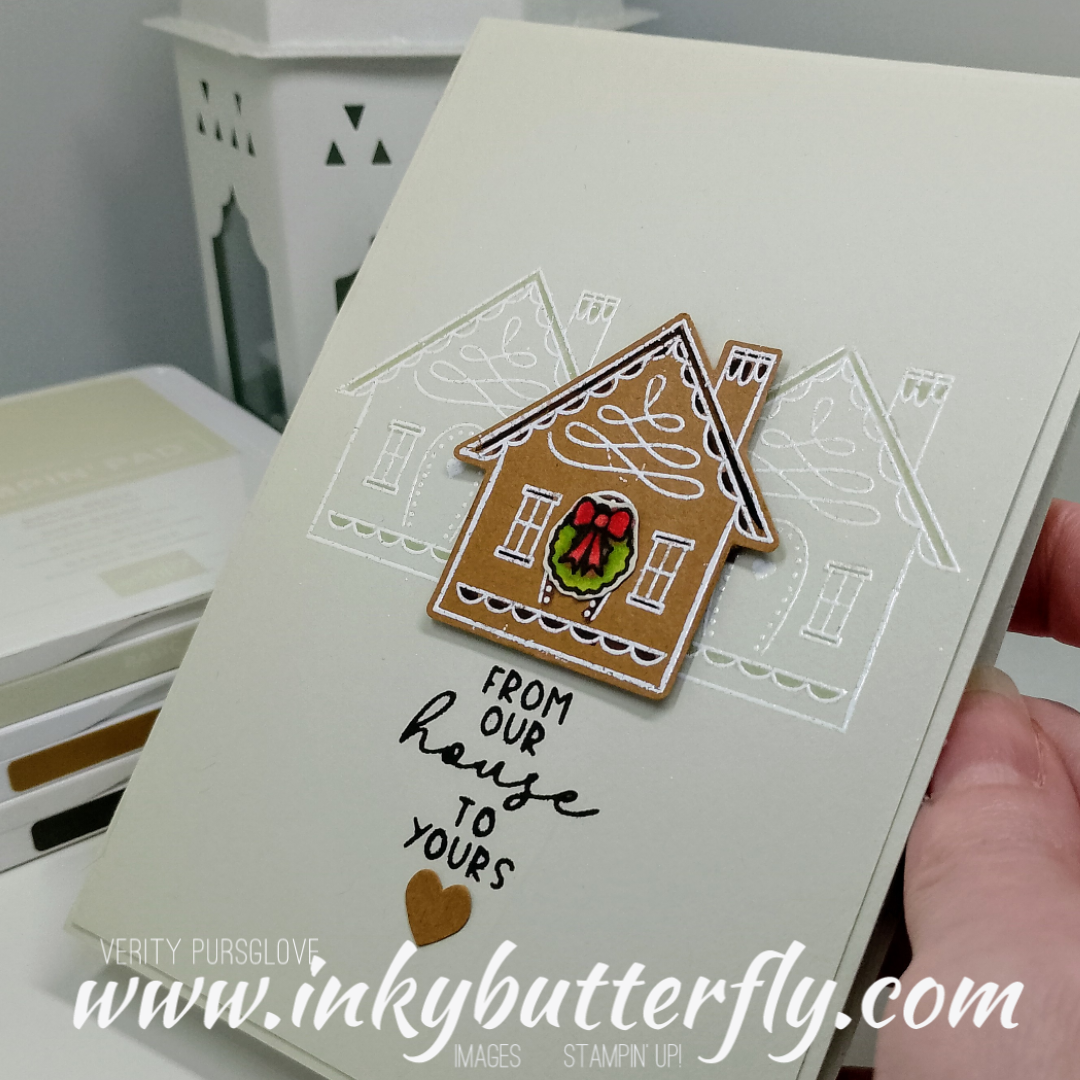
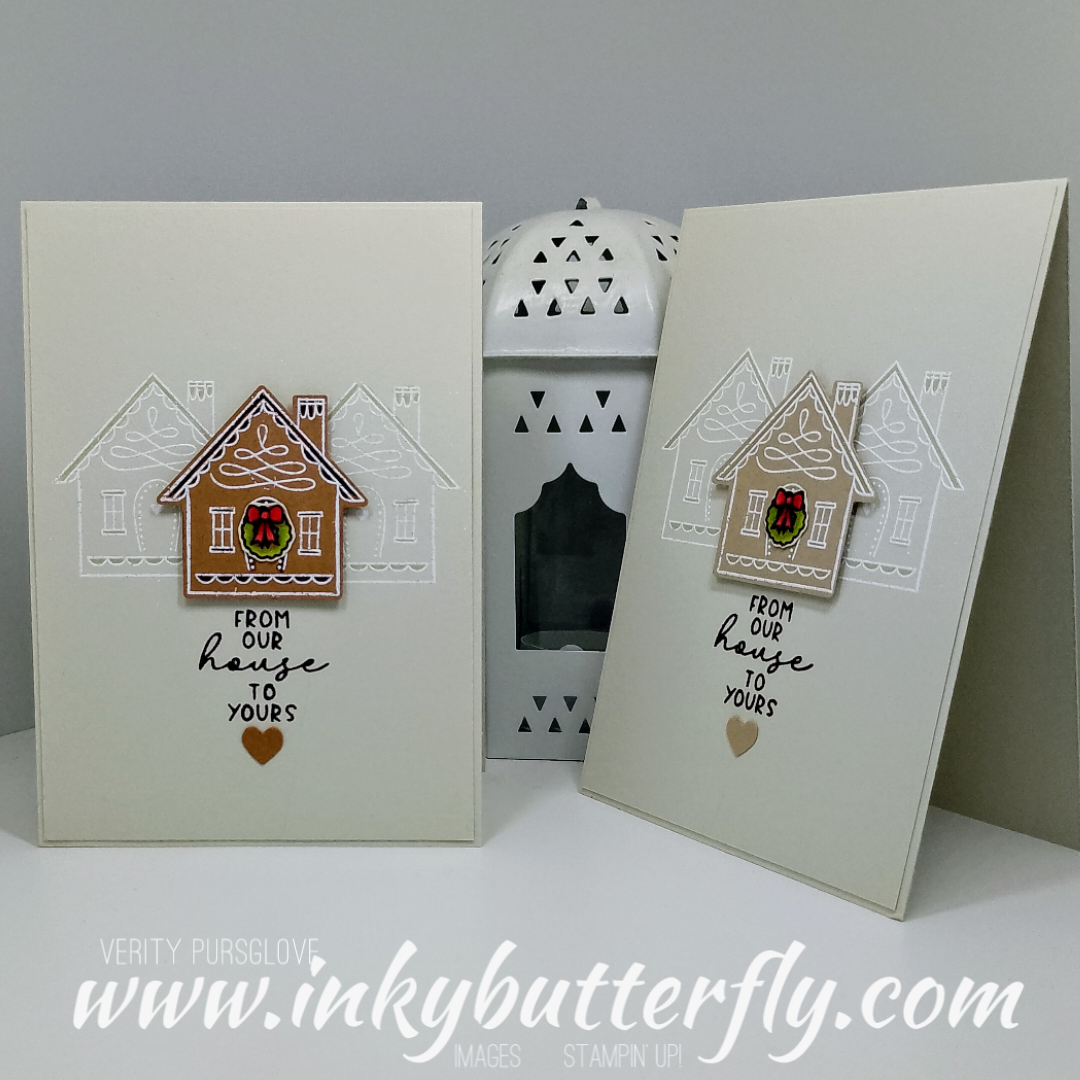
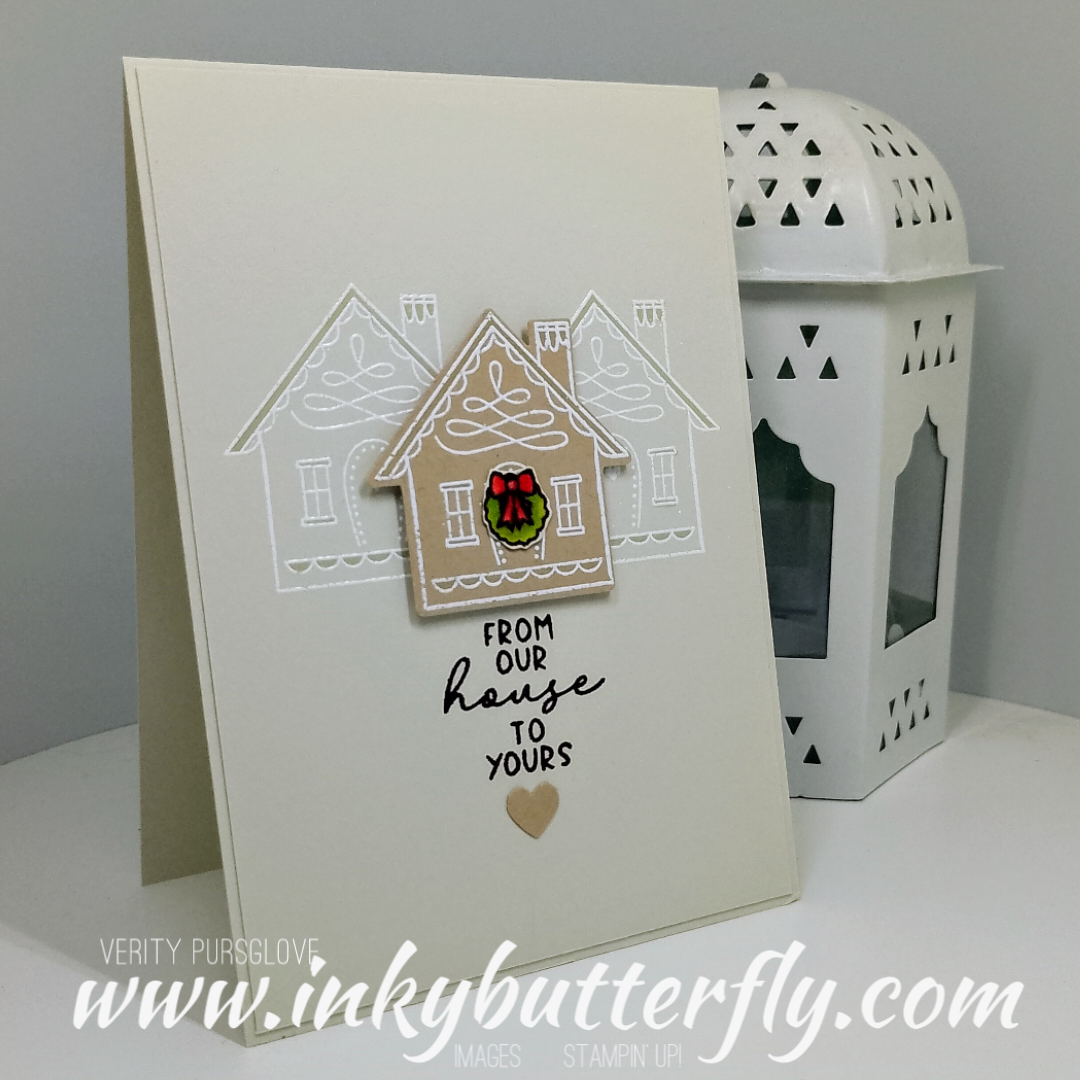
I have not had a chance to use this delightful new punch bundle yet! This set is featured on the cover of the mini catalogue and has proven very popular.
You can see how I made this card in my video tutorial….
The embossing on the background panel adds some detail.
I love the bold contrast of the Pecan Pie but the subtle look using Crumb Cake is lovely too!
The little heart from the punch is cute embellishment and a splash of colour comes from the wreath.
The supplies used are listed and linked to the online store below.
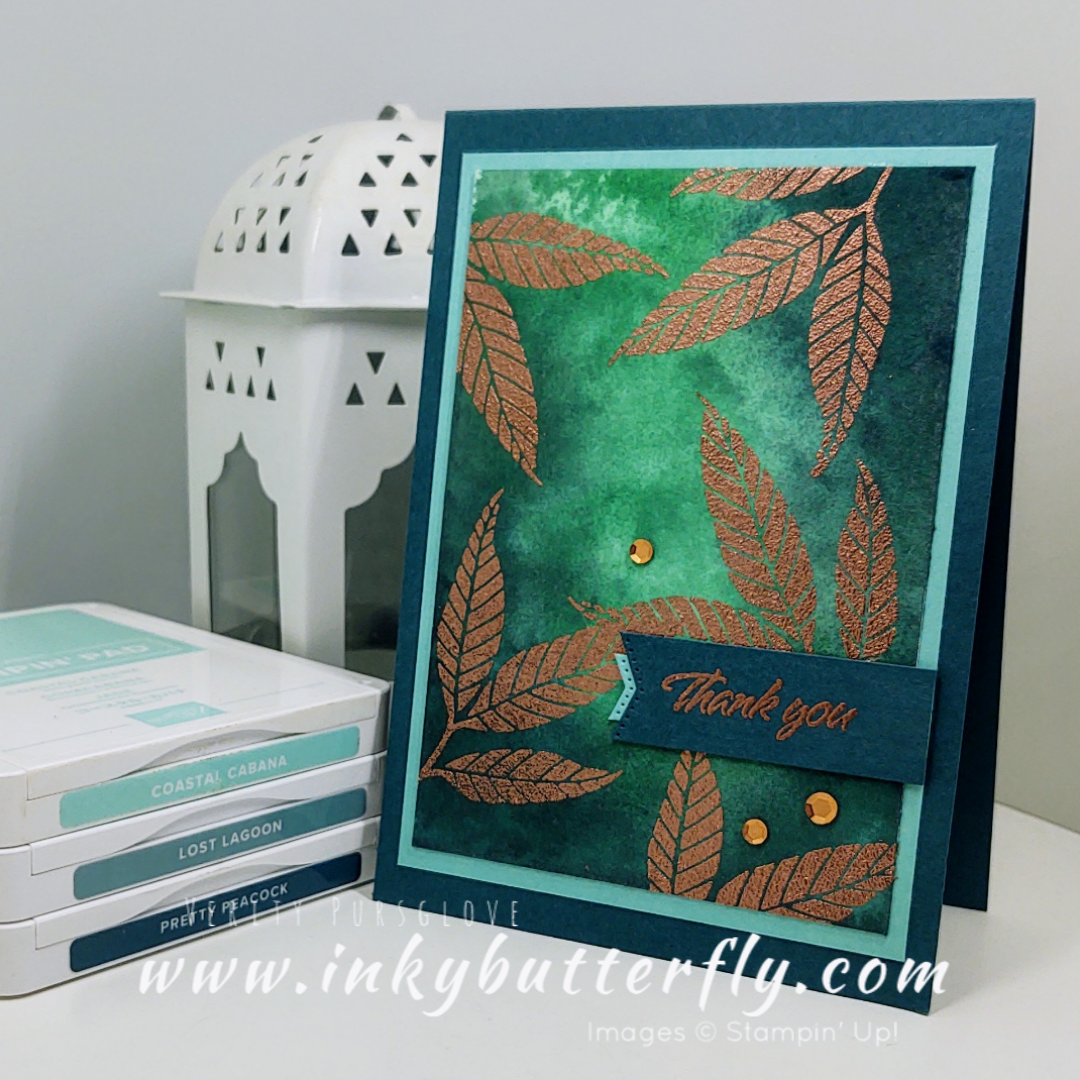
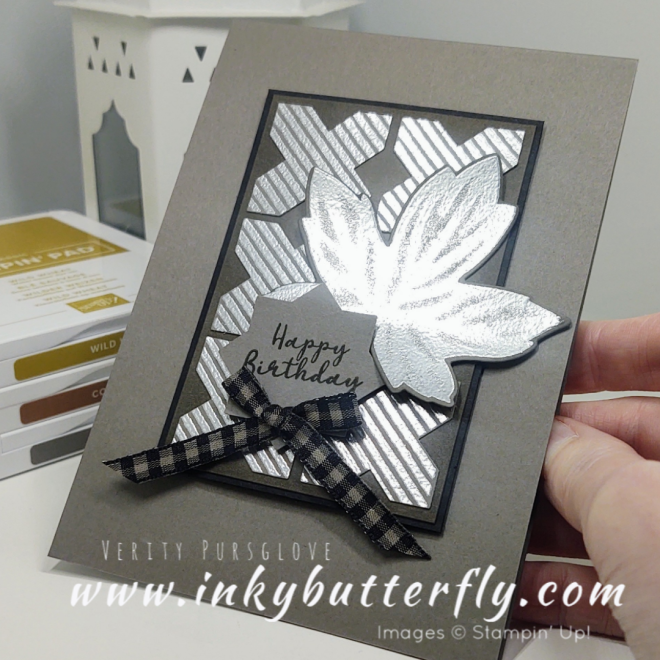
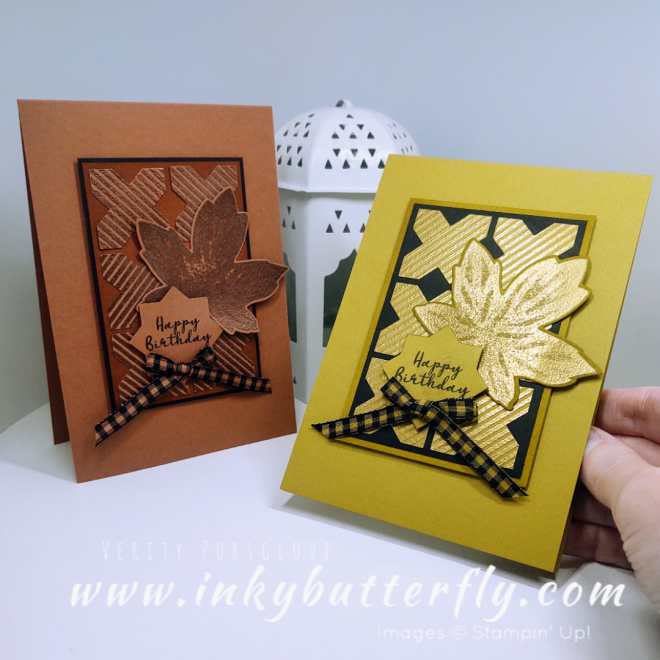
It’s been a while since I did any heat embossing. This idea came about as I have been using a lot of Wild Wheat cardstock as a substitute for gold, so I extended that to copper and silver…
I have used Medley Mix and the coordinating Inked and Tiled punches to create the background panel.
You can see how I made this card in my video tutorial
Here is the original card with Wild Wheat and gold heat embossing.
And finally, I also used copper embossing powder on Copper Clay cardstock.
I hope you enjoyed this project.
The supplies used are listed and linked to the online store below.
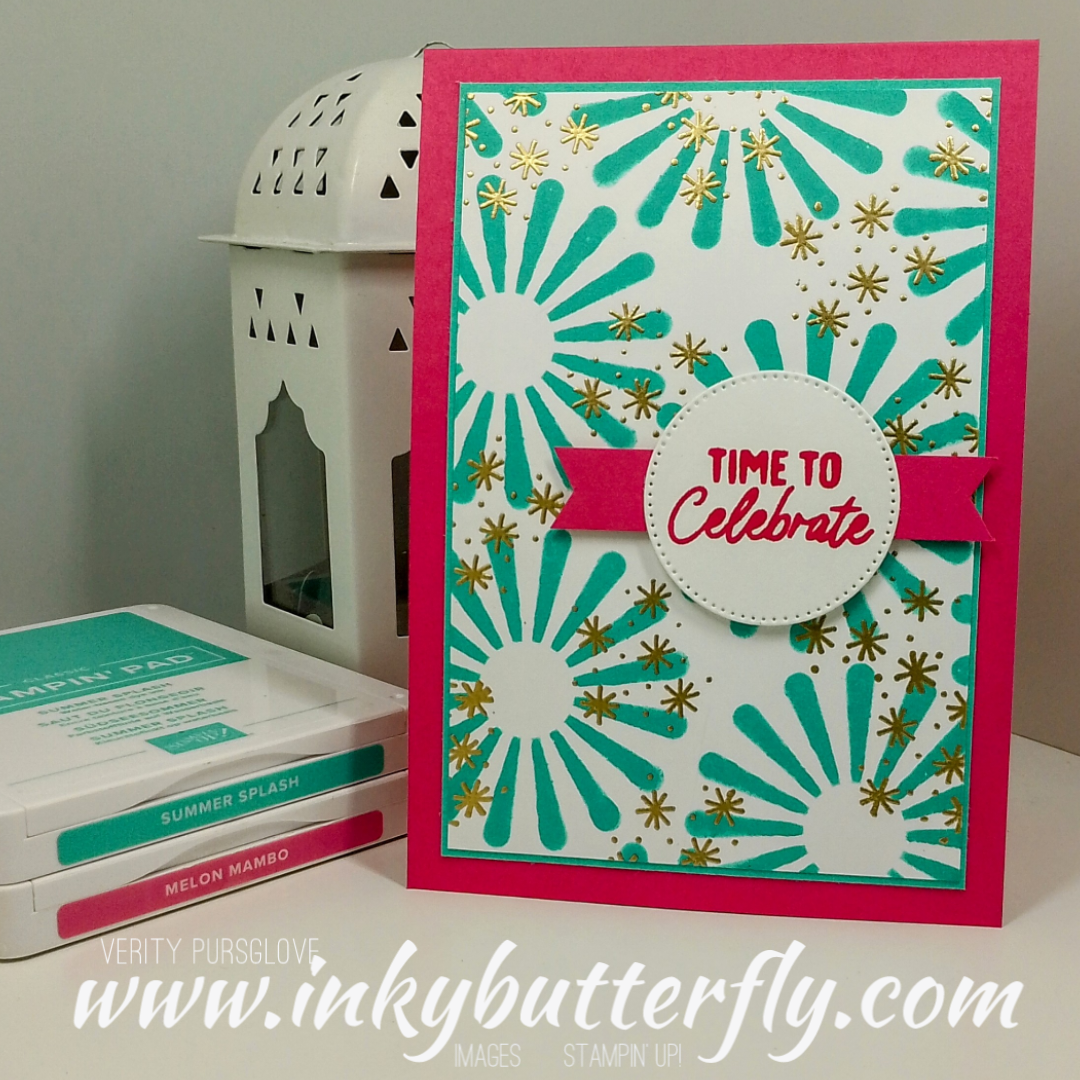
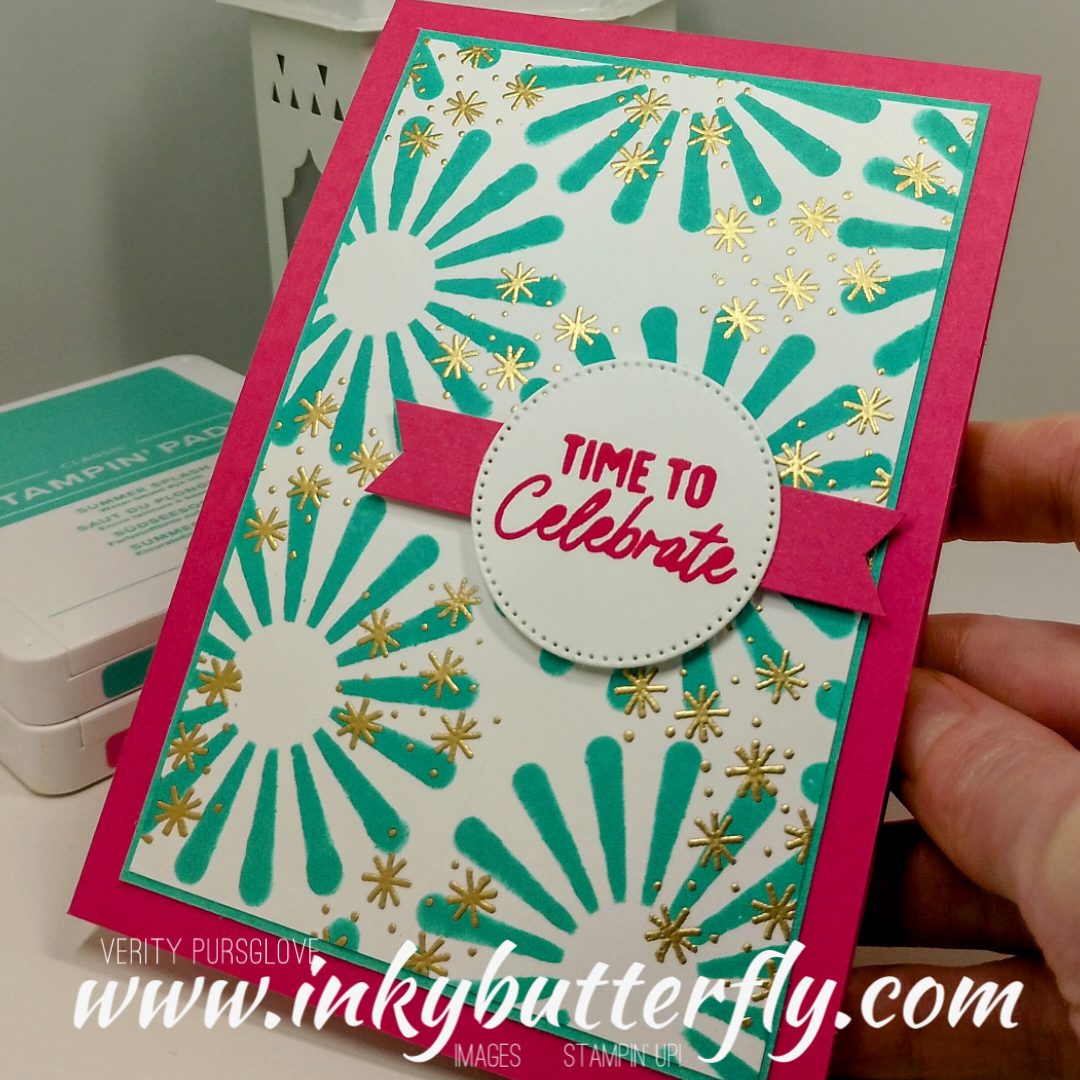
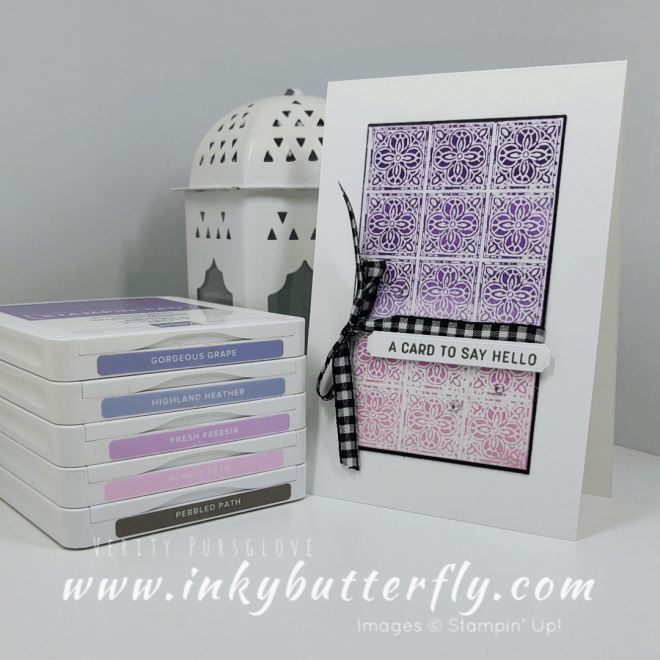
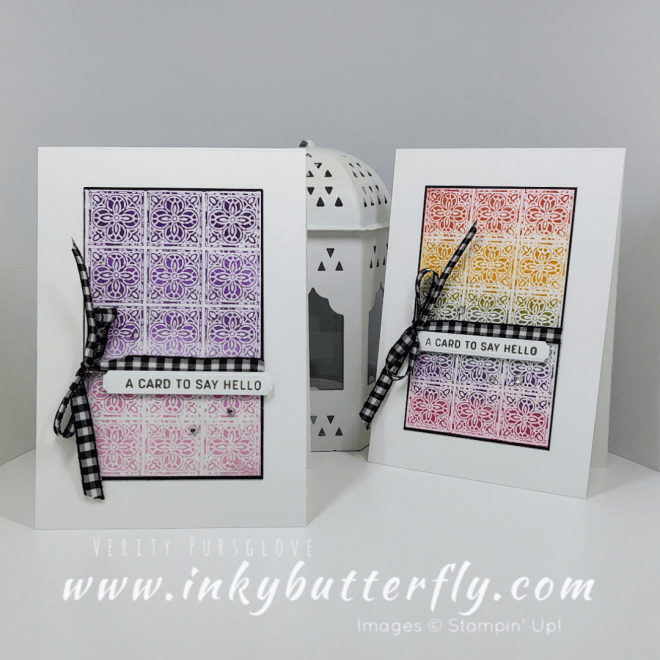
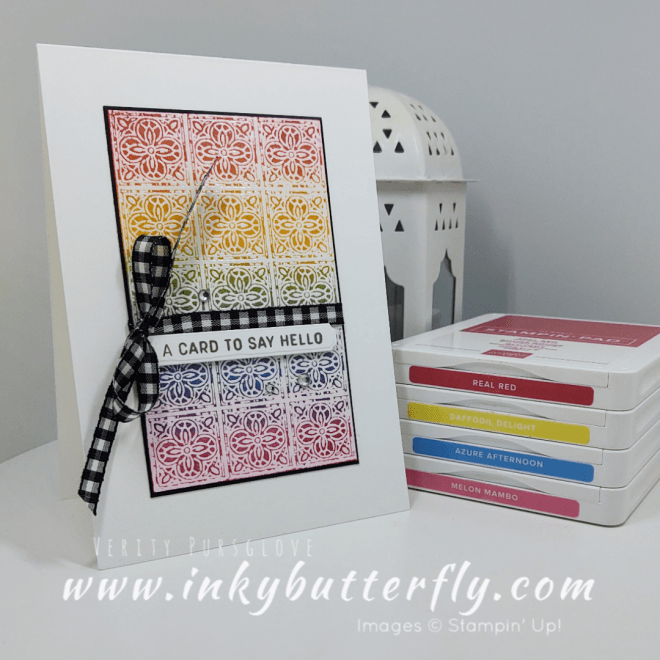
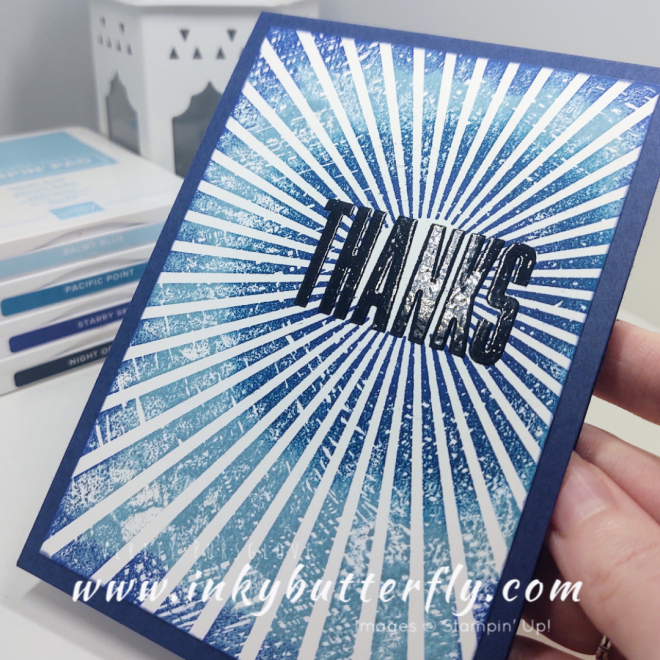
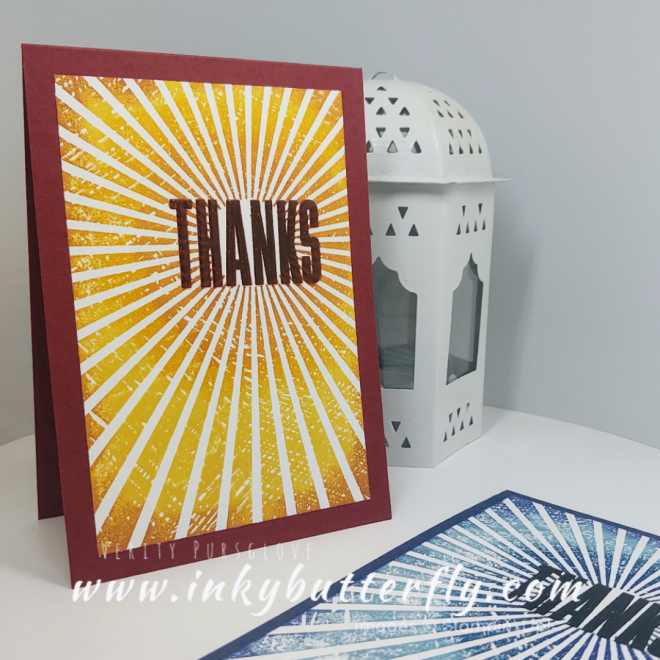
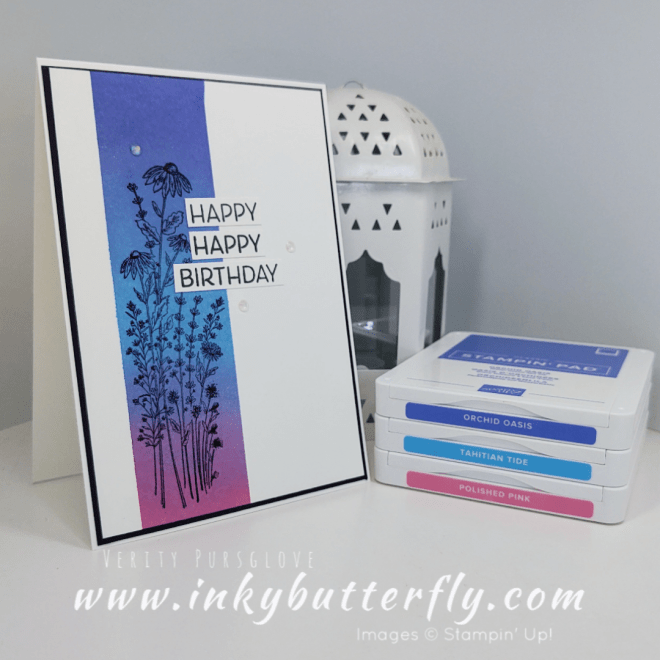
This is my absolute favourite technique ever… It never fails to look amazing!
The Timeless Tiles Stamp Set is perfect for this.
You can see how I made this card in my video tutorial….
I love the ombre effect with the purple and pink inks there are so many combinations you could try
This rainbow combo uses just four colours. The yellow mixes with red and blue to make the orange and green. Some purple appears where blue and pink overlap..
I hope you enjoyed this project.
The supplies used are listed and linked to the online store below.
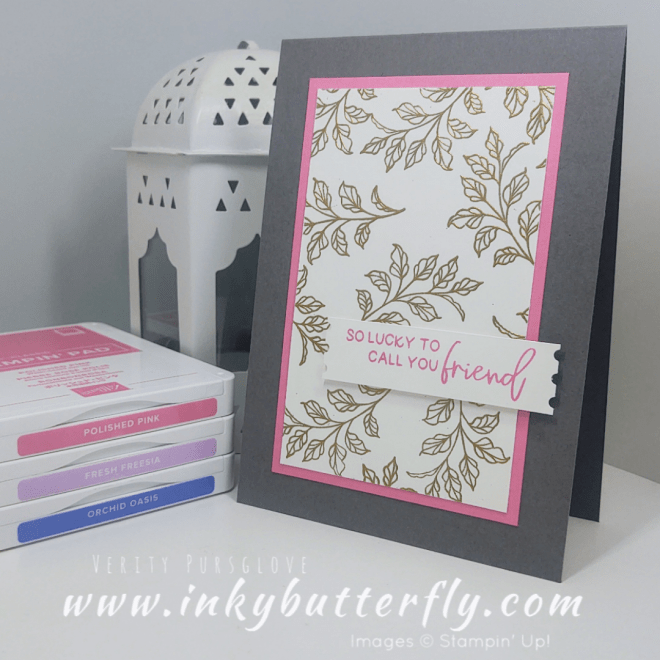
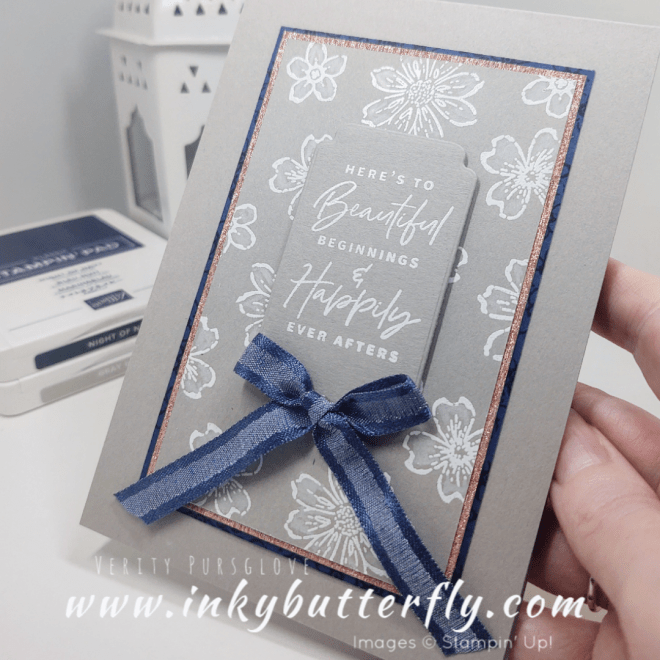
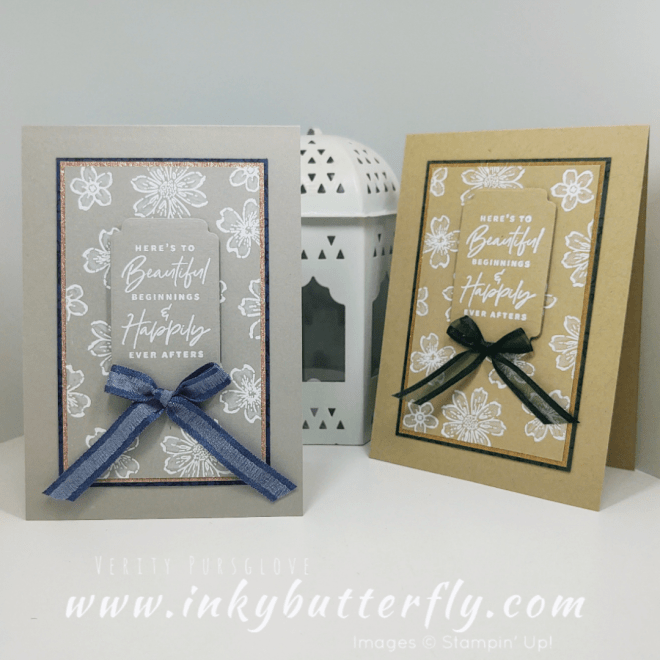
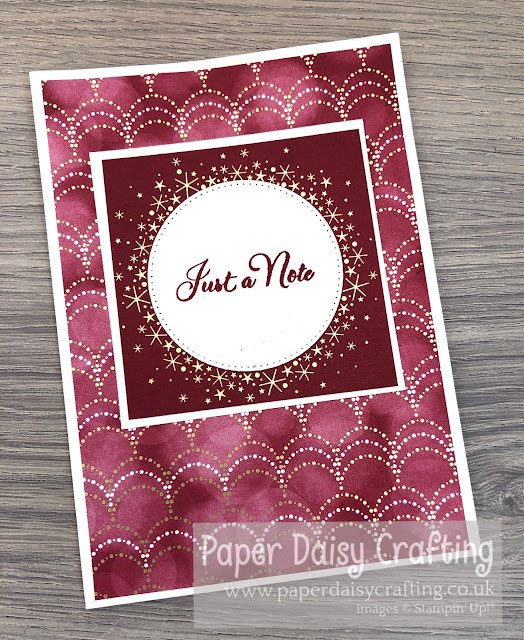
At our team retreat last weekend, we made a sweet little desk organiser. In the process, I “discovered” a new beautiful colour combination of Basic Grey, Orchid Oasis and Copper! So today, I’m exploring some other options!
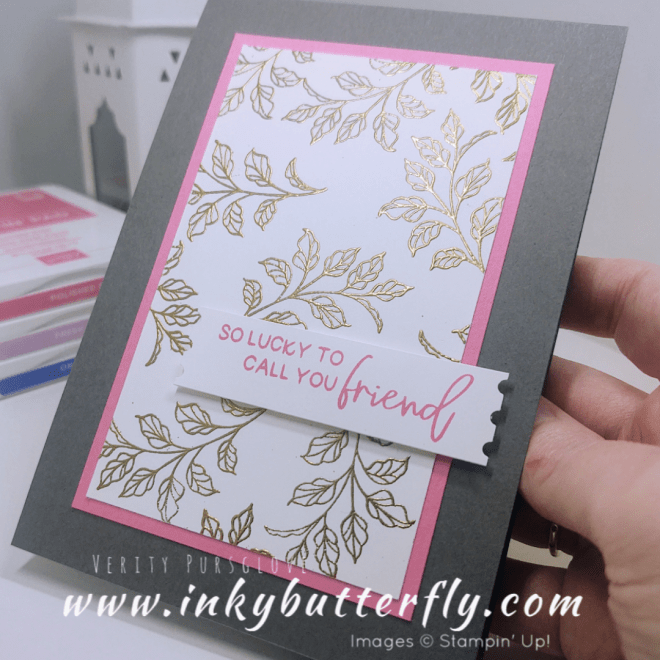
First up is Polished Pink with Gold!
You can see how I made this card in my video tutorial…
The card design is very simple to focus on the colour combinations…
Here’s the original version with Orchid Oasis and Copper….
And just for completeness, here is Fresh Freesia with Silver!
Which is your favourite?
I hope you enjoyed this project.
The supplies used are listed and linked to the online store below.
Sometimes I like to “go to town” on a card project! So this card is packed with texture from a bunch of dies cuts and I’ve thrown in some hest embossing too!
You can see how I made this card in my video tutorial….
A variety of green cardstocks were used to make the wreath background which was embellished with Rich Razzleberry flowers.
This version uses a Sahara Sand card base and Highland Heather flowers.
I hope you enjoyed this project.
The supplies used are listed and linked to the online store below.
Welcome to this week’s Project Share. As always my friends have created some lovely work. Please use the links to visit their blogs and read more about their projects.
***************
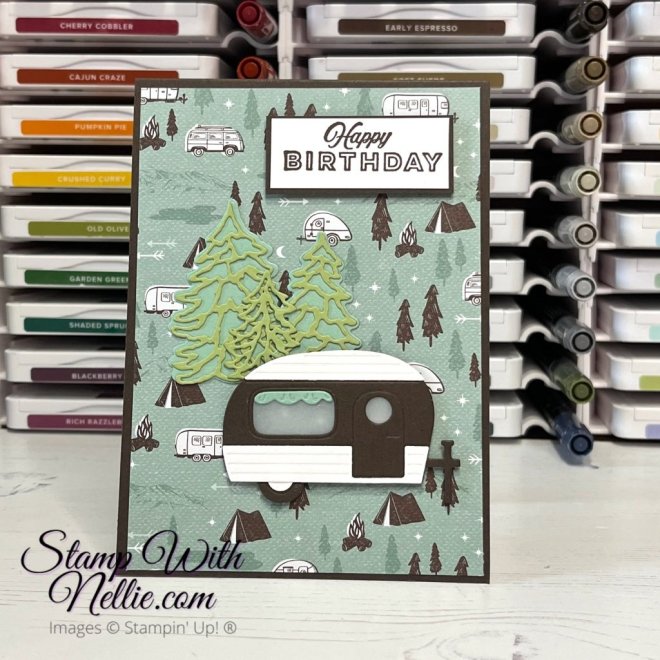
Jill’s project this week uses festive paper for a non-festive card – great way to stretch your stash!
Welcome to this week’s Project Share. As always my friends have created some lovely work. Please use the links to visit their blogs and read more about their projects.
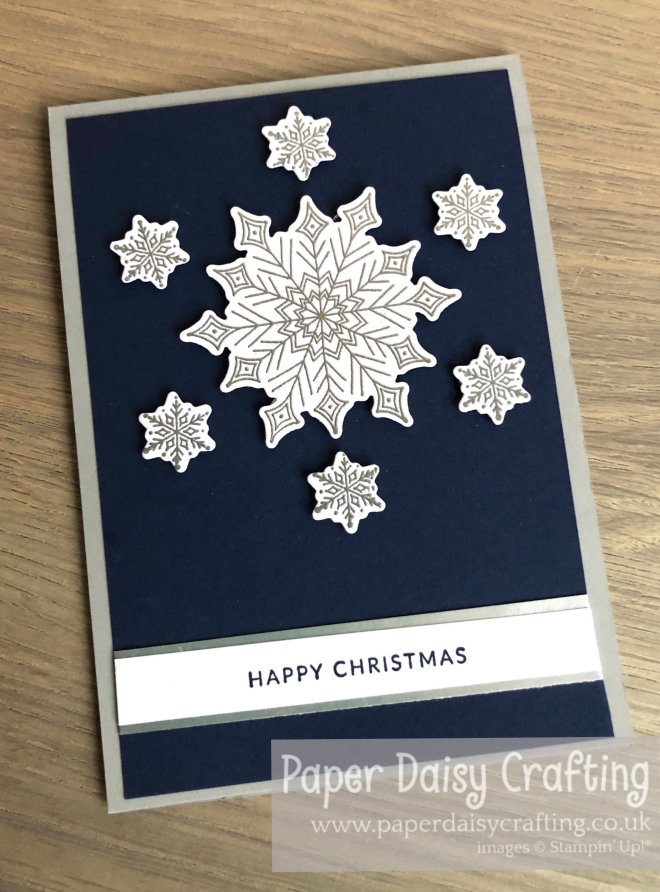
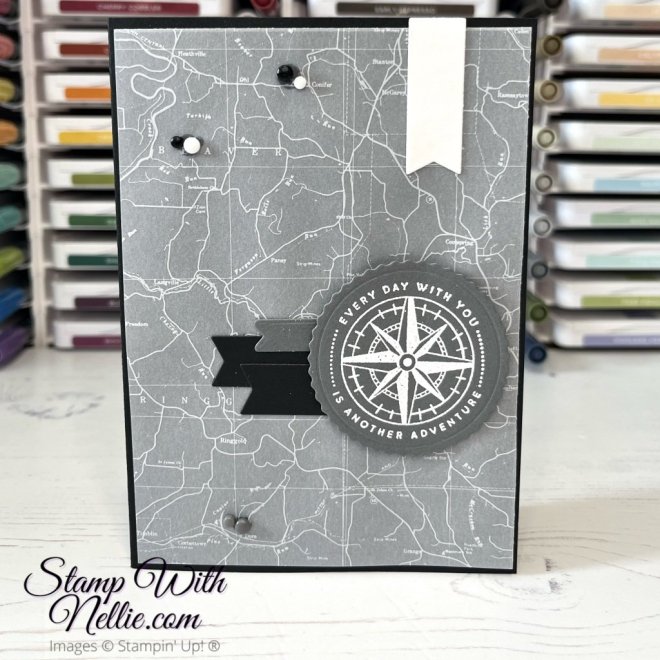
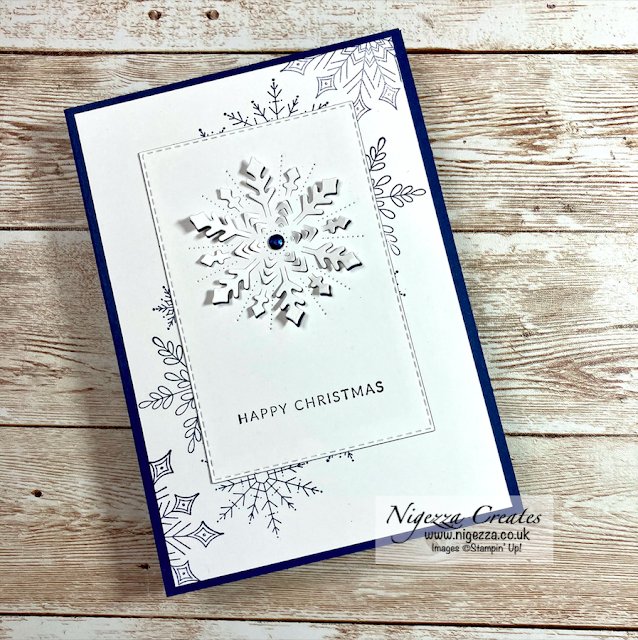
Jill is using a classic combination of navy and silver for her Christmas card!
Welcome to this week’s Project Share. As always my friends have created some lovely work. Please use the links to visit their blogs and read more about their projects.
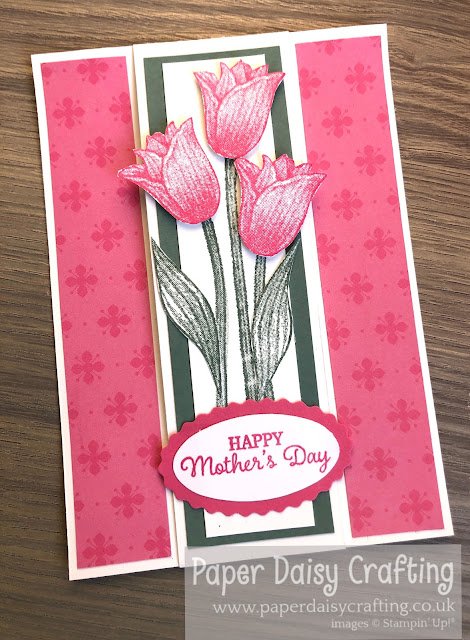
Jill’s card this week is a fun fold! This is a great alternative that can be adapted for any occasion!
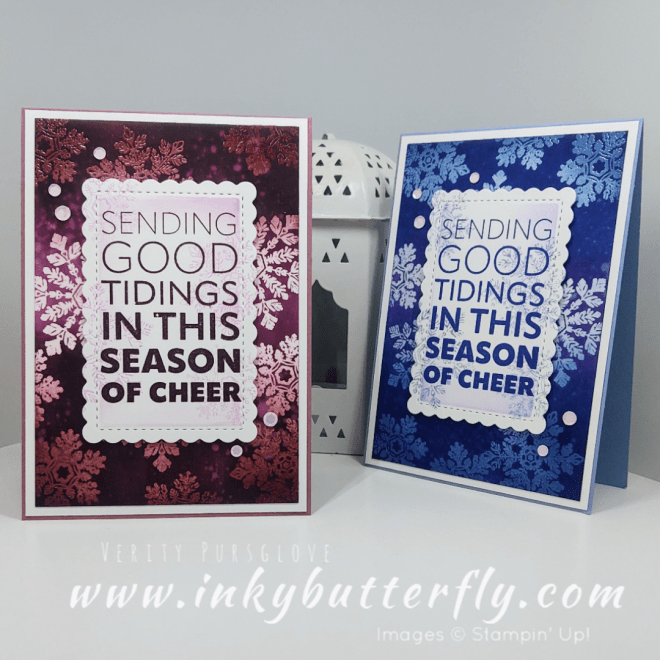
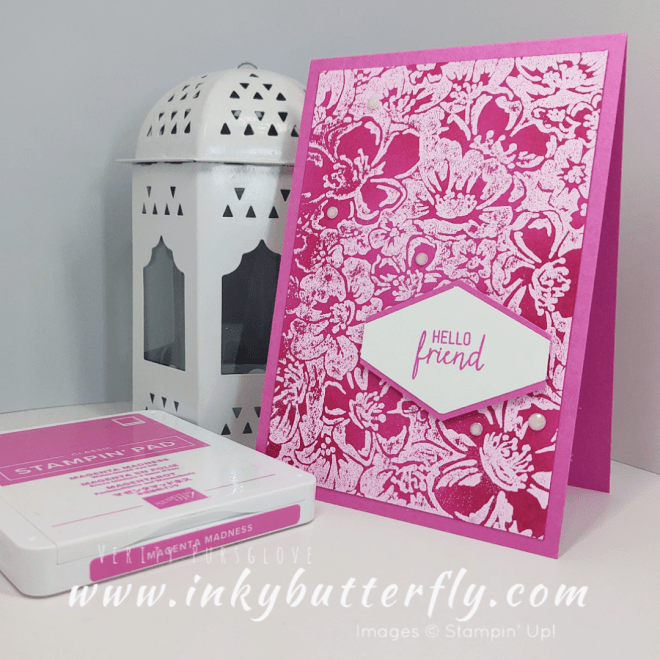
I teamed the background with the super vibrant Magenta Madness cardstock and ink. This colour also retires, but don’t worry more new colours are on their way!
You can see how I made this card in my video tutorial….
The sentiment is from Queen Anne’s Lace and cut with the Tailored Tag punch, which are also retiring products!
Click below to move on to Jill’s blog to see her wonderful project!
I hope you enjoyed this project.
The supplies used are listed and linked to the online store below.

![Modern Christmas Suite Collection (English) [ 166006 ]](https://assets1.tamsnetwork.com/images/EC042017NF/166006s.jpg "Modern Christmas Suite Collection (English) [ 166006 ]")

![Ornamental Christmas Bundle (English) [ 166001 ]](https://assets1.tamsnetwork.com/images/EC042017NF/166001s.jpg "Ornamental Christmas Bundle (English) [ 166001 ]")
![Basic White A4 Thick Cardstock [ 159230 ]](https://assets1.tamsnetwork.com/images/EC042017NF/159230s.jpg "Basic White A4 Thick Cardstock [ 159230 ]")

![Stylish Shapes Dies [ 159183 ]](https://assets1.tamsnetwork.com/images/EC042017NF/159183s.jpg "Stylish Shapes Dies [ 159183 ]")
![Versamark Pad [ 102283 ]](https://assets1.tamsnetwork.com/images/EC042017NF/102283s.jpg "Versamark Pad [ 102283 ]")
![Metallics Wow! Embossing Powder [ 165678 ]](https://assets1.tamsnetwork.com/images/EC042017NF/165678s.jpg "Metallics Wow! Embossing Powder [ 165678 ]")
![Heat Tool - Uk Plug [ 129054 ]](https://assets1.tamsnetwork.com/images/EC042017NF/129054s.jpg "Heat Tool - Uk Plug [ 129054 ]")
![Black & White & Gold Baker's Twine [ 166005 ]](https://assets1.tamsnetwork.com/images/EC042017NF/166005s.jpg "Black & White & Gold Baker's Twine [ 166005 ]")
![Stampin' Seal [ 152813 ]](https://assets1.tamsnetwork.com/images/EC042017NF/152813s.jpg "Stampin' Seal [ 152813 ]")
![Stampin' Dimensionals [ 104430 ]](https://assets1.tamsnetwork.com/images/EC042017NF/104430s.jpg "Stampin' Dimensionals [ 104430 ]")


![Memorable Blooms Bundle (English) [ 164826 ]](https://assets1.tamsnetwork.com/images/EC042017NF/164826s.jpg "Memorable Blooms Bundle (English) [ 164826 ]")
![Stampin' Cut & Emboss Machine [ 149653 ]](https://assets1.tamsnetwork.com/images/EC042017NF/149653s.jpg "Stampin' Cut & Emboss Machine [ 149653 ]")
![Early Espresso A4 Card Stock [ 121686 ]](https://assets1.tamsnetwork.com/images/EC042017NF/121686s.jpg "Early Espresso A4 Card Stock [ 121686 ]")
![Gold Foil Sheets [ 132622 ]](https://assets1.tamsnetwork.com/images/EC042017NF/132622s.jpg "Gold Foil Sheets [ 132622 ]")
![Multipurpose Liquid Glue [ 154974 ]](https://assets1.tamsnetwork.com/images/EC042017NF/154974s.jpg "Multipurpose Liquid Glue [ 154974 ]")
![Mini Stampin' Dimensionals [ 144108 ]](https://assets1.tamsnetwork.com/images/EC042017NF/144108s.jpg "Mini Stampin' Dimensionals [ 144108 ]")

![Regal Flora Bundle (English) [ 164034 ]](https://assets1.tamsnetwork.com/images/EC042017NF/164034s.jpg "Regal Flora Bundle (English) [ 164034 ]")
![Textured Timber Cling Stamp Set [ 163656 ]](https://assets1.tamsnetwork.com/images/EC042017NF/163656s.jpg "Textured Timber Cling Stamp Set [ 163656 ]")
![Throughout The Year Cling Stamp Set (English) [ 162312 ]](https://assets1.tamsnetwork.com/images/EC042017NF/162312s.jpg "Throughout The Year Cling Stamp Set (English) [ 162312 ]")
![Christmas Labels Dies [ 164100 ]](https://assets1.tamsnetwork.com/images/EC042017NF/164100s.jpg "Christmas Labels Dies [ 164100 ]")
![Paper Trimmer [ 152392 ]](https://assets1.tamsnetwork.com/images/EC042017NF/152392s.jpg "Paper Trimmer [ 152392 ]")
![Wild Wheat A4 Cardstock [ 161734 ]](https://assets1.tamsnetwork.com/images/EC042017NF/161734s.jpg "Wild Wheat A4 Cardstock [ 161734 ]")
![Wild Wheat Classic Stampin' Pad [ 161651 ]](https://assets1.tamsnetwork.com/images/EC042017NF/161651s.jpg "Wild Wheat Classic Stampin' Pad [ 161651 ]")

![Blueberry Bushel Classic Stampin' Pad [ 147138 ]](https://assets1.tamsnetwork.com/images/EC042017NF/147138s.jpg "Blueberry Bushel Classic Stampin' Pad [ 147138 ]")
![Early Espresso Classic Stampin' Pad [ 147114 ]](https://assets1.tamsnetwork.com/images/EC042017NF/147114s.jpg "Early Espresso Classic Stampin' Pad [ 147114 ]")
![Copper Clay Classic Stampin' Pad [ 161647 ]](https://assets1.tamsnetwork.com/images/EC042017NF/161647s.jpg "Copper Clay Classic Stampin' Pad [ 161647 ]")
![Blackberry Bliss A4 Cardstock [ 133682 ]](https://assets1.tamsnetwork.com/images/EC042017NF/133682s.jpg "Blackberry Bliss A4 Cardstock [ 133682 ]")
![Blackberry Bliss Classic Stampin' Pad [ 147092 ]](https://assets1.tamsnetwork.com/images/EC042017NF/147092s.jpg "Blackberry Bliss Classic Stampin' Pad [ 147092 ]")

![Pretty In Pink Classic Stampin Pad [ 163807 ]](https://assets1.tamsnetwork.com/images/EC042017NF/163807s.jpg "Pretty In Pink Classic Stampin Pad [ 163807 ]")
![Pretty Peacock Classic Stampin’ Pad [ 150083 ]](https://assets1.tamsnetwork.com/images/EC042017NF/150083s.jpg "Pretty Peacock Classic Stampin’ Pad [ 150083 ]")
![Summer Splash Classic Stampin Pad [ 163809 ]](https://assets1.tamsnetwork.com/images/EC042017NF/163809s.jpg "Summer Splash Classic Stampin Pad [ 163809 ]")


![Round We Go Photopolymer Stamp Set (English) [ 163724 ]](https://assets1.tamsnetwork.com/images/EC042017NF/163724s.jpg "Round We Go Photopolymer Stamp Set (English) [ 163724 ]")
![Melon Mambo Classic Stampin' Pad [ 147051 ]](https://assets1.tamsnetwork.com/images/EC042017NF/147051s.jpg "Melon Mambo Classic Stampin' Pad [ 147051 ]")
![Melon Mambo A4 Card Stock [ 119980 ]](https://assets1.tamsnetwork.com/images/EC042017NF/119980s.jpg "Melon Mambo A4 Card Stock [ 119980 ]")
![Summer Splash A4 Cardstock [ 163798 ]](https://assets1.tamsnetwork.com/images/EC042017NF/163798s.jpg "Summer Splash A4 Cardstock [ 163798 ]")
![Basic White A4 Cardstock [ 159228 ]](https://assets1.tamsnetwork.com/images/EC042017NF/159228s.jpg "Basic White A4 Cardstock [ 159228 ]")
![Embossing Additions Tool Kit [ 159971 ]](https://assets1.tamsnetwork.com/images/EC042017NF/159971s.jpg "Embossing Additions Tool Kit [ 159971 ]")
![Paper Snips [ 103579 ]](https://assets1.tamsnetwork.com/images/EC042017NF/103579s.jpg "Paper Snips [ 103579 ]")


")


")


")
")


")
")


")
")


")


")


")


")


")

")


")


")


")


")
")


")

")


")


