Our Family To Yours

Good Morning!

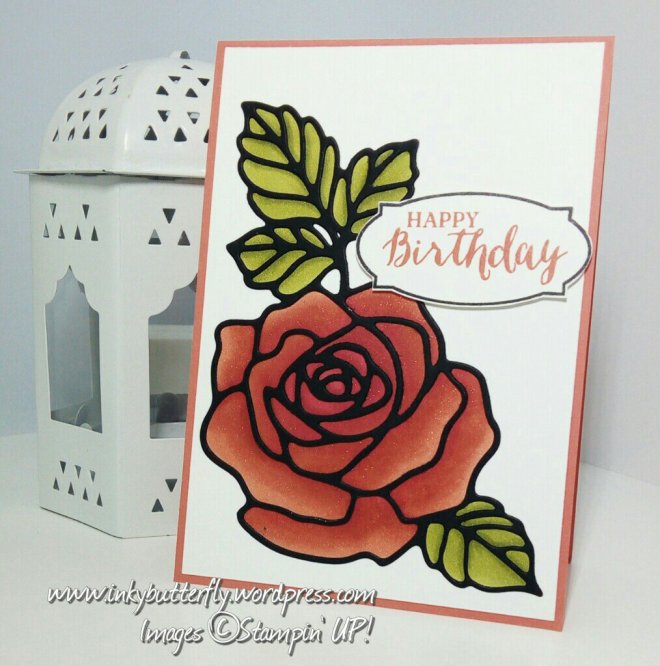
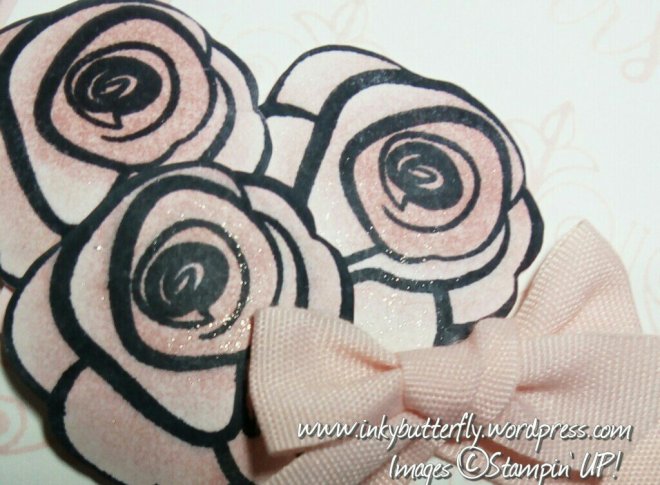
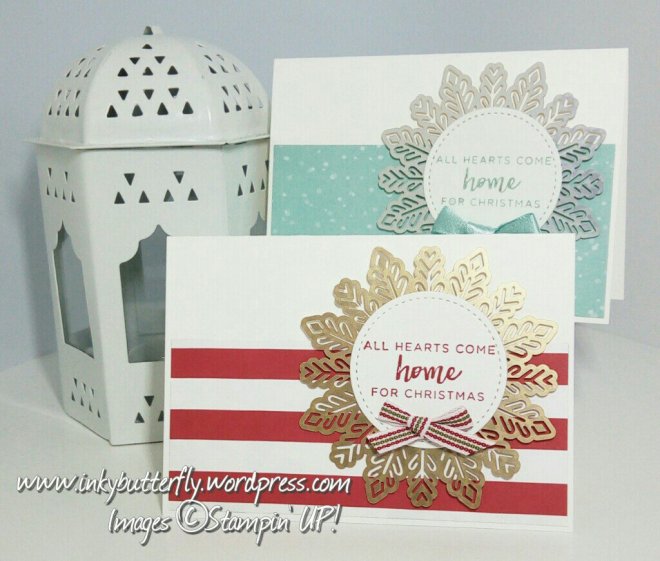
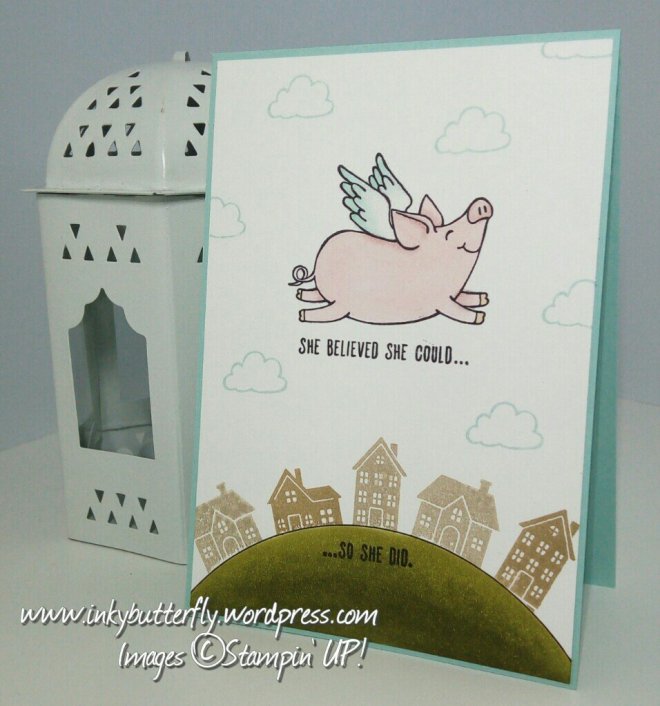
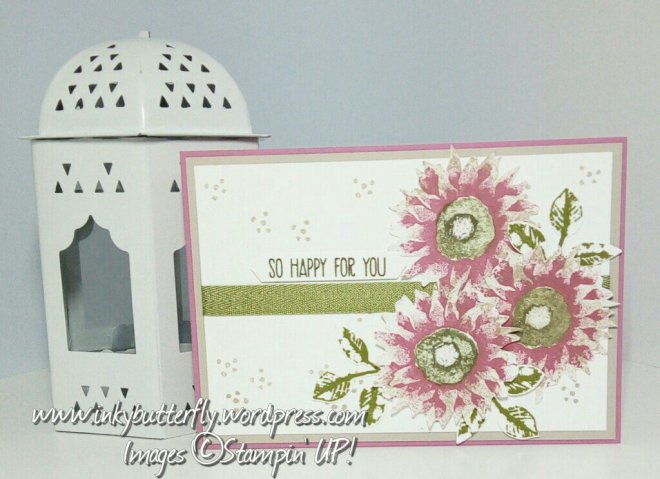
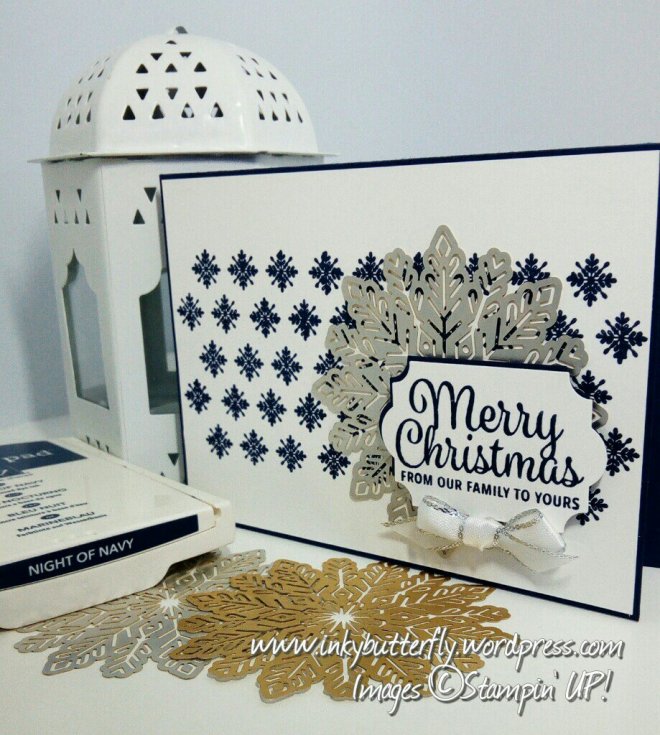
Navy and silver are a perfect combination in this card.

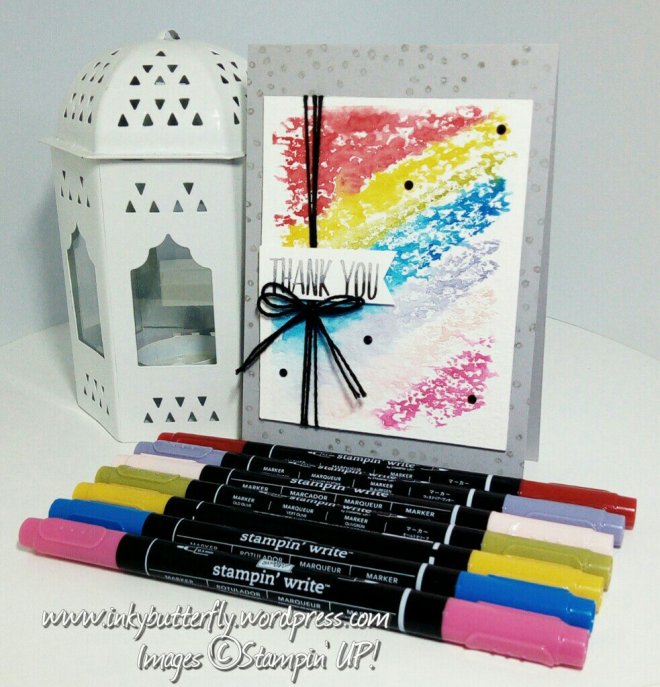
The background was made by repeat stamping the triple snowflake image. I have done this using the Stamp-a-ma-jig to help line up the images.

I love this technique and wish it was easier to achieve…. But Stampin’ Up! has come to the rescue.
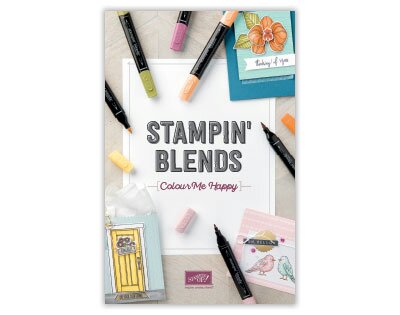
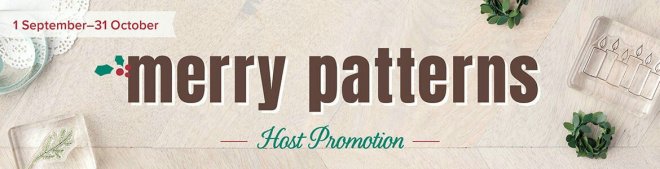
Introducing…

The Stamparatus!

The tool can be reserved from 9pm, 16th to 20th November, while stocks last, for delivery in February 2018. I can’t wait to get my hands on this revolutionary piece of kit!


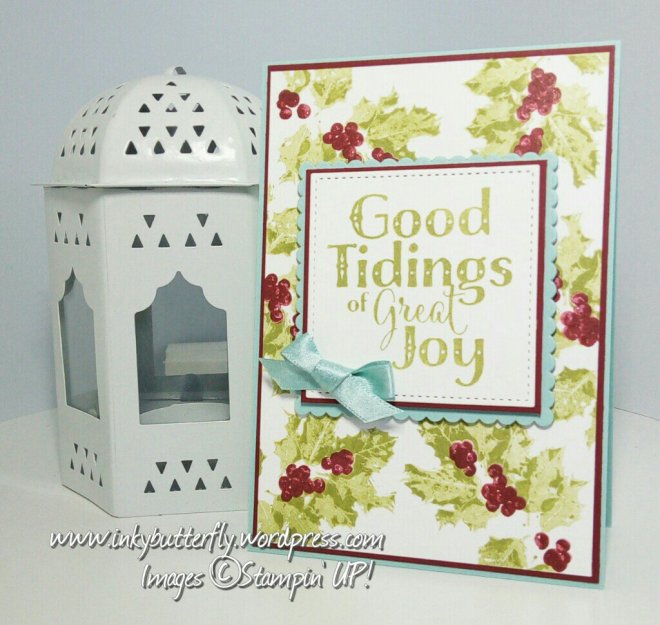
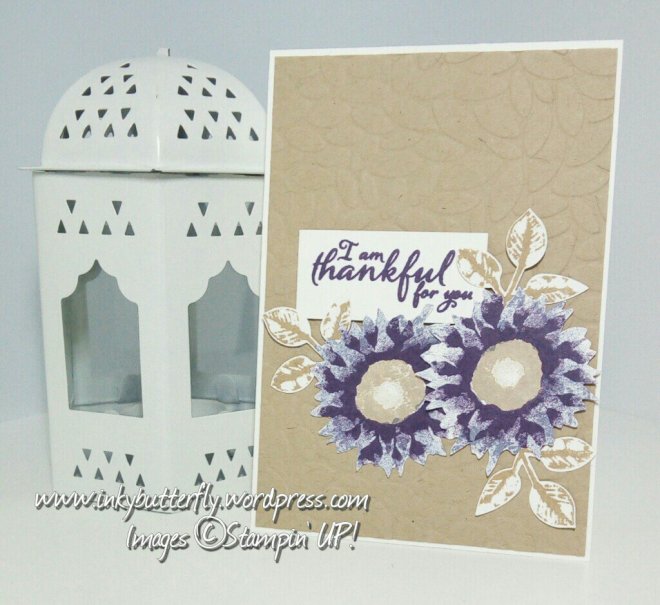
The sentiment from the same set was stamped with Night of Navy ink and cut with the Everyday Label punch.

A foil snowflake and a small bow tied from metallic edged ribbon finishes the card.


I hope you enjoyed this project. The supplies used are listed and linked below.

Thanks for stopping by and happy stampin’!

Verity x


Product List

Good Tidings #GDP113

Hi there,

It is a Colour Challenge over at the Global Design Project this week!

Click here to see what the Design Team created to inspire us!

This combo screamed Christmas!

I have used the Good Tidings stamp set to make a background. The layers are stamped with same colour ink, but the first was stamped off to give a lighter shade. This was mounted on to Cherry Cobbler card stock and then on to a Pool Party card base.

The sentiment, I stamped in Pear Pizzazz and used the Layering Square framelit to cut it out.

I wanted a narrow border of red peeking out from behind this, so I cut this with my trimmer.

Finally, this was added to a Pol Party Scalloped square, and the on to the card with dimensionals.

A small bow tied from Pool Party Shimmer ribbon completed the card.

I hope you enjoyed the project today. Thanks for stopping by and happy stampin’!

Verity x

Product List

Many Marvellous Markers

Good Morning Everybody,

Today’s project is a special thank you to my fab upline Sam Hammond …. Not only does she love rainbows, but I have used the Many Marvellous Marker collection which I only have because of her amazing generosity.

I have used the “acrylic block technique” to make this colourful background.

By adding ink from the stampin’ write markers on to the block, lightly spritzing with water and then stamping this on to watercolour paper – that’s it!

Leave it to dry and then cut it to size.

The stampin’ write markers can be used for stamping too! The sentiment from All Things Thanks was coloured with three markers, Smoky Slate, Basic Grey and Basic Black for a gradient effect.

I finished the card with black bakers twine and rhinestones.

I hope you enjoyed this project. To get your hands on these marvellous products click the links below.

Thanks for stopping by and happy stampin’!

Verity x

Product List

Clear Block E

[118484]

£11.00

Half Full

What an amazing weekend! Becoming a Stampin’ Up! Demonstrator was the best decision ever.

Yesterday was a team day put together by my upline Sam Hammond and Caroline Helwigh.

During the day, we had the opportunity to work with the Half Full stamp set.

I made three cards in the time we had… including a Christmas card with not a wine glass in sight!

The images were coloured using blender pens and ink. I can’t wait to try watercolour pencils and Stampin’ Blends with this set too!

Once coloured, the images were layered up and simply attached to card bases.

I hope you enjoyed this project. The supplies used are listed and linked below.

Thanks for stopping by and happy stampin’!

Verity x

Product List

Blender Pens

[102845]

£10.75

Simple Birthday

It is a super exciting day today…..I am surrounded by fellow demonstrators at the Stampin’ Up! On-Stage event!

And on Sunday, I will be training with my upline and my sister demonstrators. Busy busy busy!

In light of this, I am sharing a very simple card today made using the Happiest of Days stamp set.

I have used Sweet Sugarplum ink to randomly stamp the rose design over a Whisper White card layer.

The sentiment was cut in to a banner and embellished with gold mini sequin trim and Sweet Sugarplum striped grosgrain ribbon.

I hope you enjoyed this quick project. Thanks for stopping and happy stampin’!

Verity x

Product List

For Mum

Good Morning!

I made this card especially for my mother-in-law’s birthday last weekend.

I used the beautiful Stampin’ Blends to colour the rose image. The darkest shades of Cherry Cobbler were used in the centre, gradually blending in the lighter shades of Calypso Coral towards the edges.

The leaves were coloured with Old Olive markers. The dark shade was added along the veins of the leaves and then blended with the light marker.

The dies were used to cut a black outline image and the sentiment.

The fine tip glue pen was used to adhere the delicate outline. The sentiment was raised on dimensionals. The panel was added to a Calypso Coral card base.

I hope you enjoyed this project. The supplies used are listed and linked below.

Thanks for stopping by and happy stampin’!

Verity x

Product List

Time to Party

Good Morning,

I thought I would make something happy and bright for today’s post.

I have used the Confetti Celebration stamp set.

The card base is made with Lemon Lime Twist card stock.

A Whisper White card layer was stamped with Crushed Curry and Berry Burst stars.

Some Bermuda Bay mini chevron ribbon was added across the centre.

The large sentiment was stamped with Bermuda Bay ink and cut with the Starburst punch. The edges were lightly inked with a sponge dauber. This adhered to a Stitched Circle with dimensionals.

Happy Birthday was stamped in Island Indigo ink and cut with the Classic Label punch.

To finish a small bow was added to the card.

I hope you enjoyed this project. The supplies used are listed and linked below.

Thanks for stopping by and happy stampin’!

Verity x

Product List

Celebrate

Hi there,

The launch of Stampin’ Blends also means the Color Me Happy stamp set will be available – but only while stocks last.

The set includes these adorable lanterns.

I have used;

  • Cherry Cobbler
  • Old Olive
  • Pool Party
  • Bermuda Bay
  • Daffodil Delight
  • Rich Razzleberry

The panel was mounted on to a Very Vanilla card base.

A few rhinestones adds some sparkle.

I hope you enjoyed this project. The supplies used are listed and linked below.

Thanks for stopping by and happy stampin’!

Verity x

Product List

First Communion #GDP111

Good Morning,

It’s Wednesday – that means its Global Design Project day. This week is a theme challenge.

You can see what the design team created here.

… And this is my interpretation of the challenge…

img_20171031_210931_415_wm-777913213.jpg

I have used the Inspired Events stamp set to make this beautiful card to celebrate a First Communion.

The card base is made with Pink Pirouette card stock. The white card layer was decorated using the fancy corner stamp in Pink Pirouette ink.

A piece of Whisper White was cut 1 inch shorter and narrower. The large decorative stamp was used along the bottom edge and some Powder Pink ribbon was wrapped around it. The sentiment was added to the top right corner.

The flowers were coloured using Stampin’ Blends. Some sparkle was added with Wink of Stella.

To complete the card, I tied a small bow and used rhinestones to decorate the ribbon.


I hope you enjoyed this project. The supplies used are listed below.

Thanks for stopping by and happy stampin’!

Verity x


Product List

Stampin’ Blends

I am so excited to share these cards that I made using the brand spanking shiny new alcohol markers from Stampin’ Up!

There are 12 colours to choose from, a light and dark shade of each. In addition, there is a Bronze and Ivory marker which are great for skin tones. The Colour Lifter helps with blending, erasing small mistakes or adding highlights.

To demonstrate the effects that can be achieved,I picked out the Remarkable You stamp set.

The images were stamped with Memento (water based) ink. Starting at the bottom, I used:

Dark and Light Calypso Coral.

Light Calypso Coral and Pumpkin Pie.

Light Pumpkin Pie and Daffodil Delight.

Dark and Light Daffodil Delight.

To create the blend, the image was coloured with the lightest shade first, added shadow and then blended this out with the light shade again.

A softer look can also be achieved too. Applying some colour in small areas and using the colour lifter to blend creates an illusion of depth on white objects. A halo of Pool Party also blended with the colour lifter provides definition from the white background.

I hope this has given you some ideas.

Get your markers from 1st November, or join the Stampin’ Up! family and add them to your starter kit.

Look out for more projects coming soon.

Thanks for stopping by and happy stampin’!

Verity x

Product List

DSP Note Card Mix

Hi folks,

I shared some note cards a couple of days ago which were very popular. So here are some more using some of the papers included in the paper sale which ends on 31st October – so there’s still time to get yours.

These 4 use A Whole Lot of Lovely to cover the card with a simple black sentiment from the coordinating stamp set Lots of Love.


Birthday Memories was used for these cards. I used the same layout as the original post. The sentiments are taken from Happy Birthday Gorgeous.


Here is Pick a Pattern. This is quite a quirky designer paper, but looks great here. The pieces were cut on the diagonal for a different look. The sentiments are taken from Patterns and Pieces and cut and mounted in different ways.


Finally, I used Christmas Around the World. This pack has some very bold designs on one side, but the other side has some more traditional designs which I used on these cards. I teamed this with Foil Snowflakes and a sentiment from Hearts Come Home.


So I hope this gives you some ideas.

Thanks for stopping by an happy stampin’!

Verity x


Product List

Purple Harvest

Good Morning,

I am bringing back Painted Harvest again today, absolutely love this set.

I have used a Whisper White card base. The Crumb Cake card layer was embossed with Petal Burst embossing folder.

The colour combination for the flowers was Wisteria Wonder, Elegant Eggplant and Sahara Sand. The leaves were stamped in Crumb Cake.

The sentiment was stamped with Elegant Eggplant ink on to Whisper White card stock and cut to a simple rectangle. This was tucked behind the flowers for a simple look.

I hope you enjoyed this project. The supplies used are listed and linked below.

Thanks for stopping by and happy stampin’!

Verity x

Product List

Leaf Punch

[144667]

£14.50

In Colour Note Cards

Good Morning,

Today’s project is something simple that could be used as a gift idea.

I have used Stampin’ Up! note cards, which are smaller than my usual card bases measuring 3-1/2 by 5 inches.

A piece of Fresh Floral DSP was cut to 3-3/8 by 3 inches. A piece of coordinating finely woven ribbon was adhered along the top with Fast Fuse. This was then added to the bottom of the card.

The sentiment from Floral Phrases was stamped onto a strip of Whisper White card stock. This was adhered to the card with dimensionals.

Three rhinestones finished off the card. The envelopes were also embellished with the matching floral stamp.

I hope you enjoyed this project. The supplies used are listed and linked to the online shop below.

Thanks for stopping by and happy stampin’!

Verity x

Product List

Tis The Season

Good Morning,

October is almost over, which means there are only a few days left to take advantage of the current promotions.

But never fear something super shiny and new is coming in November!

So, the project for today uses Merry Patterns, Be Merry DSP and a little taster of what the new Stampin’ Blend alcohol markers can do.

The card base was made with Garden Green card stock to which DSP was added. The images from Merry Patterns were stamped on to thick Whisper White square die cut using Memento ink.

To colour the word ‘season’ I used the Cherry Cobbler markers, using darker shade at the bottom of the letters.

For the candles I used Calypso Coral and a touch of Daffodil Delight to achieve a glowing effect. The coloured piece was added to a Garden Green scalloped square. This was adhered to the card with some foil snowflakes behind it using dimensionals.


Look out for more information on Stampin’ Blends next week.

I hope you enjoyed this project and pop back again soon.

Happy Stampin’!

Verity x


Product List

…So She Did!

Hi there,

Had a bit of fun with this card design.

I started by stamping and colouring little miss piggy on to a piece of Whisper White card stock.

She looked a bit lonely in the air all by herself, so I thought I would add some perspective with some distant houses. These were borrowed from the Hearts Come Home stamp set.

I created a hill by drawing round a small bowl with a journalling pen. I then cut a simple paper mask which allowed me to stamp the houses on the hill.

I decided she needed some clouds in the sky with her too, and a bit of sparkle on her wings…it is a magical pig after all!

I hope you enjoyed today’s project.

Thanks for stooping by and happy stampin’!

Verity x

Product List

Very Happy Birthday

Good Morning,

The team have got together again to share some birthday card ideas.

I decided to create something for the guys, and opted for a Marina Mist card base.

The card layer is made with Very Vanilla card stock. The edges were stamped using Timeless Textures with Smoky Slate and Night of Night ink for a distressed look. I then used the Hexagons embossing folder to add texture.

Some Copper Trim was teased apart and attached to the middle, with some Gold Natural Trim over the top.

The sentiment is from Big on Birthdays, stamped on to Very Vanilla with Marina Mist ink and die cut with the largest Layering Square. Mats of Basic Black and Marina Mist card stock, lift this from the card base.

I hope you enjoyed this project. Please be sure to check out the blog posts from the rest of the team.

Thanks for stopping by and happy stampin!

Verity x

Product List

Happy for You

This months challenge….. I have to say I wasn’t immediately sure I could use all the colours this time, but I did it.

See what the design team created by following the blog hop, start here

This is what I came up with.

In a light bulb moment, I tried using Sahara Sand and Sweet Sugarplum with Painted Harvest. The centres are Always Artichoke stamped off once. What an effect, love it.

I stamped the leaves in Old Olive, then cut these with the Leaf punch. The flowers were fussy cut by hand.

I opted for a Sweet Sugarplum card base with a Sahara Sand layer.

Some Whisper White was stamped with the tiny speckle image. A piece of Old Olive mini chevron ribbon was added to the middle before adhering to the card base.

The flowers and leaves were arranged on the card. The sentiment is taken from Sunshine Sayings, stamped in Always Artichoke and cut with the Classic Label punch

I hope you enjoyed this project.

Thanks for stopping by and happy stampin’!

Verity x

Product List

Quilted Christmas

Hi there,

Christmas will be here before we know it, time to get started on making your cards!

Today I am using the Quilted Christmas bundle.

I started with a Very Vanilla card base. The card was stamped with the large stitched shape and Crumb Cake ink.

The large quilt die was used to cut Whisper White, Cherry Cobbler and Garden Green card stock. Keep the red and green bits and the white frame.

I also die cut a large scalloped square from Crumb Cake card stock. The white frame was carefully adhered to this square.

The red and green pieces were then used to fill in the frame.

Finally, the sentiment was stamped with memento ink and cut to a banner.

I hope you enjoyed this project. The supplies used are listed below.

Thank for stopping by and happy stampin’!

Verity x

Product List

Splits

Good Morning,

I thought I would try a different card style that I have seen on Pinterest from many other crafters.

I have used Pick a Pattern DSP and the coordinating Patterns and Pieces stamp set.

I made a Whisper White card base and added a DSP layer.

A second Whisper White layer was cut to create two angled pieces. These were adhered to the card with dimensionals.

The flowers were stamped in Archival Black ink. To make them match the paper, I used Emerald Envy ink and a blender pen to colour the centre.

Two sets of leaves were cut with the Leaf punch.

The sentiment was stamped with Flirty Flamingo ink and cut in to a banner.

I hope you enjoyed this project. The supplies used are listed below.

Thanks for stopping by and happy stampin’!

Verity x

Product List

Blender Pens

[102845]

£10.75

Leaf Punch

[144667]

£14.50

Merry & Bright #GDP109

Hi there,

It’s time for another Global Design Project. This week is a colour challenge. You can see what the design team created here

This is my interpretation;

I used a Basic Black card base, A4 cut lengthways at 4-1/8 inches and scored at 5-7/8 inches.

The card layer was cut from Old Olive, 4 by 5-3/4 inches. The edges were stamped with snowflakes from Colorful Season stamp set in versamark ink and heat embossed with gold powder. This was adhered flat to card base.

I cut another Basic Black layer, 3-1/4 by 5 inches to which I added some Old Olive, 3-1/8 by 4-7/8 inches, which I debossed with the Winter Wonder embossing folder. This was adhered flat to the Basic Black and then to the card with dimensionals.

A foiled snowflake was added to the middle of the debossed image.

The sentiment from Hearts Come Home was stamped on to Basic Black card stock with versamark ink and heat embossed with gold powder. This was die cut with a Stitched Shape framelit.

A small bow was tied from Old Olive mini chevron ribbon and adhered in place with a glue dot.


I hope you enjoyed this project. The supplies used are listed below.

Thanks for stopping by and happy stampin’!

Verity x


Product List

Glue Dots

[103683]

£4.75