Good Morning!
I have the great pleasure of joining my crafting friends in the first InspirINK blog hop for 2018.
There’s lots of inspiration to be found for our January theme… Sparkle, Shimmer and Shine!
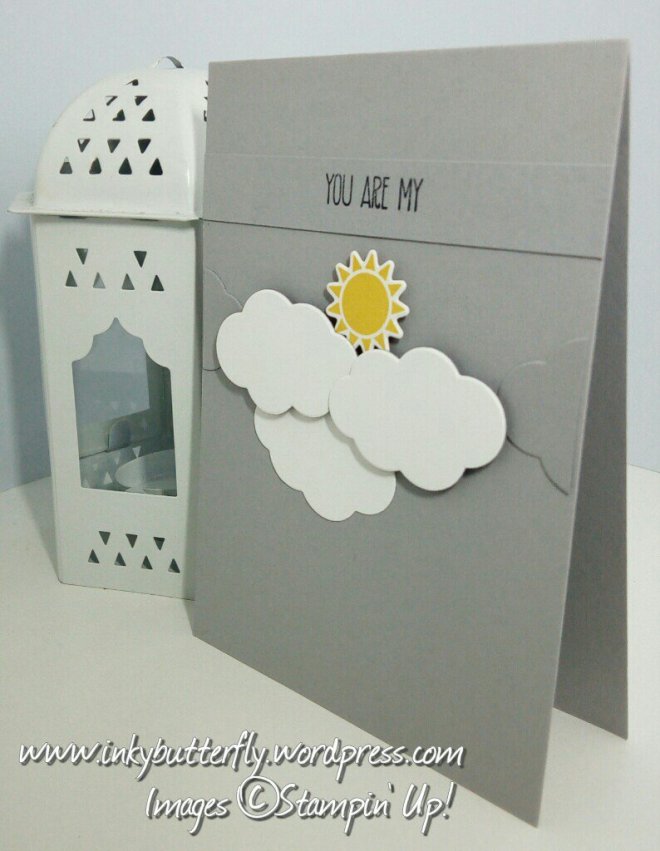
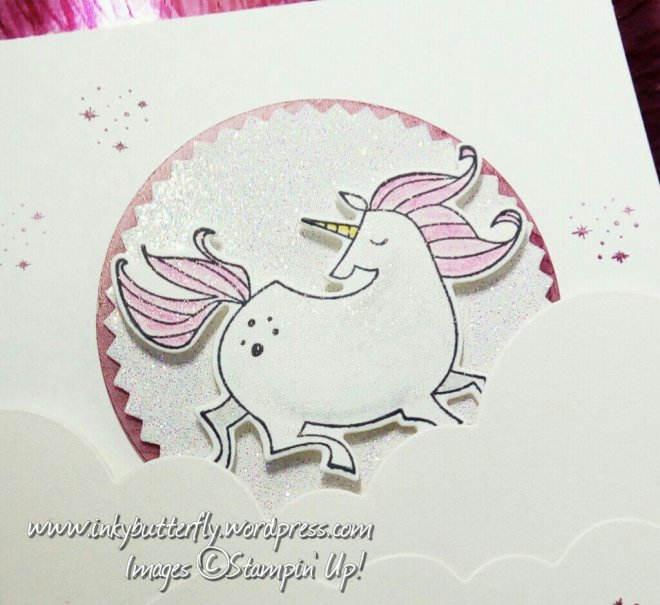
I just had to use the Magical Day stamp set.

The focal point uses the wonderful unicorn which was stamped in black ink. The mane and tail were coloured with Melon Mambo and Rich Razzleberry watercolour pencils, a touch of Daffodil Delight coloured the horn and a hint if Basic Grey to shade the body. Clear Wink of Stella added some magical shimmer!
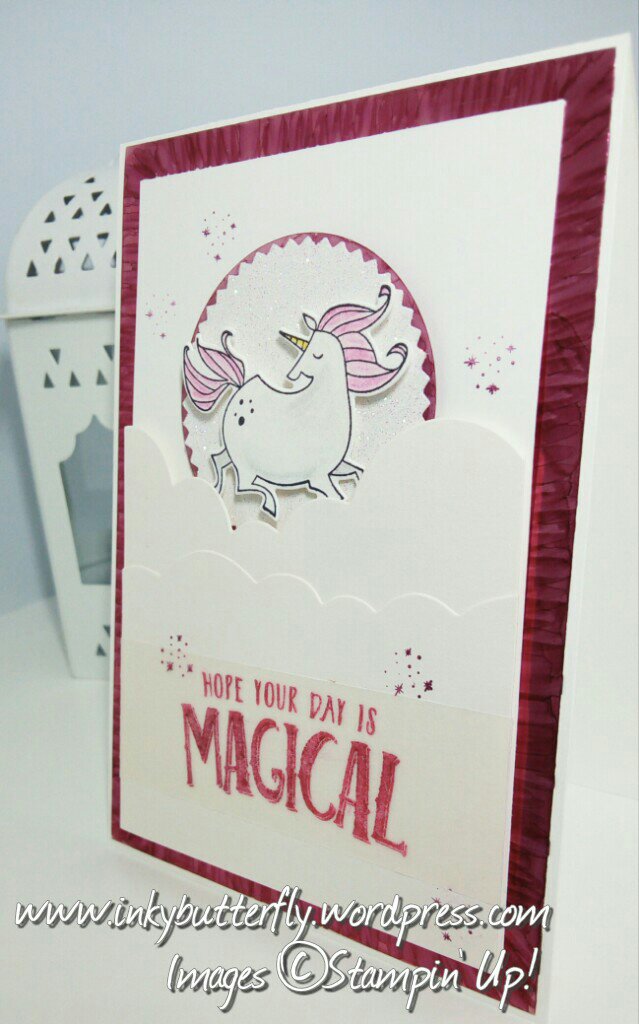
My sparkles came from some Glimmer paper which I cut with the Starburst punch. I adhered this to a vellum circle that I coloured with a Rich Razzleberry Stampin’ Blend marker.
I prepared a white card base and cut some silver foil to add some shine! To tie in the colour scheme, I also coloured this with the Stampin’ Blend marker.
The unicorn was added to a white card stock layer and adhered to the card base.
Two additional pieces of white card stock were cut with the cloud border die from the Sunshine and Rainbows bundle. These were adhered together with Fast Fuse.
The sentiment was stamped with Rich Razzleberry ink on to a strip of vellum. Because the ink doesn’t dry straight away, there is time to apply some clear embossing powder and heat set the ink.
The vellum was added to the cloud layers and then to the card with dimensionals.
I hope you enjoyed this project.
Click below to continue along the hop – enjoy!

Product List