Good Morning,
I thought I would get this beautiful stamp set out again.
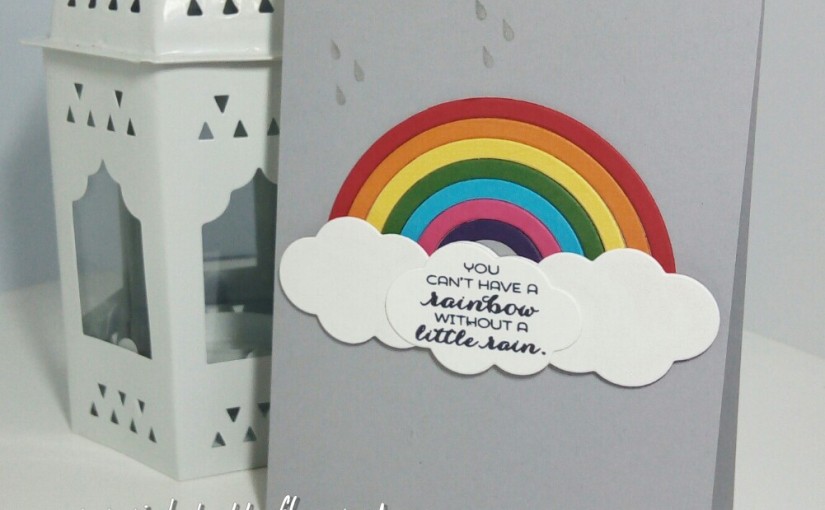
I used Soft Sky ink to stamp the background, adding some of the splatter images using Pool Party ink. This was adhered to an Island Indigo card base.
Island Indigo ink was used to stamp the dragonflies. They really stand out against the background.
The sentiment was adhered with dimensionals over the top of a small piece of Island Indigo ombre ribbon.
I hope you enjoyed this project. The supplies used are listed below.
Have you checked the retiring list? See something you like, get it now before it disappears. Products are only available while stocks last.

Thanks for stopping by and Happy Stampin’!
Verity x
Product List

|

|
|

|
||

|

|