Colourful Birthday Card with Sketched Butterflies!

Hello Everyone,

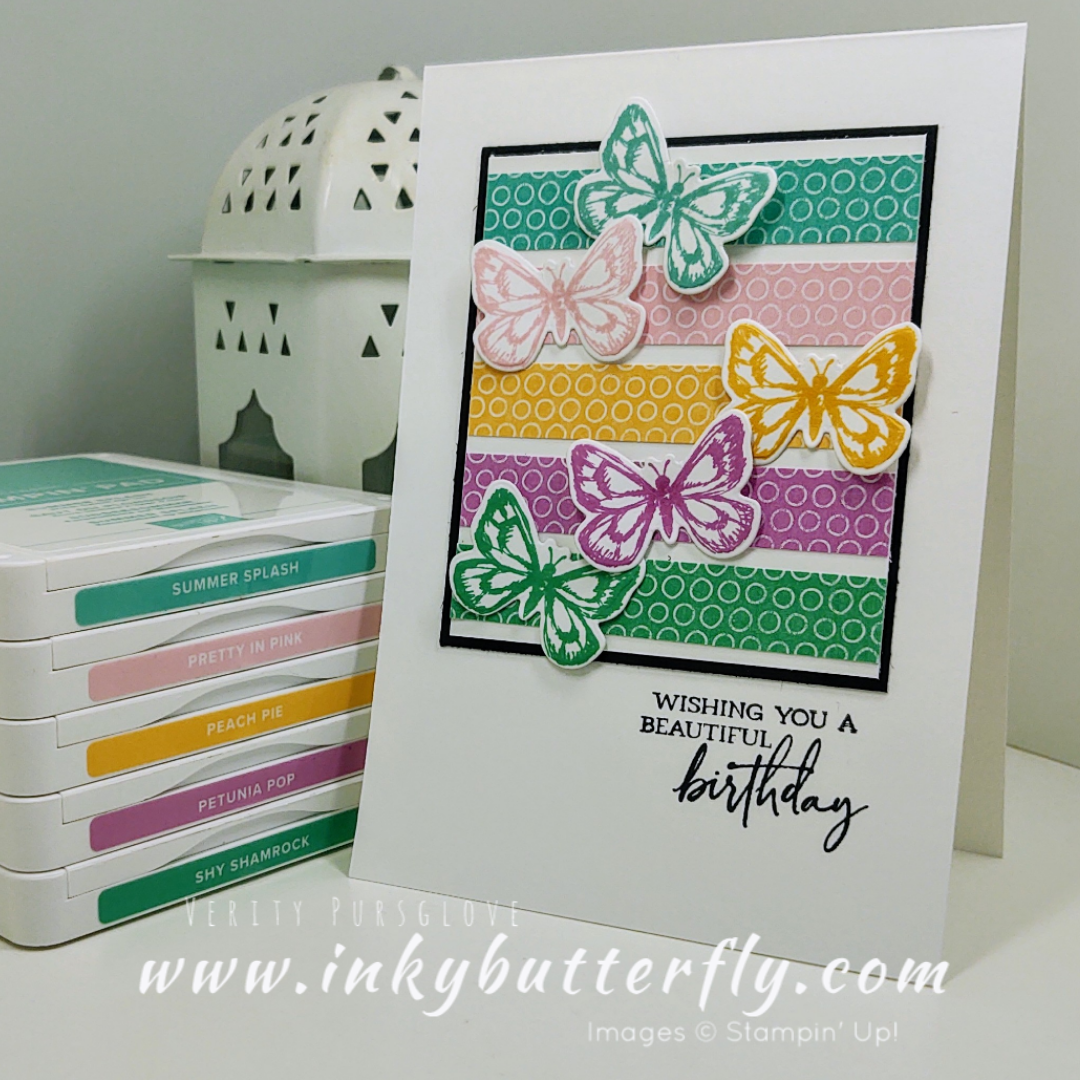
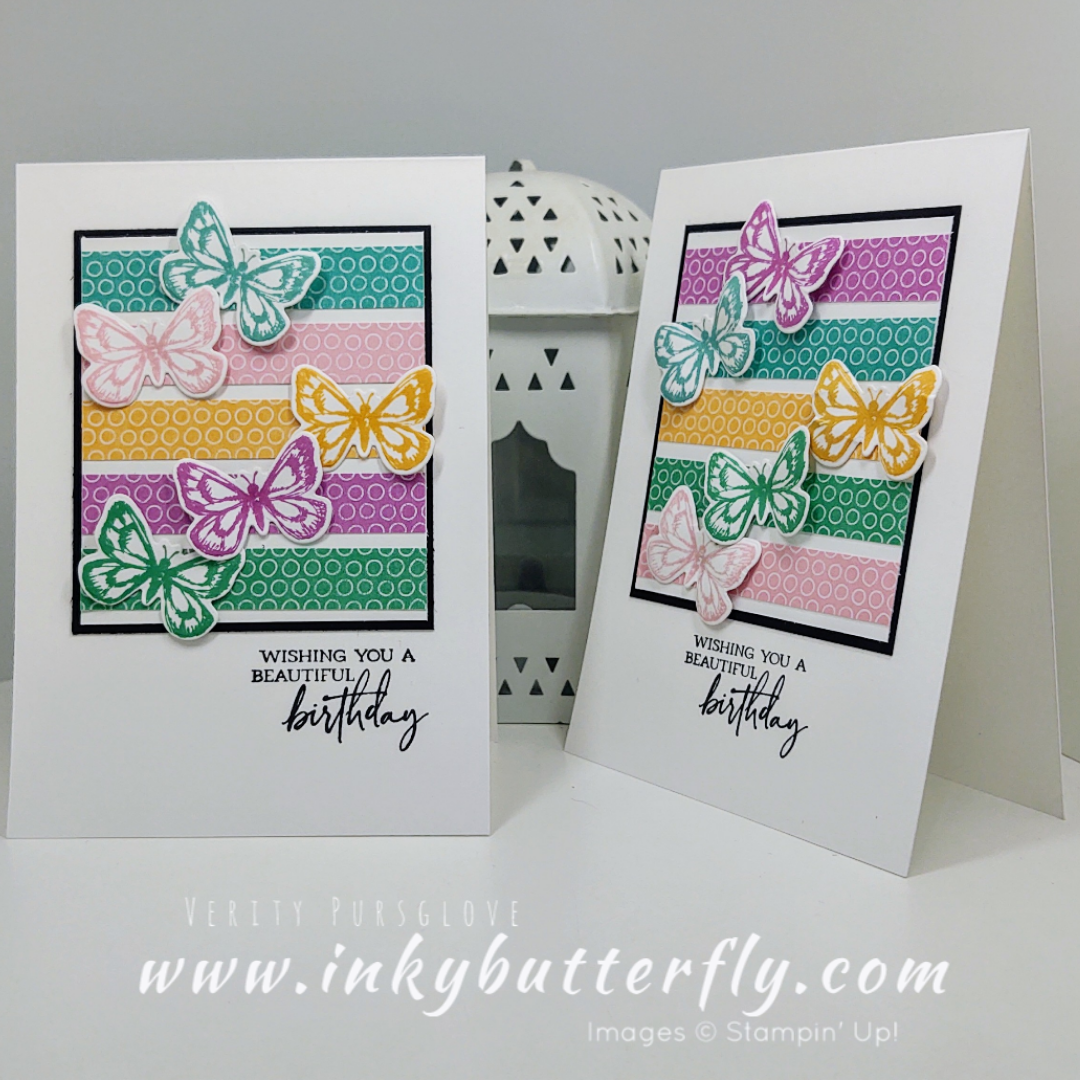
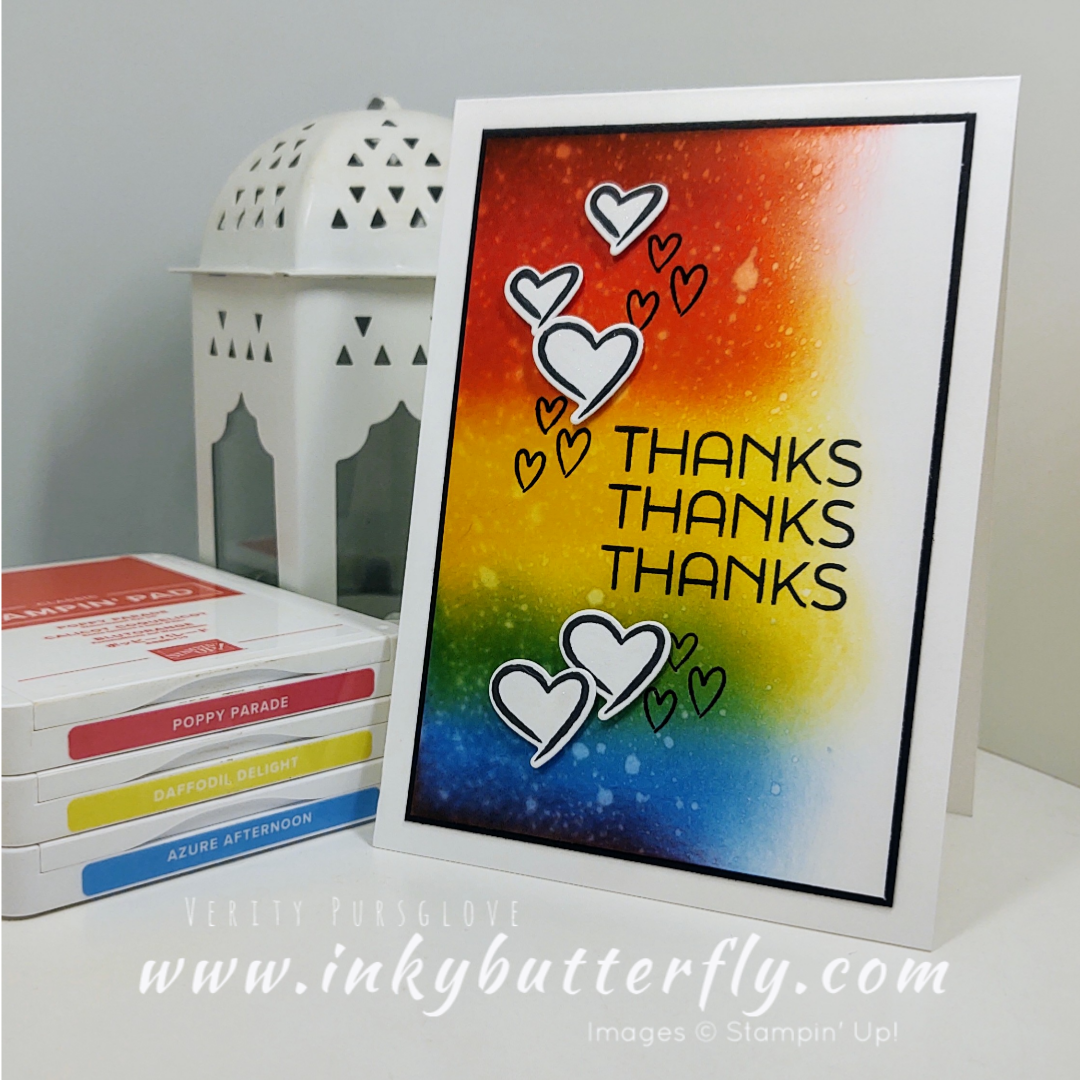
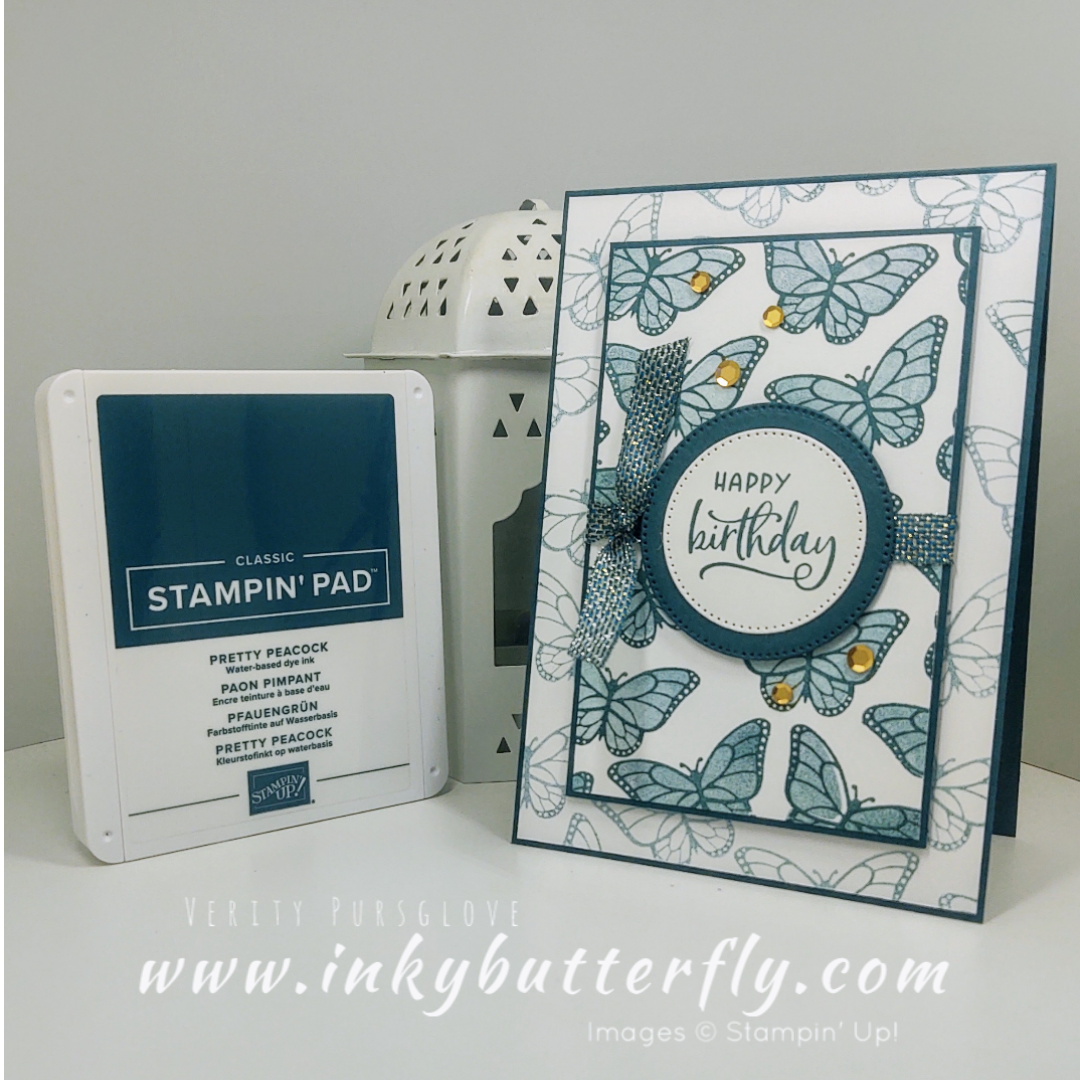
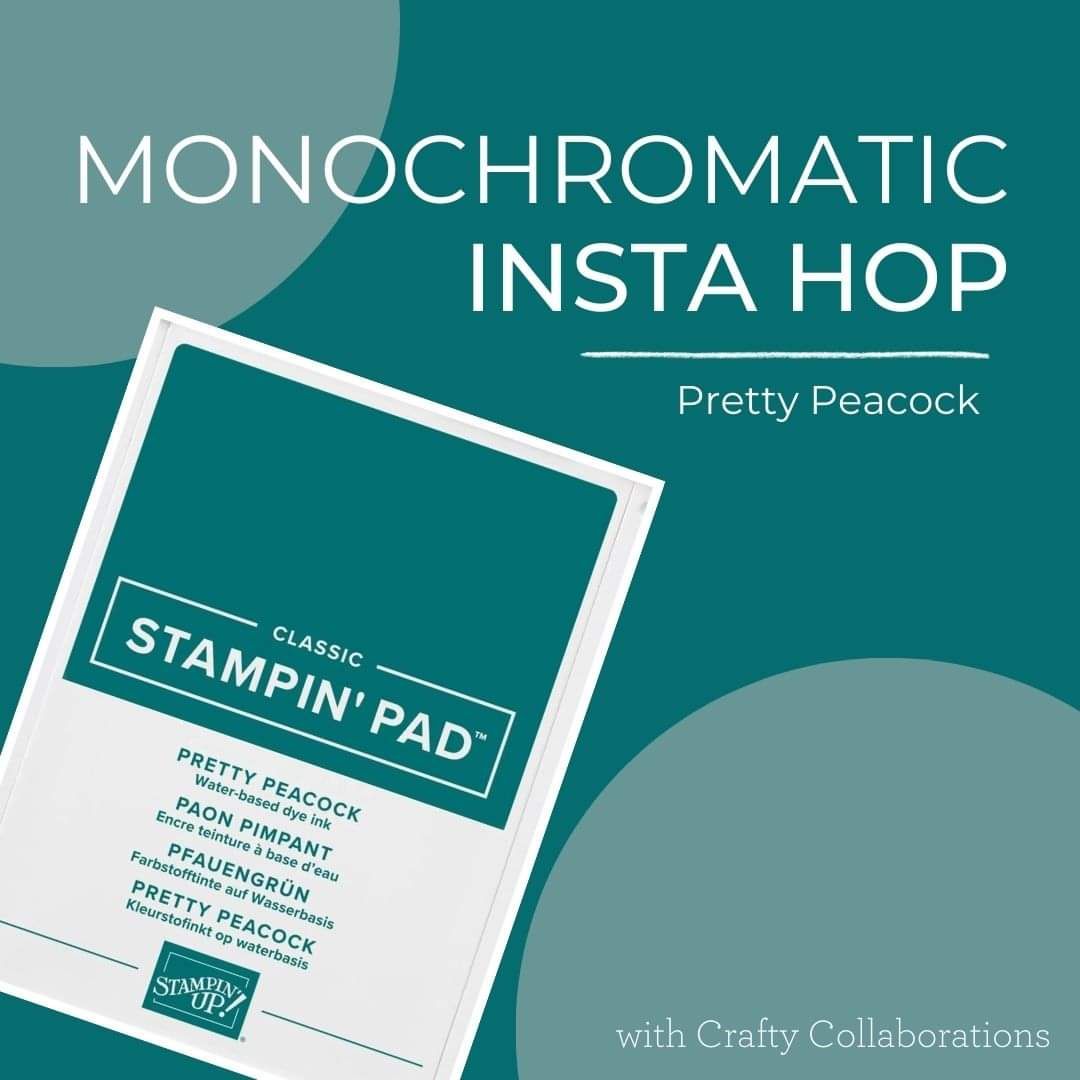
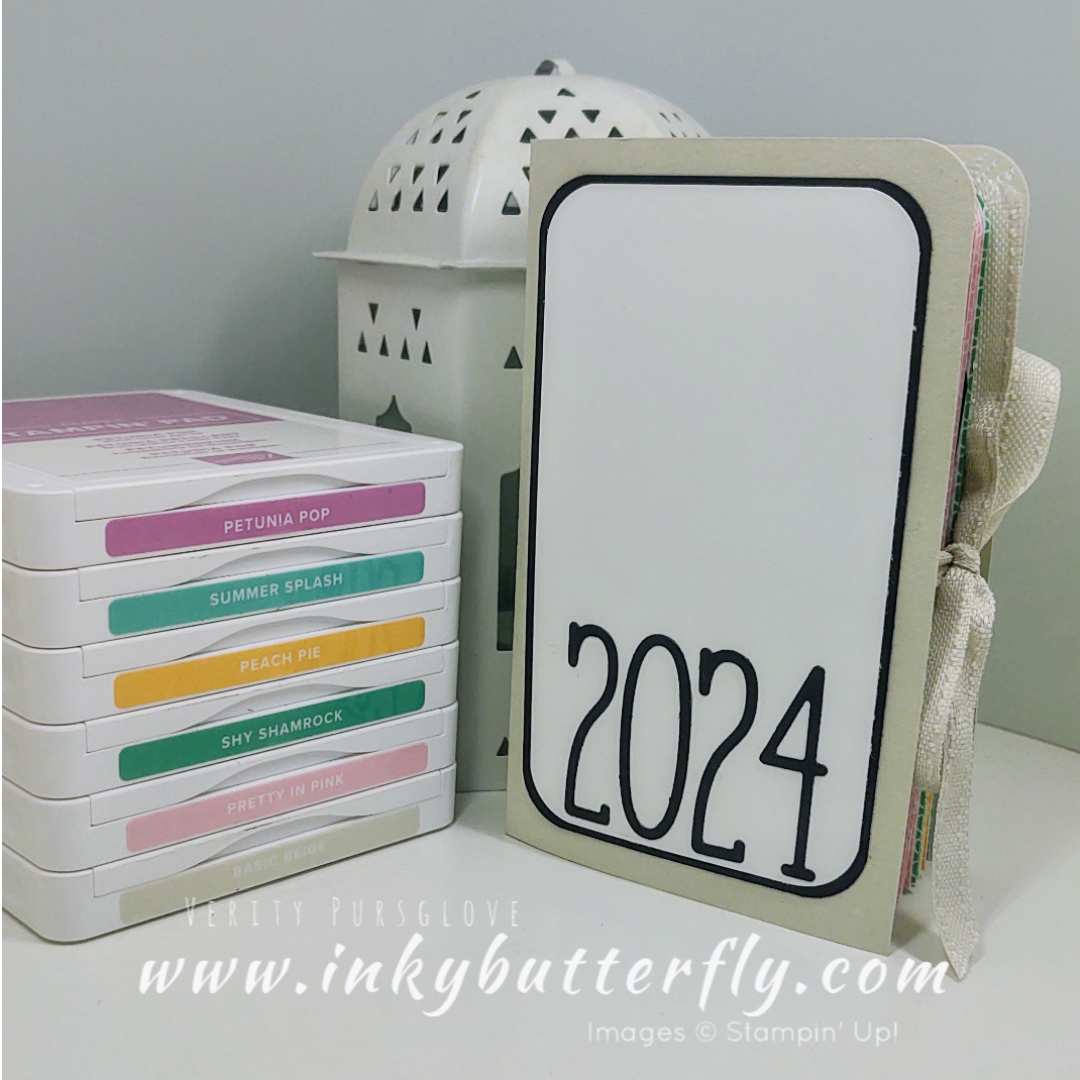
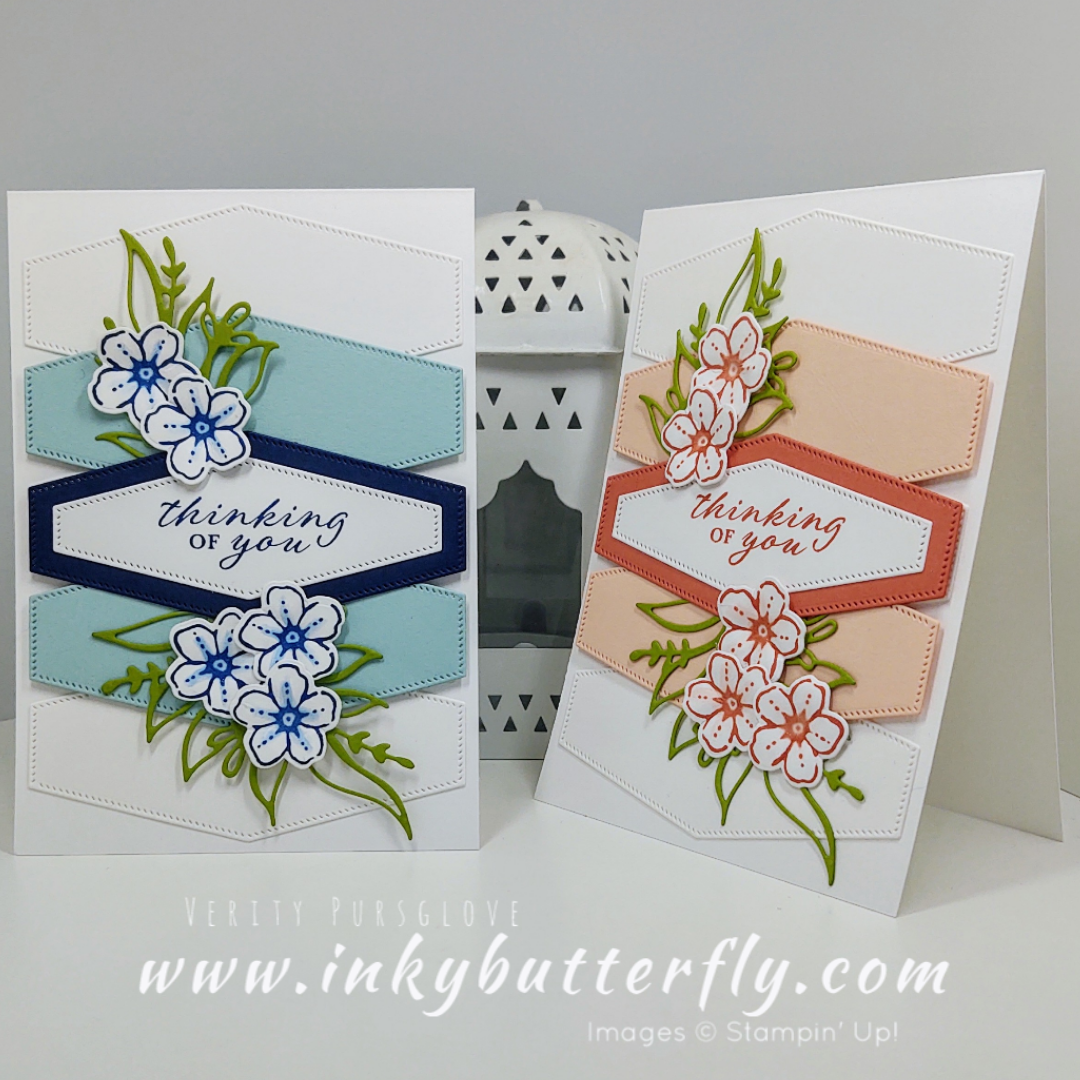
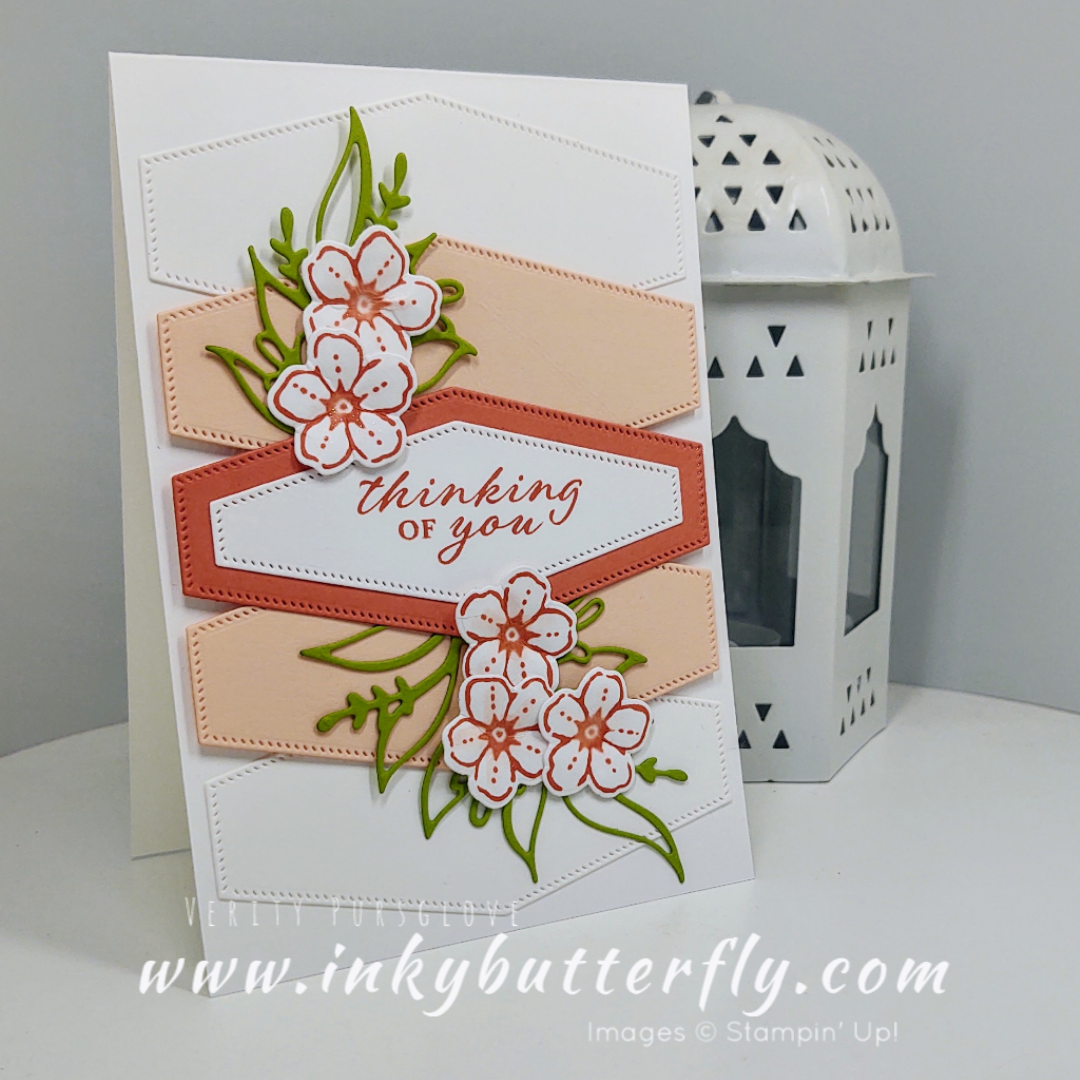
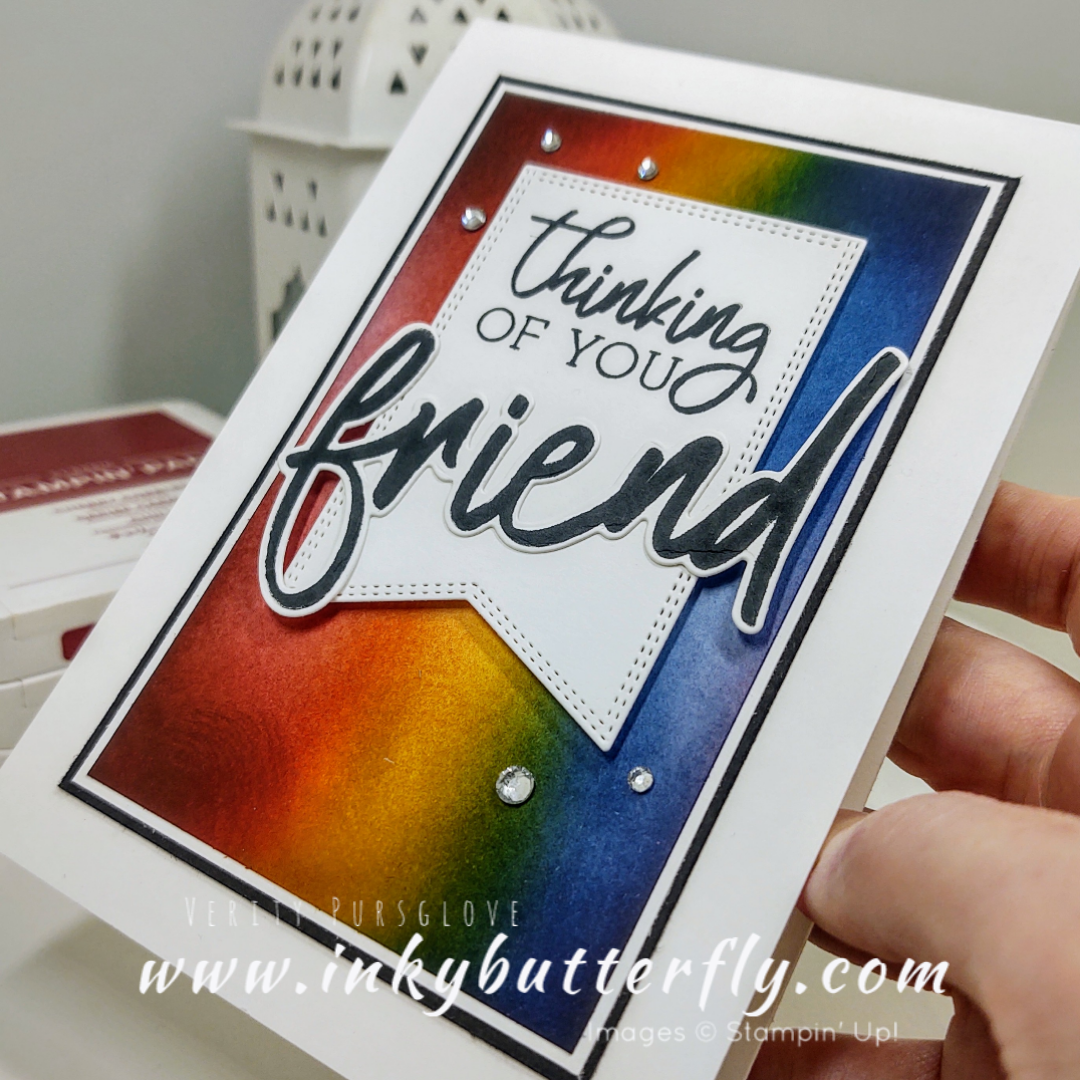
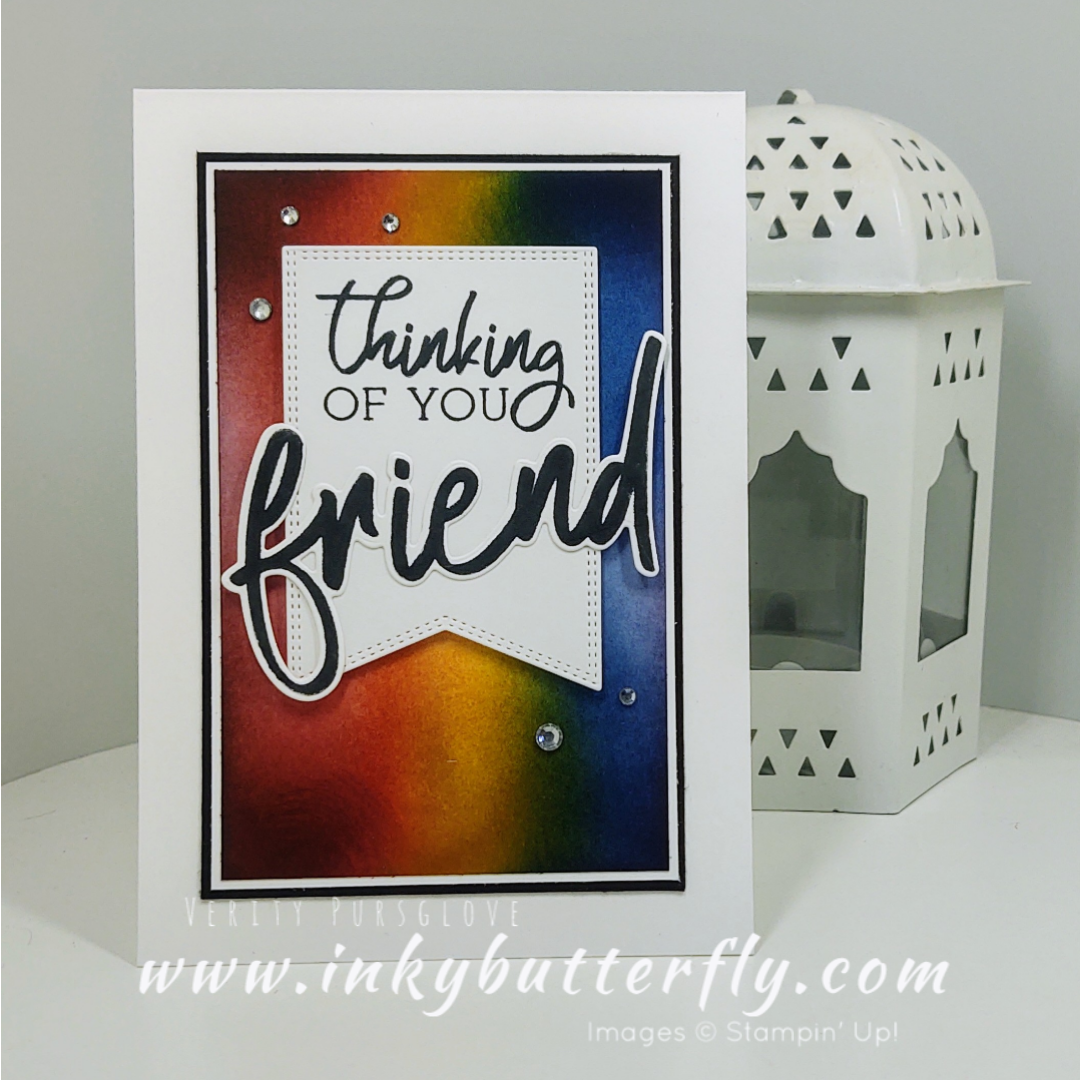
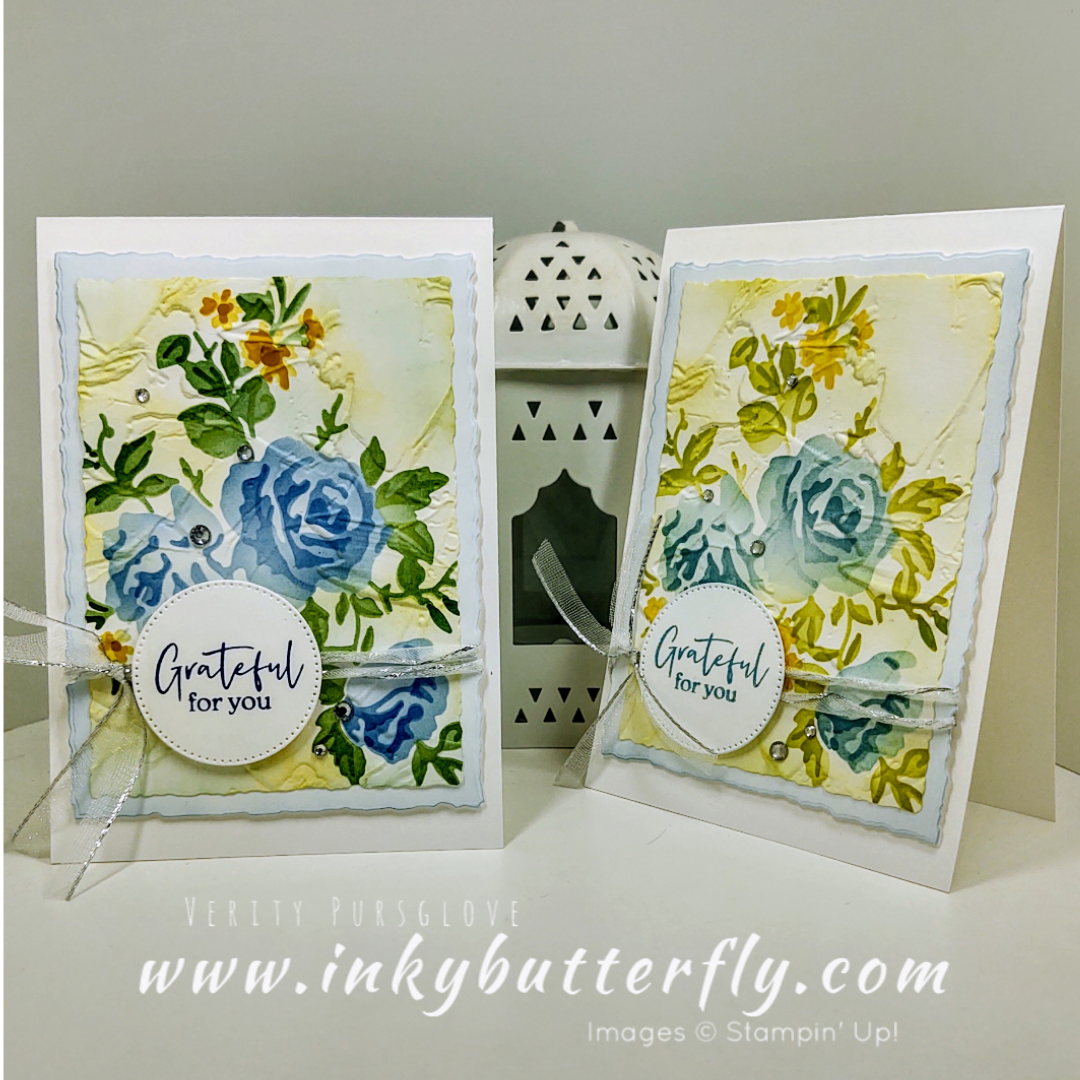
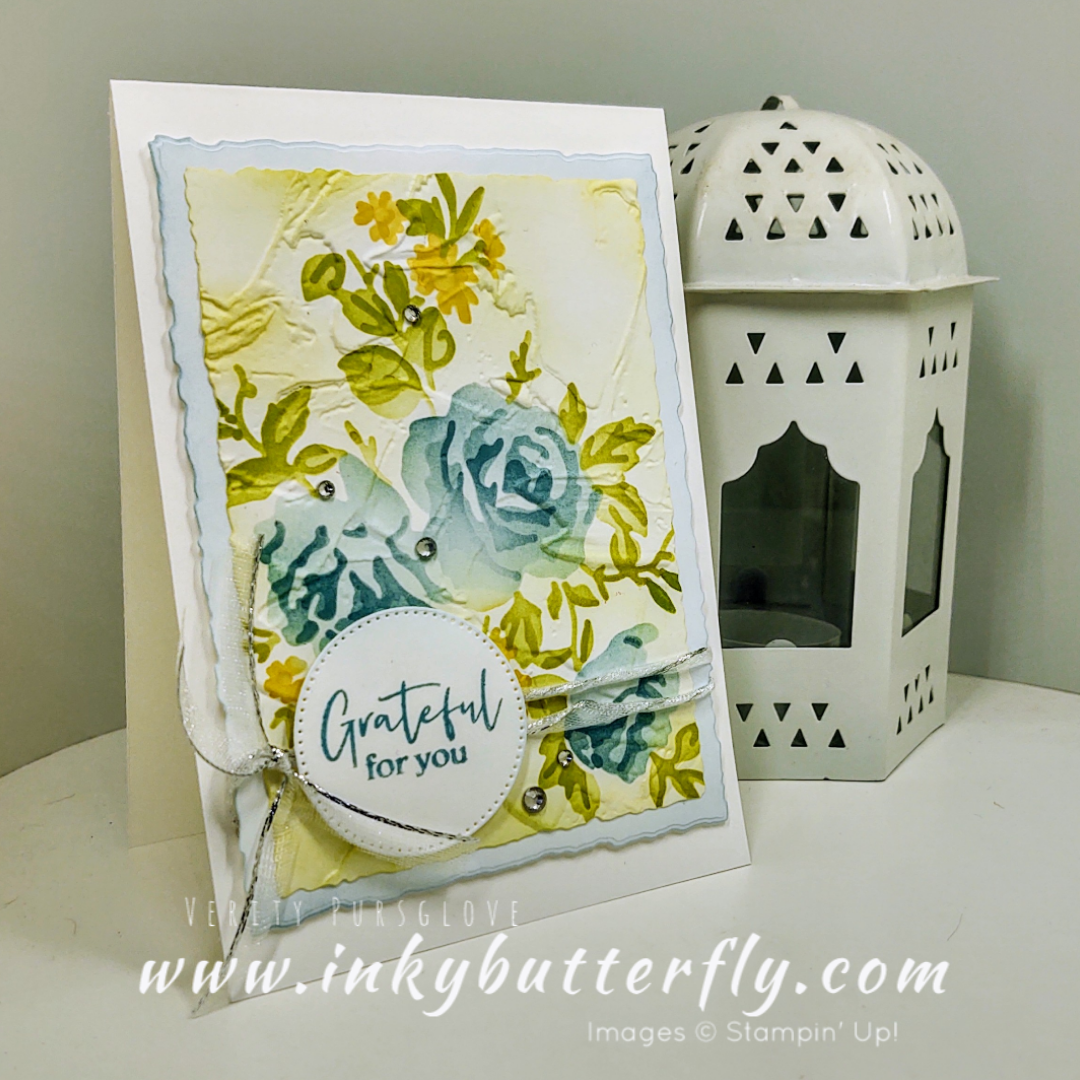
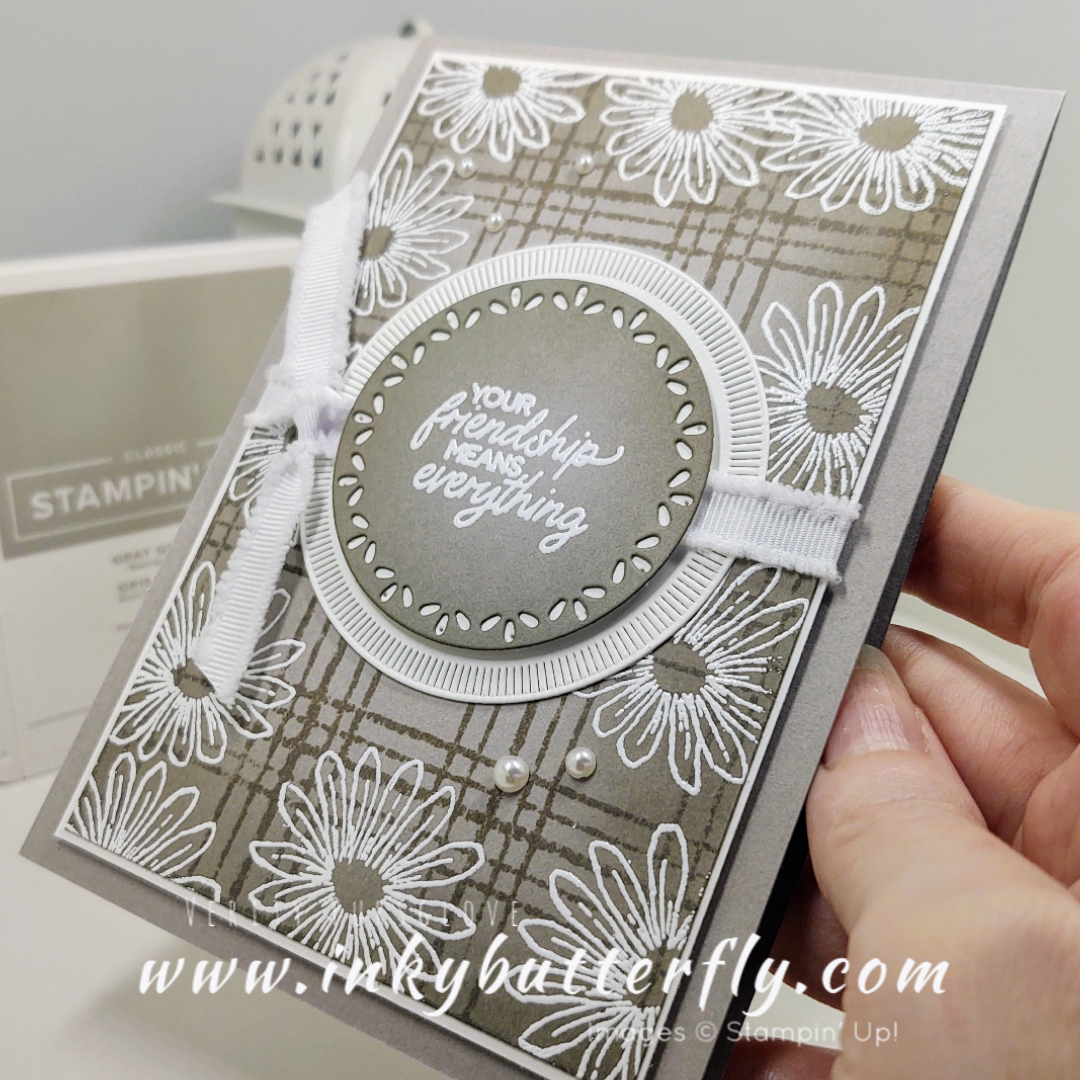
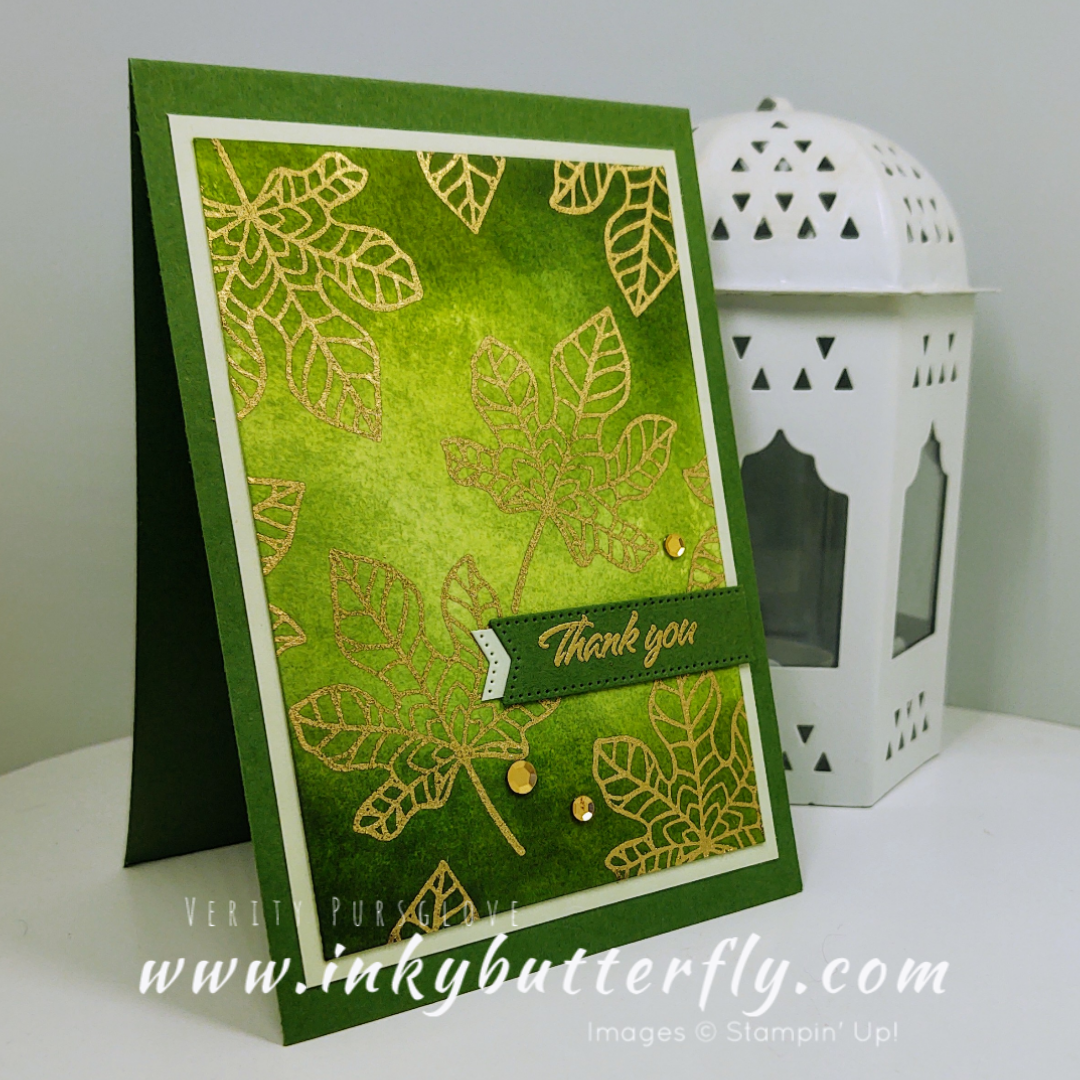
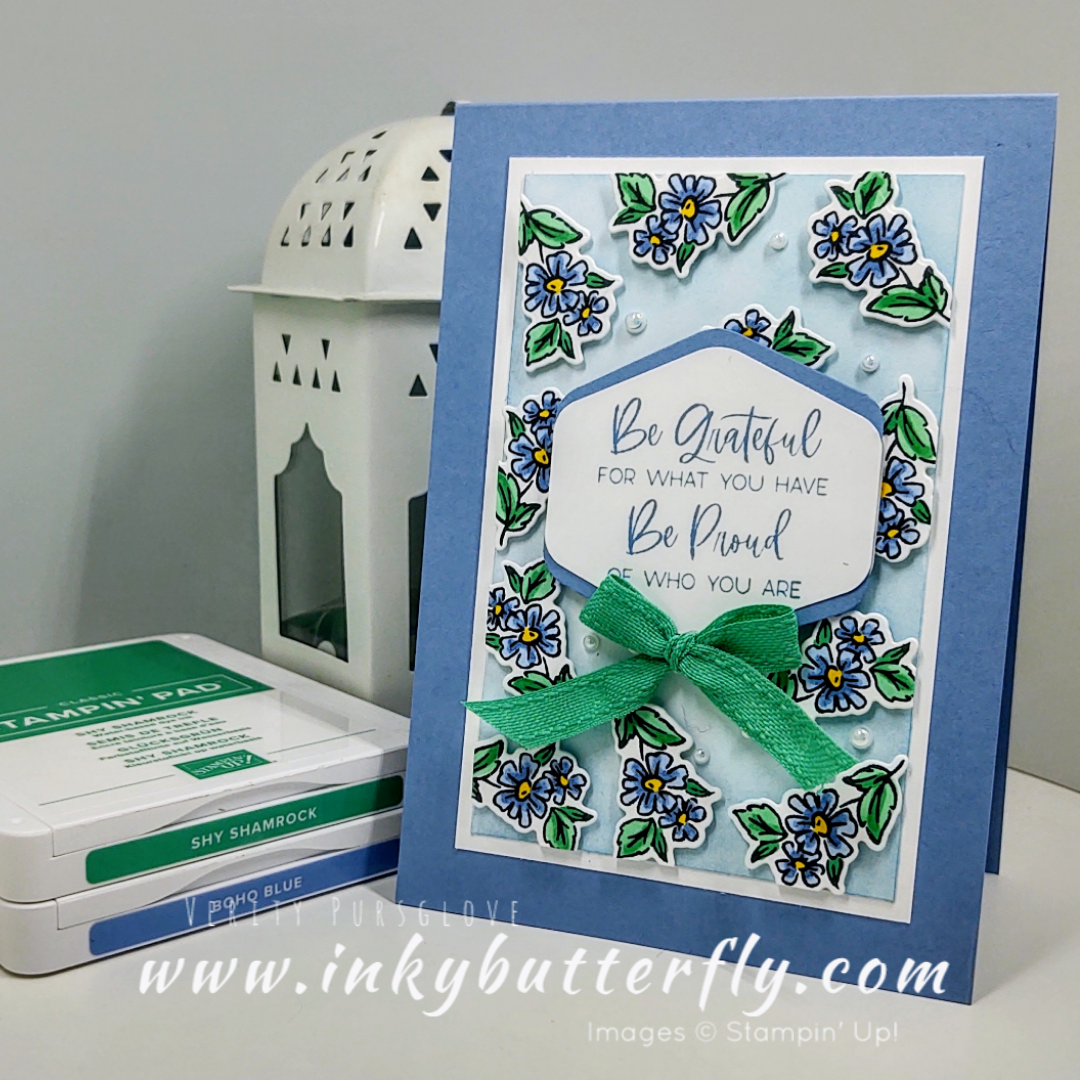
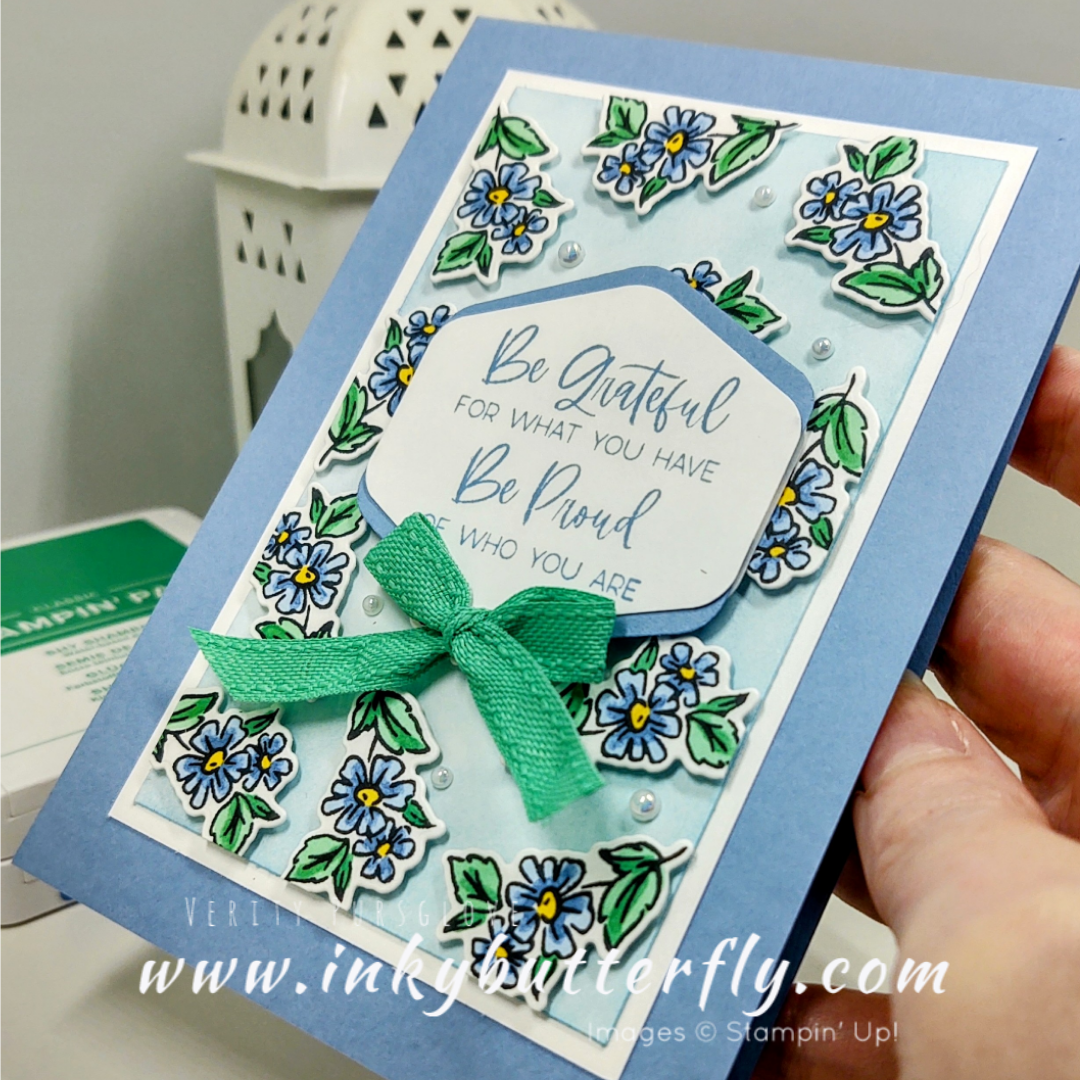
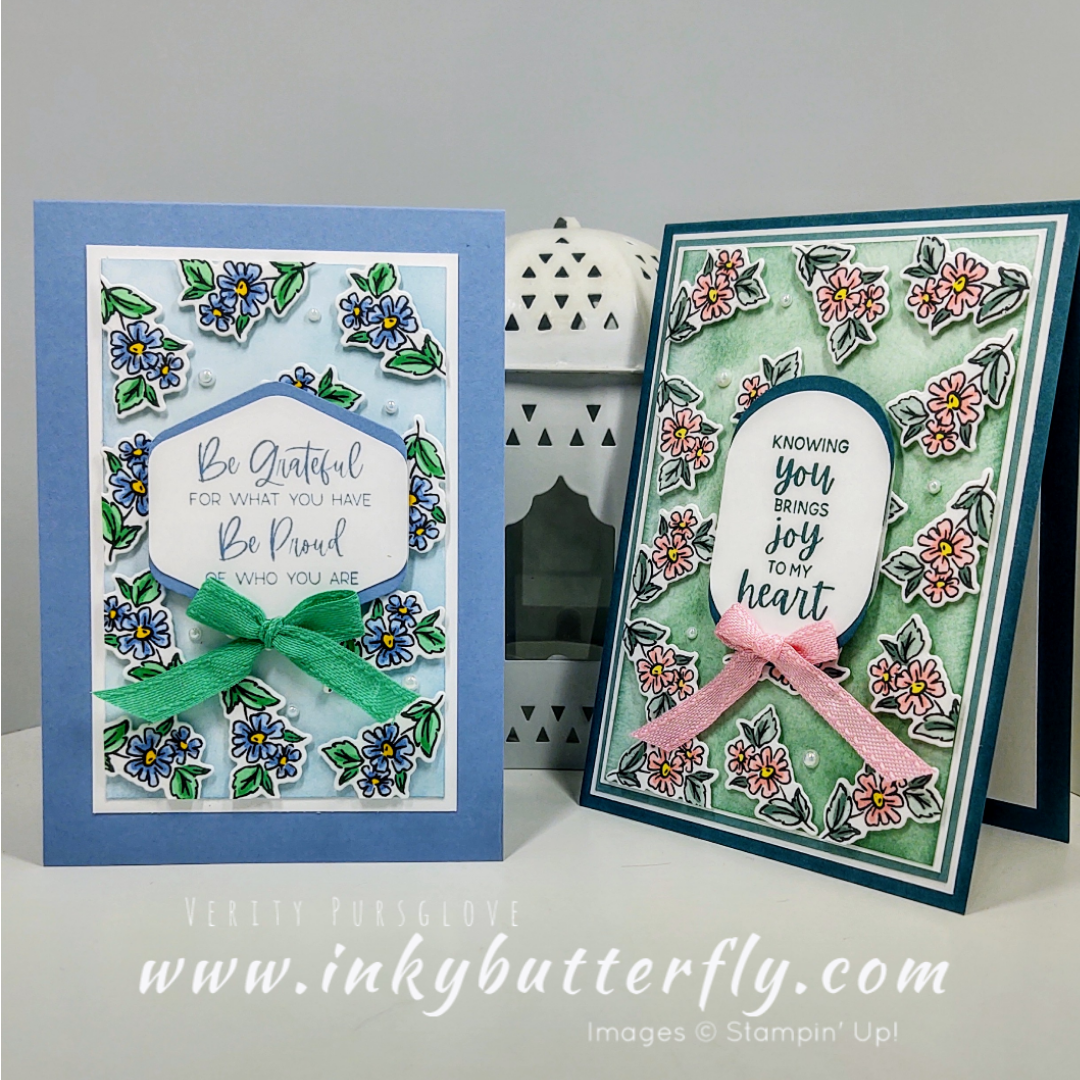
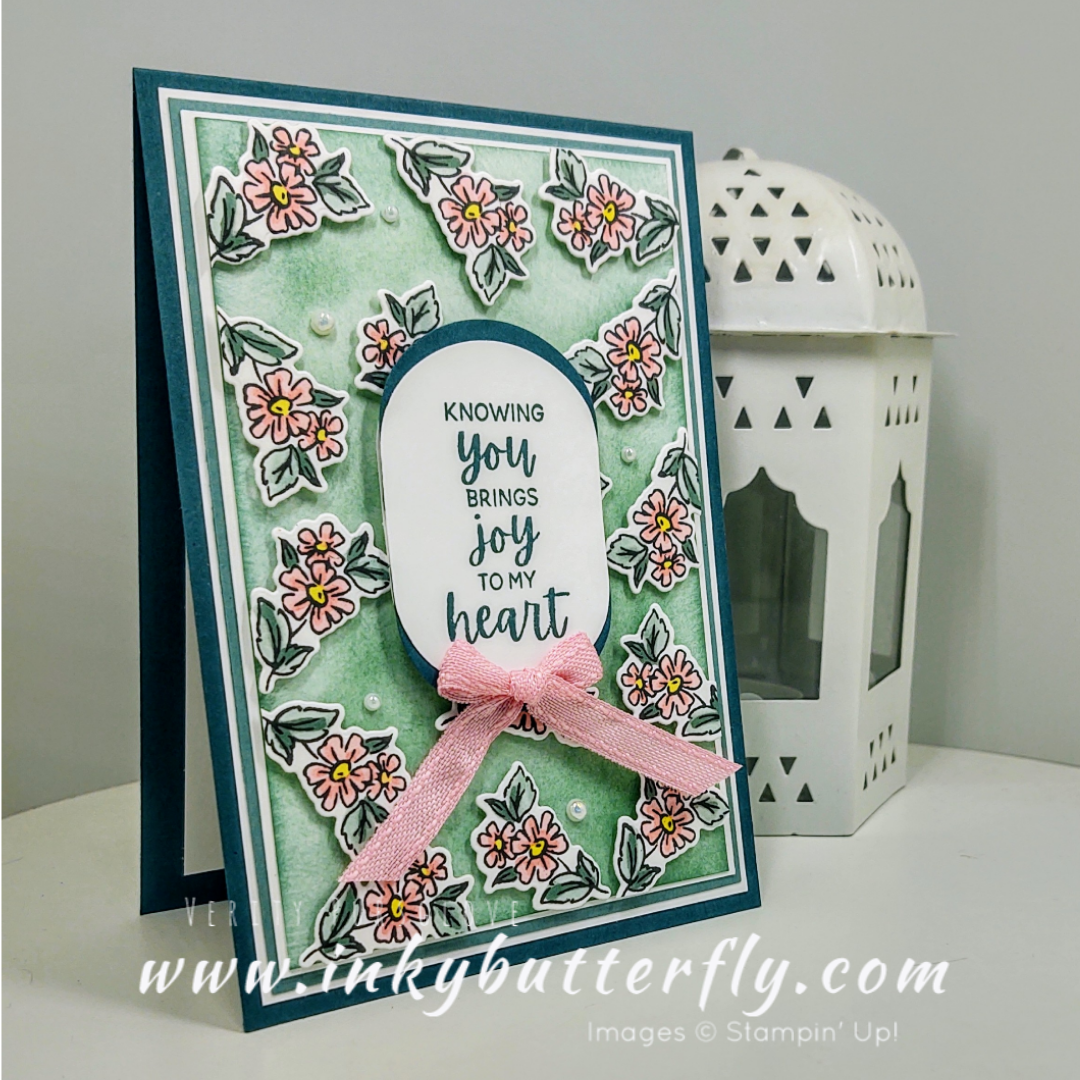
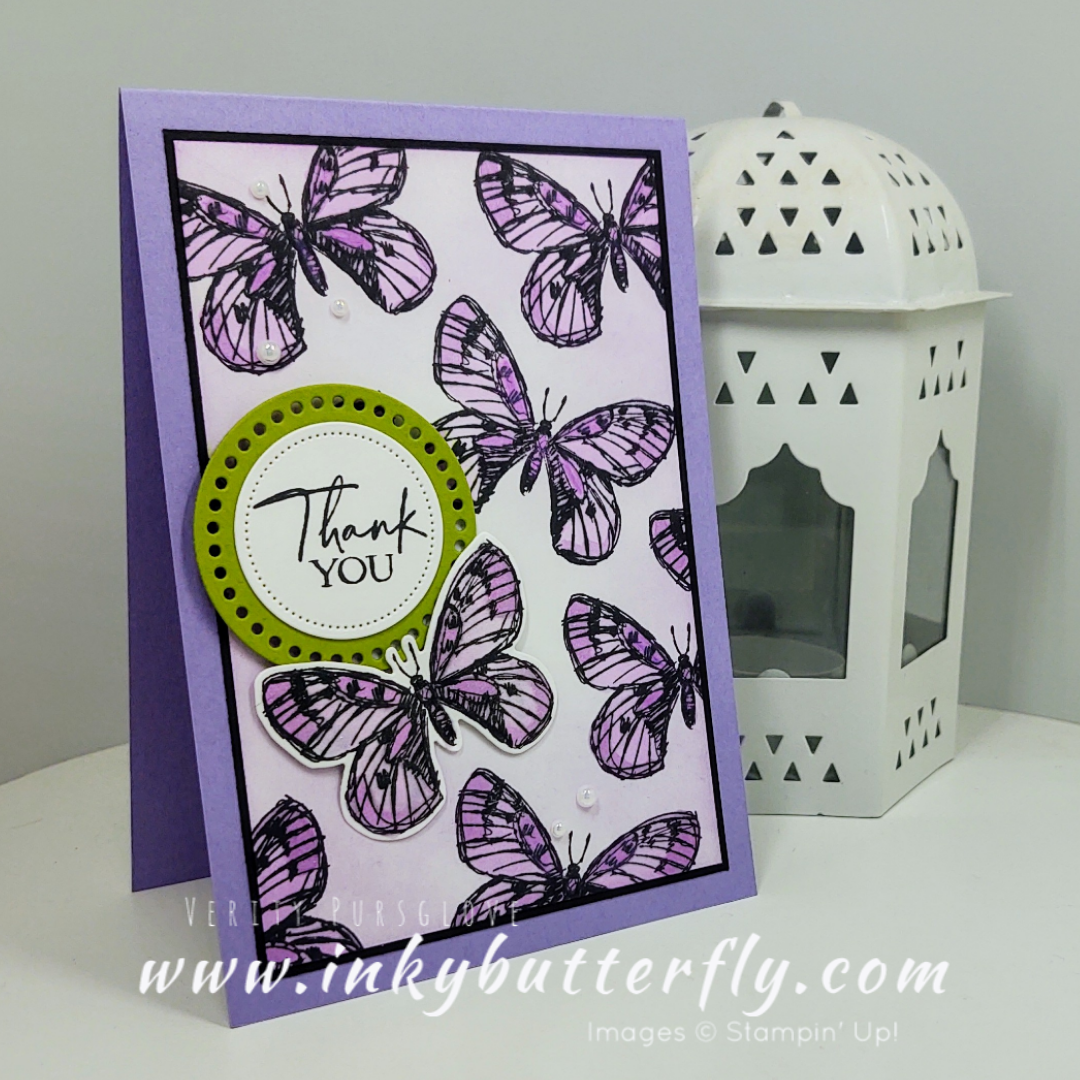
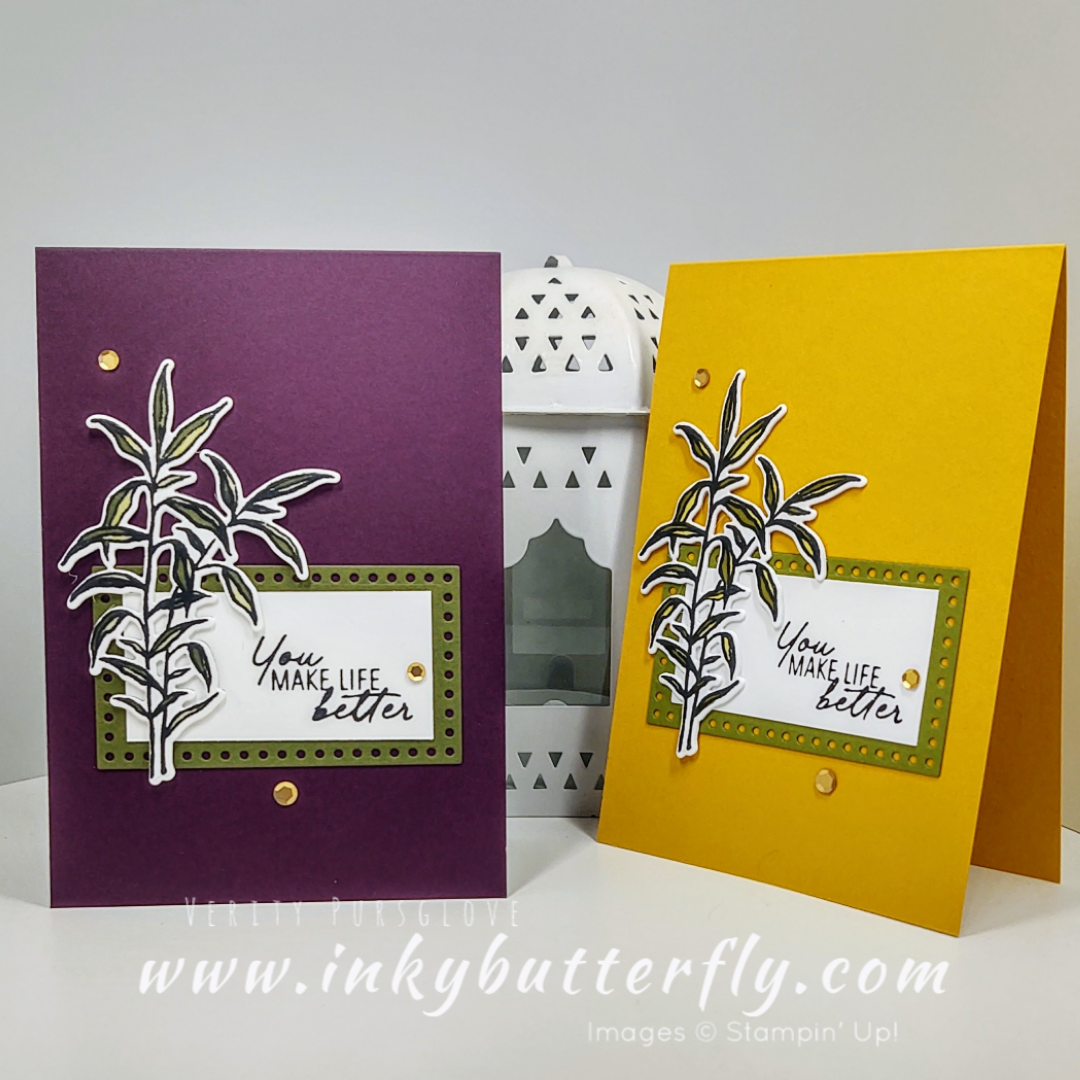
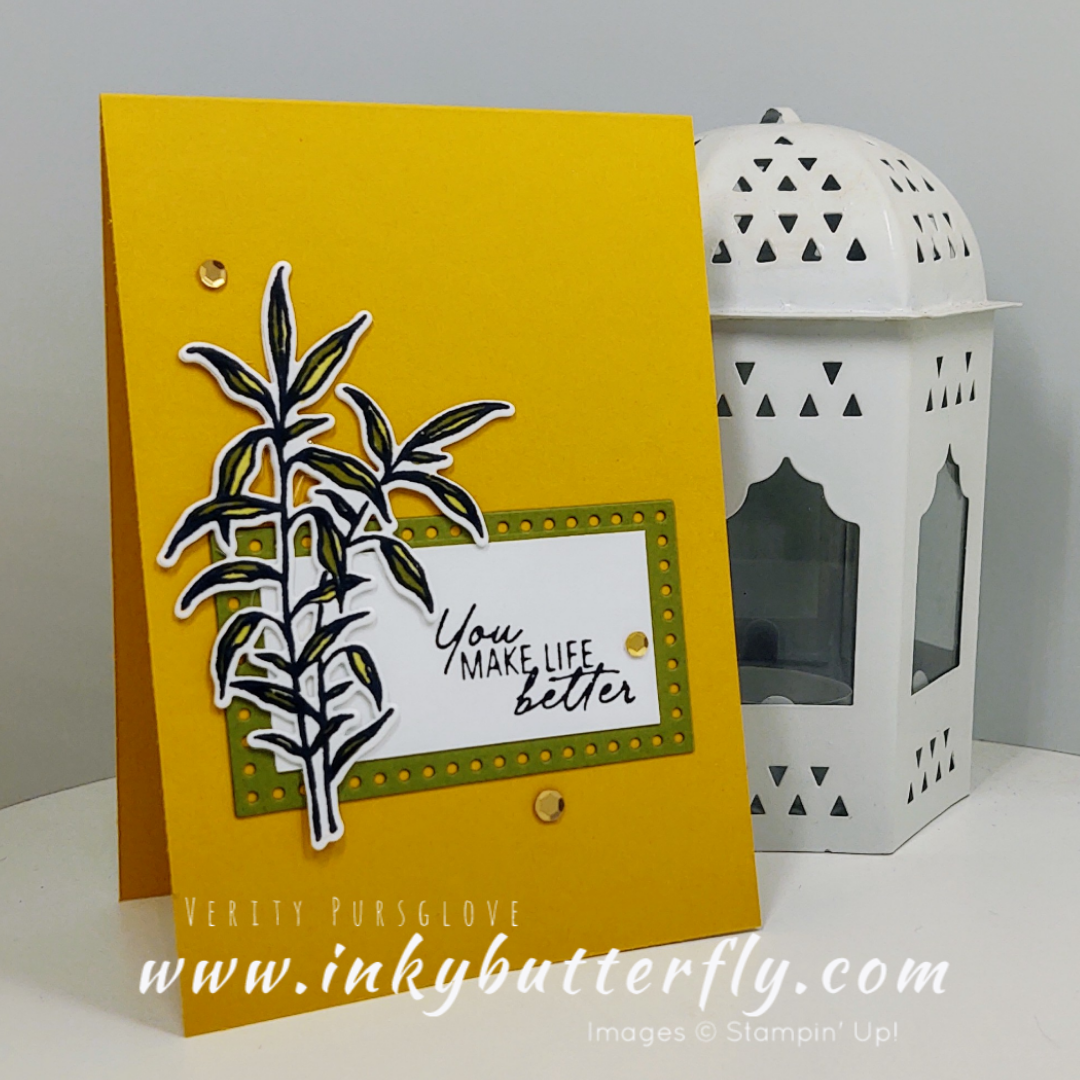
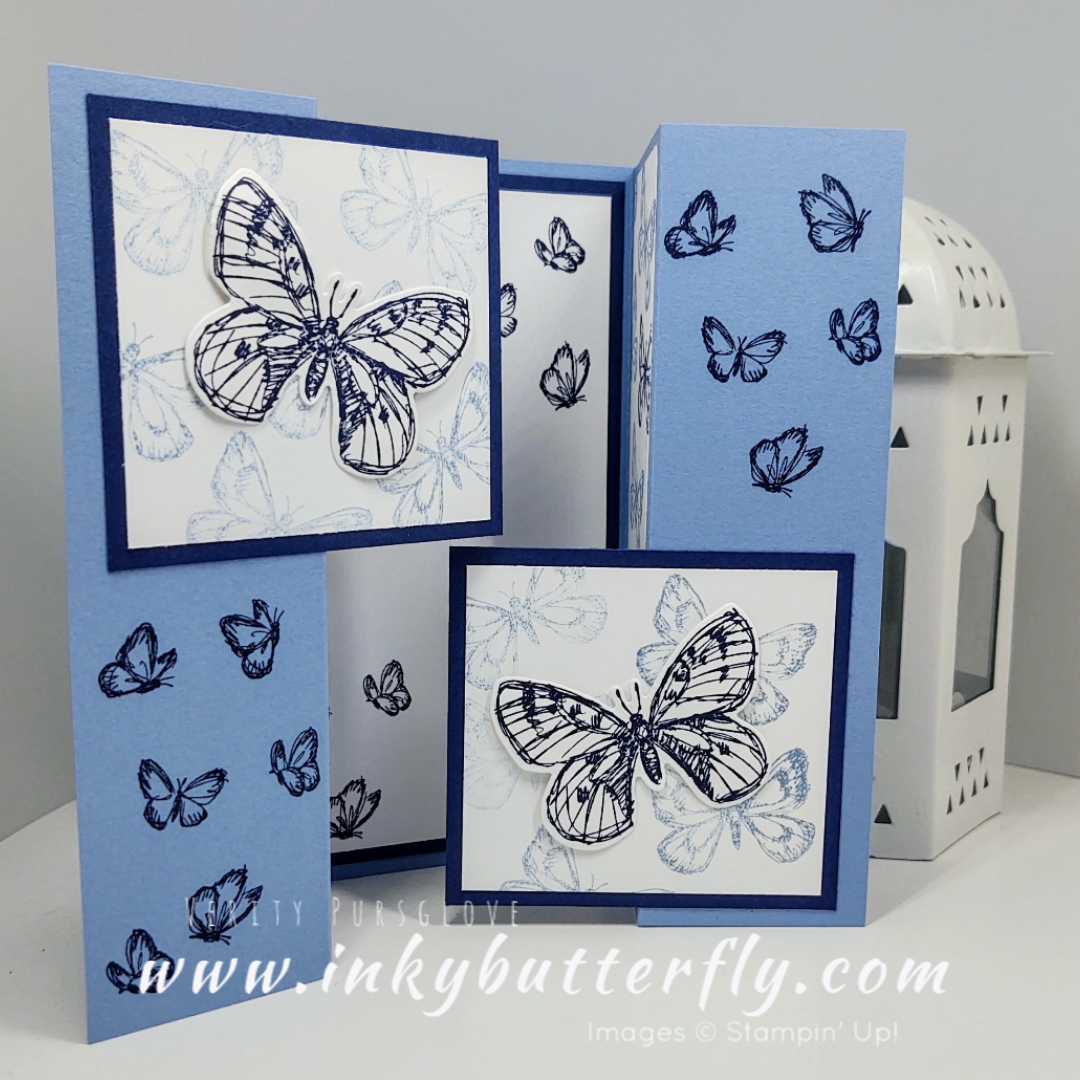
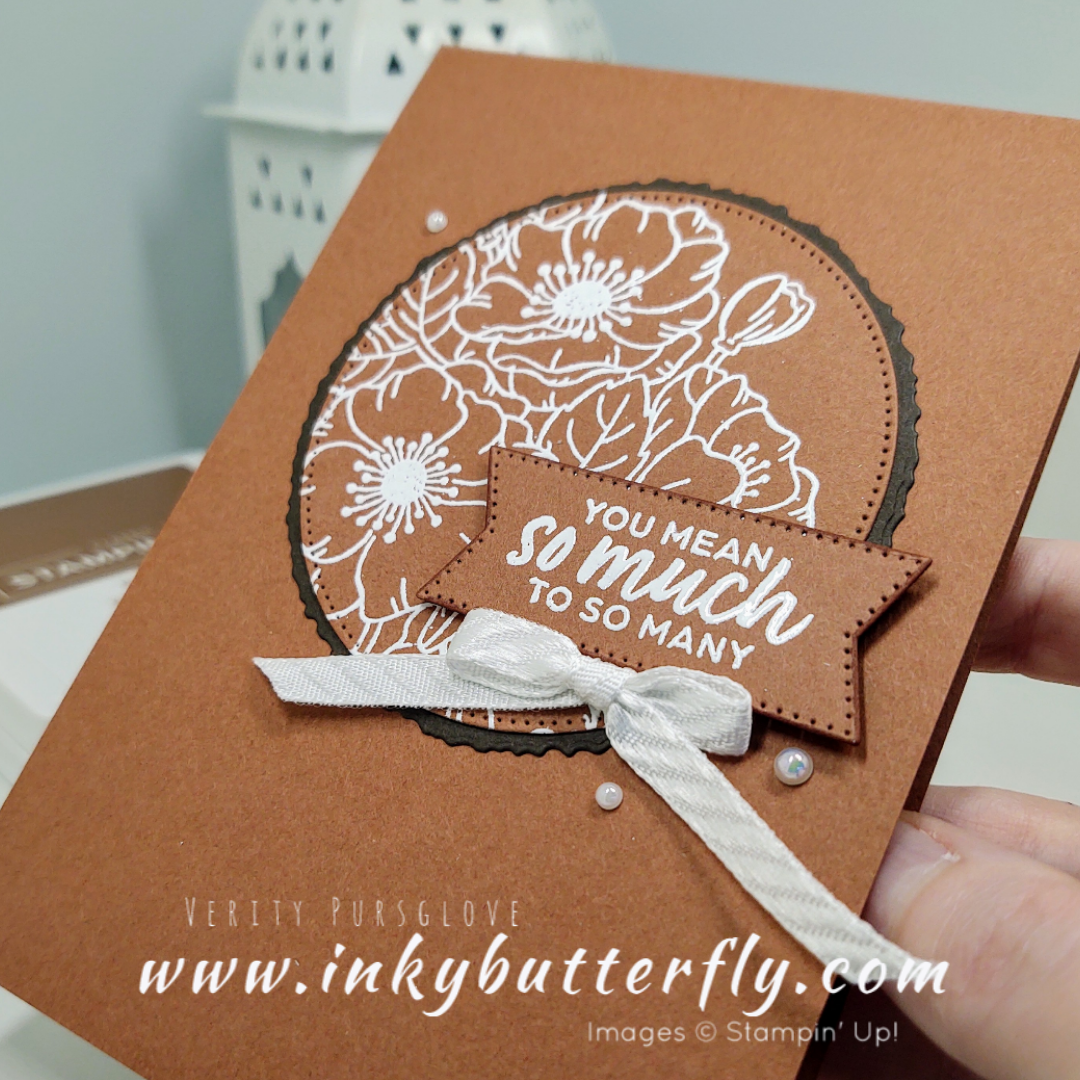
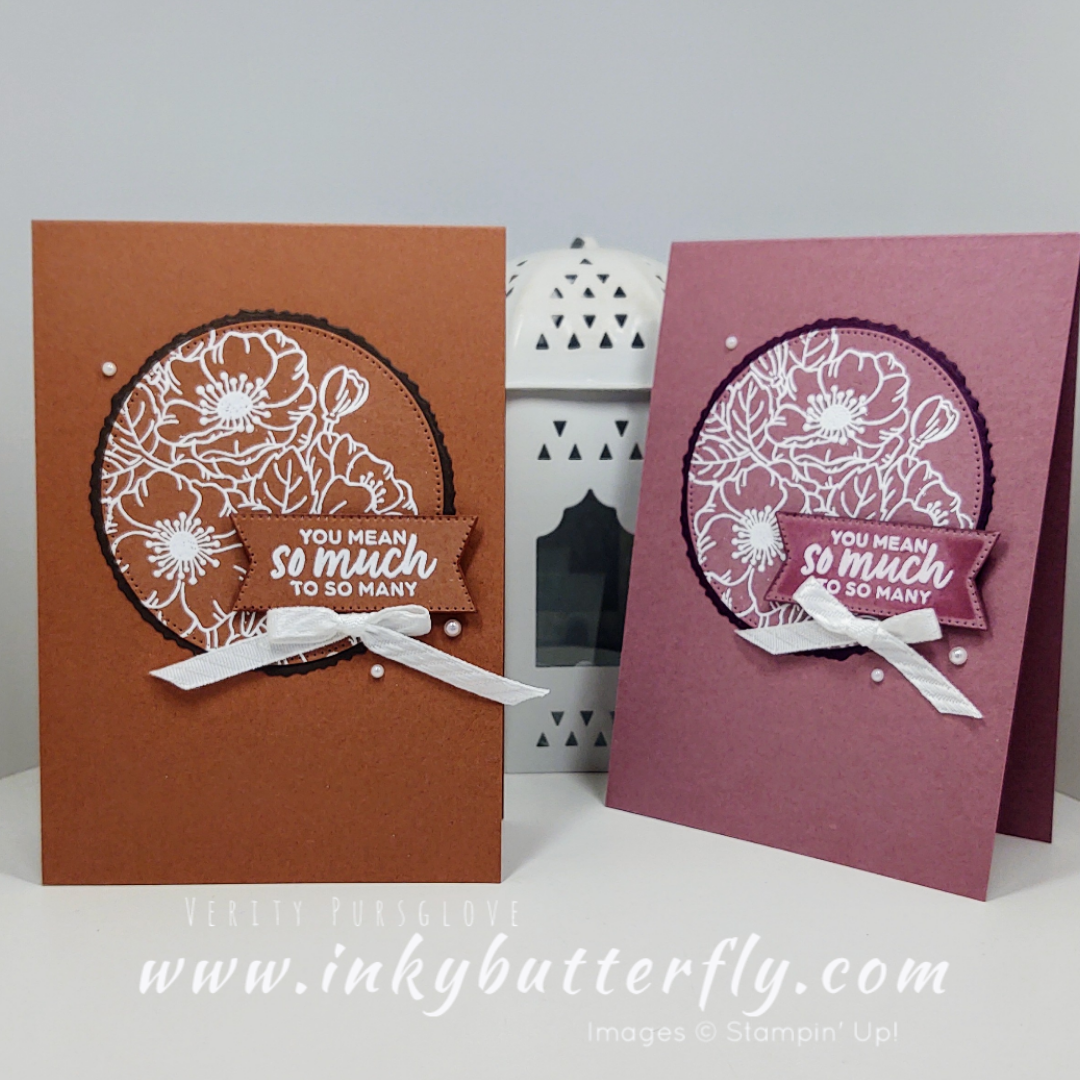
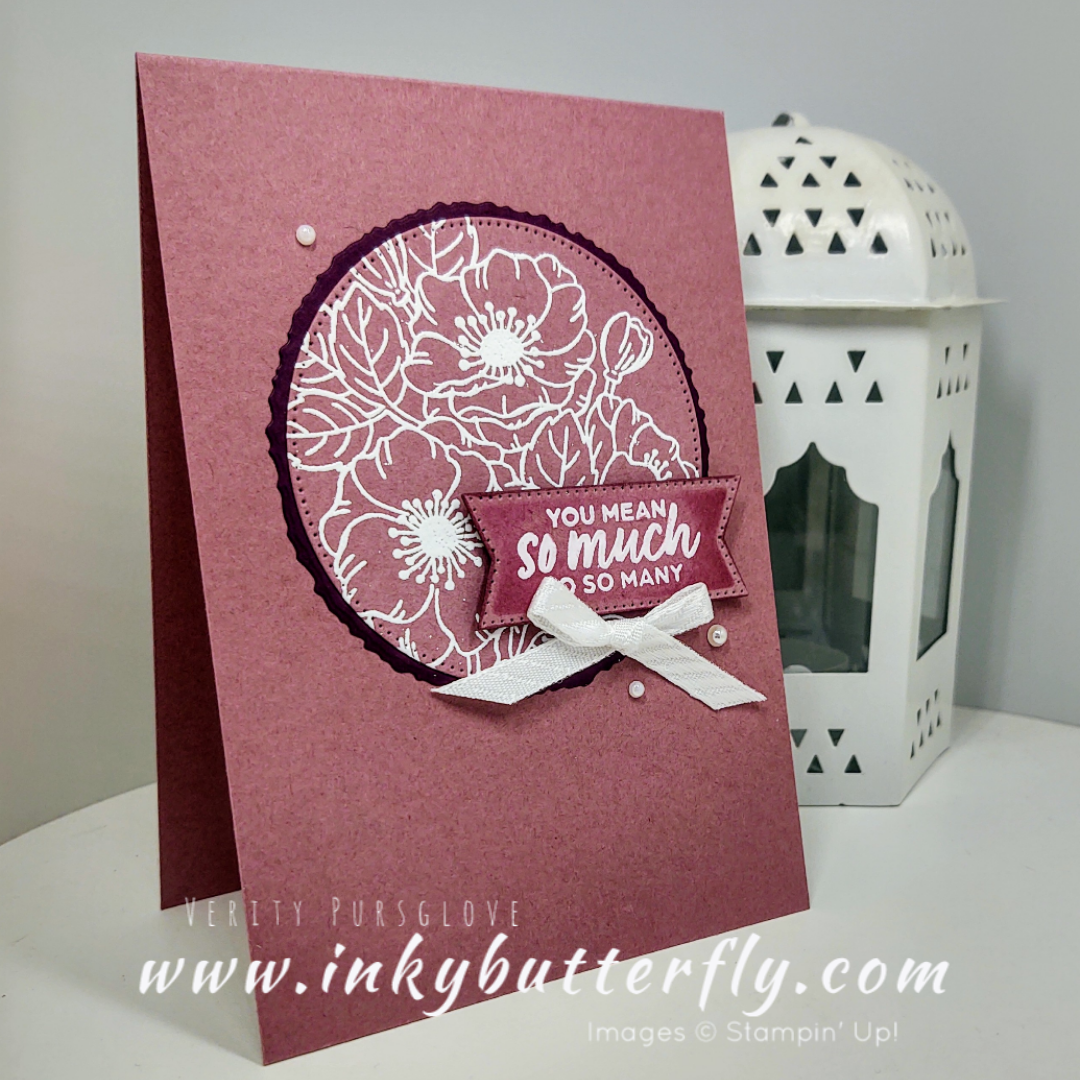
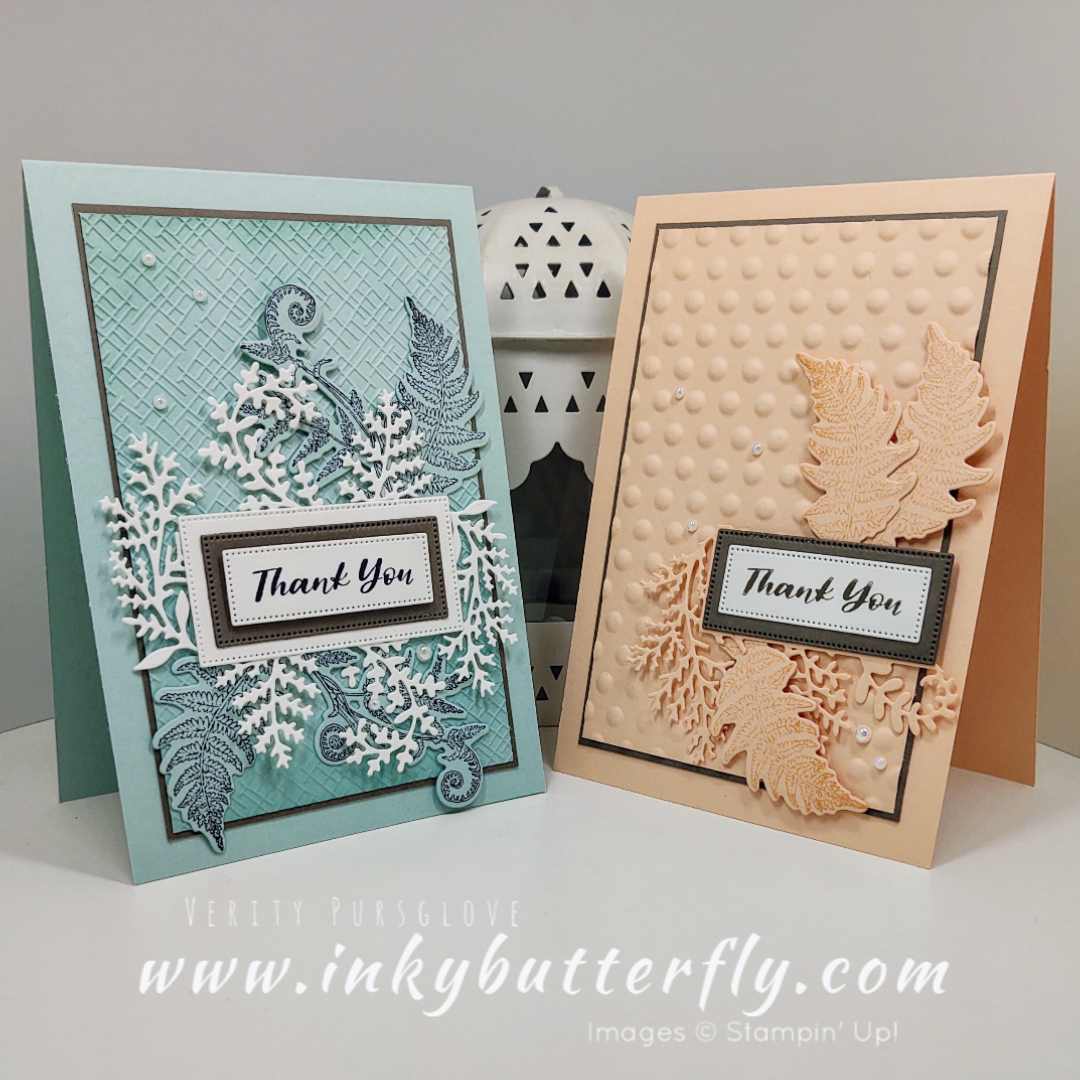
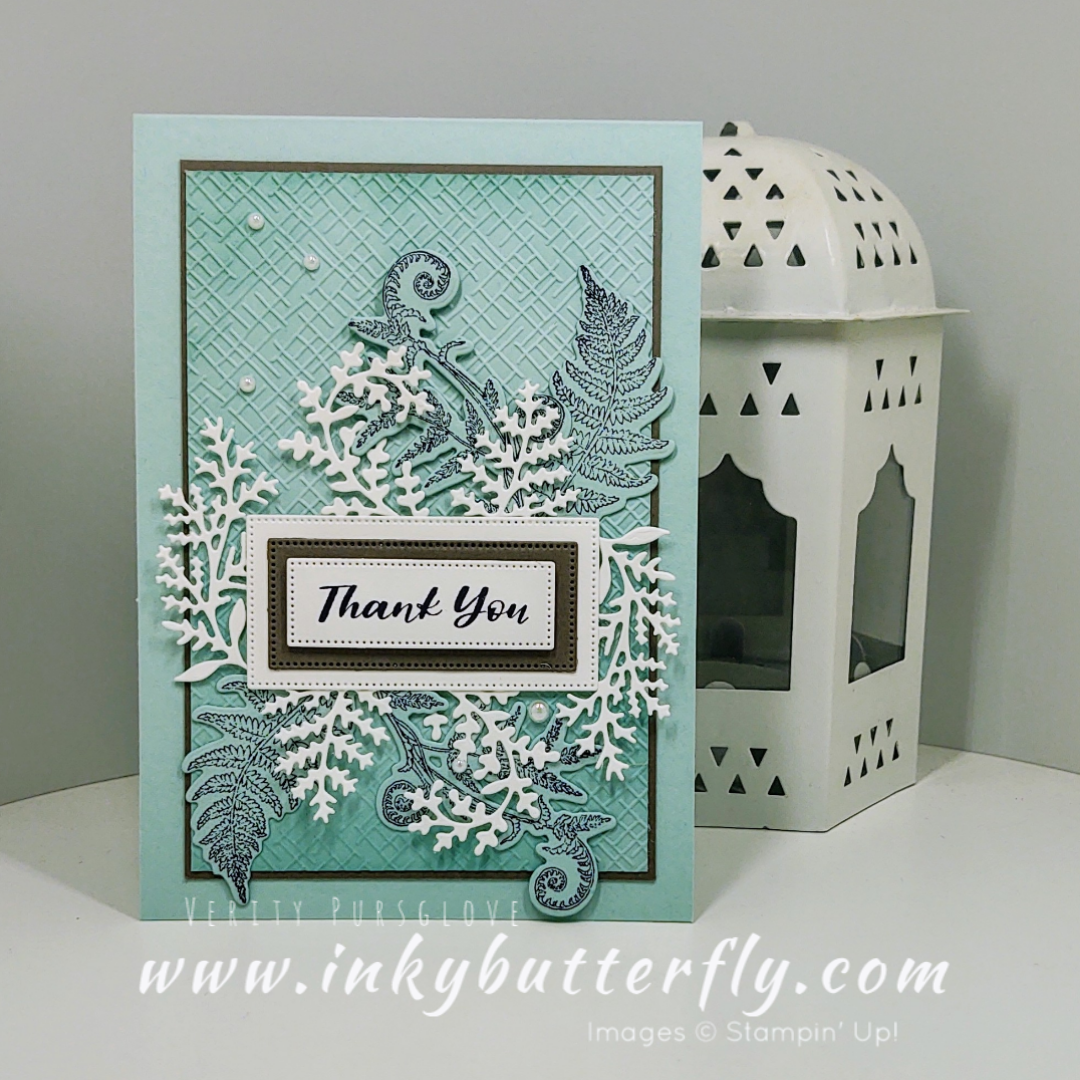
I’m sharing this sweet card today. The brief was to make something colourful, so I have pulled out the happy 2024 In Colours.

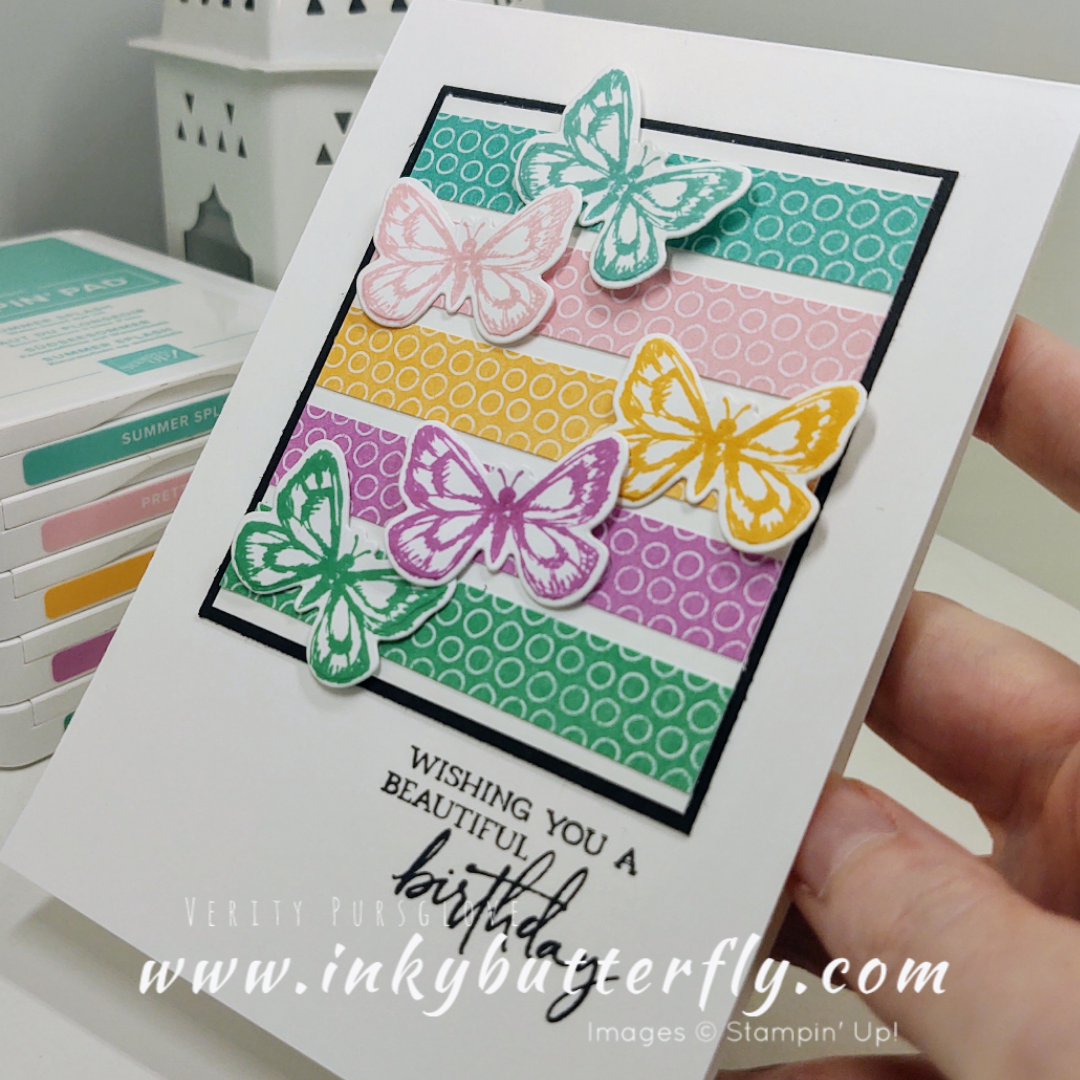
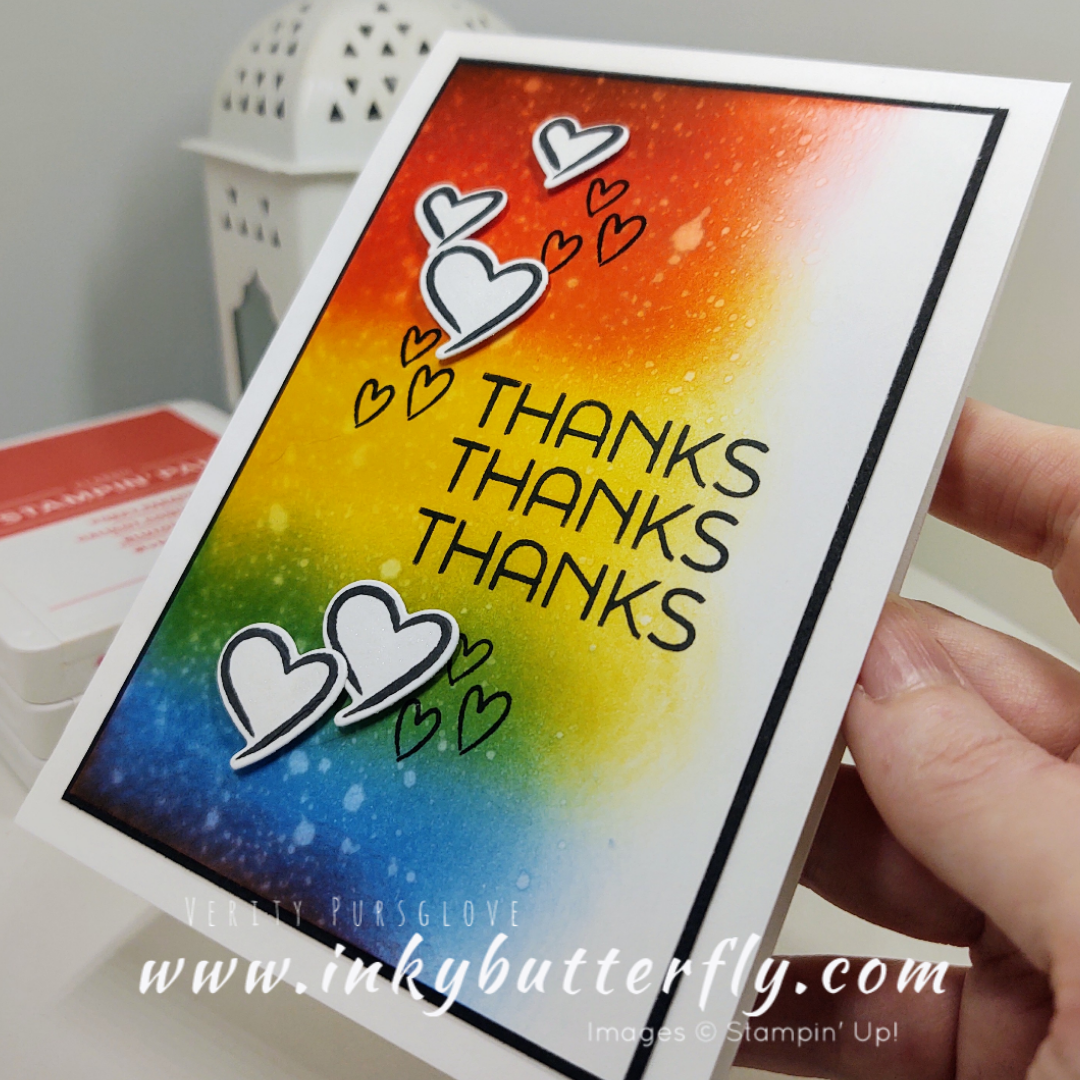
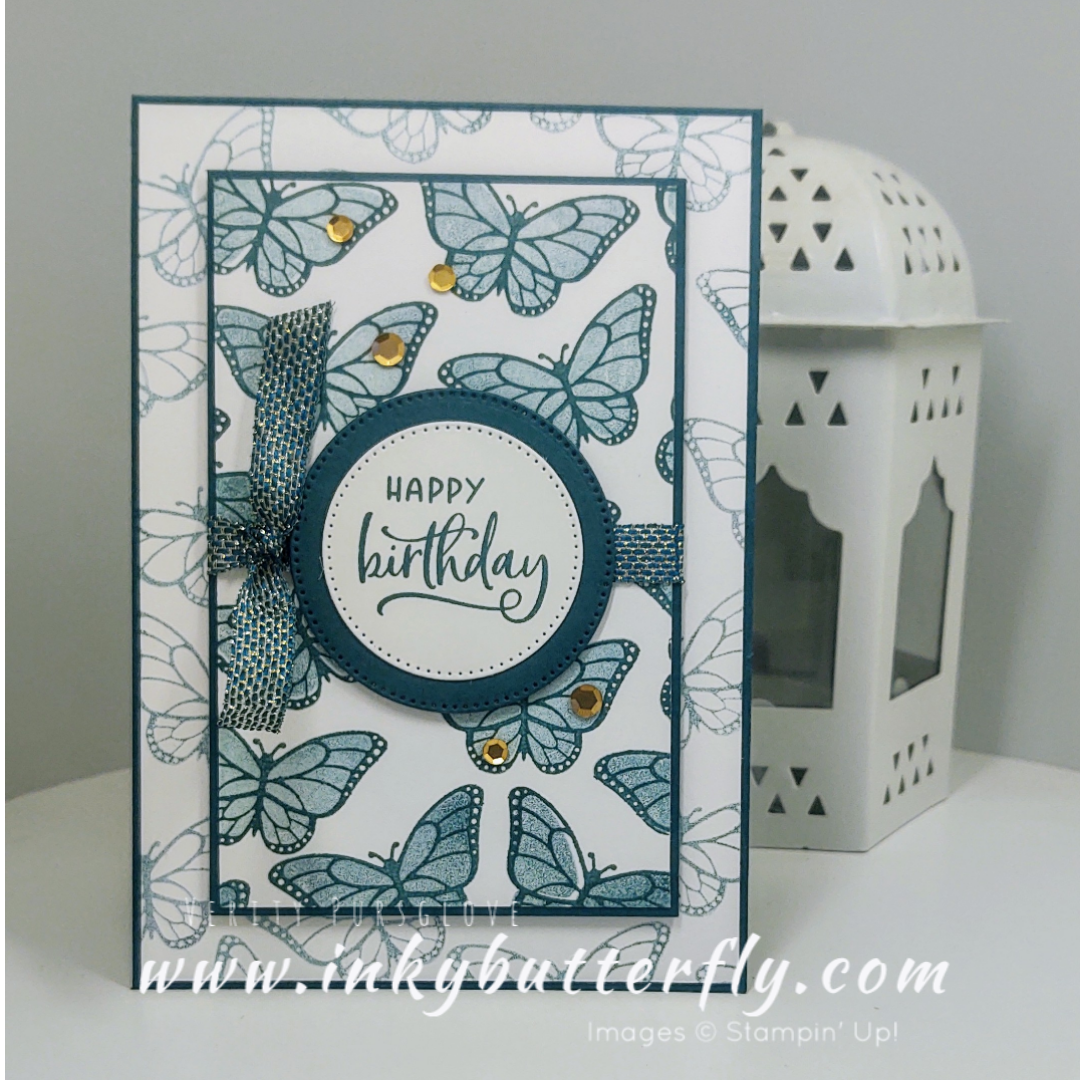
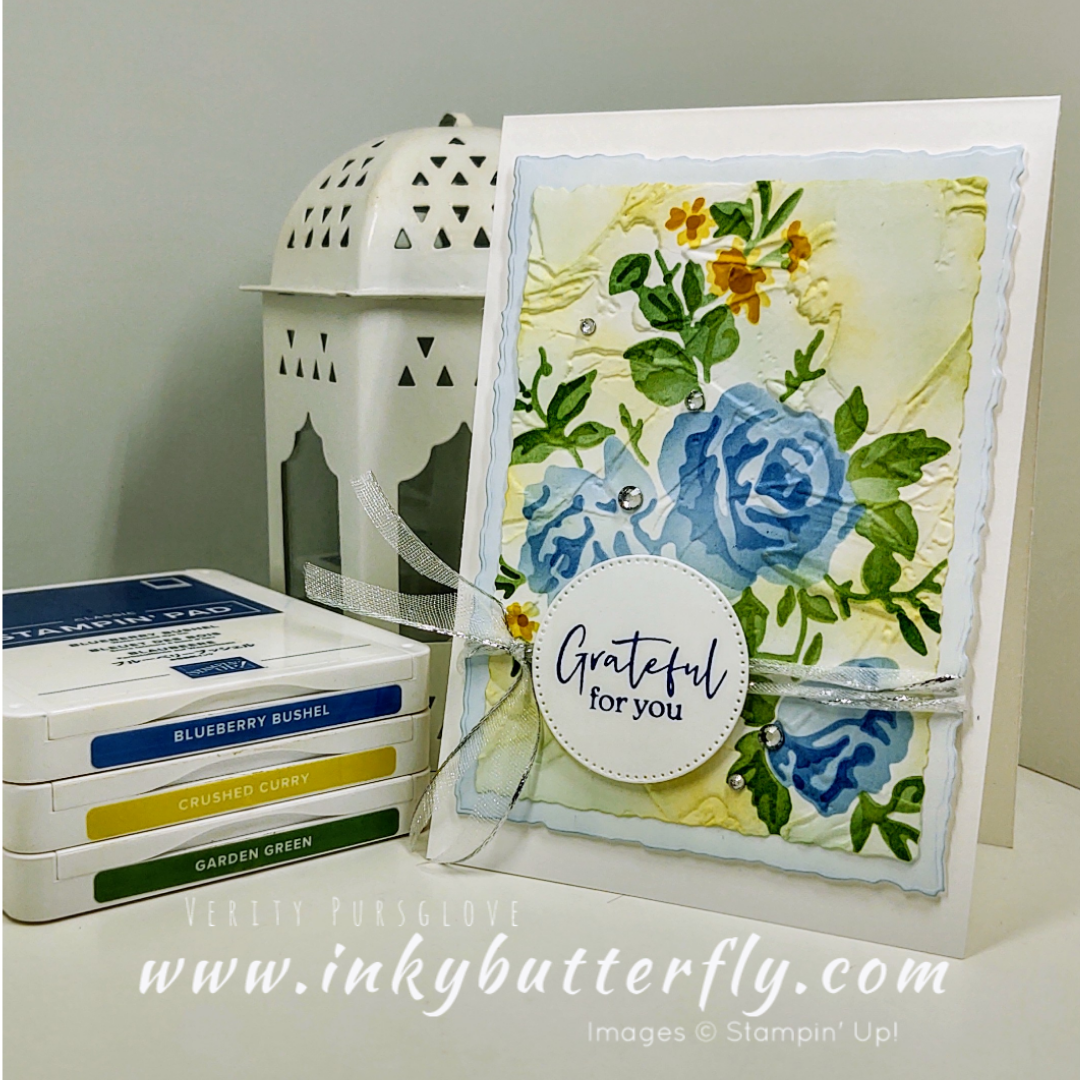
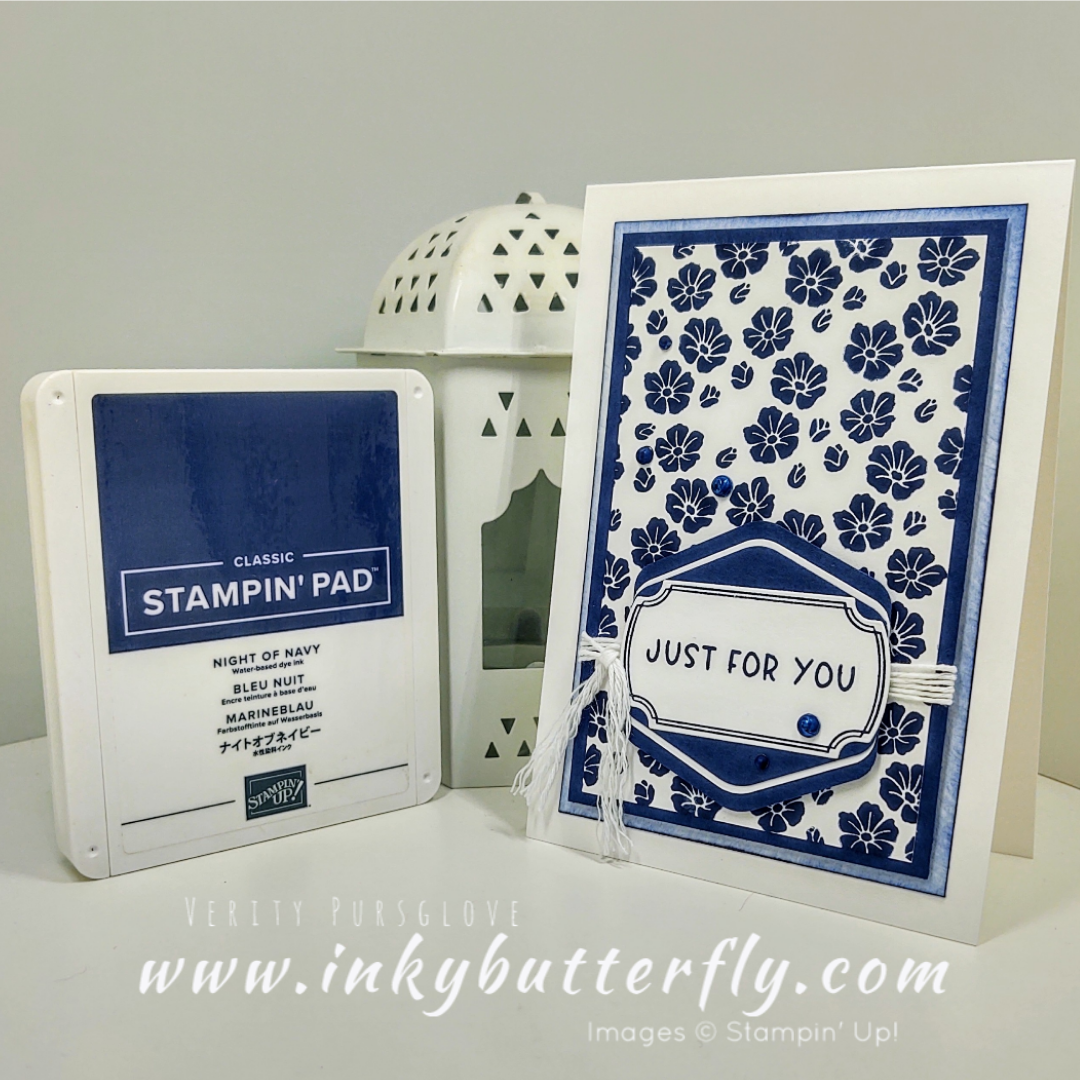
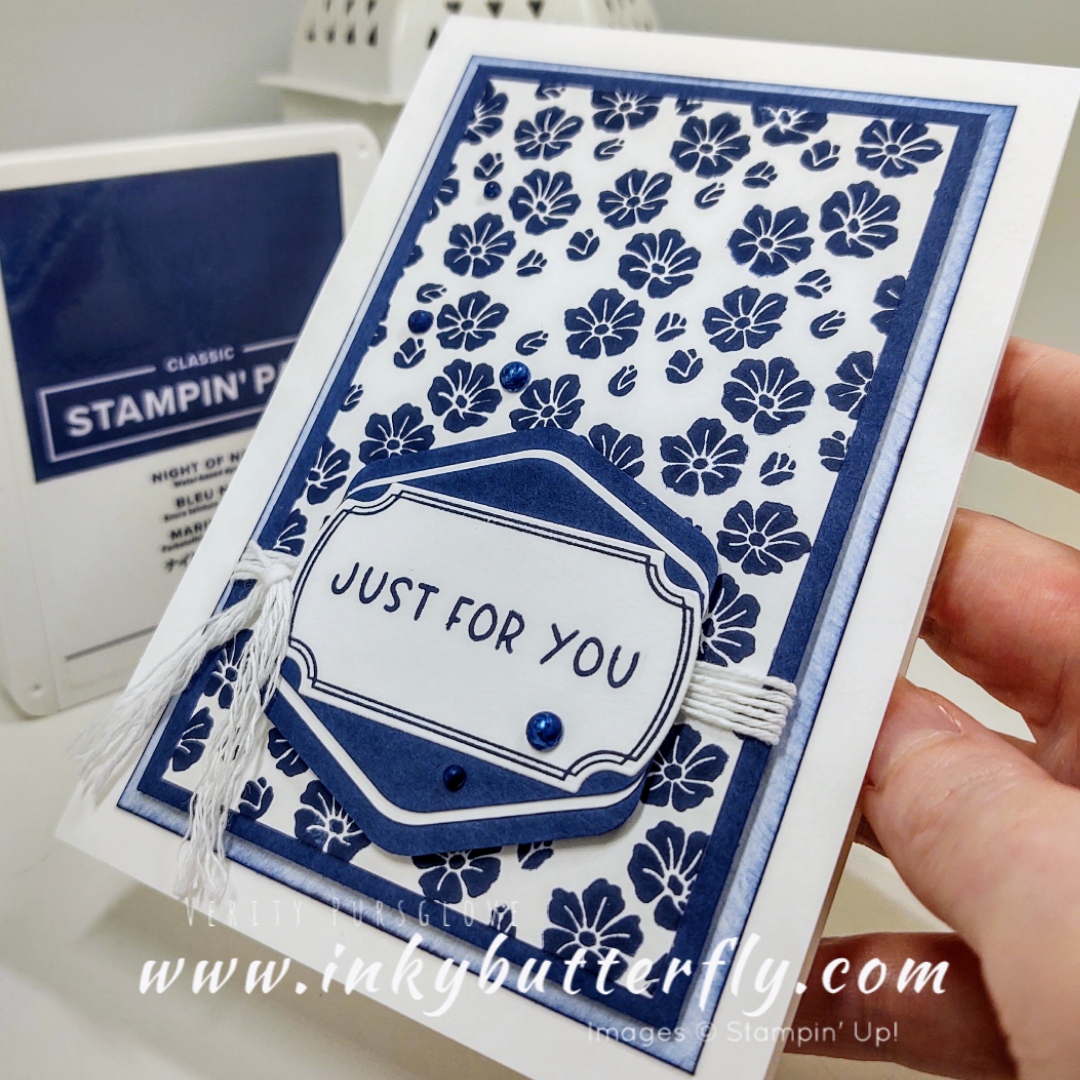
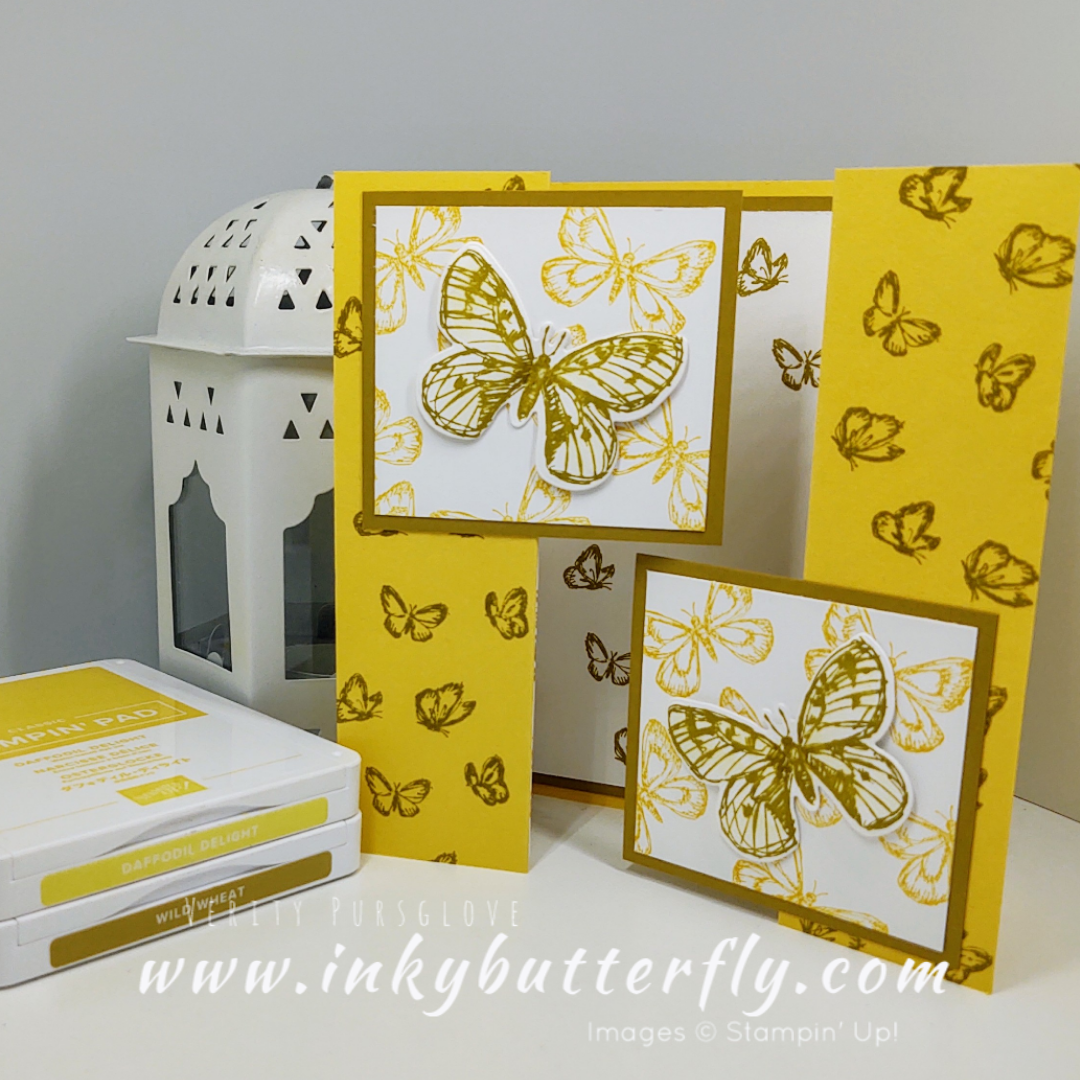
The coordinating 6×6 designer series paper was cut to 3 inches, and then I took ½inch strips and added to a piece of Basic White cardstock.

This was layered with Basic Black cardstock and added to a card base.

You can see how I made this card in my video tutorial….

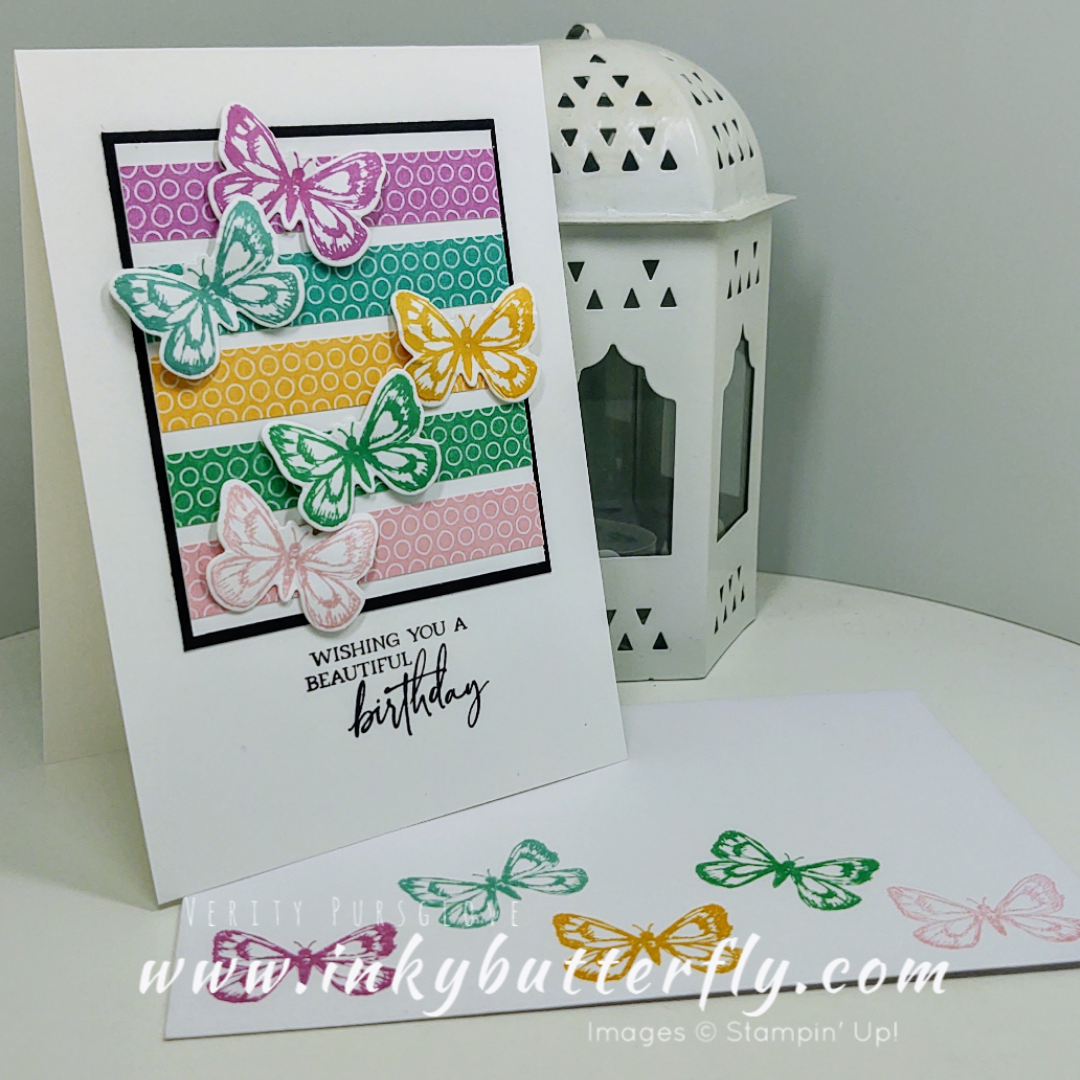
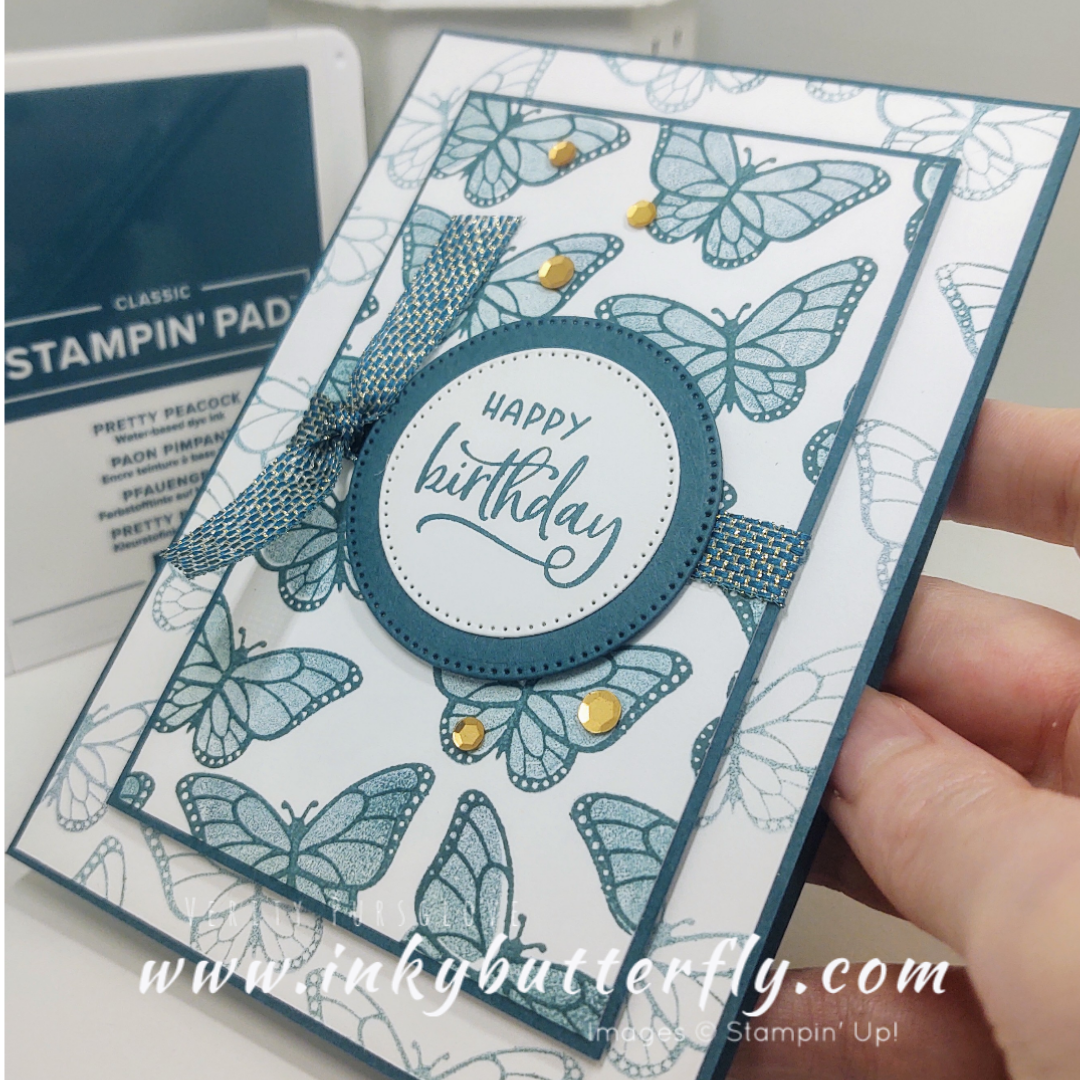
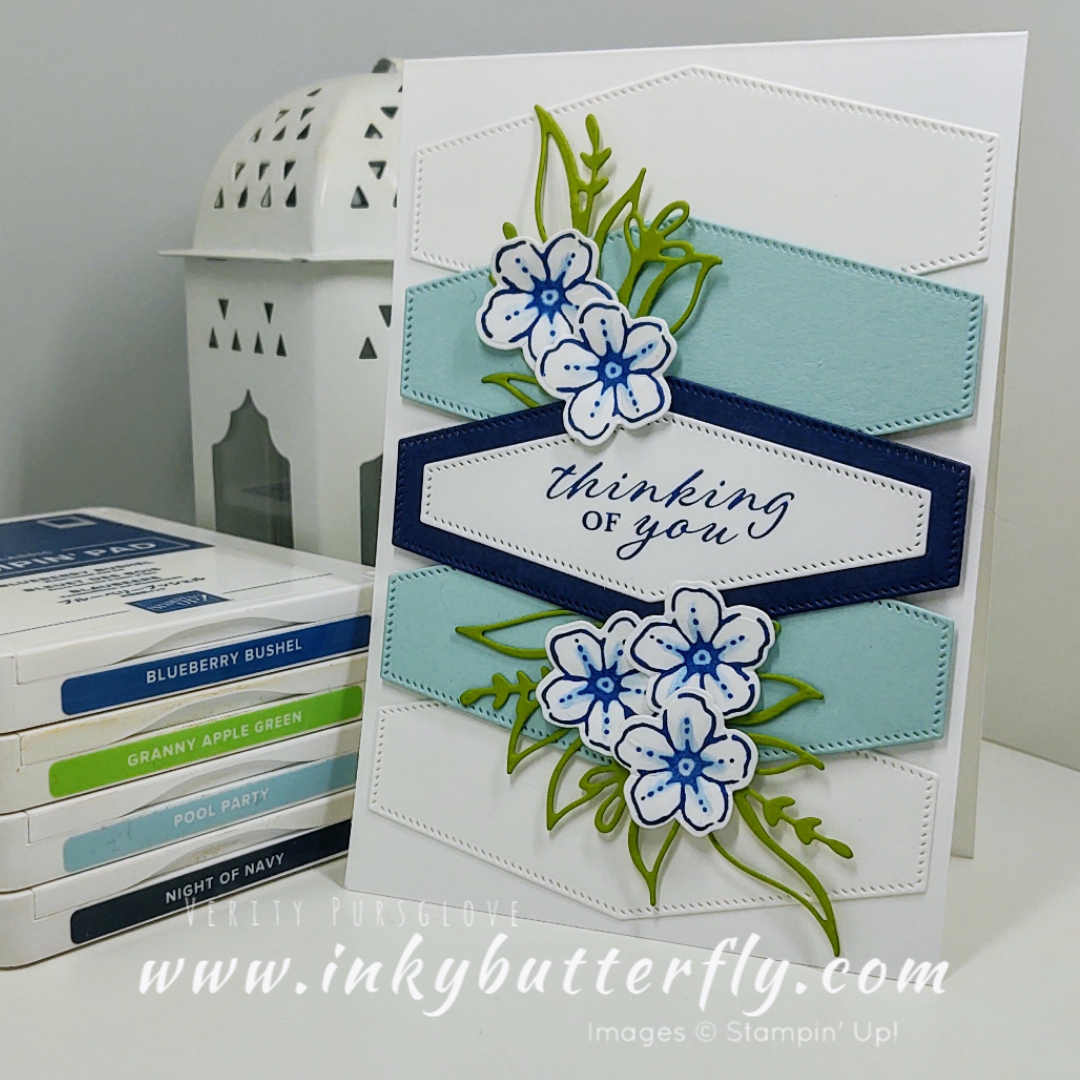
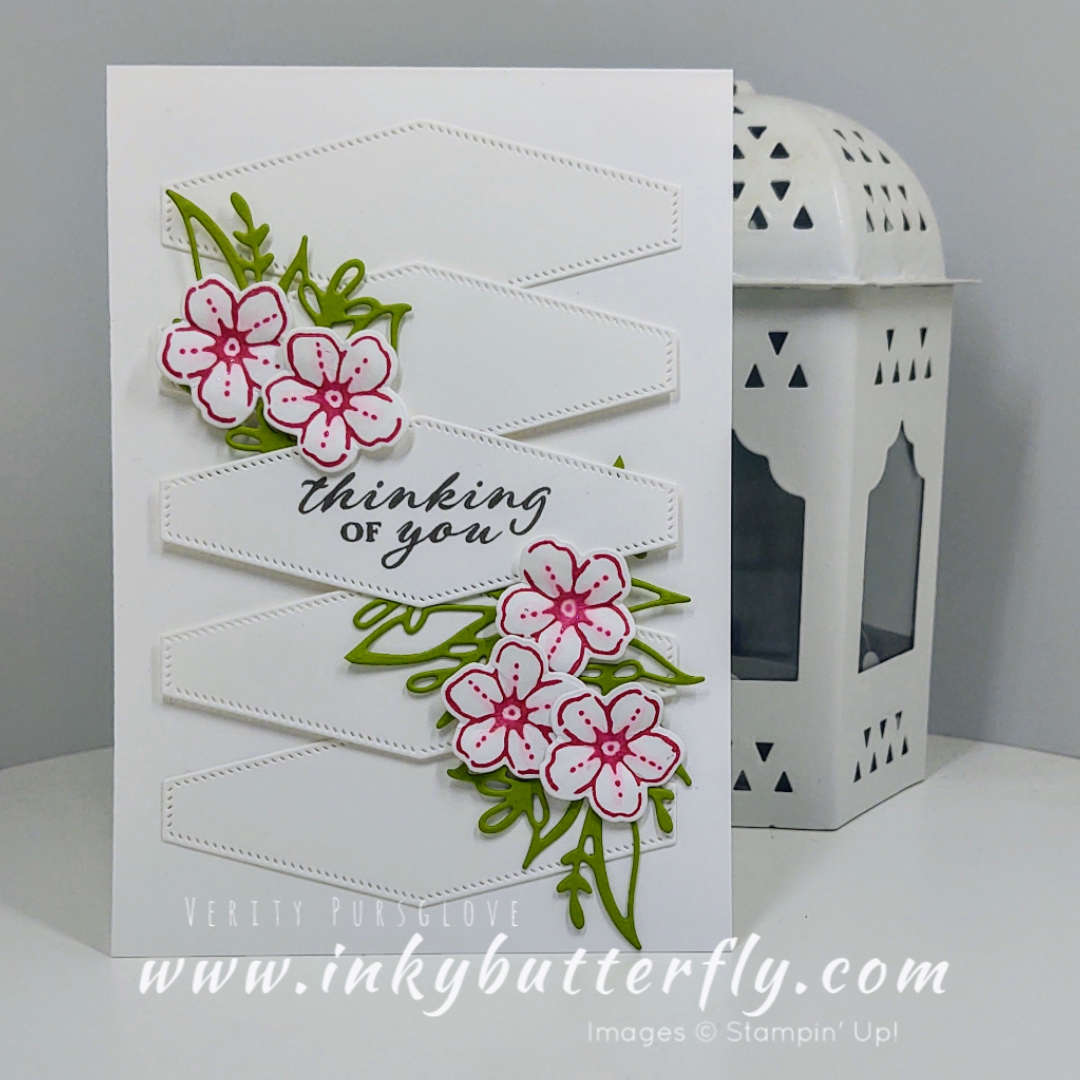
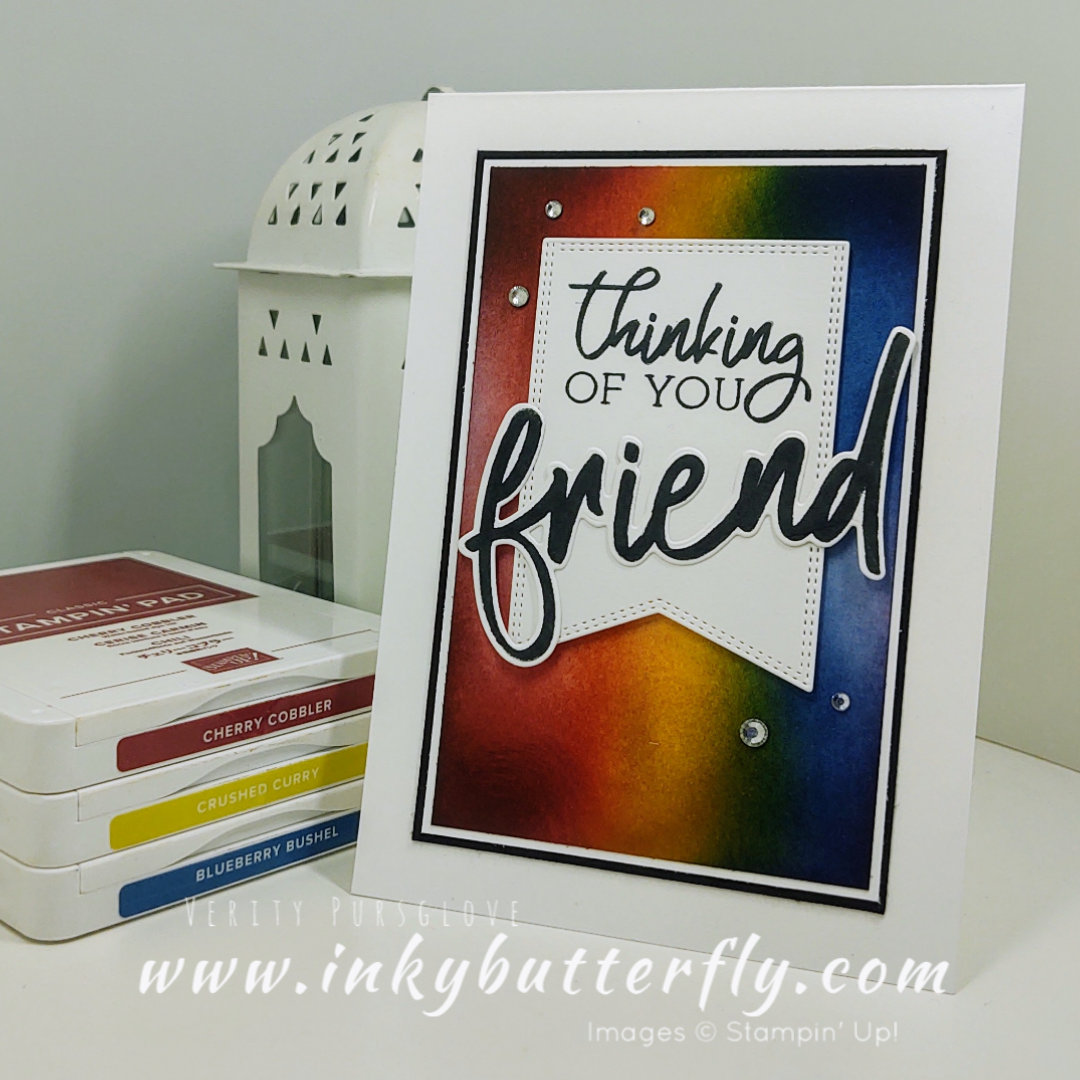
Butterflies were stamped and die cut and added to the corresponding strip.

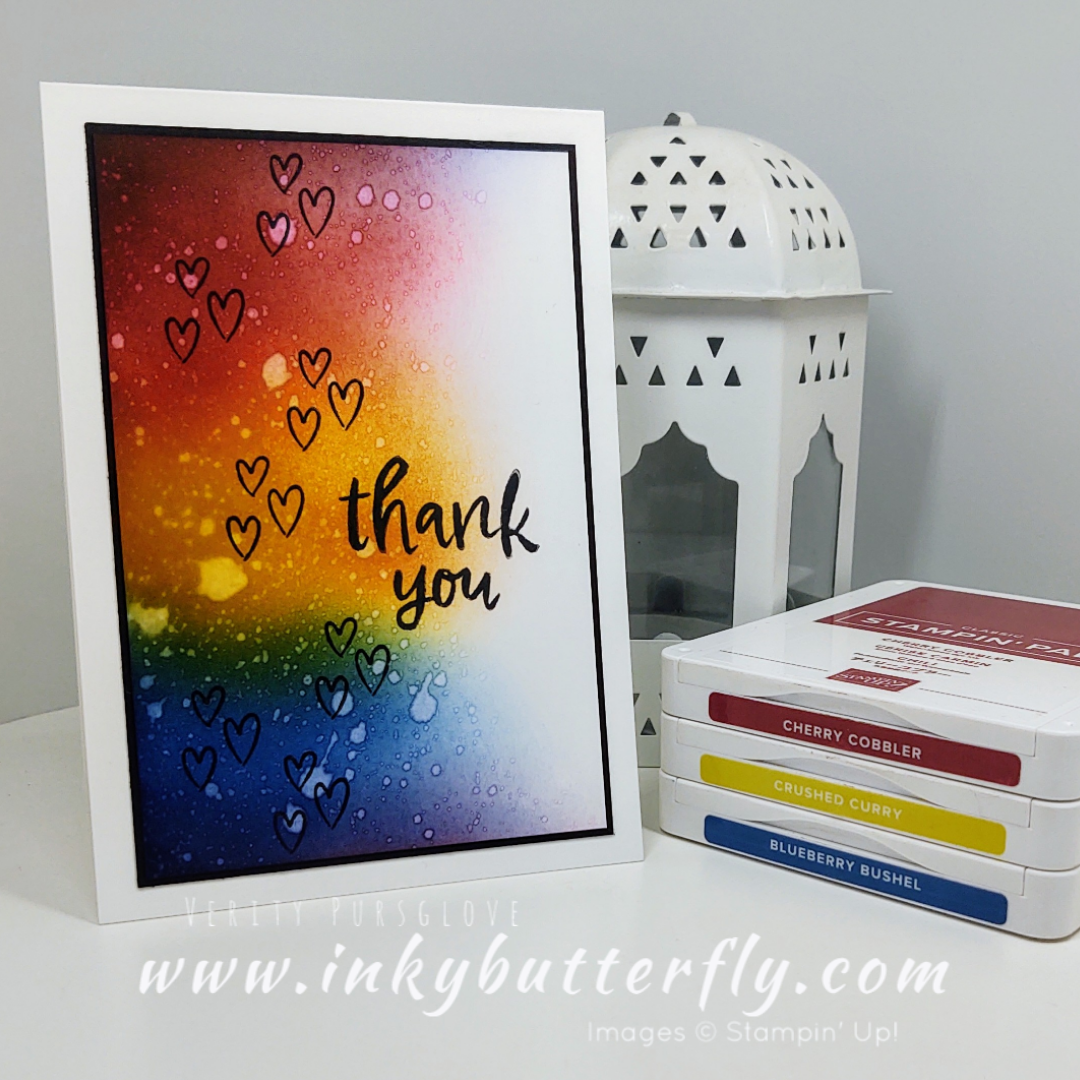
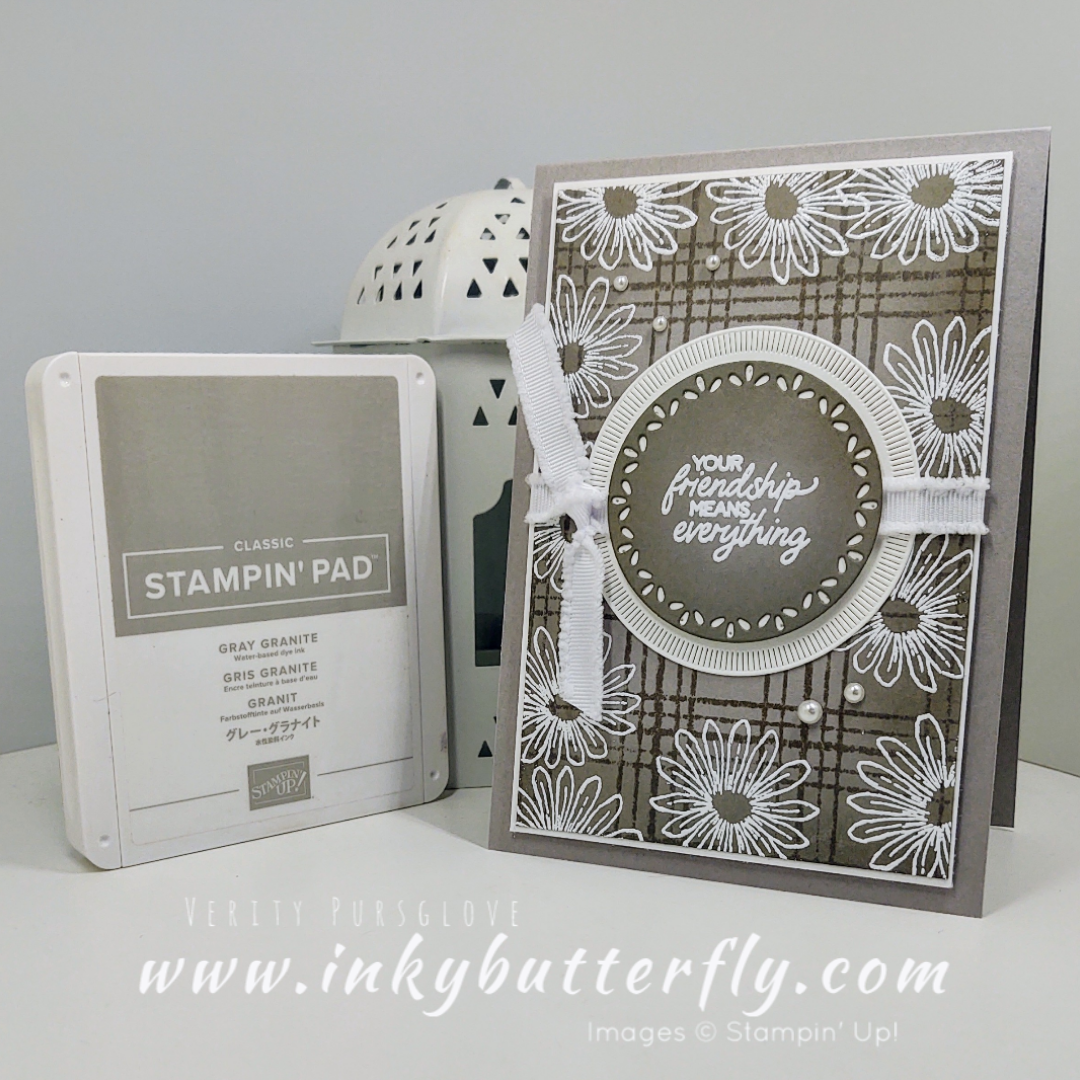
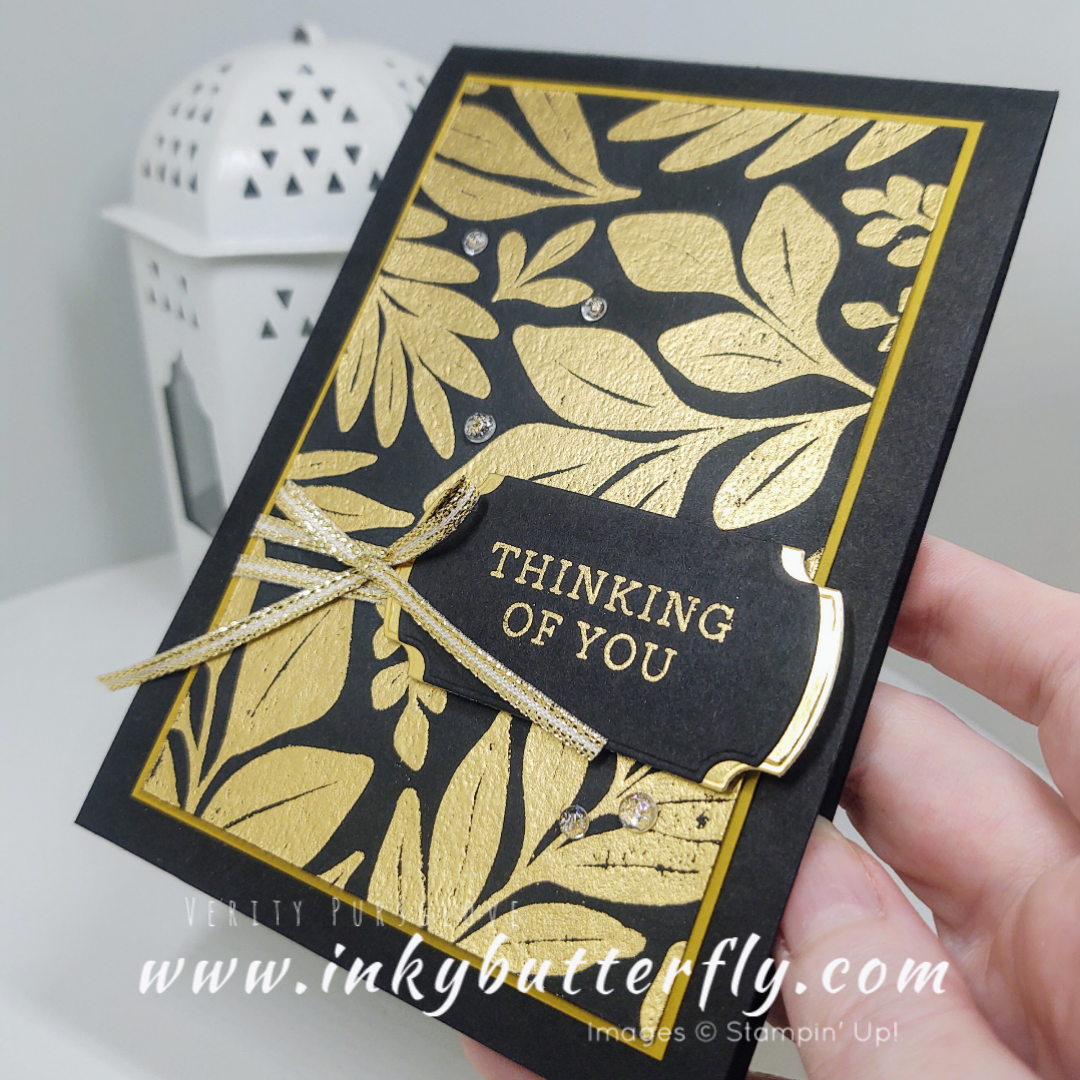
The sentiment was added at the bottom with black ink.

The supplies used are listed and linked to the online store below.

I would love to be your demonstrator.

Thanks for stopping by today and happy Stampin’!

Verity xx

Product List

Project Share Project Blog Hop – August 2024 – Rainbow!

Good Morning Everybody,

Welcome to this month’s Project Share Project blog hop. Our theme this month is Rainbow!

See the other projects by using the links below, or use the “Next” button at the bottom of this post!

Jayne Frank – Craft with Jayne

Heather Forgan – Stamp With Nellie

I’ve used the Bright, Poppy Parade, Daffodil Delight and Azure Afternoon inks to create a blended background.

A light spritz of water adds some interest before layering with Basic Black cardstock.

Stamped elements from the My Small Business and Friends for Life sets were used as embellishments.

You can see how I made this card in my video tutorial…

Here is my original sample using the Regals, Cherry Cobbler, Crushed Curry and Blueberry Bushel.

And…. I used the Subtles for this version!

Click below to move on to Jayne’s project!

I hope you enjoyed this project.

The supplies used are listed and linked to the online store below.

I would love to be your demonstrator.

Thanks for stopping by today and happy Stampin’!

Verity xx

Product List

Monochrome Friday – Pretty Peacock!

Hello Everyone,

Today I’m bringing you the card I made for this week’s Monochromatic Instahop!

You can hop through all the projects from my post @stampinwithinkybutterfly

This week…. Pretty Peacock 🦚

I am using one of my go to layering combinations to make my card.

For the background panel I used second generation ink, (stamped off) to add butterflies around the edge.

For the smaller panel, I used the two-step stamping feature of the set, filling the outline images with the solid stamp and second generation ink.

Some ribbon was added before adhering to the card with dimensionals

The sentiment was added with simple layered circles, and some gold sequins to finish.

The supplies used are listed and linked to the online store below.

I would love to be your demonstrator.

Thanks for stopping by today and happy Stampin’!

Verity xx

Product List

#StampAroundUK Video Hop August 2024 – 3D Project!

Hi Everyone,

It’s the first of the month which means it’s time for the #StampAroundUK video hop!

Our theme this time is “3D” so I tried my hand at making this mini album!

Links to all the other participants are listed in my video description over on You Tube. Please stop by, like and subscribe!

I hope you enjoyed this project.

I would love to be your demonstrator.

Thanks for stopping by today and happy Stampin’!

Verity xx

Product List

Creating a Dimensional Background with Nested Essentials Dies!

Hello Everyone,

Here’s another background idea for you, this time using the Nested Essentials dies!

Six die cuts are needed, I used 3 in Basic White, 2 in Pool Party and 1 in Night of Navy.

The Basic White shapes were adhered first. The centre one was added last and helps with positioning the coloured pieces.

The sentiment is taken from Wonderful Thoughts and stamped with Blueberry Bushel ink.

You can see how I made this card in my video tutorial….

A combination of Thoughtful Wishes and Sentimental Park created the foliage and flowers. Some Wink of Stella pulled some colour from the stamped outline.

This card used Calypso Coral and Petal Pink, not my favourite colours, but look great together in this layout.

I also creating this version when I was designing today’s project. This one uses the smaller shape in Basic White. The flowers are in Melon Mambo and the sentiment in Pebbled Path.

The supplies used are listed and linked to the online store below.

I would love to be your demonstrator.

Thanks for stopping by today and happy Stampin’!

Verity xx

Product List

Crafty Challenge Insta-hop July 2024 – Dice Challenge!

Hello Everyone,

Today I’m bringing you the card I shared over on Instagram for this month’s Crafty Challenge….

You can hop through all the projects from my post @stampinwithinkybutterfly

The dice have given some fantastic parameters to work with!

I love the Regals colour family, you can make a fabulous rainbow of colour!

I’ve used. Cherry Cobbler, Crushed Curry and Blueberry Bushel to blend this background panel, layered with Basic White and framed in Basic Black.

The sentiment is a taken from the Friends for Life stamp set. They were added to a die cut from the Nested Essentials set.

Some rhinestones added the bling element!

The supplies used are listed and linked to the online store below.

I would love to be your demonstrator.

Thanks for stopping by today and happy Stampin’!

Verity xx

Product List

Inspire Create Challenge #173 – Colour Challenge!

Hello Everyone,

Today’s card is made for the latest Inspire Create Challenge Design Team!

For Challenge #173 we are using a colour challenge!

You can see the other design team projects and take part in the challenge by clicking below!

I am working with Layers of Beauty masks to create my card today

I chose Blueberry Bushel, Garden Green and Crushed Curry, (Regals), to create this card.

The image was die cut using the Deckled Rectangles and embossed with the Painted Texture folder.

For a different look, I twisted the ribbon before wrapping around the front.

For this version I used Balmy Blue, Soft Sea Foam and Lemon Lolly, (subtles).

I would love to be your demonstrator.

Thanks for stopping by today and happy Stampin’!

Verity xx

Product List

Monochrome Friday – Gray Granite!

Hello Everyone,

Today I’m bringing you the card I made for this week’s Monochromatic Instahop!

You can hop through all the projects from my post @stampinwithinkybutterfly

This week…. Gray Granite 🩶

I’ve created a background with Sketched Plaid and blended some ink around the edge.

Daisies were added using versamark ink and heat embossed with white powder.

I also heat embossed the sentiment and cut this with the Spotlight on Nature dies. A larger circle was also cut from Basic White cardstock.

A piece of white ribbon was tied around the panel and decorated with some pearls.

The supplies used are listed and linked to the online store below.

I would love to be your demonstrator.

Thanks for stopping by today and happy Stampin’!

Verity xx

Product List

Creating a Watercolour Background using Acrylic Blocks!

Hello Everyone,

Think week I am creating a watercolour background in a really fun way!

The colours I picked out for the video are Coastal Cabana, Lost Lagoon and Pretty Peacock.

You can see how I made this card in my video tutorial….

Once the background was completely dry, I stamped the leaves with versamark ink and embossed with copper embossing powder.

The panel was layered with Coastal Cabana cardstock and matching embossed sentiment was added.

Here’s another version using Soft Sea Foam, Granny Apple Green and Garden Green!

The supplies used are listed and linked to the online store below.

I would love to be your demonstrator.

Thanks for stopping by today and happy Stampin’!

Verity xx

Product List

Monochrome Friday – Night of Navy!

Hello Everyone,

Today I’m bringing you the card I made for this week’s Monochromatic Instahop!

You can hop through all the projects from my post @stampinwithinkybutterfly

This week…. Night of Navy 💙

I’ve created a background with a stamp from the Labeled with Love stamp set and layered this with Night of Navy cardstock and an ink blended panel.

Some baker’s twine was wrapped around the panel before adhering to a white card base.

The sentiment was die cut and layered with the Heartfelt Hexagon punch.

The supplies used are listed and linked to the online store below.

I would love to be your demonstrator.

Thanks for stopping by today and happy Stampin’!

Verity xx

Product List

Creating a Dimensional Background with Layers of Beauty!

Hello Everyone,

I love making my own backgrounds, and today I’m adding dimension too!

I’m working with Boho Blue and Shy Shamrock, In Colours from both collections – they worked together better than I thought they would!

You can see how I made this card in my video tutorial….

The small image from the Layers of Beauty stamp set was was stamped, coloured and die cut…. I used 12 in the end…. Then added them to the card panel with dimensionals.

Punched pieces were layered together to create the sentiment feature and embellished with Bordered Ribbon and Iridescent Pearls.

Here’s another version using Pretty in Pink, Lost Lagoon and Pretty Peacock!

The supplies used are listed and linked to the online store below.

I would love to be your demonstrator.

Thanks for stopping by today and happy Stampin’!

Verity xx

Product List

Inspire Create Challenge #172 – Case the Designer!

Hello Everyone,

Today’s card is made for the latest Inspire Create Challenge Design Team!

For Challenge #172 we are casing the designer!

You can see the other design team projects and take part in the challenge by clicking below!

I am working with the Sketched Butterflies stamp set and a pink and purple palette inspired by Hannah’s card.

I do love to make my own backgrounds and the butterflies worked so well.

There’s a pop of green from the sentiment die cut!

I would love to be your demonstrator.

Thanks for stopping by today and happy Stampin’!

Verity xx

Product List

Monochrome Friday – Crumb Cake!

Hello Everyone,

Today I’m bringing you the card I made for this week’s Monochromatic Instahop!

You can hop through all the projects from my post @stampinwithinkybutterfly

This week…. Crumb Cake 🤎

I created my card UI g the Autumn Leaves dies. All the die cuts were given a dusting of ink to make them stand out from the background panel.

Some white layering adds definition to the panel and sentiment.

A Stampin’ Blend marker was used to colour some pearls to coordinate with the rest of the card.

The supplies used are listed and linked to the online store below.

I would love to be your demonstrator.

Thanks for stopping by today and happy Stampin’!

Verity xx

Product List

Super Simple Card Layout featuring the Thoughtful Wishes

Hello Everyone,

I wanted to share something super quick and easy today, and it gave me an excuse to use one of my favourite colours!

I’m working with Blackberry Bliss and Mossy Meadow, from the Neutrals colour family.

You can see how I made this card in my video tutorial….

The sentiment panel was created with the Everyday Details dies with a piece of Basic White cut to size added to the middle.

I positioned this lower on the card base to allow the foliage die cut to “hug” the sentiment.

Here’s another version using Crushed Curry and Old Olive from the Regals colour family.

The supplies used are listed and linked to the online store below.

I would love to be your demonstrator.

Thanks for stopping by today and happy Stampin’!

Verity xx

Product List

Project Share Project Blog Hop – July 2024 – Fun Fold!

Good Morning Everybody,

Welcome to this month’s Project Share Project blog hop. Our theme this month is Fun Fold!

See the other projects by using the links below, or use the “Next” button at the bottom of this post!

Heather Forgan – Stamp With Nellie

Jayne Frank – Craft with Jayne

Victoria Littlewood – VickieLou Designs

I’ve used the Sketched Butterflies stamp set to decorate this modified gate fold card. This one uses Daffodil Delight and Wild Wheat.

To make the card base;

  • Cut on the short side at 5⅞ inch.
  • Score on the short side at 1¾ and 3-13/16
  • Rotate the cardstock and score again.

White panels;

  • Inside back panel – 5⅜ x 3⅝
  • Inside side panels -5⅜ x 1⅞
  • Front panels – 2½ x 2¾

Coloured panels;

  • Inside back panel – 5⅝ x 3⅞
  • Front panels – 2¾ x 3

You can see how I made this card in my video tutorial…

For this version, I used Boho Blue and Night of Navy!

Click below to move on to Heather’s project!

I hope you enjoyed this project.

The supplies used are listed and linked to the online store below.

I would love to be your demonstrator.

Thanks for stopping by today and happy Stampin’!

Verity xx

Product List

Monochrome Friday – Old Olive!

Hello Everyone,

Today I’m bringing you the card I made for this week’s Monochromatic Instahop!

You can hop through all the projects from my post @stampinwithinkybutterfly

This week…. Old Olive 💚

I started by creating a panel with the Leaf Collection background stamp, which I layered with Basic White cardstock.

Some bakers twine was wrapped around the panel and adhered to the card base.

Elements were stamped with Old Olive ink and cut with the Friends for Life and Everyday Details dies.

The supplies used are listed and linked to the online store below.

I would love to be your demonstrator.

Thanks for stopping by today and happy Stampin’!

Verity xx

Product List

Creating a White Heat Embossed Topper!

Hello Everyone,

Today’s card is not only an opportunity to use some new white embossing powder, but also to revisit using the 2023 in colours!

I’m working with a Copper Clay and Early Espresso to make this sample.

You can see how I made this card in my video tutorial….

The circle was cut using a combination of Stylish Shapes and the Deckled Circles.

You can use whatever you have, or use a different shape entirely.

Here’s a Moody Mauve version with a Blackberry Bliss layer.

The supplies used are listed and linked to the online store below.

I would love to be your demonstrator.

Thanks for stopping by today and happy Stampin’!

Verity xx

Product List

#StampAroundUK Video Hop July 2024 – Black &Gold!

Hi Everyone,

It’s the first of the month which means it’s time for the #StampAroundUK video hop!

Our theme this time is “Black &Gold”!

Links to all the other participants are listed in my video description over on You Tube. Please stop by, like and subscribe!

I hope you enjoyed this project.

I would love to be your demonstrator.

Thanks for stopping by today and happy Stampin’!

Verity xx

Product List

Monochrome Friday – Pecan Pie!

Hello Everyone,

Today I’m bringing you the card I made for this week’s Monochromatic Instahop!

You can hop through all the projects from my post @stampinwithinkybutterfly

This week…. Pecan Pie 🤎!

I’ve chosen to work with the Autumn Leaves dies to make today’s project.

Six of the label shapes were cut from Very Vanilla cardstock and adhered to a background panel.

Pecan Pie ink was added over the top, appearing darker along the cut edges.

Leaves were cut from Pecan Pie cardstock and also inked with blending brush. These were added to five of the panels, leaving one for the sentiment.

The card was embellished with the Neutral Self Adhesive sequins.

The supplies used are listed and linked to the online store below.

I would love to be your demonstrator.

Thanks for stopping by today and happy Stampin’!

Verity xx

Product List

Thank You Card using Wild Fern Die Cuts!

Hello Everyone,

If you have followed my blog or watched my You Tube channel for a while, you will know I LOVE die cutting!

I’m working with a Pool Party, Night of Navy and Pebbled Path colour combo.

You can see how I coloured the flowers in my video tutorial….

The background panel was embossed with one of the Basics 3D folder set in the online store.

I also made a Petal Pink version!

I love how the white die cuts pop from the background.

The supplies used are listed and linked to the online store below.

I would love to be your demonstrator.

Thanks for stopping by today and happy Stampin’!

Verity xx

Product List